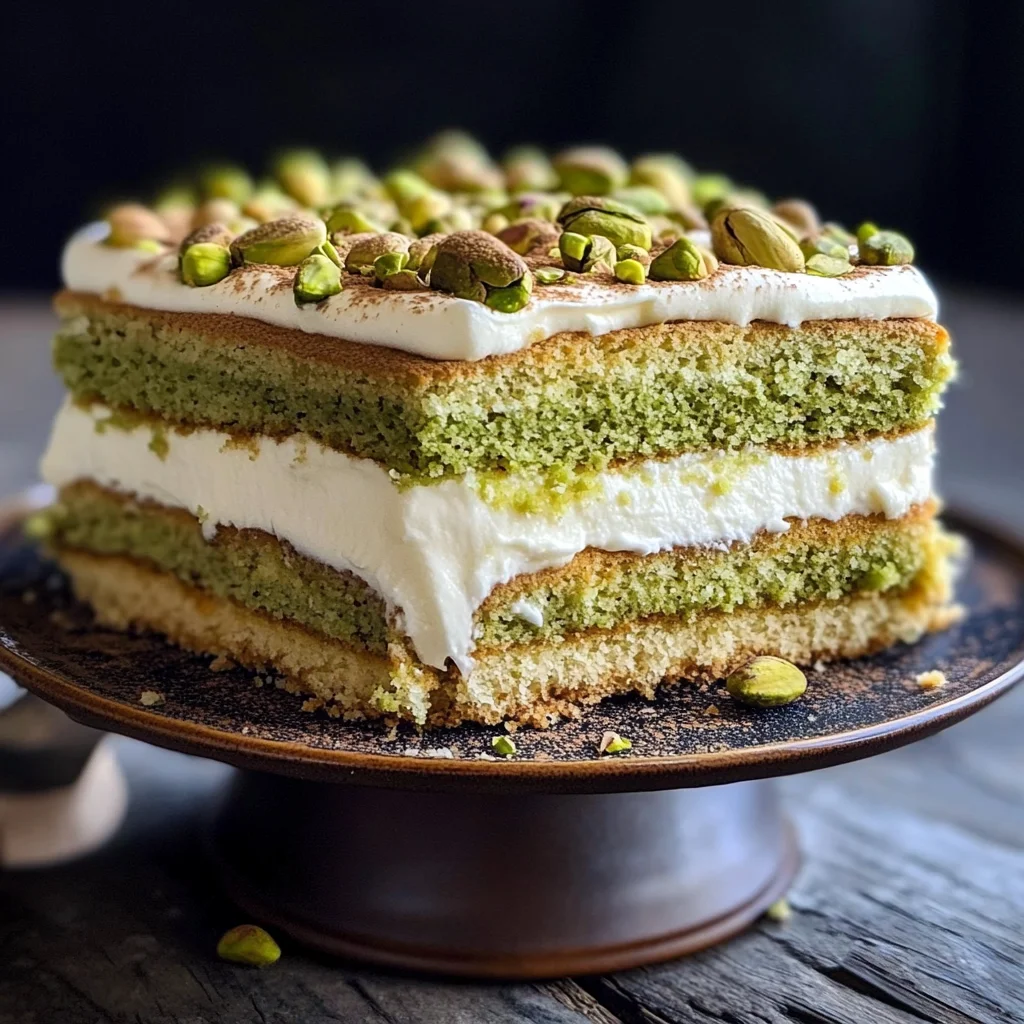
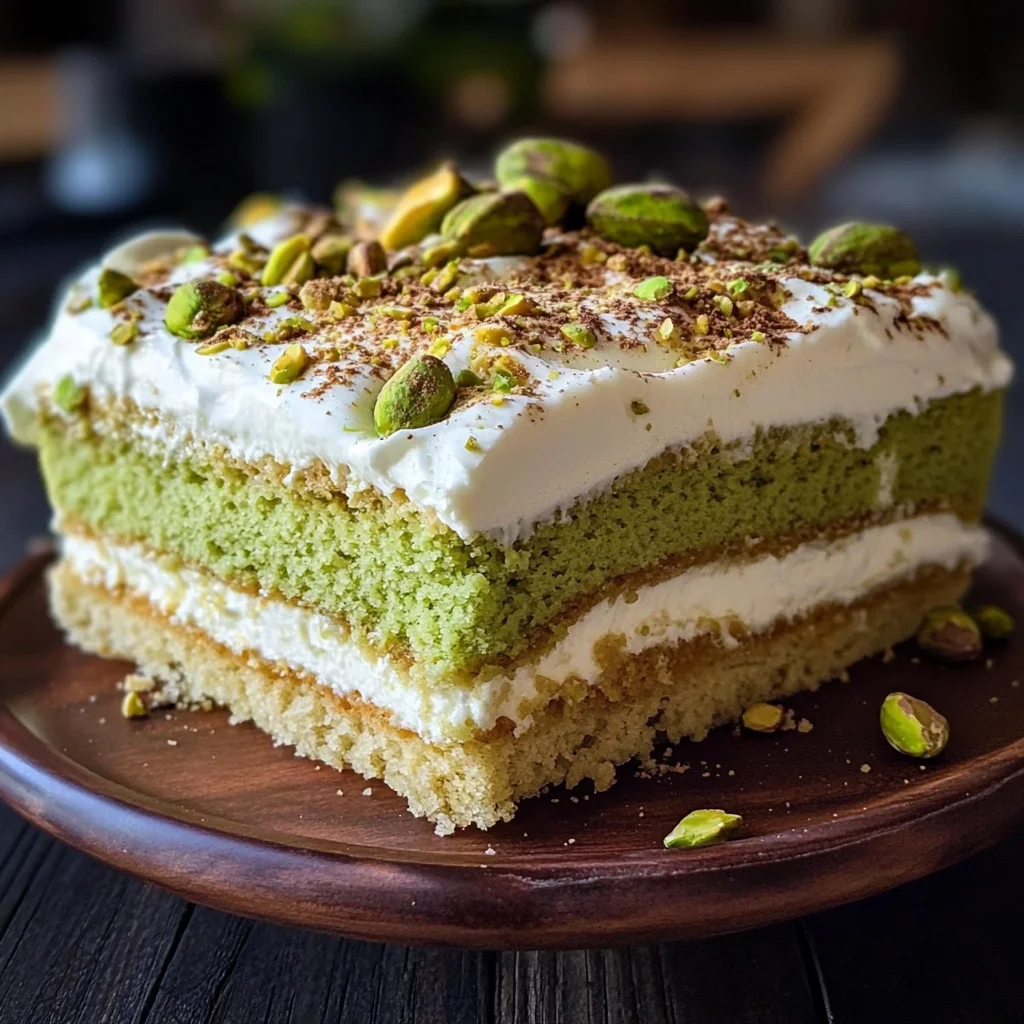
Pistachio Tiramisu
The moment you take your first bite of Pistachio Tiramisu, it’s as if you’re being transported to a sun-soaked Italian piazza, surrounded by laughter and the gentle clinking of glasses. This dessert is not just a sweet indulgence; it’s a celebration of life, a story told through layers of creamy goodness and nutty richness. The way the delicate mascarpone dances with the earthy notes of pistachio creates a symphony of flavors that is both utterly intoxicating and profoundly satisfying. I promise you, once you try this recipe, it will become a cherished staple in your dessert repertoire, one that’ll have your friends and family begging for seconds.
I’ve always been captivated by the magic that happens when simple ingredients come together to create something extraordinary. The Pistachio Tiramisu is a beautiful twist on the classic Italian dessert, infusing it with the aromatic essence of pistachio that elevates its traditional roots into something fresh and exciting. Why do we love desserts like this? Because they evoke memories, celebrate special moments, and sometimes, they just help us unwind after a long day. Whether it’s for a festive gathering or a quiet evening at home, serving up this delightful treat will undoubtedly make any occasion feel special.
Pistachio Tiramisu: A Creamy Delight That Redefines Indulgence
Let me take you on this culinary journey where we bring together the creamy richness of mascarpone and the vibrant flavor of pistachios to craft a dessert that’s sure to impress. With each layer whispering secrets of indulgence, this Pistachio Tiramisu will quickly become your go-to recipe for all things sweet and celebratory!
Ingredients:
As we embark on this delightful culinary adventure together, let’s gather our ingredients with care. Each component plays an essential role in creating the luscious layers of our Pistachio Tiramisu.
- 8-10 tablespoons milk (I used 2%) divided: Milk is versatile; it adds moisture and creaminess to our tiramisu while helping to soften our ladyfingers—or whatever alternative you choose—creating that melt-in-your-mouth experience we crave. I recommend using whole or 2% milk for a richer flavor profile; if you’re looking for alternatives, feel free to use almond or oat milk for an equally delightful result! Just keep in mind that different milks can slightly alter the final texture.
- 1 large egg: This ingredient serves as a binding agent and adds richness to our creamy filling. When whipped properly with sugar, it contributes to creating an airy texture that’s key in desserts like tiramisu. However, if you’re concerned about using raw eggs, consider using pasteurized eggs as they’re safe while still providing that lovely custardy base we adore.
- 2 tablespoons granulated sugar: Sugar isn’t just about sweetness; it enhances all the other flavors in our tiramisu and balances out the nuttiness of pistachios beautifully. The sugar will also help stabilize our whipped cream later on, ensuring that every layer holds its shape perfectly when served. Don’t rush this step—let’s be patient as we allow it to dissolve completely!
- 1½ cups whole/whipping/heavy cream: This is where magic happens! Heavy cream is crucial for creating those dreamy clouds of whipped cream that will elevate our tiramisu from good to absolutely extraordinary. When beaten until fluffy but not over-whipped (watch closely here!), it’ll provide volume and structure while keeping everything light-as-a-feather. Go for high-quality cream whenever possible; trust me—it makes all the difference!
- 1½ cups mascarpone: The star ingredient! Mascarpone is rich, creamy, and slightly tangy—a perfect complement to our sweet components. It adds depth and smoothness to our filling that no other cheese can quite replicate. Make sure your mascarpone is fresh because its quality directly impacts the flavor profile of your tiramisu; you want that heavenly creaminess without any off flavors.
Equipment You’ll Need:
Before we dive into making this masterpiece, let’s gather some essential tools that will make your cooking experience smoother and more enjoyable. These are not just items on a list; they are your steadfast partners in creating something wonderful!
- Mixing bowls – A set of sturdy mixing bowls is essential for combining ingredients without fear of spills or messes! Choose larger ones for whipping cream so you can have plenty of room for movement as you beat air into your mixture.
- Electric mixer (handheld or stand) – An electric mixer makes whipping cream effortless! If you’ve ever tried whisking by hand for what feels like eternity only to end up exhausted before achieving soft peaks—trust me—you’ll appreciate having an electric mixer at hand! It saves time and ensures consistent results.
- Spatula – A rubber spatula allows you to fold ingredients gently without deflating all that lovely air we’ve incorporated into our whipped cream or egg mixture. Use it generously throughout the process; you’ll find it’s invaluable!
- 9×13 inch baking dish or trifle bowl – The vessel you choose matters! For traditional presentations, opt for a glass trifle bowl where layers are visible—the beauty of each component should shine through! Alternatively, a baking dish works wonderfully too; just ensure it’s deep enough for those glorious layers.
Now that we’ve got everything ready let’s dive into preparing our Pistachio Tiramisu!
Step 1: Whisking Together Egg and Sugar
Begin by cracking open your large egg into one of those trusty mixing bowls along with the granulated sugar. With an electric mixer set at medium speed (you don’t want to go too fast here), whisk them together until the mixture becomes pale and slightly thickened—it should take about 5 minutes if you’ve got fresh eggs! This step is crucial because it helps aerate the mix while incorporating air pockets which contribute significantly to achieving lightness in your final product. You’ll know you’ve hit the sweet spot when ribbons form as you lift your whisk out—trust me on this one!
Step 2: Whipping Up That Cream
In another mixing bowl (yes, I know we’re dirtying several), pour in the heavy cream and start beating it until soft peaks form—this typically takes around 3-4 minutes on medium-high speed if you’re using cold cream straight from the fridge. Pay attention during this process because over-whipping can turn your beautiful liquid gold into butter—a delicious mistake but not exactly what we’re aiming for here! Once those peaks form nicely but still maintain their softness when lifted with a spatula—go ahead and fold half of them into your egg-sugar mixture gently using your spatula until just combined.
Step 3: Folding In Mascarpone
Next up comes my favorite part—adding in that luscious mascarpone cheese! Gently spoon it into your egg-sugar-whipped cream mixture while being careful not to deflate all those lovely bubbles we’ve worked so hard to create thus far. Using broad strokes with your spatula (think “folding” rather than mixing), combine everything until smooth but still light—we want every bit incorporated without losing fluffiness! This step ensures maximum flavor integration while preserving texture—absolutely paramount as we layer later on.
Step 4: Preparing Your Ladyfingers
Now it’s time to prep those ladyfingers or whatever alternative you’re using! If you’ve got store-bought ladyfingers at hand—fantastic—but if you’d prefer homemade ones (which I highly encourage!), then now’s when you’ll want them ready too! Just remember—they should be able to soak up some moisture without falling apart completely once dipped lightly into milk before layering within our dessert assembly process later on—this balance is key for achieving perfection throughout every bite!
Stay tuned as we continue crafting this delightfully layered wonder that’ll leave everyone craving more…
Step 5: Whisking to Creamy Perfection
Now it’s time to whip up some magic! Grab that large bowl and let’s begin by whisking together the egg and granulated sugar. I want you to really take your time with this step—trust me, it’s absolutely paramount. You’ll want to whisk until the mixture is a pale, frothy consistency, almost like a luscious cloud. This process not only incorporates air into the egg but also helps dissolve the sugar thoroughly, creating a silky base for our Pistachio Tiramisu. Aim for about 3-5 minutes of vigorous whisking; the transformation is truly enchanting as the mixture goes from dull yellow to a bright, airy volume.
Once you’ve achieved that dreamy texture, it’s time to add in half of your milk—about 4-5 tablespoons. Carefully mix in the milk using a gentle folding motion rather than vigorous stirring; this helps maintain that beautiful aeration we worked so hard to create. By adding milk at this stage, you’re introducing moisture that will enhance the overall creaminess of our filling. It’s important to remember that this step lays down the foundation for your tiramisu’s rich, indulgent flavor, so don’t rush through it!
Step 6: Creating Your Dreamy Mascarpone Mixture
Next up is where we introduce one of my favorite ingredients: mascarpone! In another bowl, take that delightful tub of mascarpone and add in the remaining milk along with half of your whipped cream (that means about three-quarters of a cup here). Using a spatula or a whisk, gently fold these together until they’re just combined. The goal here is to keep everything light and airy while ensuring there are no lumps—this is going to be the luscious layer in our Pistachio Tiramisu that makes every bite feel like silk on your tongue.
Why is this step so crucial? Well, mascarpone has a unique ability to hold its shape while being incredibly creamy. It’s like liquid gold! The careful folding technique allows you to preserve that airy quality from the whipped cream while blending in the rich flavor of mascarpone. I encourage you to take your time here; you’ll want this mixture to be smooth yet voluminous. Once combined, set this bowl aside momentarily because we’re about to join forces with our previously whipped egg-sugar mixture!
Step 7: Folding It All Together
This is where the real excitement begins! In an exhilarating moment of culinary alchemy, you’re going to combine both mixtures into one heavenly creation. Starting with the egg-sugar-milk mixture we prepared earlier, gently fold in one-third of your mascarpone mixture using a spatula. This initial incorporation helps loosen up the thicker mascarpone and makes it easier for everything else to blend harmoniously.
Once that first third is folded in smoothly without any lumps (you may still see streaks—that’s okay!), continue adding more of your mascarpone mix gradually until everything is beautifully combined. This step is not merely about mixing; it’s about achieving an ethereal balance between richness and lightness. The final result should be a creamy concoction that feels utterly intoxicating when you scoop it! Take care not to overmix—this could lead you down a path where airiness is lost, resulting in a denser filling than we desire for our Pistachio Tiramisu.
Step 8: Embracing Patience – Chilling Time
Now comes perhaps one of the most difficult yet rewarding parts: chilling your creation! Once you’ve achieved that glorious fluffy consistency, cover your bowl tightly with plastic wrap or transfer it into an airtight container and place it into the refrigerator for at least 2 hours—or even better, overnight if you can wait! I know patience isn’t always easy in our fast-paced world, but believe me when I say this waiting period transforms flavors dramatically.
During chilling time, magic happens—the flavors meld together beautifully as they mingle and become more pronounced. Not only does this help elevate each mouthful into an utterly extraordinary experience, but chilling also solidifies those fabulous layers we’ll be creating later on. When you’re ready to assemble your Pistachio Tiramisu, every spoonful will boast depth and complexity thanks to this crucial resting period! So walk away for now; let the fridge work its wonders while you dream about how deliciously satisfying each bite will be.
Conclusion:
As we wrap up our delightful journey through crafting this enchanting Pistachio Tiramisu together, I can’t help but feel an overwhelming sense of excitement and joy! From its velvety layers to the nutty crunch of pistachios that dance on your palate, every element harmonizes beautifully to create something truly extraordinary. What makes this recipe stand out isn’t just its indulgent taste; it’s also about sharing moments with loved ones over dessert that brings warmth to our hearts. Each bite encapsulates love and care—an experience worth savoring!
I wholeheartedly believe this recipe is a must-try not only because it’s utterly delicious but also because it’s wonderfully versatile. Picture yourself serving it at gatherings—a family dinner or perhaps during festive celebrations—and watch as smiles light up the room with each forkful taken. The joy of preparing something so special fills the heart with anticipation; there’s nothing quite like pulling out this stunning dessert from the refrigerator or freezer and watching everyone’s eyes widen in delight!
Imagine savoring one with freshly brewed coffee or curling up with a piece after dinner while enjoying a good book; both pair so beautifully with the rich flavors of pistachio and mascarpone. Or perhaps you prefer an afternoon pick-me-up alongside some vibrant fruit salad—whatever your choice may be, I assure you that each combination enhances the experience further. For a truly decadent adventure, try pairing it with dark chocolate shavings or drizzling some warm caramel sauce over top; you’ll find these additions elevate your Pistachio Tiramisu into realms of pure bliss.
Feeling adventurous? This recipe is wonderfully adaptable! If you’re inspired by seasonal flavors, think about incorporating some crushed berries or swapping out pistachios for macadamia nuts for an exotic twist! You could even experiment with infusing spices like cardamom or cinnamon into your cream layers for an unexpected yet delightful kick. The possibilities are endless, inviting you to explore new dimensions while keeping true to what makes this dessert so beloved. So go ahead—try it out, share your experiences with family and friends, and don’t forget to connect with others who embark on this delicious journey too!
Pistachio Tiramisu

Pistachio Tiramisu is a delightful twist on the classic Italian dessert that captivates with its creamy layers and nutty flavor. This no-bake treat combines rich mascarpone with the aromatic essence of pistachios, creating a perfect harmony of textures and tastes. Each bite transports you to sunlit piazzas filled with laughter and joy, making it an ideal indulgence for festive gatherings or a cozy evening at home. Easy to prepare and utterly satisfying, this Pistachio Tiramisu will quickly become a cherished favorite among family and friends!
- Prep Time: 30 minutes
- Cook Time: N/A
- Total Time: 0 hours
- Yield: Serves approximately 8
- Category: Dessert
- Method: No-Bake
- Cuisine: Italian
Ingredients
- 8–10 tablespoons milk (2% or plant-based)
- 1 large egg (or pasteurized egg)
- 2 tablespoons granulated sugar
- 1½ cups heavy cream
- 1½ cups mascarpone cheese
- Ladyfingers or alternative for layering
Instructions
- In a mixing bowl, whisk together the egg and sugar until pale and thickened.
- Gently fold in half of the whipped cream into the egg mixture.
- In another bowl, combine mascarpone with remaining whipped cream.
- Fold the mascarpone mixture into the egg-sugar blend until smooth.
- Dip ladyfingers in milk briefly and layer them in your serving dish.
- Spread half of the mascarpone mixture over the ladyfingers. Repeat layers.
- Chill for at least 2 hours before serving.
Nutrition
- Serving Size: 1 slice (150g)
- Calories: 300
- Sugar: 18g
- Sodium: 50mg
- Fat: 22g
- Saturated Fat: 12g
- Unsaturated Fat: 9g
- Trans Fat: 0g
- Carbohydrates: 24g
- Fiber: 1g
- Protein: 5g
- Cholesterol: 95mg