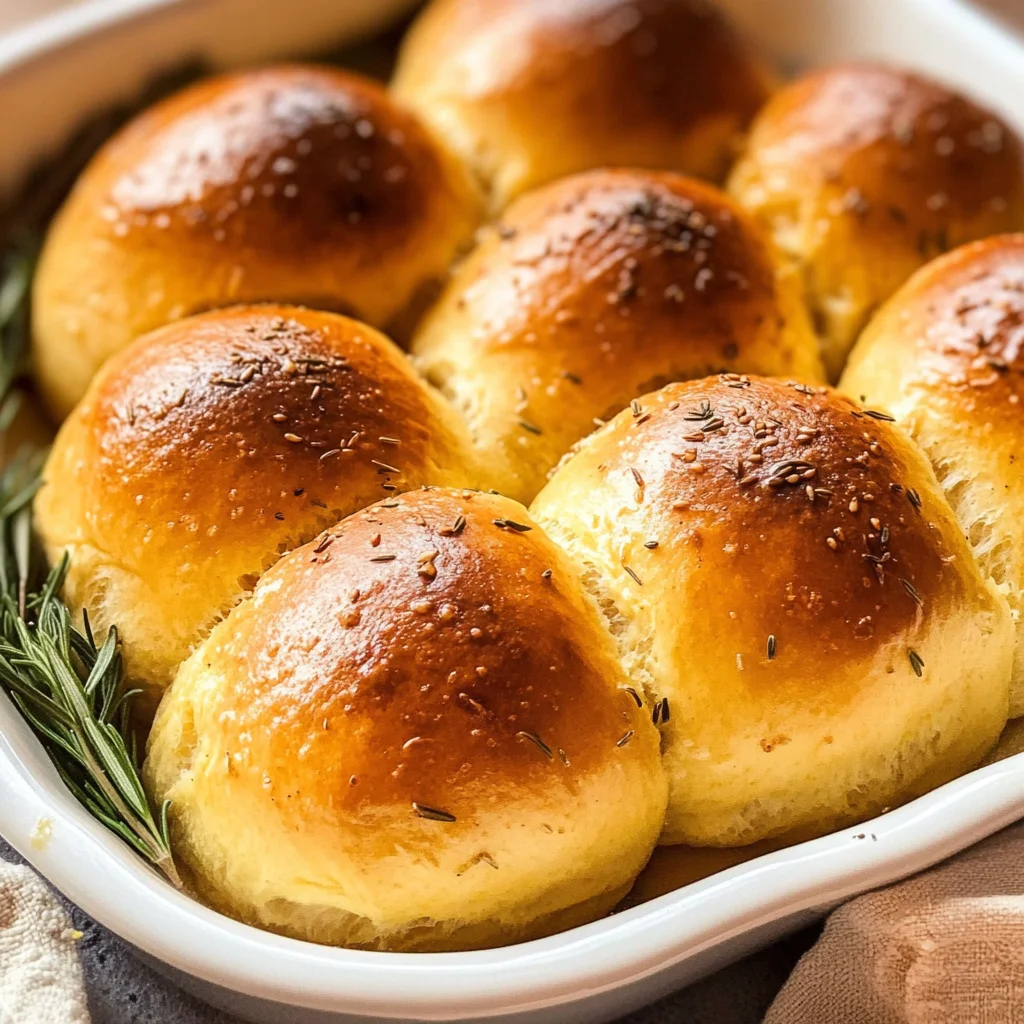
Rosemary pumpkin dinner rolls
There are moments in life when the simplest things bring us the greatest joy, and for me, those moments often revolve around the warmth of freshly baked bread. There’s something utterly enchanting about walking into a kitchen filled with the heavenly aroma of Rosemary pumpkin dinner rolls—soft, buttery, and bursting with flavors that whisper of comfort and tradition. As you knead the dough, feel the textures transform beneath your hands; it’s a physical manifestation of love and patience. The infusion of fragrant rosemary and warm cardamom melds beautifully with the earthy sweetness of pumpkin puree, turning each bite into a celebration of flavors. This isn’t just a recipe; it’s an experience that bridges generations, where family gatherings are illuminated by shared laughter over warm rolls straight from the oven.
I’ve always been captivated by how baking can evoke such deep connections to our roots while inviting us to innovate and play. These Rosemary pumpkin dinner rolls are perfect for any occasion—be it a festive gathering, a cozy dinner with friends, or even just as a comforting side on a weeknight. They carry with them not only rich flavors and textures but also stories waiting to be told at your table. Trust me on this: once you serve these rolls, they will become a beloved staple in your home as they have in mine! Let’s roll up our sleeves and embark on this culinary adventure together—I promise you won’t regret it!
Rosemary Pumpkin Dinner Rolls: A Symphony of Flavors
These delightful rolls combine all the best elements of comfort food with an elevated twist! You’ll love how easy they are to make while still being impressive enough to wow your guests.
Ingredients:
Before we dive into this delicious journey, let’s take a moment to gather our ingredients. Each one plays an essential role in crafting these delectable Rosemary pumpkin dinner rolls that you’ll cherish long after they’re devoured.
- 2 tbsp (26g) unsalted butter, cut into pieces. This ingredient is instrumental for enriching our dough with a velvety texture and irresistible flavor. As we brown this butter later in the process, it transforms into liquid gold, adding nuttiness that takes these rolls over the top. When selecting butter, go for high-quality unsalted varieties; this allows you to control the saltiness in your recipe better without any surprises.
- 2 1/4 tsp active dry or instant yeast (1 standard packet). Yeast is truly magical—it’s what gives our rolls that airy lift we crave! Whether you opt for active dry or instant yeast doesn’t change much here; both will work beautifully as long as they’re fresh! Always check expiration dates; if your yeast doesn’t foam when combined with sugar and warm milk, it’s time for a new packet.
- 1 1/2 tbsp granulated sugar. Not only does sugar add sweetness to our dinner rolls, but it also fuels the yeast during fermentation. This is crucial because active fermentation gives rise to those fluffy textures we adore! Don’t worry about making these too sweet—the sugar balances out the savory elements without being overpowering.
- 1/4 cup (60g) lukewarm milk. The warmth of lukewarm milk activates our yeast while also contributing richness to our dough. It’s important that it’s not too hot—think baby bottle temperature—or you risk killing off those precious little yeast cells. Whole milk works wonderfully here for its creaminess; however, if you’re looking for alternatives due to dietary preferences or restrictions, feel free to substitute with almond or oat milk!
- 2 cups (250g) all-purpose flour. Flour is where all the magic happens! It provides structure and stability in our dough while allowing it to rise beautifully. I recommend using unbleached all-purpose flour for its natural flavor and better protein content—this helps create those lovely gluten strands that give us soft yet chewy rolls.
- 1 egg. Eggs not only enrich our dough but also contribute color and shine when brushed onto the surface before baking. They help bind everything together perfectly! If you prefer an egg-free option or need a substitute due to allergies or dietary needs, consider using flaxseed meal mixed with water—this mimics egg’s binding properties quite well!
- 1/2 cup (100g) pumpkin puree. Here lies the heart of our recipe! Pumpkin puree adds moisture and depth of flavor while providing nutrients like beta-carotene and fiber—making these rolls feel somewhat virtuous amidst their indulgence! Be sure to use pure pumpkin puree rather than spiced pie filling; we want all that lovely pumpkin flavor without competing spices.
- 3/4 tsp salt. Salt enhances every nuance in flavor throughout our dish—it’s absolutely paramount! Without it, everything can taste bland and flat; however, ensure you don’t add too much—it should enhance rather than overpower.
- 1 1/2 tsp dried rosemary. Rosemary lends an aromatic quality that complements both pumpkin and cardamom beautifully—it’s like wrapping yourself in a cozy sweater on a chilly day! Use dried rosemary since it blends seamlessly into our dough without adding unwanted texture; however, fresh rosemary could also be used if finely chopped.
- 3/4 tsp ground cardamom. Cardamom introduces warmth and spice reminiscent of fall—it truly elevates these rolls from ordinary to extraordinary! Its unique flavor profile pairs exceptionally well with both pumpkin and rosemary; just be cautious not to overdo it since cardamom can be quite potent!
- 1 egg + 1 tbsp milk or water (for egg wash). This mixture gives our rolls that golden-brown finish we all adore while enhancing texture upon baking—who wouldn’t want beautifully glossy tops? If you prefer not using egg wash at all due to dietary preferences or restrictions, simply brush them lightly with some milk or water right before baking!

Equipment You’ll Need:
Now that you’ve gathered your ingredients let’s make sure we have everything else ready too—having the right tools makes your cooking experience smoother and more enjoyable!
- Stand mixer with dough hook attachment – This trusty appliance will do most of the heavy lifting when kneading your dough! A stand mixer provides consistent mixing speed without tiring out your arms—as kneading by hand can be quite labor-intensive if you’re making larger batches.
- Light-colored saucepan – You’ll need this for browning your butter so you can easily monitor its progress without burning it! Dark pans absorb heat differently which could lead to uneven browning—a light-colored one helps you catch those beautiful nutty notes as they develop.
- Baking tin (9×9 inch or similar) – A well-greased baking tin ensures your rolls don’t stick during baking—they’ll come out effortlessly golden brown and perfectly shaped! Consider using glass if possible because metal pans conduct heat differently which may affect even cooking.
- Mixing bowl – An essential piece used during various stages including combining ingredients before transferring them into your stand mixer—it doesn’t have to be fancy but having ample space makes mixing easier!
Now let’s move on to creating those delightful Rosemary pumpkin dinner rolls!
Step 1: Browning Your Butter
To begin crafting these flavorful rolls, start by preparing your brown butter—a step that’s not just about melting but transforming butter into something truly special! In a light-colored saucepan over medium heat, place your chopped unsalted butter pieces and keep stirring consistently; this constant movement helps distribute heat evenly throughout the fat while preventing scorching at any point along the way. As you stir continuously, watch closely as foaming begins—the liquid will bubble up initially before calming down slightly as golden flecks appear at its bottom edge signaling that it’s beginning its transformation into liquid gold filled with nutty aromas wafting through your kitchen air! Once those delightful golden tones emerge along with an intoxicating scent reminiscent of warm cookies fresh from the oven—you know it’s time to remove it from heat immediately—to avoid burning—and transfer into a heat-proof container so it can cool slightly before incorporating into our dough later on.
Step 2: Activating Your Yeast
Next up is activating our yeast—a vital step ensuring fluffy results within every bite! In the bowl of your stand mixer fitted with a dough hook attachment blend together lukewarm milk (remember baby bottle temperature!), granulated sugar, and yeast until well combined then allow this mixture rest undisturbed for about 5–10 minutes until frothy bubbles start forming atop revealing signs indicating that fermentation has begun—all thanks due diligence taken thus far ensuring freshness prior purchase matters immensely here folks—so do keep tabs on expiration dates regularly next time shopping around! If after this period there aren’t any signs indicating activity has commenced then unfortunately best toss it out instead trying again otherwise risk ending up disappointed later down line when consuming final product yields less-than-desired outcomes overall…no one wants dense buns after investing so much effort right?
Step 3: Mixing All Ingredients Together
Once you’ve confirmed successful activation—you’ll see those little bubbles dancing atop—that’s when we mix everything together creating something truly magnificent ahead now full circle completion unfolds soon enough ahead here today my dear friends joining along path ahead here today indeed!! To achieve this glorious union start adding cooled brown butter alongside flour followed by egg plus canned pumpkin puree too then sprinkle salt alongside dried rosemary followed lastly ground cardamom spices finishing touches enhancing overall depth flavor notes present here today surely blending harmoniously throughout each bite enjoyed later down line!! Select medium-low speed setting allowing machine do most work kneading away creating cohesive ball shape developing slowly pulling away sides bowl eventually transitioning towards achieving necessary gluten structure within dough itself over course approximately twenty-five minutes total duration needed here…don’t rush through process allow magic unfold gradually instead savoring moments along way instead enjoying benefits derived from patience employed throughout journey taken here today ultimately yielding fabulous results achieved afterwards worthy share amongst friends family alike!!
Step 4: First Proofing Stage
Having reached point where cohesive ball formed successfully please cover mixing bowl lightly wrap cloth towel placed snugly atop preventing drafts entering space surrounding environment affecting rising process negatively thus far moving forward next crucial phase awaits patiently awaiting expansion take place ahead now my dear friends!!! Allow resting period commence lasting anywhere between forty-five minutes up until hour passing comfortably watching as lovely mass doubles size gradually unfolding beautifully within given timeframe desired outcome intended ultimately achieved once half-finger pressed gently leaves behind slight indentation bouncing back halfway intelligibly confirming readiness progression further along pathway towards success ahead now…while waiting patiently preheat oven set around three hundred seventy-five degrees Fahrenheit ensuring equipment adequately prepared beforehand ready unleash deliciousness awaiting arrival shortly thereafter!!
With each step leading closer towards achieving perfectly baked Rosemary pumpkin dinner rolls filled luscious flavors weaving seamlessly compiling together bringing forth enticing aromas wafting throughout kitchen space overflowing warmth comfort shared experiences built around tables ladened lovingly amidst cherished company gathered near ready partake delightful treats crafted earlier culmination hard work ultimately rewarded indeed!! I cannot wait for you enjoy them as much I know promise will absolutely become favorite addition repertoire forevermore enduring memories created alongside ones held dear hearts forever…let’s keep going shall we?
Step 5: Shaping Your Rolls with Love
Once your dough has risen to a glorious size, bursting with potential and flavor, it’s time to bring it to life. Start by gently greasing your baking tin—this is crucial for ensuring that those beautiful rosemary pumpkin dinner rolls release easily after baking. Now, carefully transfer the pillowy dough onto a lightly floured surface, letting it breathe for just a moment. You’ll want to divide this dough into 8 equal pieces; I find that using a bench scraper makes this process so much easier and cleaner. As you portion out each piece, take a moment to appreciate the vibrant hue of the pumpkin against the backdrop of your countertop.
Now comes the fun part: shaping each piece into a smooth, round ball. This step is not just about aesthetics; it’s essential for creating an even rise during baking. To shape them, start by cupping your hand over the dough and gently rolling it in circular motions on the surface until it forms a nice ball. The tension you’re creating on the exterior helps structure the roll while ensuring they remain soft and fluffy inside. Place each ball into your prepared baking tin, leaving just a little space between them because they will expand and embrace one another beautifully as they rise again. Trust me on this—taking time to shape them well will yield rolls that are not only visually stunning but also wonderfully consistent in texture.
Step 6: The Second Proof – Patience is Key
With your rolls nestled in their tin, it’s time for yet another proofing session—this is where the magic happens! Cover the tin with a clean kitchen towel or plastic wrap to keep warmth and moisture in; this environment mimics a cozy little bakery—just perfect for our dough’s final rise. Let them proof for about 45 minutes to 1 hour until they have puffed up significantly; you’ll know they’re ready when you gently press your finger into one of them and it springs back halfway. This gentle bounce-back indicates that they’ve developed enough air bubbles within, thanks to yeast fermentation—a process that transforms simple ingredients into something extraordinary.
During this waiting period, don’t rush! It’s essential to allow adequate time for these rolls to grow; if you don’t give them enough love and attention now, you could end up with dense rolls that are more akin to bricks than fluffy clouds of goodness. As you wait, preheat your oven to 375°F (190°C). The warmth will be ready for those delightful rolls as soon as they finish their second proofing session, sealing in all those intoxicating flavors we’ve integrated throughout this journey.
Step 7: Brushing with Golden Goodness
Now that your rosemary pumpkin dinner rolls are perfectly proofed and seemingly eager to meet their golden destiny in the oven, it’s time for one last touch of finesse—the egg wash! In a small bowl, beat together one egg with a tablespoon of milk or water until combined; this mixture will work wonders in giving your rolls that gorgeous golden sheen we all adore. Using a pastry brush or even just your fingers (if you’re feeling adventurous), gently brush the tops of each roll with this liquid gold before sending them off into the oven.
This step isn’t merely cosmetic—it plays an important role in developing flavor and texture as well! The fats in the egg wash contribute to browning through a process called the Maillard reaction, which enhances both taste and aroma as they bake. As you place your tin into the preheated oven, let yourself bask in anticipation; those buttery scents of rosemary mingling with sweet pumpkin will soon fill your home like an inviting hug.
Step 8: Baking Until Perfectly Golden
As your rosemary pumpkin dinner rolls bake away for about 20-25 minutes, keep an eye on them through the oven door glass—this is where patience really pays off! You’ll start noticing their transformation from pale dough balls into beautifully browned orbs of deliciousness. To test if they’re done baking, give them a gentle tap on their tops; if they produce a hollow sound—like nature’s very own drumroll—you can be confident they’re ready to come out.
Visual cues are key here: look for that stunning golden-brown color across their tops which signifies caramelization at its finest. Just remember every oven behaves differently; some run hotter than others so check on them around the 20-minute mark if you’re unsure! Once baked perfectly, remove them from the oven and let cool in their tin for just a few minutes before transferring them onto a wire rack or directly onto a serving platter if you’re eager to indulge right away!
Conclusion:
As we wrap up our journey through this recipe for rosemary pumpkin dinner rolls, I want to take a moment to bask in the joy that comes from sharing something so deliciously special. The combination of fragrant rosemary mingling with the earthy sweetness of pumpkin creates an experience that’s not just food but rather a heartfelt creation meant to be savored. Each roll embodies comfort—their pillowy texture and buttery richness is simply extraordinary. I hope my excitement has ignited your passion for baking these little treasures!
This recipe isn’t just about satisfying hunger; it’s about creating memories filled with laughter and warmth around your dining table. Imagine pulling these beauties from your oven—the golden crust glistening invitingly under soft kitchen lights—as friends or family gather around, eager to dive into freshly baked bread that fills every corner with its irresistible aroma. Whether it’s for Sunday dinner or a festive gathering, these rolls will surely steal the show.
Picture yourself enjoying one of these mouthwatering rosemary pumpkin dinner rolls slathered with creamy vegan butter or alongside a steaming bowl of hearty soup; it’s pure bliss! For an afternoon pick-me-up, dip one into your favorite herbal tea or coffee—trust me on this one; it transforms your snack time into something utterly enchanting. And if you’re feeling adventurous? Try pairing them with savory dips or spreads like hummus or sun-dried tomato pesto—they’ll elevate any occasion.
Feeling inspired yet? This recipe is wonderfully adaptable; if you’re looking to mix things up, consider adding some grated cheese or swapping out rosemary for other herbs like thyme or sage—each variation brings its own unique flair! You could even try incorporating seeds like sunflower or sesame on top before baking for an added crunch. I wholeheartedly encourage you to experiment and make it your own! So roll up those sleeves and let this become part of your cherished repertoire—I can’t wait for you to share your experiences and connect over these delightful little morsels of joy!
Rosemary Pumpkin Dinner Rolls
Indulge in the warm, comforting allure of Rosemary Pumpkin Dinner Rolls—soft, buttery delights that blend the earthy sweetness of pumpkin with the aromatic touch of rosemary and a hint of cardamom. These rolls are perfect for any occasion, whether you’re hosting a festive gathering or enjoying a cozy dinner at home. With their pillowy texture and rich flavors, these rolls will quickly become a family favorite, inviting laughter and shared memories around the table. Easy to make and irresistibly delicious, they’re more than just bread; they’re a culinary experience that nourishes both body and spirit.
- Prep Time: 30 minutes
- Cook Time: 25 minutes
- Total Time: 55 minutes
- Yield: Approximately 8 servings 1x
- Category: Bread
- Method: Baking
- Cuisine: American
Ingredients
- 2 tbsp unsalted butter
- 2 1/4 tsp active dry yeast
- 1 1/2 tbsp granulated sugar
- 1/4 cup lukewarm milk (or plant-based alternative)
- 2 cups all-purpose flour
- 1 egg (or flaxseed meal for an egg-free version)
- 1/2 cup pumpkin puree
- 3/4 tsp salt
- 1 1/2 tsp dried rosemary
- 3/4 tsp ground cardamom
Instructions
- Begin by browning the butter in a light-colored saucepan over medium heat until golden and fragrant. Remove from heat and let cool.
- In the bowl of a stand mixer, combine lukewarm milk, sugar, and yeast. Allow to sit for 5–10 minutes until bubbly.
- Add cooled brown butter, flour, egg (or flaxseed mixture), pumpkin puree, salt, rosemary, and cardamom to the yeast mixture. Mix on medium-low speed until combined.
- Knead the dough for about 25 minutes until smooth and elastic.
- Cover the bowl with a cloth and let it rise in a warm place for about 45 minutes to an hour until doubled in size.
- Preheat your oven to 375°F (190°C).
- Shape the risen dough into equal-sized balls and place them in a greased baking tin.
- Allow the rolls to rise again for about 45 minutes, then brush with an egg wash or milk before baking for 20–25 minutes.
Nutrition
- Serving Size: 1 serving
- Calories: 150
- Sugar: 3g
- Sodium: 150mg
- Fat: 5g
- Saturated Fat: 3g
- Unsaturated Fat: 2g
- Trans Fat: 0g
- Carbohydrates: 24g
- Fiber: 1g
- Protein: 3g
- Cholesterol: 20mg