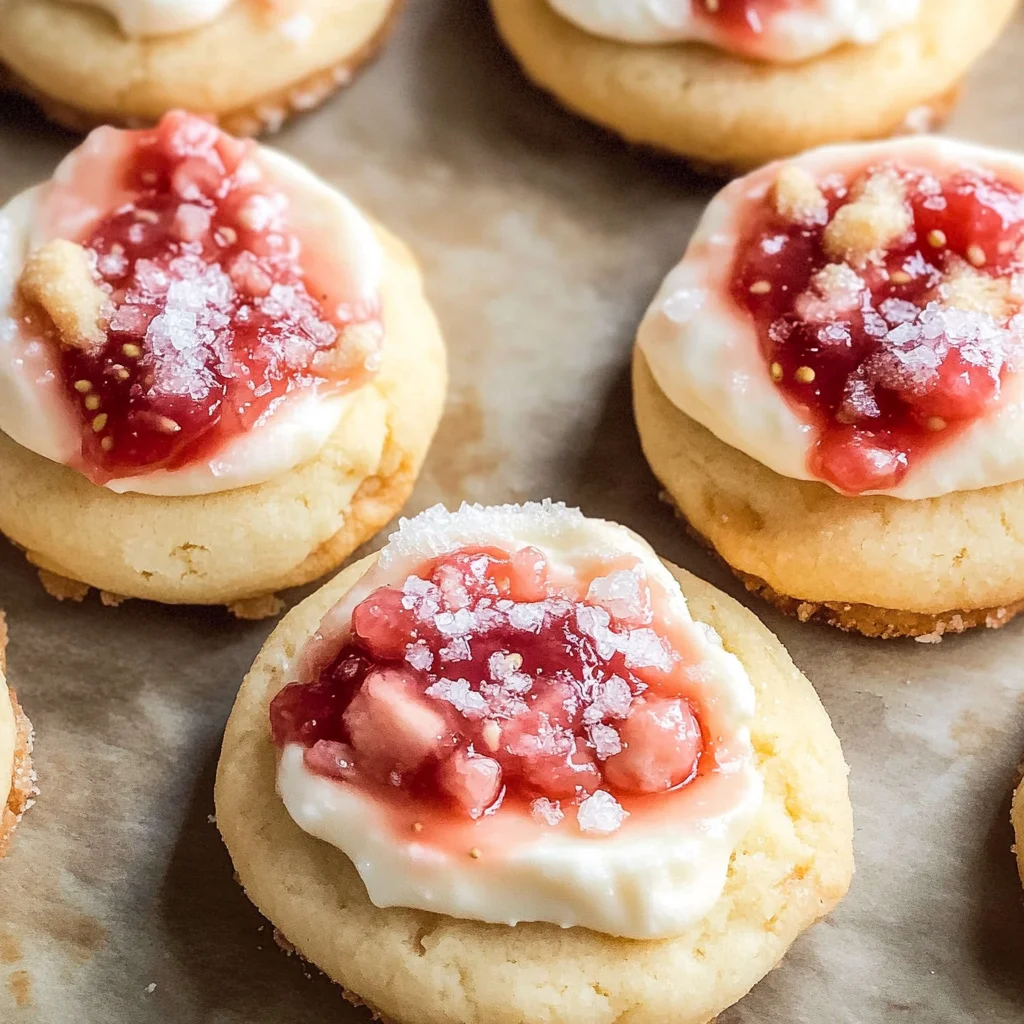
Soft Strawberry Cheesecake Cookies – Sweet & Creamy Bites
Welcome, dear dessert lovers! Today, I’m bubbling with excitement to share a recipe that transcends mere cookies and dances into the realm of extraordinary treats—Soft Strawberry Cheesecake Cookies. Just imagine biting into a soft, chewy cookie that cradles an enticingly creamy cheesecake filling, bursting with the vibrant essence of strawberries. It’s not just about satisfying your sweet tooth; it’s about creating a delightful experience that will conjure smiles and joy at any gathering. These cookies are like little clouds of happiness, merging the richness of cheesecake with the comforting familiarity of a homemade cookie. I promise you, each bite is a symphony of flavors that sings with every luscious morsel!
Now, let’s take a moment to appreciate why this recipe holds such a special place in my heart. You see, Soft Strawberry Cheesecake Cookies bring back fond memories of summer picnics where laughter echoed in the air and sweetness lingered on our lips. They’re perfect for brunch gatherings or cozy evenings at home when you want something delicious yet effortless to whip up. The beauty of these cookies lies in their versatility; they can dazzle at birthday parties or serve as a comforting treat after a long day. Each time I bake them, I’m reminded that food is not just sustenance—it’s an expression of love and creativity. So let’s embark on this culinary journey together!
Soft Strawberry Cheesecake Cookies – Sweet & Creamy Bites: A Delightful Fusion of Flavors
Let’s dive right into this enchanting recipe that brings together two beloved desserts in one delightful creation! Whether you’re hosting friends or simply treating yourself, these Soft Strawberry Cheesecake Cookies are bound to impress and satisfy.
Ingredients:
As we embark on this delightful baking adventure together, it’s essential to gather all your ingredients first. Each component plays its part in crafting those magical bites we’re aiming for.
- 1 ½ cups all-purpose flour – This ingredient is the backbone of our cookies, providing them with structure and stability. When choosing flour, opt for high-quality all-purpose flour; it strikes the perfect balance needed for both texture and flavor. Too much flour can lead to dry cookies—so be sure to measure accurately! Spoon it into your measuring cup lightly and level it off for best results.
- ½ teaspoon baking powder – This tiny powerhouse is what helps our cookies rise beautifully during baking. It creates those lovely air pockets that make our cookies soft and tender instead of dense or heavy. Fresh baking powder is key; if it has been sitting around for too long, it may lose its potency, so do check your pantry before diving in!
- ¼ teaspoon salt – Salt is often underrated but trust me when I say it enhances flavors like nothing else can! In our cookies, it balances the sweetness and brings out the rich buttery goodness while amplifying that strawberry essence we love so much. A little pinch goes a long way in making each bite profoundly satisfying.
- ½ cup unsalted butter, softened – Butter is crucial here; it imparts moisture and richness while contributing to that melt-in-your-mouth texture we crave in cookies. Make sure your butter reaches room temperature for ideal creaming with sugar—this ensures we achieve the fluffy consistency needed for our dough.
- ¾ cup granulated sugar – Ah, sugar—the sweet kiss that brings harmony to our cookies! It not only sweetens but also helps create those delightful chewy edges by caramelizing during baking. When mixing with butter, you’ll want to beat them until light and fluffy; this step is essential for incorporating air into our batter.
- 1 large egg – Eggs are nature’s binding agents—they hold everything together beautifully! They add moisture too but don’t rush the process; let your egg sit out until it’s at room temperature before mixing it in so it blends seamlessly with the other ingredients.
- 1 teaspoon vanilla extract – Vanilla extract adds depth and warmth to our cookies—it’s like wrapping them in a cozy hug! Opt for pure vanilla extract rather than imitation; you’ll notice the difference in aroma and taste immediately.
- Pink food coloring (optional) – If you’re feeling playful (and who wouldn’t be?), adding pink food coloring gives these cookies an eye-catching hue reminiscent of fresh strawberries! Just a few drops will do; remember we eat with our eyes first!
- 4 ounces cream cheese, softened – The star ingredient in our cheesecake filling! Cream cheese transforms these cookies from ordinary to extraordinary by providing that signature creamy texture we associate with cheesecake. Ensure it’s softened before use—this allows for easy blending without lumps.
- ¼ cup powdered sugar – This finely milled sugar sweetens our cream cheese filling gently without overpowering its delicate flavor profile—just enough sweetness to keep things balanced!
- ½ teaspoon vanilla extract (for filling) – Just like before, adding more vanilla enhances the overall character of our cheesecake filling—making sure every bite bursts with flavor!
- ½ cup strawberry jam – This ingredient adds vibrant fruity notes throughout each cookie while ensuring every bite carries that lovely strawberry flavor we crave so much! Choose a quality jam made from real strawberries for maximum taste impact.
- Pink glaze (made with powdered sugar and a few drops of milk) – A simple glaze elevates these cookies visually while offering just a hint of sweetness on top—perfect for enticing friends and family alike!
- Sparkling sugar for garnish – To finish everything off beautifully, sparkling sugar adds a lovely crunch and visual appeal—a touch of sparkle to make these cookies even more inviting!
Equipment You’ll Need:
Before we jump into creating these treats together, let’s talk about some essential tools that will make your baking journey smoother and more enjoyable. Having the right equipment can truly elevate your experience from good to glorious!
- Mixing bowls – A set of sturdy mixing bowls is vital since you’ll need different sizes for mixing various components—from creaming butter and sugar to combining dry ingredients. Look for bowls made from glass or stainless steel as they are durable and easy to clean.
- Electric mixer (or whisk) – An electric mixer simplifies creaming butter and sugar together effortlessly but don’t worry if you don’t have one! A good old-fashioned whisk will work too; just know it may take more elbow grease—so roll up those sleeves!
- Measuring cups & spoons – Accurate measurements are crucial in baking since even slight variations can alter textures significantly! Invest in good quality measuring cups (both dry and liquid) along with measuring spoons—you’ll thank yourself later when everything turns out just right.
- Baking sheets – Non-stick or parchment-lined baking sheets ensure an even bake without sticking—which means less hassle during cleanup afterward! Remember: lining your trays helps deliver perfectly shaped cookies every time.
- Cooling rack – Allowing your freshly baked cookies ample time on a cooling rack ensures they cool evenly without becoming soggy on the bottom—a non-negotiable step if you want those delectable chewy centers preserved!
Preparing the Soft Strawberry Cheesecake Cookies – Sweet & Creamy Bites
Step 1: Creaming Butter & Sugar
To begin this delightful process, grab your softened butter—you should feel its velvety texture—and place it into your mixing bowl along with granulated sugar. Now comes one of my favorite techniques: creaming! Use either an electric mixer or whisk vigorously until the mixture becomes light and fluffy; this generally takes about 2–3 minutes if using electric power. What you’re doing here is incorporating air into your batter which will help create those pillowy soft cookie textures we adore so much! Don’t rush this step because achieving the right consistency sets the stage for success later on—trust me when I say patience pays off here.
Step 2: Adding Egg & Vanilla
Once you’ve got that beautiful creamed mixture ready, it’s time to introduce your egg along with one teaspoon of pure vanilla extract into the bowl as well! Continue beating until fully combined—you should see everything meld seamlessly together becoming even fluffier than before. The egg acts as an essential binder while also contributing moisture which keeps our cookie dough pliable rather than dry—something we definitely want to avoid when aiming for ultimate deliciousness!
Step 3: Mixing Dry Ingredients
In another bowl (yes—we’re multitasking here), whisk together all-purpose flour, baking powder, and salt until evenly combined—this helps ensure no clumps remain hidden away within our batter later on! When incorporating dry ingredients into wet ones like this step requires care; gently fold them into your mixture rather than stirring aggressively as overmixing could lead us down a path towards tough cookies instead of tender ones—so go slow here!
Step 4: Incorporating Cream Cheese Filling
Now comes the fun part—creating our luscious cheesecake filling! In a separate bowl again (I know there are lots!), mix softened cream cheese alongside powdered sugar until smooth—a wonderful transformation occurs here where graininess gives way to rich creaminess making each dollop utterly intoxicating! Afterward add half-a-teaspoon more vanilla extract followed by half-a-cup strawberry jam which guarantees fruity flavor dancing amongst those creamy textures—we want every bite coated generously so combine thoroughly ensuring even distribution throughout each scoop produced later on when assembling those heavenly bites ahead!
And there you have it—the first steps toward creating something truly exceptional await us next as we piece together these delectable Soft Strawberry Cheesecake Cookies one layer at a time…stay tuned friends because magic is unfolding right beneath our fingertips!
Step 5: Creaming the Butter and Sugar
Now comes a magical moment in our baking journey—creaming the butter and sugar together. Start by placing your softened unsalted butter into a large mixing bowl. You want it to be just soft enough to hold its shape but not melting; think of it as a cloud waiting to be whipped into a delightful frenzy. Add in the ¾ cup of granulated sugar, which is going to add sweetness and help create that lovely, airy texture we crave in cookies. Using an electric mixer, beat these two ingredients on medium speed for about 2-3 minutes until the mixture becomes light and fluffy. This is crucial because creaming incorporates air into the dough, making your cookies tender and giving them that melt-in-your-mouth quality that’s utterly intoxicating!
As you mix, take a moment to inhale the rich, sweet aroma wafting up from the bowl—it’s like a promise of all the deliciousness to come. You’ll know you’re done when your mixture looks pale and fluffy; if it starts looking grainy or clumpy, simply keep mixing! Don’t rush this step; allowing enough time for proper aeration will make all the difference in achieving those Soft Strawberry Cheesecake Cookies that are sweet & creamy bites of heaven.
Step 6: Incorporating Eggs and Vanilla
Next, it’s time to bring everything together with our egg and vanilla extract. Crack that large egg right into your creamy butter-sugar mixture, followed by 1 teaspoon of vanilla extract. The egg serves as a binding agent—think of it as the glue that holds our cookie dreams together—while vanilla adds an aromatic warmth that elevates every bite. Mix on low speed until just combined; overmixing here can lead to tough cookies, which we definitely want to avoid!
As you blend these ingredients, pay attention to how they transform—the batter should become smooth with a hint of glossiness that signals good things ahead. I promise you; this is where the magic begins! Once combined, feel free to scrape down the sides of your bowl with a spatula to ensure everything is fully incorporated. It’s these small details that contribute significantly to achieving that perfect texture we’re after.
Step 7: Mixing Dry Ingredients
Now it’s time for one of those essential steps that often gets overlooked—the careful incorporation of our dry ingredients! In a separate bowl, whisk together 1 ½ cups of all-purpose flour, ½ teaspoon baking powder, and ¼ teaspoon salt. This combination is not just thrown together haphazardly; each component plays a pivotal role in our cookie’s structure. The flour forms the base while the baking powder provides lift—a bit like giving our cookies little pillows to rest upon as they bake—and salt enhances all those lovely flavors we’ve built so far.
Once you’ve whisked everything together thoroughly, gradually add this dry mixture into your wet ingredients. I recommend doing this in three parts; this method prevents clumping and ensures even distribution throughout your dough. Use a spatula or wooden spoon here—gentleness is key! Fold everything together until just combined; there may be some streaks of flour remaining, but trust me—this is normal! Overmixing at this stage can lead to dense cookies instead of those light and chewy bites we’re aiming for.
Step 8: Creating Your Cheesecake Filling
Ahh, now we arrive at perhaps the most exciting part—creating that luscious cheesecake filling! In another bowl (yes, I know it feels like we’re using a lot of dishes), combine 4 ounces of softened cream cheese with ¼ cup powdered sugar and an extra ½ teaspoon of vanilla extract. The cream cheese gives us that signature cheesecake flavor while adding creaminess that perfectly complements our strawberry jam later on. Using an electric mixer again on medium speed makes this step quick and easy; mix until smooth and creamy—about 2 minutes should do!
At this point, don’t forget to taste test your filling—it’s heavenly! If you find it needs more sweetness or flavor (we all have different preferences), feel free to adjust by adding more powdered sugar or vanilla extract little by little until you achieve perfection! Remember though: balance is key here as we’ll be adding strawberry jam later on too. This filling is what transforms our Soft Strawberry Cheesecake Cookies into truly extraordinary bites that burst with flavor.
Final Touches: Assembling Your Sweet & Creamy Bites
Step 9: Shaping Your Cookies
The moment has arrived for assembling these delightful treats! Preheat your oven to 350°F (175°C) while we prepare our cookie portions for baking. Using either a cookie scoop or two spoons, portion out about one tablespoon of cookie dough onto a parchment-lined baking sheet—leaving enough space between each dollop because they will expand as they bake! Now comes the fun part: using your fingers or the back of another spoon (dampening them slightly if needed), create an indent in the center of each dough ball where our creamy cheesecake filling will nestle beautifully.
Once you’ve created those charming little wells in each cookie mound, spoon about half a teaspoon of your prepared cheesecake filling into each indentation followed by half a teaspoon of strawberry jam atop that lovely cream layer. It might feel like you’re building tiny edible works of art—and trust me; it’s worth every moment spent on this step because each bite will deliver an explosion of flavors! Don’t worry if some jam spills over—it adds character!
Step 10: Baking Perfection!
Now it’s time for these beauties to meet their destiny in the oven! Place your baking sheet in the preheated oven and allow them to bake for about 12-15 minutes or until their edges turn lightly golden brown while still appearing soft in the center—a telltale sign that they’ll retain their chewy texture once cooled down. Every oven varies slightly in temperature distribution; so keep one eye on those cookies towards the end!
When they are nearly done baking but still soft (don’t worry—they’ll firm up as they cool), remove them from the oven and let them sit on the baking sheet for around five minutes before transferring them onto wire racks for complete cooling. This resting period allows residual heat from the pan to continue cooking without drying them out too much—a non-negotiable step if you want those Soft Strawberry Cheesecake Cookies – Sweet & Creamy Bites!
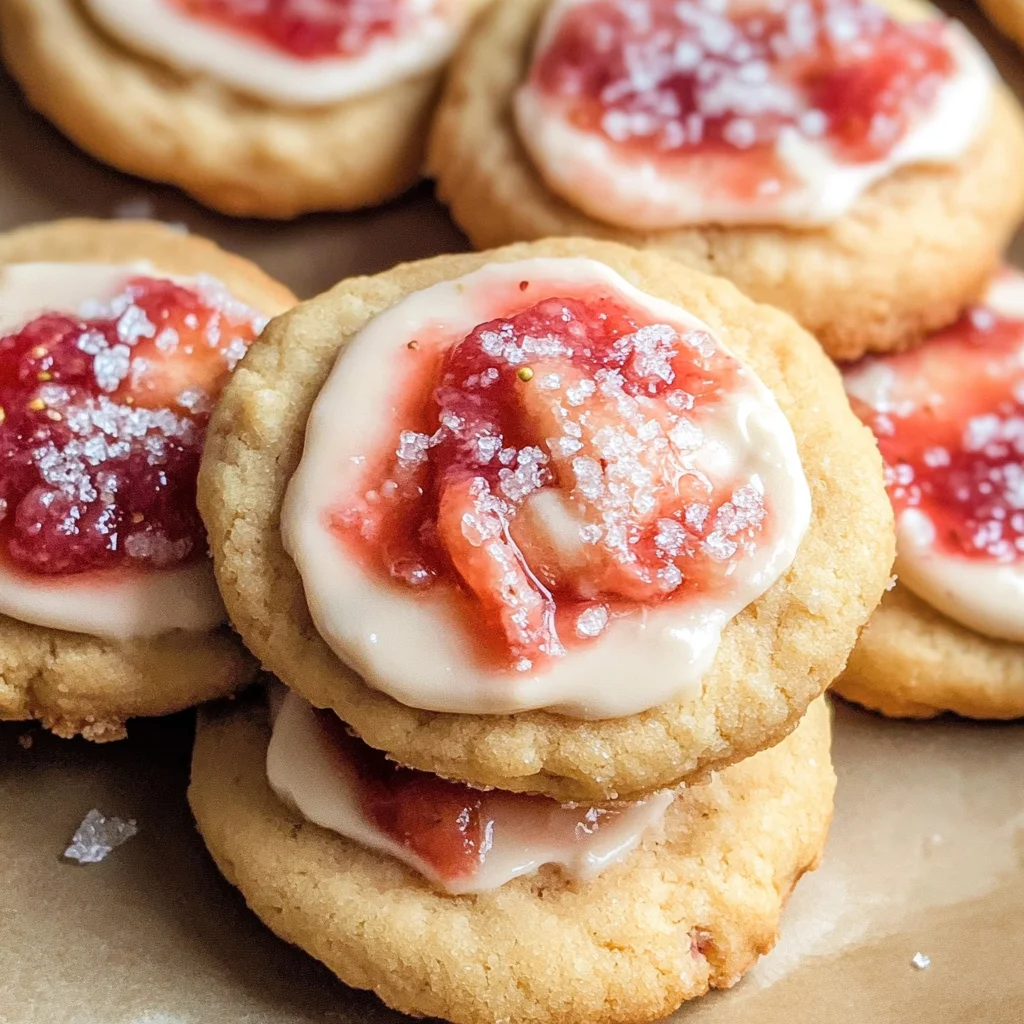
Step 11: Glazing & Garnishing
Finally, let’s elevate these delights with some finishing touches! Prepare your pink glaze by mixing powdered sugar with just enough milk until it reaches a pourable consistency—think liquid gold—but not too runny! Drizzle this sweet glaze over each cooled cookie generously because who doesn’t love a pretty dessert? It adds not only sweetness but also visual appeal—making these cookies truly irresistible.
To add even more flair (and sparkle!), sprinkle some sparkling sugar over top before serving—you’ll see how it catches light beautifully when presented at gatherings or simply enjoyed at home with loved ones while sharing stories around kitchen tables filled with laughter and joy.
And there you have it—the completed masterpiece: Soft Strawberry Cheesecake Cookies – Sweet & Creamy Bites! These delightful creations are perfect for any occasion—from casual afternoons spent with friends over coffee to festive celebrations where they will undoubtedly steal hearts (and plates!). I encourage you wholeheartedly not just to share them but savor every single bite yourself—as life is truly sweeter when enjoyed one cookie at a time!
Storage and Enjoyment Tips for Your Soft Strawberry Cheesecake Cookies – Sweet & Creamy Bites
Ah, the moment has arrived! Your kitchen is filled with that intoxicating aroma of freshly baked cookies, and you can hardly wait to sink your teeth into these delightful Soft Strawberry Cheesecake Cookies. But what happens when you have some leftovers? Trust me, these sweet and creamy bites are just as enjoyable the next day (or even later!), so let’s talk about how to store them properly to maintain their divine flavor and texture.
Storing Leftover Soft Strawberry Cheesecake Cookies – Sweet & Creamy Bites
To keep those luscious cookies fresh, I recommend using an airtight container; this is absolutely paramount in preserving their soft texture and rich flavors. Place a piece of parchment paper between layers if you find yourself stacking them, which helps to avoid any sticky situations (we all know how cream cheese can be). You can store them at room temperature for up to three days, but if you want to stretch their deliciousness a bit longer, they can last about a week in the fridge. Pro tip: adding a slice of bread into the container can work wonders—this little hack keeps your cookies moist by absorbing excess air moisture. And while they’re delicious straight from the container, I encourage you to pop one in the microwave for a few seconds before enjoying; it transforms the cookie into a warm, gooey delight that will make your heart sing.
Freezing Soft Strawberry Cheesecake Cookies – Sweet & Creamy Bites for Later
If you find yourself with an abundance of these scrumptious treats (which is always a good problem to have), freezing them is an excellent option! To freeze these beauties properly, simply place them on a baking sheet lined with parchment paper and put them in the freezer until they’re solid—about an hour should do. Once frozen, transfer them into a freezer-safe bag or container. They’ll keep well for up to three months! When the craving strikes, just take out as many cookies as you desire and let them thaw at room temperature for about 30 minutes—or if you’re like me and can’t wait that long—give them a quick zap in the microwave for 15 seconds. The convenience of having a stash of these heavenly bites ready for any occasion makes my heart flutter with joy!
Soft Strawberry Cheesecake Cookies – Sweet & Creamy Bites

Welcome to the delightful world of Soft Strawberry Cheesecake Cookies – Sweet & Creamy Bites! These cookies are the perfect blend of soft, chewy cookie goodness and a luscious cream cheese filling infused with vibrant strawberry flavor. Each bite offers a delightful experience, combining the familiar comfort of homemade cookies with the rich, creamy texture of cheesecake. Ideal for any occasion, these treats will brighten up your gatherings or cozy evenings at home. Get ready to create smiles and sweet memories!
- Prep Time: 20 minutes
- Cook Time: 15 minutes
- Total Time: 35 minutes
- Yield: Approximately 12 cookies 1x
- Category: Dessert
- Method: Baking
- Cuisine: American
Ingredients
- 1 ½ cups all-purpose flour
- ½ teaspoon baking powder
- ¼ teaspoon salt
- ½ cup unsalted butter (softened)
- ¾ cup granulated sugar
- 1 large egg (room temperature)
- 1 teaspoon vanilla extract
- 4 ounces cream cheese (softened)
- ¼ cup powdered sugar
- ½ teaspoon vanilla extract (for filling)
- ½ cup strawberry jam
Instructions
- Preheat your oven to 350°F (175°C) and line a baking sheet with parchment paper.
- In a mixing bowl, cream together softened butter and granulated sugar until light and fluffy.
- Add the egg and vanilla extract, mixing until fully combined.
- In another bowl, whisk together flour, baking powder, and salt before gently folding it into the wet mixture.
- Prepare the cheesecake filling by blending softened cream cheese, powdered sugar, additional vanilla extract, and strawberry jam in a separate bowl until smooth.
- Scoop tablespoon-sized portions of cookie dough onto your baking sheet, creating an indent in each for the filling.
- Fill each indent with the cheesecake mixture and drizzle some extra strawberry jam on top.
- Bake for 12–15 minutes or until edges are lightly golden. Allow to cool before enjoying!
Nutrition
- Serving Size: 1 cookie
- Calories: 180
- Sugar: 12g
- Sodium: 75mg
- Fat: 8g
- Saturated Fat: 5g
- Unsaturated Fat: 2g
- Trans Fat: 0g
- Carbohydrates: 24g
- Fiber: 1g
- Protein: 2g
- Cholesterol: 25mg