Strawberry Banana Pudding Dream
There’s something truly magical about desserts that bring together the sweetness of ripe fruit and the comforting embrace of creamy textures. As I sit here, reminiscing about my childhood, I can’t help but think of those lazy summer afternoons spent with family, where laughter mingled with the scent of freshly sliced strawberries and bananas. This Strawberry Banana Pudding Dream is not just a recipe; it’s an experience that captures those moments, a delightful fusion of flavors that dances on your palate and warms your heart. Each spoonful envelops you in a symphony of creamy pudding and fruity bursts, creating a dessert that’s as satisfying as it is nostalgic. Trust me when I say this: once you make it, you’ll have friends and family clambering for seconds!
The beauty of this dish lies in its simplicity and versatility—perfect for any occasion, be it a gathering or a quiet evening at home. The layers of vanilla wafers give it that delightful crunch while the bananas and strawberries add freshness and vibrancy. This Strawberry Banana Pudding Dream carries with it the essence of summer, no matter what time of year you’re making it. It’s easy to whip up yet feels utterly indulgent, making it ideal for both casual dinners and festive celebrations alike. So let’s dive into this culinary adventure together, shall we?
Ingredients:
As we embark on this delicious journey to create our Strawberry Banana Pudding Dream, let’s take a moment to appreciate each ingredient that plays a crucial role in crafting this delightful dessert.
- 2 boxes (approximately 24 oz.) Vanilla Wafers. These little cookies are the backbone of our dessert, adding texture and sweetness that perfectly complements the creamy layers above them. When selecting your vanilla wafers, look for those with a nice balance between crispness and flavor; you want them to soften slightly when layered but still provide that satisfying crunch. If you’re feeling adventurous or want to customize flavors further, consider using other cookie options like graham crackers or even chocolate wafers!
- 6 to 8 ripe bananas, sliced. Bananas are the stars of this dessert alongside strawberries; their natural sweetness melds beautifully with the pudding base while providing a luscious mouthfeel. Look for bananas that are perfectly ripe—yellow with just a hint of speckling—since under-ripe bananas can taste starchy and overripe ones may turn mushy too quickly. Don’t underestimate how crucial these slices are; they add both flavor and visual appeal to your layers.
- 2 cups milk. The milk acts as a wonderful canvas for our pudding mixture, adding creaminess without overwhelming the other flavors. For this recipe, whole milk is preferred due to its rich texture; however, if you’re looking for lighter alternatives or have dietary preferences such as almond or oat milk, those can work too! Just remember that different milks might slightly alter the final consistency.
- 1 container (approximately 16 oz.) strawberries. Fresh strawberries bring an irresistible burst of juicy flavor that brightens up each bite of our pudding dream. When choosing strawberries at the store or farmers’ market, opt for vibrant red berries without any soft spots; they should smell sweet and fragrant—a sign they’re bursting with flavor! Strawberries not only enhance taste but also add lovely color contrast against the creamy base.
- 1 (5 oz.) box French Vanilla pudding mix. This is where we introduce richness into our dessert! The French Vanilla pudding mix lends an exquisite depth of flavor along with a velvety texture that’s simply divine. If you prefer to avoid pre-packaged mixes entirely, feel free to make your own homemade vanilla pudding; just ensure it’s fully chilled before layering.
- 1 (8 oz.) package cream cheese, softened at room temperature. Cream cheese adds an essential tangy note that balances out all the sweetness in our dessert while contributing to its luxurious creaminess—this is absolutely paramount! Be sure it’s softened before mixing so you don’t end up with lumps because incorporating cold cream cheese into your mixture will be quite challenging.
- 1 (14 oz.) can sweetened condensed milk. This ingredient is like liquid gold—it brings an incredible level of sweetness along with creamy richness that transforms our pudding mixture into something truly extraordinary! It’s non-negotiable here; its unique consistency cannot be replicated easily with other ingredients.
- 1 (12 oz.) container whipped topping. Finally, we crown our creation with whipped topping, which adds an airy lightness to finish off our layers beautifully! While homemade whipped cream would elevate this recipe even further if you have time, store-bought works just fine here—just reach for one that’s labeled “whipped topping” rather than regular whipped cream for ideal results.
Equipment You’ll Need:
Having the right tools makes all the difference in creating your Strawberry Banana Pudding Dream smoothly and joyfully! While these may not be ingredients per se, they act as essential partners on this culinary journey.
- Mixing bowl – A large mixing bowl is crucial for combining all those lovely ingredients without spilling over! Opt for one made from glass or stainless steel so you can see your mixture come together beautifully.
- Electric mixer – While you could mix by hand if you’re feeling particularly strong (and patient!), an electric mixer will save you time and help achieve that smooth blend effortlessly—especially important when incorporating cream cheese into the pudding mixture.
- Large serving dish (or trifle dish) – Choose a clear glass serving dish if possible; not only does it allow everyone to admire those beautiful layers you’ve created, but it also gives guests an idea of how deliciously decadent their serving will be!
- Spatula – A silicone spatula is perfect for scraping down sides during mixing while ensuring every last bit of your delicious pudding mixture gets into those layers!
With everything prepped and ready in front of you, let’s dive into preparing this delectable Strawberry Banana Pudding Dream together!
Step 1: Whip Up That Creamy Base
To begin our delightful creation process, grab your mixing bowl and combine the softened cream cheese with sweetened condensed milk until smooth—a task best performed using your trusty electric mixer! This step is essential because it ensures that there are no lumps in your final pudding mixture; trust me—you don’t want any surprises when serving this beautiful dessert later on! Once blended well into what resembles silky liquid gold (oh yes!), gently fold in the French vanilla pudding mix along with two cups of milk until everything harmonizes into one luscious concoction.
Step 2: Layering Begins
Now comes one of my favorite parts—the layering! In your chosen serving dish—be it trifle or otherwise—start by laying down half of those crispy vanilla wafers at the bottom like foundation stones laid in place for something magnificent above them. Next up: slice those ripe bananas generously across their surface followed by luscious strawberry slices nestled snugly between each wafer layer as if building a cozy fruit haven within reach!
Step 3: Pour Your Pudding
With each layer lovingly placed before you like pieces in an exquisite puzzle, it’s now time to pour half of your velvety pudding mixture over everything—watch how it cascades down eagerly among fruits while filling nooks around wafers! This step is non-negotiable because it locks everything together beautifully—the combination creates pathways where flavors meld seamlessly throughout every bite later on…don’t rush through here!
Step 4: Repeat Those Layers
Once you’ve poured half the pudding mixture over wafting fruity aromas filling up air around us—and believe me when I say they are intoxicating—we’ll repeat these steps until all ingredients find their rightful places within this masterpiece’s embrace! Begin again with another layer of crunchy vanilla wafers topped once more by banana slices followed by strawberries resting comfortably atop—they seem almost eager waiting patiently beneath creamy blanket set soon upon them once more…
And there we go! We’ve begun crafting layers full-on packed flavor alongside delightful textures awaiting final touches before refrigeration calls them home briefly until serving time arrives…
This journey has just begun—but oh boy—isn’t it promising? Stay tuned as we wrap things up beautifully after completing these initial steps…
Step 5: Layering the Love – Fruits and Wafers Unite
Now comes one of the most delightful stages of creating your Strawberry Banana Pudding Dream: layering those incredible ingredients. Begin by taking your large serving dish, one that can showcase this beautiful dessert, and start with a layer of Vanilla Wafers. Lay them down gently; it’s not just about filling the space but creating a foundation that will soak up the creamy goodness that’s to come. You want to ensure they slightly overlap, almost like a cozy blanket for the fruit that will follow. Trust me on this—using Vanilla Wafers sets the stage for a delightful crunch that contrasts beautifully with the silky pudding and fresh fruit.
Next, take those luscious bananas you’ve been slicing—aim for even thickness, about half an inch is perfect. Lay them over the wafers in an even layer; this is crucial because each bite should have a harmonious mix of flavors and textures. Following your banana layer, it’s time to bring in those vibrant strawberries! Slice them into thick pieces as well, allowing their juicy sweetness to shine through. Arrange them artfully atop the bananas; visual appeal is vital when it comes to desserts! These steps aren’t just about stacking ingredients together—they’re about creating an experience that tells a story of flavor and texture with every single spoonful.
Step 6: The Creamy Blanket – Pouring on the Pudding Magic
With your layers of fruit in place, it’s time to pour half of that dreamy pudding mixture over your fruit and wafers. This pudding base is where all the magic happens! As you pour, be gentle yet deliberate; allow it to cascade over the fruits and wafers like liquid gold, covering every nook and cranny. This step is absolutely paramount because this pudding doesn’t just add flavor—it acts as a binding agent that turns these separate elements into a cohesive whole. It transforms everything into something truly extraordinary.
Make sure to use a spatula or the back of a spoon to spread it out evenly if necessary; you want to ensure that each piece gets its fair share of this creamy delight. As you do this, pay attention to how everything begins to meld together. You might notice some wafts of sweet vanilla rising—a scent so intoxicating it could make anyone weak at the knees! Once you’ve poured half the mixture over, take a moment to admire your handiwork before repeating with another layer of Vanilla Wafers, bananas, strawberries, and finally topping it all off with the remaining pudding mixture.
Step 7: The Second Layer – More is Merrier!
Now we’re entering round two—layering again! This isn’t just repetition; it’s about building depth and richness in taste and texture for our Strawberry Banana Pudding Dream. Start once more with a layer of Vanilla Wafers, just as before, ensuring they are closely packed but not crushed; they need room to absorb some moisture from our beloved pudding without becoming too soggy too soon. Follow this closely with another beautiful layer of sliced bananas followed by fresh strawberries—the vibrant colors contrasting so pleasingly against each other.
As you pour on that second helping of pudding mixture, take extra care not just to cover but also to coax any elusive bits of fruit back into view if needed! Let those strawberries peek through; they deserve their moment in the spotlight! You’ll notice how thick and luscious this pudding mixture becomes—it’s like magic happening right before your eyes as it envelops everything in its creamy embrace. Once all layered up perfectly once more, don’t forget to take a moment here—this visual masterpiece you’ve created deserves some appreciation!
Step 8: Topping It Off – Whipped Topping Goodness
At last—our final step before we let this beauty chill! Grab your container of whipped topping (I always choose one that’s light and fluffy) and spread it generously over your final layer of pudding mixture like frosting on a cake. This step adds an airy lightness that beautifully complements the rich creaminess beneath it while providing an inviting look with its smooth surface begging for spoons to dive in! Use an offset spatula or simply the back of a spoon for an easy application; there’s no need for perfection here—just aim for luscious coverage.
Now comes an essential part—the chilling phase. Cover your assembled Strawberry Banana Pudding Dream tightly with plastic wrap or foil (make sure it’s airtight!) and place it in the refrigerator for at least four hours—or preferably overnight if you can resist temptation! Why chill? Well, during this time, all those flavors meld together beautifully—the bananas soften slightly while absorbing lovely hints from the creamy layers above them making every bite profoundly satisfying when you’re ready to serve! Plus, letting it sit allows those Vanilla Wafers time to soak up some moisture without turning completely mushy—this balance between textures is what we’re after!
Finishing Touches – Serving Your Strawberry Banana Pudding Dream
Step 9: The Grand Reveal – Slicing into Sweetness
When you’re ready to serve this stunning creation at your next gathering or family dinner (or just because you deserve something special!), gently remove it from the refrigerator and peel away any covering used during chilling. Take a deep breath—inhaling those wonderful sweet aromas wafting up—it’s utterly intoxicating! Use a sharp knife or spatula to slice through layers; watch as they reveal themselves beautifully stacked inside—the vibrant colors showcasing their charm.
As you dish out portions onto plates or into bowls, consider adding fresh slices of strawberries or banana on top for an extra flair—like little jewels atop your delicious crown! I promise you; every spoonful will be met with smiles and sighs at how truly extraordinary this dessert is. Each bite delivers such a symphony of flavors—from sweet strawberries bursting forth paired harmoniously with comforting creaminess—it’s nothing short of blissful indulgence.
So go ahead—dive in! Enjoy every mouthful knowing that you’ve created not just a dessert but rather a cherished experience filled with love—and isn’t that what cooking is all about?
Storage and Enjoyment Tips for Your Strawberry Banana Pudding Dream
Ah, the moment has finally arrived! You’ve crafted this delightful creation, and your Strawberry Banana Pudding Dream is ready to enchant your taste buds and those of your loved ones. Before you dive in with gusto, let’s talk about how to keep this heavenly dessert at its best for as long as possible. Whether you’re saving some for later or preparing for a gathering, I’ve got you covered with some handy preservation tips that will ensure every spoonful remains just as luscious and vibrant as when it was first made.
Storing Leftover Strawberry Banana Pudding Dream
When it comes to storing your Strawberry Banana Pudding Dream, I recommend using an airtight container—trust me, this is crucial to maintaining that creamy texture and preventing any unwanted odors from mingling in your fridge. If you have any leftovers (which is often a rarity!), it will happily keep in the refrigerator for up to three days. However, here’s the pro tip: placing a slice of bread in the container can help absorb excess moisture and keep the pudding dream fluffy. You’ll be delighted to know that even after a few days, this dessert transforms slightly—while the flavors meld beautifully together, the strawberries may soften a tad more, creating an utterly intoxicating experience with each bite. When you’re ready to enjoy it again, simply scoop it out with love and perhaps add a fresh slice of banana or a sprinkle of crushed vanilla wafers on top for that fresh touch!
Freezing Components for Later
Now, if you want to take things one step further and prepare ahead of time, freezing components of your Strawberry Banana Pudding Dream is an excellent option! Begin by freezing the pudding mixture in an airtight container—you can store it like this for about two months without sacrificing flavor or texture. Just make sure to leave some room at the top since it may expand as it freezes. When you’re ready to indulge again, simply thaw it overnight in the refrigerator before layering it again with fresh fruit and wafers. This convenience not only saves time but also allows you to whip up this crowd-pleaser effortlessly during busy weeks or last-minute gatherings. Imagine having that creamy goodness waiting for you; it’s like having a little taste of sunshine stored away!
With these storage tips in hand, you’re all set to enjoy your Strawberry Banana Pudding Dream at its very best—no matter when you choose to savor it!
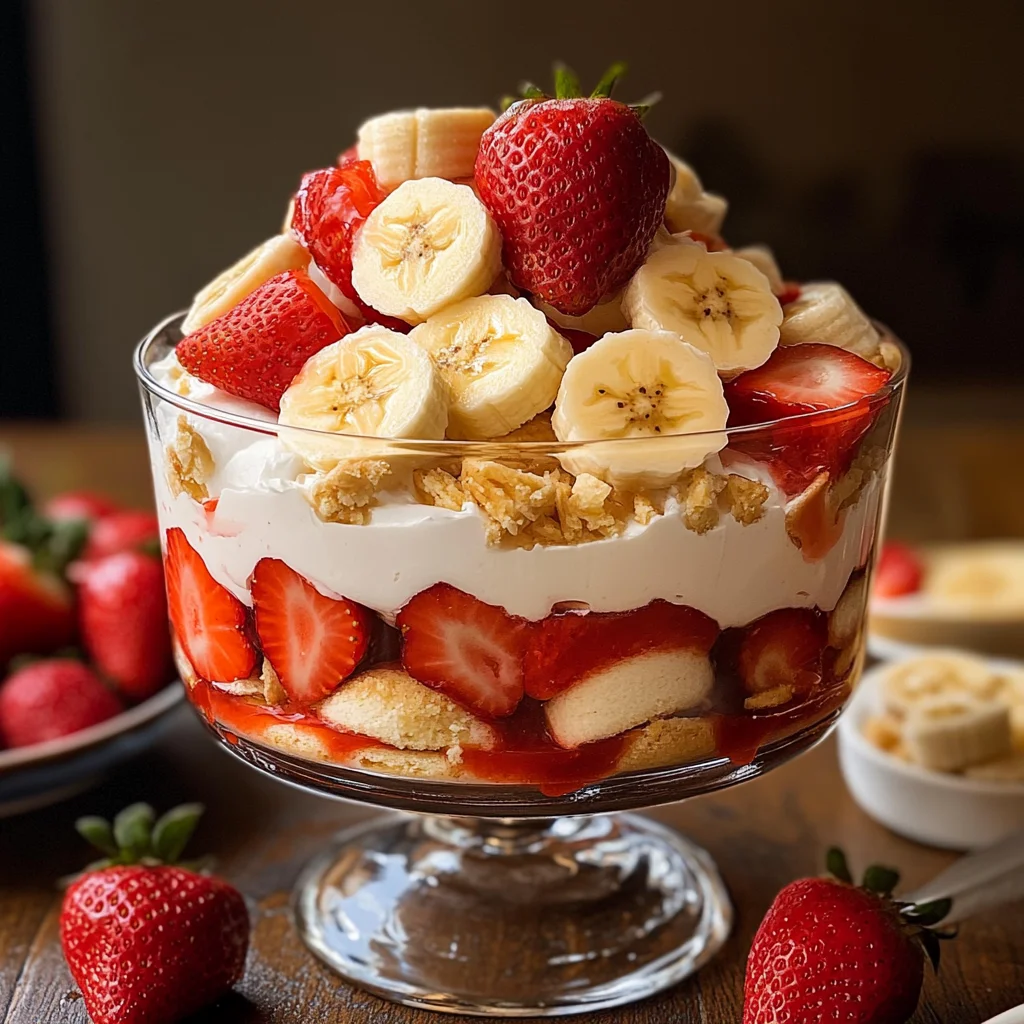
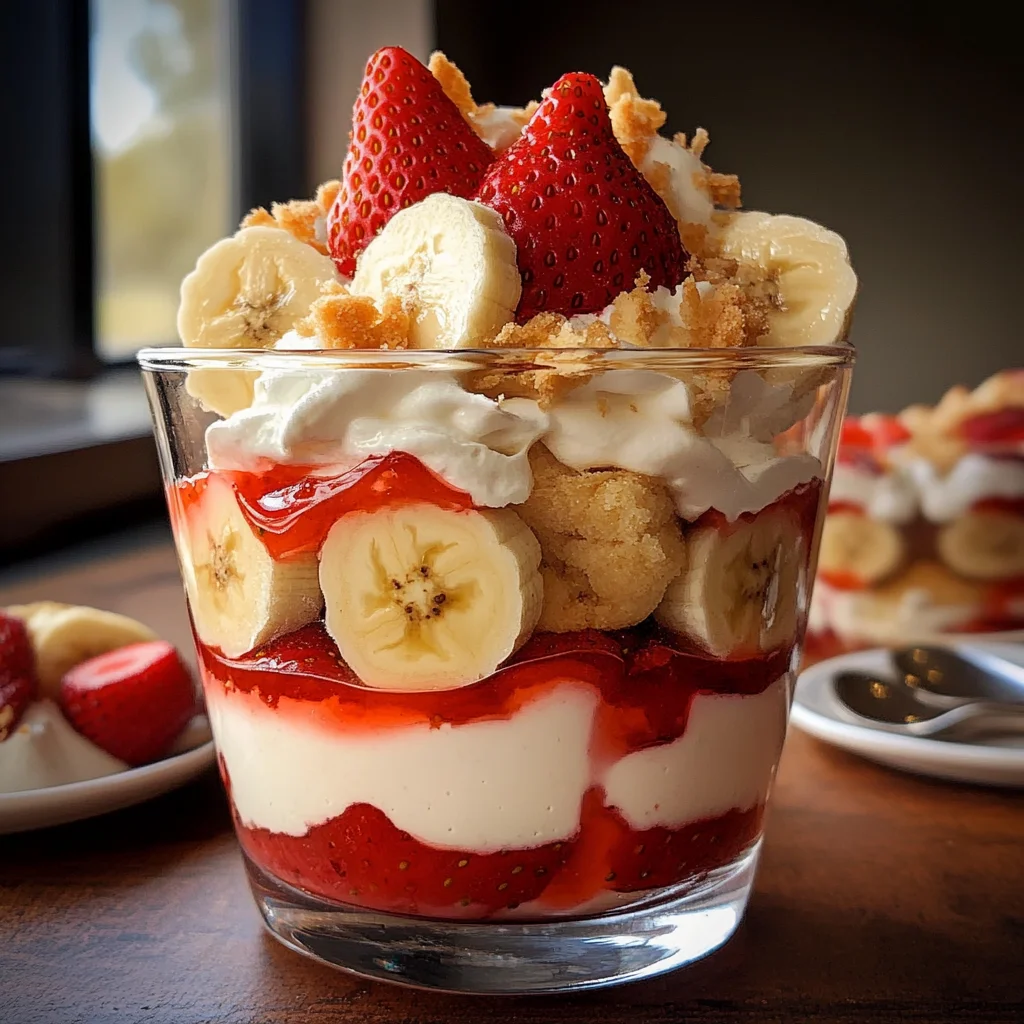
Strawberry Banana Pudding Dream
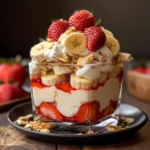
Indulge in the delightful experience of our Strawberry Banana Pudding Dream, a no-bake dessert that perfectly balances creamy textures with the refreshing sweetness of ripe strawberries and bananas. This layered creation features crunchy vanilla wafers soaked in luscious pudding, making it an ideal treat for any occasion—whether a summer gathering or an everyday dessert craving. Each spoonful promises nostalgia as you savor the harmonious blend of flavors and textures in this easy-to-make dish. Your friends and family will be asking for seconds!
- Prep Time: 30 minutes
- Cook Time: None
- Total Time: 0 hours
- Yield: Serves approximately 8
- Category: Dessert
- Method: No-bake
- Cuisine: American
Ingredients
- 2 boxes (approximately 24 oz.) Vanilla Wafers
- 6 to 8 ripe bananas, sliced
- 2 cups milk (whole or plant-based)
- 1 container (approximately 16 oz.) strawberries, sliced
- 1 box (5 oz.) French Vanilla pudding mix
- 1 package (8 oz.) cream cheese, softened
- 1 can (14 oz.) sweetened condensed milk
- 1 container (12 oz.) whipped topping
Instructions
- In a large mixing bowl, combine softened cream cheese and sweetened condensed milk using an electric mixer until smooth. Fold in French vanilla pudding mix and milk until well incorporated.
- In your serving dish, layer half of the vanilla wafers at the bottom. Add layers of banana slices and strawberries.
- Pour half of the pudding mixture over the fruit and wafers, ensuring even coverage.
- Repeat with another layer of vanilla wafers, banana slices, strawberries, and pour on the remaining pudding mixture.
- Top with whipped topping and smooth it out evenly.
- Cover tightly and refrigerate for at least four hours or overnight before serving.
Nutrition
- Serving Size: Approximately 1 cup (240g)
- Calories: 380
- Sugar: 26g
- Sodium: 210mg
- Fat: 18g
- Saturated Fat: 10g
- Unsaturated Fat: 7g
- Trans Fat: 0g
- Carbohydrates: 54g
- Fiber: 2g
- Protein: 5g
- Cholesterol: 40mg