Vegan Garlic Dough Balls
When I think about Vegan Garlic Dough Balls, I can’t help but feel a rush of warmth and nostalgia. There’s something utterly intoxicating about the aroma of freshly baked bread mingling with the rich, buttery scent of garlic wafting through the air. It’s not just about creating a dish; it’s about crafting an experience that draws friends and family together, where each bite is a hug for your taste buds. These delightful dough balls are fluffy little pillows of joy, generously coated in luscious garlic butter, and served alongside a creamy cashew dip that is simply to die for. I promise you, they will disappear faster than you can say Vegan Garlic Dough Balls!
What makes these tender morsels so special? Well, it’s not just the mouthwatering flavors; it’s also their ability to transform any occasion into a celebration. Whether it’s a cozy family dinner, a lively get-together with friends, or even just a quiet night in with a good movie, these dough balls bring an element of excitement to the table. Plus, each one is like a little canvas waiting to be dipped into that cheesy cashew concoction—an experience that teeters on the edge of indulgence and comfort. So gather your ingredients and let’s embark on this culinary journey together!

Ingredients:
As we dive into making these Vegan Garlic Dough Balls, let’s take a moment to appreciate each ingredient we’ll be using. Every component plays its own unique role in creating this delightful dish, and understanding their contributions can elevate your cooking game.
- 500 g (4 cups) white bread flour: This is the backbone of our dough balls. White bread flour has a higher protein content than all-purpose flour, which helps develop gluten—a key factor for achieving that perfect chewy texture. When shopping for flour, look for brands labeled specifically as ‘bread flour’ to ensure you’re getting the right type. If you need to make substitutions due to dietary restrictions or preferences, whole wheat flour can work well too but will yield denser dough balls.
- 10 g (3 teaspoons) fast action (instant) yeast: Yeast is what makes our dough rise beautifully! Using fast-action yeast allows us to skip some rising times while still achieving fluffy results. When adding yeast to your mixture, remember to keep it separate from salt until mixing begins; salt can inhibit yeast activation. If you find yourself without instant yeast on hand, you can use active dry yeast—just make sure to activate it in warm water before adding it to your dough.
- 1 teaspoon salt: Salt is absolutely paramount in this recipe—not just for flavor but also because it strengthens gluten structure and enhances overall fermentation. It balances sweetness from other ingredients and helps prevent any overly bland bites.
- 1 teaspoon sugar: Sugar isn’t just for sweetness here; it acts as food for our yeast! A small amount helps kickstart fermentation and contributes to browning during baking. While granulated sugar works perfectly fine, feel free to experiment with coconut sugar or agave syrup if you prefer natural sweeteners.
- 3 Tablespoons olive oil: This liquid gold adds richness and moisture to our dough while helping create that lovely crust we all adore. Choose extra virgin olive oil if possible; its robust flavor will shine through in every bite. Alternatively, avocado oil or melted coconut oil can also serve as great substitutes.
- 160 ml (⅔ cup) unsweetened non-dairy milk (I use soy): Non-dairy milk adds moisture while keeping our recipe vegan-friendly! Soy milk has a nice creaminess that mimics dairy milk well, but almond or oat milk would also work beautifully—just ensure they’re unsweetened for this savory application.
- 160 ml (⅔ cup) water (lukewarm): Water serves as another source of hydration for our dough—it activates the yeast when warmed gently but not too hot (think bathwater temperature). If it’s too hot, you’ll end up killing your precious yeast!
- 75 g (2 + ⅔ oz / ½ cup) raw cashews: These nuts are essential for creating our dreamy cheesy dip! After soaking them in hot water—which softens them up—they’ll blend into an incredibly smooth consistency that mimics traditional cheese sauces without any animal products involved.
- 2 cloves garlic (peeled): Fresh garlic adds pungent flavor that elevates both our dough balls and cheesy dip! The aroma alone is enough to draw people into your kitchen; plus, roasting these cloves enhances their sweetness while mellowing out their sharpness.
- 1 ½ teaspoons tapioca starch: This ingredient thickens our cashew dip beautifully while providing that desirable stretchy texture reminiscent of cheese! It’s also gluten-free; if you don’t have it on hand though, cornstarch could work as an alternative—but expect different results in texture.
- ½ teaspoon salt: Just like before! A pinch here balances flavors within the cashew dip itself—because no one wants bland cheese sauce!
- 2 Tablespoons nutritional yeast: Nutritional yeast imparts an extraordinary cheesy flavor to our dip without using any dairy! It’s packed with vitamins and has become a staple in vegan kitchens everywhere due to its flavor-enhancing properties.
- 1 teaspoon cider vinegar: This tangy addition rounds out the flavors in our dip perfectly by adding acidity—mimicking what we often find in traditional cheese dips!
- 160 ml (⅔ cup) water: Some more water here ensures we reach ideal consistency when blending up everything together!
- 85 g (rounded ⅓ cup) vegan butter/spread: This delightful spread helps create our garlic butter coating! Look for brands that are rich and flavorful while ensuring they’re free from animal-derived ingredients—your taste buds will thank you!
- 4 cloves garlic (peeled and crushed): What’s better than two cloves? Four more! Infusing crushed garlic into melted vegan butter creates an utterly intoxicating aroma—this step is non-negotiable if you want true flavor depth!
- 1 Tablespoon finely chopped fresh parsley: Fresh herbs bring color but more importantly—flavor! Parsley brightens up both visually and taste-wise—a sprinkle will elevate your dish from ordinary to extraordinary!
- 1 heaped teaspoon dried oregano: Dried herbs provide concentrated flavors that’s crucial when you’re looking for depth without needing additional fresh ingredients. Oregano pairs deliciously with garlic ensuring every bite packs a flavorful punch!
Equipment You’ll Need:
Now that we’ve gathered all these wonderful ingredients together let’s talk about the tools you’ll need for success in making these Vegan Garlic Dough Balls. Trust me when I say having the right equipment makes all the difference in crafting something truly special—and enjoyable!
- Large mixing bowl or stand mixer with dough hook – An absolute necessity for kneading your dough effectively; it allows you ample space while providing enough power behind those kneading arms! If using a stand mixer though be mindful of speed settings; medium-high should do just fine without overworking things.
- Baking sheet lined with parchment paper – This partner ensures easy clean-up after baking while preventing sticking issues during lifting off those fluffy dough balls once they’re golden brown!
- Ramekin (approximately 11cm wide x 4cm deep) – Essential when creating your cheesy dip center—it allows us room within which we pour all those delectable flavors before baking them into gooey goodness!
Step 1: Combine Your Ingredients
Let’s get started on this delightful journey by first combining our dry ingredients—the foundation of great bread-making! In either a large mixing bowl or using your trusty stand mixer fitted with a dough hook attachment add the measured white bread flour first thing—this is where all magic begins! Next comes the crucial part; on one side sprinkle over your fast action yeast while leaving space on another side for salt & sugar since direct contact could disrupt activation efforts earlier down line. Mixing them together too soon might lead yeasty disaster none of us want!
Once you’ve created those separate sections pour in olive oil alongside lukewarm non-dairy milk followed by warm water gently blending everything together until rough cohesive ball forms around edges—keep mixing until no loose bits remain stuck at bottom corners either way inside bowl feels bouncy yet slightly tacky texture-wise when touched lightly with fingers—that’s what we’re aiming for here folks!
Step 2: Knead Your Dough
Now comes one of my favorite parts—the kneading process! Kneading develops gluten which gives structure ensuring fluffy results once baked later down line so don’t rush this step; treat it like meditation if possible—focusing entirely upon task at hand brings joy well beyond kitchen life itself trust me on this one! If working by hand turn ball out onto unfloured surface then begin using palms pushing downwards folding over again repeating motion rhythmically till smooth elastic form appears after roughly five minutes’ worth effort expended.
If utilizing stand mixer however aim high speed between medium-high settings allowing machine do heavy lifting instead whilst observing progress closely every minute spent watching rise & fall pattern created tells story itself revealing how close nearing completion stage truly means success awaits near horizon eventually…
Step 3: Let Your Dough Rise
With everything mixed thoroughly place dough back inside oiled bowl covering top securely using clean damp cloth ensuring warmth envelops entire area aiding rise process taking anywhere from one-to-two hours depending upon environment temperature levels present around area at time—you’ll know it’s ready when doubled size achieved visibly noticeable transformation occurs right before eyes! Don’t rush this step; allowing proper resting time enables flavors develop deeper resulting end product greater than sum parts alone ever could achieve without patience practiced beforehand…
Step 4: Shape Those Dough Balls
Once you’ve punched down risen dough giving brief knead break air bubbles apart take moment marvel at transformation occurred throughout previous stages now ready shape individual portions into neat little balls awaiting future glory ahead next steps require precision yet don’t worry practice makes perfect here too folks—I usually weigh pieces around thirty grams each aiming twenty-nine total ideally shaped ones ready go fill up surrounding ramekin center plate magically soon enough…
With your hands gather edges pinching tightly closed forming rounded tops flipping over cupped palm lightly rolling gently until smooth surface appears upon inspection feeling proud accomplishment achieved thus far proceed onward toward arranging lovely circles awaiting final touches…
Step 5: Soaking the Cashews – A Creamy Transformation
As your dough rises and fills your kitchen with the intoxicating scent of yeast, it’s time to prep for the star of our show—the cheesy cashew dip that pairs beautifully with our Vegan Garlic Dough Balls. Start by placing those raw cashews in a bowl and covering them generously with boiling water. This soaking step is absolutely crucial as it allows the cashews to soften up, transforming them from hard little nuggets into a creamy, dreamy base for your dip. I promise you, this makes all the difference! If you skip this step, you’ll find yourself blending away only to end up with a gritty texture that’s far from enjoyable. Let those cashews soak for about 15-20 minutes while you sip on a cup of tea or dance around your kitchen—this is all part of the process!
You’ll know they’re ready when they feel soft to the touch; they should squish easily between your fingers. Soaking not only enhances their creaminess but also makes them easier to digest, which is an added bonus. Once they’re perfectly soaked, set them aside; we’ll come back to them shortly to whip up something truly extraordinary.
Step 6: Shaping Your Dough Balls – Crafting Little Pillows of Joy
Now that your dough has risen beautifully and doubled in size—don’t you just love that moment when it transforms?—it’s time to punch it down gently. This step may seem a bit counterintuitive because we’re literally deflating all that hard work, but trust me on this: punching down helps redistribute the yeast and gas bubbles throughout the dough, leading to an even texture in our finished product. Give it a brief knead right there in the bowl to knock out any stubborn air pockets. You want the dough to feel smooth and pliable under your hands; if it feels sticky, don’t hesitate to dust it lightly with flour.
Next comes one of my favorite parts—shaping those small pieces into delightful balls! Using a scale can really help here; aim for about 30 grams each. It may feel tedious, but precision ensures that all your dough balls bake evenly, giving you that perfect golden crust on every single piece. As you gather the edges of each piece and pinch them together into a ball, envision how these little bites will be enjoyed by friends and family—imagine their smiles as they sink their teeth into these fluffy morsels!
Step 7: The Second Rise – Patience is Key
Once you’ve shaped all your dough balls, arrange them in two circles around that greased ramekin on your baking sheet. This isn’t just for looks; trust me when I say there’s magic happening here! Loosely cover the entire baking sheet with a clean kitchen towel or plastic wrap and let them rise again for about 30-40 minutes until they’re puffed up like little clouds. During this time, your kitchen will start smelling like heaven as warmth encourages the yeast to come alive again.
It’s essential not to rush this step; patience pays off big time! You want these dough balls to spring back slowly when poked gently with a finger—if they bounce back quickly, give them more time! The second rise allows those flavors to deepen and develop further while creating an airy texture inside each ball. Watching them grow plump is one of my favorite moments in baking; it’s like witnessing a mini miracle unfold before my eyes!
Step 8: Prepping for Baking – The Final Flourish
With your dough balls puffed up nicely, it’s time to get that oven preheating! Set it to 210°C (or 425°F) so that when you’re ready to bake, it’s hot enough to create that lovely golden crust we’re after. While you’re waiting for the oven’s warmth to envelop your kitchen like a cozy hug, let’s make our garlic butter—a non-negotiable element that elevates these Vegan Garlic Dough Balls into pure bliss! Melt together vegan butter with crushed garlic, finely chopped parsley, and dried oregano over gentle heat until everything melds together beautifully. The aroma will fill your space with an utterly intoxicating scent—your friends might start wandering into the kitchen wondering what deliciousness awaits!
Meanwhile, don’t forget about that cheese dip! Drain those soaked cashews and place them in a blender along with garlic cloves, tapioca starch for thickness, salt for flavor enhancement, nutritional yeast (which adds that lovely cheesy taste), cider vinegar for brightness, and fresh water. Blend until it’s silky smooth; if necessary, scrape down those sides because we want every last bit blended well—it’s worth it! After blending comes the cooking part: pour this mixture into a pan over medium heat and whisk constantly until it thickens up beautifully—this should take just a few minutes. And remember: keep an eye on it because nobody wants burnt cheese dip!
Baking Your Perfect Vegan Garlic Dough Balls
Step 9: The Baking – A Moment of Anticipation
With everything prepped—the garlicky pool of melted goodness waiting patiently beside you—the moment has finally arrived! Carefully pour the creamy cheese mixture into the greased ramekin at the center of your arranged dough balls and level it off so it bakes uniformly alongside its delightful companions. Drizzle some extra virgin olive oil over everything if you’re feeling fancy—it adds an extra layer of richness that’s simply divine.
Gently brush about two-thirds of that fragrant garlic butter over each dough ball before sliding the whole tray into your preheated oven. Bake these beauties for about 20 minutes or until they’re golden brown on top—a visual cue that tells you they are perfect and ready! If you’ve got a probe thermometer handy (and I highly recommend having one), insert it into one of those glorious dough balls; you’re aiming for at least 90°C (194°F). This ensures they’re cooked through properly while maintaining an irresistibly soft interior.
As soon as they’re out of the oven—and believe me when I say you’ll want to take in every heavenly aroma wafting through your home—brush any remaining garlic butter over those golden nuggets one last time before serving them warm. There’s something profoundly satisfying about presenting these Vegan Garlic Dough Balls alongside their cheesy counterpart; it’s an experience meant to be shared with laughter and joy among friends!
Step 10: Serving – A Festive Experience
Now comes my favorite part—serving these scrumptious Vegan Garlic Dough Balls! Arrange everything artfully on a platter; don’t be shy about showcasing those pillowy delights surrounding their cheesy dip companion—they deserve all the attention they can get! Encourage everyone at the table to dig right in while they’re still warm because trust me—the flavors are utterly extraordinary when enjoyed fresh out of the oven.
As you watch your loved ones take their first bite—their faces lighting up as they experience that delectable combination of warm bread paired with creamy cashew cheese—it’s moments like these that remind us why we cook. Whether it’s a festive gathering or simply indulging during movie night at home, I promise you these Vegan Garlic Dough Balls will become an instant classic in your kitchen repertoire! Enjoy every gooey bite knowing you’ve created something truly special from scratch—a labor of love that’s bound to bring smiles all around.
And remember: Cooking is not just about following steps but celebrating flavors and connections through food. Happy cooking!
Storage and Enjoyment Tips for Your Vegan Garlic Dough Balls
Now that you’ve created this delightful batch of Vegan Garlic Dough Balls, let’s talk about how to preserve that incredible flavor and fluffy texture for later enjoyment. Trust me when I say that these little gems are just as delicious even after a day or two—or longer! The key is all in the storage.
Storing Leftover Vegan Garlic Dough Balls
To keep your Vegan Garlic Dough Balls fresh and scrumptious, I recommend placing them in an airtight container. This helps lock in moisture while preventing any unwanted odors from mingling with their beautiful garlicky aroma. If you happen to have leftovers (which is often a surprise because they tend to disappear quickly!), you can store them in your refrigerator for up to three days. For those who want to maintain that delightful soft texture, consider placing a slice of bread in the container with the dough balls; this simple tip helps absorb excess moisture, keeping everything perfectly fluffy. When you take them out after a couple of days, you’ll still savor that profound satisfaction of freshly baked goodness—just reheat them gently in the oven for about 5-10 minutes at 180°C/350°F for a warm, inviting experience.
Freezing Dough Balls for Later
If you’d like to enjoy these Vegan Garlic Dough Balls down the line, freezing is an excellent option! To do this properly, allow your dough balls to cool completely first. Then, lay them out on a baking sheet lined with parchment paper and freeze until solid—this prevents them from sticking together. Once frozen, transfer them into a freezer-safe bag or container where they can happily stay for up to three months. The beauty of freezing these tasty morsels is that you can pop one or two out whenever the craving strikes; simply bake them directly from frozen—no need to thaw! This makes it exceptionally convenient for spontaneous gatherings or cozy nights at home when you’re feeling indulgent but don’t want to spend too much time in the kitchen.
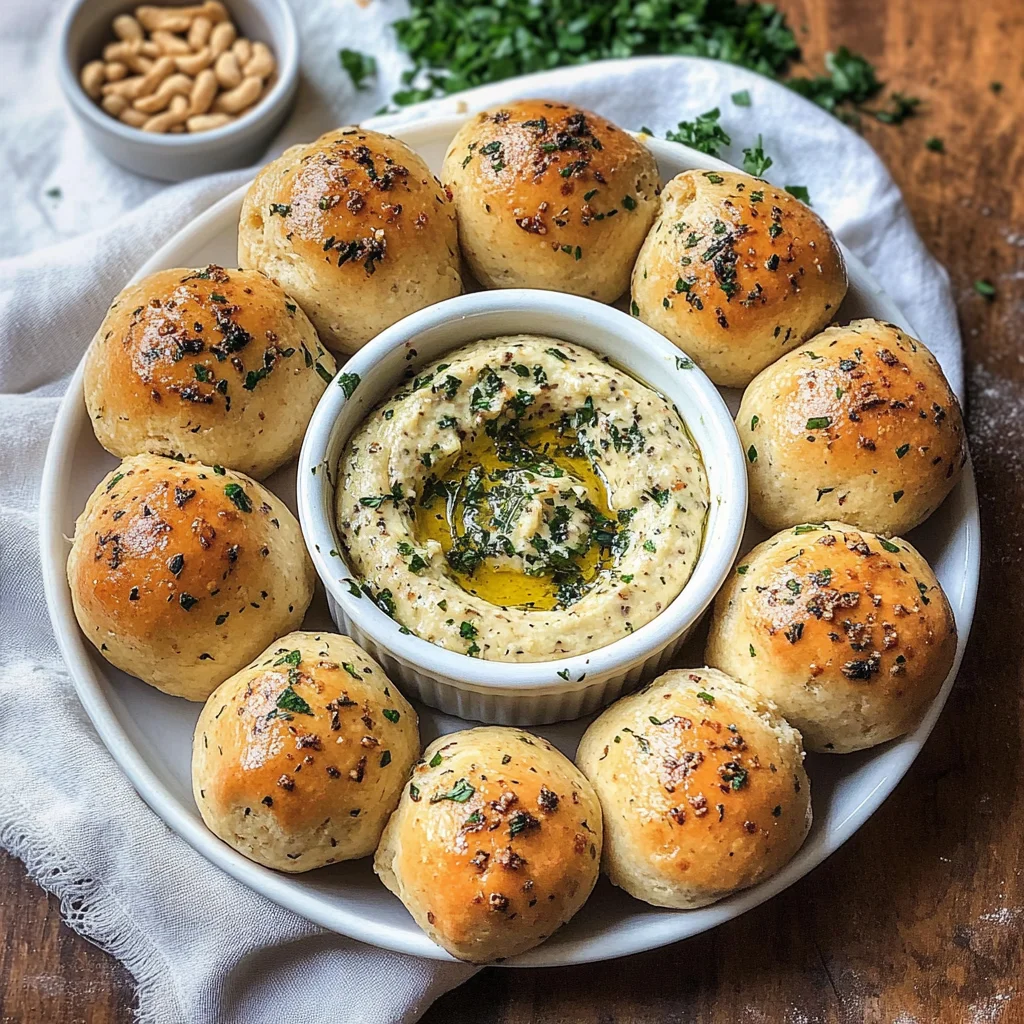
Vegan Garlic Dough Balls

Indulge in the warm, inviting flavors of Vegan Garlic Dough Balls, perfect for any gathering or cozy night in. These fluffy, golden bites are generously coated in a rich garlic-infused vegan butter and served alongside a creamy, dreamy cashew dip that will have everyone coming back for more. The delightful combination of textures and flavors transforms these simple dough balls into an irresistible treat that brings friends and family together. Whether enjoyed as an appetizer, a side dish, or a comforting snack, these Vegan Garlic Dough Balls promise to elevate your dining experience and create lasting memories.
- Prep Time: 25 minutes
- Cook Time: 20 minutes
- Total Time: 45 minutes
- Yield: Approximately 20 servings 1x
- Category: Appetizer
- Method: Baking
- Cuisine: Vegan
Ingredients
- 500 g (4 cups) white bread flour
- 10 g (3 teaspoons) fast action yeast
- 1 teaspoon salt
- 1 teaspoon sugar
- 3 tablespoons olive oil
- 160 ml (⅔ cup) unsweetened non-dairy milk (e.g., soy)
- 160 ml (⅔ cup) lukewarm water
- 75 g (½ cup) raw cashews
- 4 cloves garlic (peeled and crushed)
- 2 tablespoons nutritional yeast
Instructions
- In a large mixing bowl, combine flour, yeast (on one side), salt, and sugar (on the other). Mix well.
- Add olive oil, non-dairy milk, and lukewarm water to the dry ingredients; stir until a cohesive dough forms.
- Knead the dough for about 5 minutes until smooth and elastic.
- Place the dough in an oiled bowl, cover it with a damp cloth, and let it rise until doubled in size (1-2 hours).
- Meanwhile, soak cashews in boiling water for 15-20 minutes; then blend with garlic, nutritional yeast, salt, and water until smooth.
- Punch down the risen dough; shape into small balls (about 30g each).
- Arrange dough balls around a greased ramekin on a baking sheet; let rise again for 30-40 minutes.
- Preheat oven to 210°C (425°F). Brush dough balls with melted vegan butter infused with crushed garlic and herbs before baking for about 20 minutes until golden brown.
- Serve warm with the creamy cashew dip.
Nutrition
- Serving Size: 1 serving
- Calories: 88
- Sugar: 0.6g
- Sodium: 155mg
- Fat: 3g
- Saturated Fat: 0.5g
- Unsaturated Fat: 2g
- Trans Fat: 0g
- Carbohydrates: 12g
- Fiber: 0.5g
- Protein: 2g
- Cholesterol: 0mg