White Chocolate Trash Cookies
There’s something absolutely enchanting about cookies, isn’t there? They hold the power to transform an ordinary day into something special, filling your home with warmth and that intoxicating aroma of sweetness. When I first stumbled upon the concept of White Chocolate Trash Cookies, I knew I was onto something truly remarkable—a delightful concoction that combines the rich creaminess of white chocolate with the unexpected crunch of pretzels and the sugary goodness of toffee bits. Trust me, my friend, each bite is like a little celebration, a sweet serenade to your taste buds that dances between flavors and textures. These cookies are not just a treat; they’re an experience that invites you to pause, savor, and indulge.
What makes these White Chocolate Trash Cookies so beloved is their ability to effortlessly merge contrasting flavors—sweet meets salty in a harmonious embrace. It’s no wonder why they’ve become a cherished recipe in our home; they evoke memories of laughter-filled gatherings and cozy evenings spent with family and friends. When you take that first bite, you’ll understand why I say they are dangerously delicious! This recipe is inspired by my favorite local bakery’s creation, but I promise you, it’s simple enough for anyone to recreate at home. Get ready to embark on an adventure filled with flour dusted countertops and gooey chocolate bliss!
White Chocolate Trash Cookies: A Sweet Symphony of Flavors
Let’s dive right into this cookie magic! You’re going to love how straightforward this recipe is while still delivering an utterly extraordinary flavor profile. With every scoop of dough you form and every cookie that comes out of your oven, you’re creating not just dessert but also joy—an invitation for everyone around you to join in on the fun.
Ingredients:
As we embark on this delightful culinary journey together, let’s take a moment to appreciate each ingredient that will bring our White Chocolate Trash Cookies to life. Each element plays its own important role in crafting something truly special.
- ⅔ cup brown sugar: Brown sugar is more than just sweetness; it’s the secret behind the chewy texture we crave in cookies. The molasses content gives our cookies a deeper flavor profile, adding hints of caramel that complement the white chocolate beautifully. When choosing brown sugar, look for a soft texture rather than one that’s hard as a rock—freshness makes all the difference here.
- ⅓ cup white sugar: The addition of granulated white sugar balances out the rich flavors from brown sugar while also helping our cookies spread slightly during baking. It contributes to that delightful crispness on the edges while keeping the center wonderfully soft. Feel free to adjust this if you prefer a sweeter or less sweet outcome; it’s all about personal preference.
- ½ cup butter, softened: Butter is crucial in creating that light and airy texture we’re aiming for in our cookies. It’s essential for creaming properly with our sugars—this step introduces air into the mixture, making our cookies rise beautifully while baking. Be sure your butter is at room temperature; if it’s too cold or melted, it won’t yield those perfect results we desire.
- 1 egg: Eggs act as a binder in our cookie dough while also contributing moisture and richness. This single egg will help your cookies remain soft and tender even after they’ve cooled down. If you’re looking for an egg substitute due to dietary preferences or allergies, consider using a flaxseed meal mixed with water as an effective alternative!
- 2¾ cups Bisquick: Using Bisquick simplifies things by providing us with flour along with baking powder and salt already mixed in! This means fewer ingredients for you to measure out individually. The beauty of Bisquick lies not only in its convenience but also in how it creates wonderfully tender cookies without any fuss.
- 2 tsp vanilla: Vanilla extract is like a warm hug for your senses—it enhances all those sweet flavors swirling around in our batter. Always opt for pure vanilla extract over artificial when possible; it makes a world of difference in depth of flavor!
- ⅔ cup white chocolate chips: Ahh, the pièce de résistance! These chips melt beautifully during baking and create little pockets of creamy sweetness throughout each cookie. Look for good-quality white chocolate—this makes all the difference between mediocre and spectacular!
- ½ cup toffee bits: Toffee bits add that delightful crunch along with an extra layer of sweetness that’s hard to resist! They can be found pre-packaged at most grocery stores or made easily at home if you’re feeling ambitious—either way adds a wonderful dimension.
- ½ cup chopped pretzels: Here’s where we introduce some savory crunch! Chopped pretzels bring not just texture but also that beloved salty contrast that elevates every bite into something special. Make sure they’re broken up into chunks—not too fine—to maintain their satisfying crunch.
Equipment You’ll Need:
Having the right tools can make your baking experience smoother and more enjoyable—and trust me when I say these pieces are essential partners in creating something wonderful! While they may not be ingredients, these tools will ensure everything comes together flawlessly.
- Electric mixer: This kitchen workhorse takes care of creaming butter and sugars effortlessly, saving you from tiring whisking by hand! An electric mixer allows for consistent texture which is vital when making fluffy cookie dough.
- Mixing bowls: Opt for sturdy mixing bowls (glass or stainless steel) as they’ll withstand vigorous mixing without warping or cracking under pressure! You’ll need at least two bowls—one for dry ingredients and another for wet ingredients—to keep things organized as we combine flavors.
- Parchment paper: Line your baking sheets with parchment paper so your cookies don’t stick during baking—a non-negotiable step if you want perfectly shaped treats every time!
- Large cookie scoop: This tool ensures uniformity in size across your cookies so they bake evenly—a great trick if you’re aiming for consistency!
Now that we have gathered our ingredients and tools together like old friends reuniting after years apart, let’s move on to preparing these fabulous White Chocolate Trash Cookies!
Step 1: Prepping Our Space
First things first—let’s set ourselves up for success by preheating our oven to 375ºF (190ºC). This ensures we have consistent heat throughout baking time which is crucial when aiming for those perfectly baked edges! While waiting for it to warm up, line your baking pans with parchment paper; this step will save cleanup time later while ensuring those precious cookies don’t stick when it’s time to transfer them onto cooling racks.
Step 2: Creaming Together
In a bowl fitted with an electric mixer paddle attachment (or using good old-fashioned elbow grease), combine the brown sugar, white sugar, and softened butter until light and fluffy—a process known as creaming. This step incorporates air into the mixture which helps give structure as well as contribute richness from butter’s fat content! You should aim for about 3 minutes on medium speed until everything looks pale yellow—a visual cue indicating you’ve achieved peak fluffiness!
Step 3: Adding In Egg
Once you’ve reached this lovely fluffy stage (and trust me—it smells divine!), crack one egg into your mixture followed by those delightful drops of pure vanilla extract we’ve prepared earlier! Beat these together until fully incorporated before moving forward; this adds depth both flavor-wise AND texture-wise since eggs play such an essential role in binding all components together seamlessly throughout baking.
Step 4: Mixing Dry Ingredients
Next up comes adding Bisquick along with its secret weapon—the baking powder already mixed inside! Gently fold this dry mixture into wet ingredients using either spatula or mixer set on low speed until just combined (be careful not overmix!). At this point you should see dough forming but avoid unnecessary gluten development which could lead tough results later down road; we’re striving here instead towards tender perfection after all!
And there we go! We’ve taken some significant steps toward creating these incredible White Chocolate Trash Cookies together—you’re doing wonderfully so far! We’ll continue diving deeper into mixing those irresistible additions next; just think about how amazing they’ll taste fresh outta oven soon enough… Stay tuned for more delicious details coming up next!
Step 5: Scooping the Dough – The Art of Cookie Formation
Now that you’ve created a magnificent dough filled with sweet surprises, it’s time to scoop! I cannot stress enough how satisfying this part is. Using a large cookie scoop, which is about 2 tablespoons in size, gently portion out the dough and place it onto your lined baking sheets. Make sure to leave at least two inches between each mound because these cookies are going to spread and grow as they bake, creating that perfectly soft, chewy center surrounded by crispy edges that we all crave. Trust me on this; if you crowd the pan, you’ll end up with one giant cookie instead of individual delights!
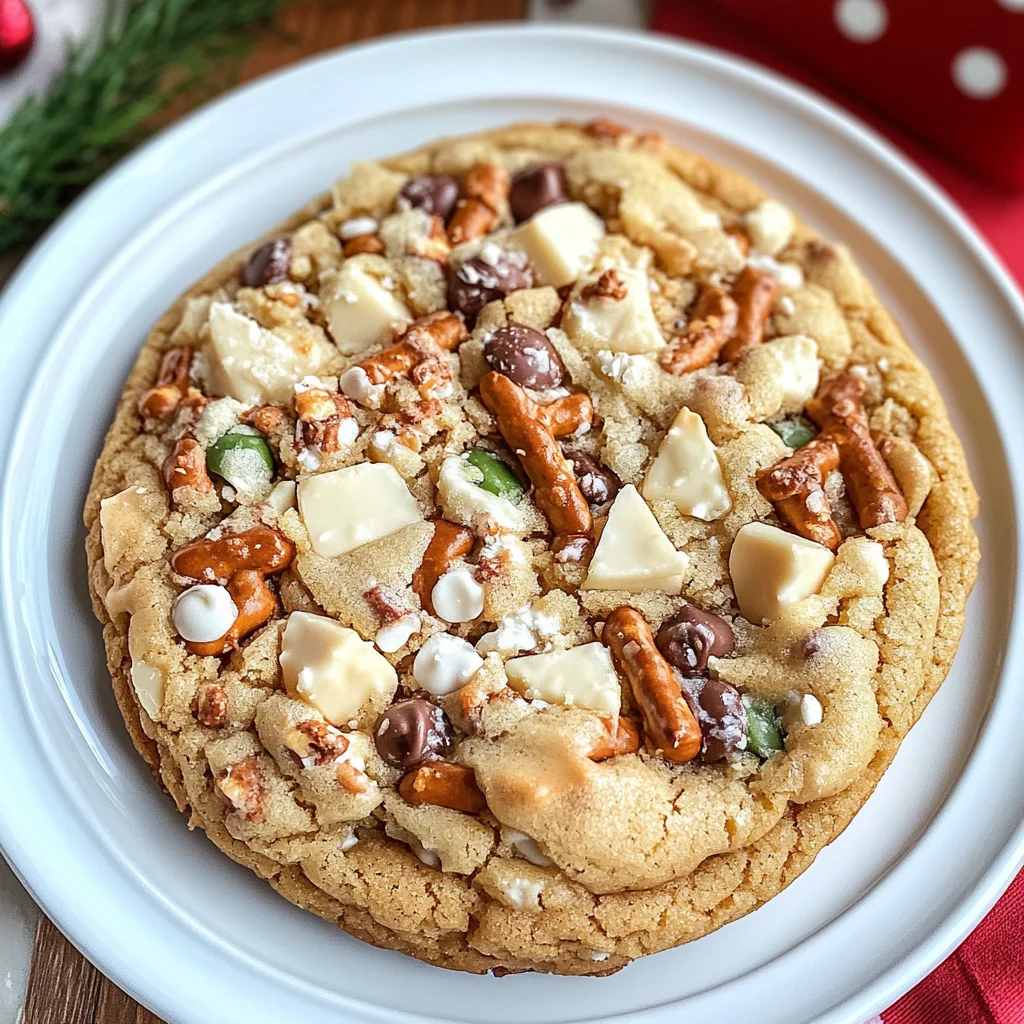
As you scoop, take a moment to admire the mixture. You should see those lovely white chocolate chips peeking through alongside the rich toffee bits and crunchy pretzel pieces—the visual alone is enough to make your mouth water! Each cookie should be a little mountain of joy waiting for its turn in the oven. If you find that your dough is too sticky to scoop easily, don’t hesitate to pop it in the fridge for about 15 minutes; this will firm it up just enough to make scooping a breeze. Patience here is key because a well-formed cookie will bake more evenly, ensuring that every bite is an experience of harmonious flavors.
Step 6: Baking Time – The Transformation Begins
With your baking sheets full of cookie dough mounds, it’s time for the magic of baking to commence! Preheat your oven to 375ºF (190ºC) if you haven’t done so already—this temperature is crucial for achieving those perfectly baked cookies that are crisp on the outside yet delightfully chewy within. I like to bake my cookies one sheet at a time on the middle rack of the oven for even heat distribution. This ensures that they brown beautifully without burning, which can happen if they’re too close to the heating element above or below.
As you slide them into the oven, take a moment to breathe in that intoxicating aroma of butter and sugar starting to meld together—it’s truly heavenly! Bake your cookies for 10 to 12 minutes; however, I urge you not to rush this step. Keep an eye on them during the final minutes; you’ll want them to turn a golden hue but not become overly browned. When they’re ready, they should have puffed up slightly and set around the edges while still looking soft in the center—that’s when you know they’re perfect! Remember, they will continue cooking slightly after being removed from the oven due to residual heat.
Step 7: Cooling – The Sweet Anticipation
Once your cookies have reached their golden perfection and filled your kitchen with an utterly intoxicating scent, it’s time for them to cool—this step is absolutely paramount! Carefully transfer them onto a wire rack using a spatula; this allows air circulation around each cookie so they won’t become soggy on the bottom. Cooling may seem like an afterthought, but I promise you it’s an essential part of achieving that ideal texture. As they cool, they’ll firm up beautifully while maintaining that decadent chewiness we all adore.
While waiting during this cooling phase might test your patience (I know how tempting those warm cookies can be!), resist the urge to dive right in immediately. Give them at least five minutes on the rack; this brief pause allows those flavors to deepen and develop further—a transformative effect that elevates your White Chocolate Trash Cookies from good to extraordinary! Plus, if you’re anything like me, you’ll find joy in sharing freshly baked goodies with others; giving them a moment longer can create delightful anticipation.
Step 8: Final Touches – Admiring Your Creation
After allowing your cookies some much-deserved cooling time, now comes one of my favorite parts—admiring and savoring these beauties! The final touch involves taking a moment just for yourself (and perhaps some taste testers) before indulging fully into each scrumptious bite. While it’s tempting just to grab one and run off into blissful enjoyment right away—trust me when I say lingering over them adds another layer of appreciation.
As you take that first bite, notice how everything comes together—the creamy sweetness of white chocolate mingling beautifully with buttery richness from both sugars and butter combined with salty crunch from pretzels and delightful caramel-like notes from those glorious toffee bits. This symphony of flavors creates an utterly satisfying experience as each bite melts effortlessly in your mouth. And let’s not forget about texture—the chewy center contrasted perfectly by crispy edges creates what I believe can only be described as pure cookie heaven!
Next Major Phase – Wrapping It Up!
Now that you’ve successfully baked these dangerously delicious White Chocolate Trash Cookies and possibly sampled more than you’d intended (no judgment here!), let’s discuss storage options so you can enjoy these beauties for days or even weeks ahead! If by chance there are any leftovers—though let’s be honest; they rarely last long—they can be stored in an airtight container at room temperature for up to five days or frozen for up to three months! Just ensure they’re completely cooled before sealing them away; otherwise moisture will sneak in and spoil their delightful texture.
When you’re ready for another round of indulgence straight from frozen bliss? Simply pop them into a preheated oven at 350ºF (175ºC) until warmed through—about 5-7 minutes—and transport yourself back into that wonderful world of warmth and comfort once again through these marvelous cookies. So gather your loved ones around because nothing brings people together quite like sharing homemade treats—and remember: every batch tells a story worth savoring!
Happy baking my friend—these White Chocolate Trash Cookies are sure to become a cherished favorite in your home just as they have become in mine!
Storage and Enjoyment Tips for Your White Chocolate Trash Cookies
Now that you’ve indulged in the delightful process of making your very own White Chocolate Trash Cookies, it’s time to relish in their warm, gooey goodness! But let’s be honest, if you manage to have any leftovers—because trust me, they’re dangerously addictive—you’ll want to know how to preserve that sweet magic for later. This is where the joy of baking meets practicality; you can savor the flavors of your baking adventure long after the last batch has come out of the oven. So let’s dive into how to store these heavenly treats!
Storing Leftover White Chocolate Trash Cookies
To keep those White Chocolate Trash Cookies fresh and scrumptious, I recommend placing them in an airtight container. Whether it’s a classic Tupperware or a lovely glass jar that makes you smile every time you open it, the key is sealing them off from the air. You can keep them at room temperature for about a week—though I must warn you, they might not last that long! If you’re looking to maintain peak freshness, try placing a slice of bread in with your cookies; this little trick helps maintain moisture and keeps them soft. Even after a few days, these cookies retain their utterly intoxicating flavor and texture; the sweet and salty bites still deliver a profound satisfaction! When you’re ready to enjoy another cookie (and I know you will be), simply pop them in the microwave for about 10 seconds. This brings back that melty white chocolate experience that feels like fresh out of the oven!
Freezing White Chocolate Trash Cookies for Later
If you’re looking to extend your cookie enjoyment even further, freezing is a fantastic option! To freeze your cookies properly, let them cool completely on a wire rack first—this ensures they won’t stick together in their chilly slumber. Then, place them in a single layer on a baking sheet and pop them into the freezer until fully frozen. Once solid, transfer them into a freezer-safe bag or container, layering parchment paper between cookies as needed to prevent sticking. These cookies can be kept frozen for up to three months without compromising their deliciousness! The convenience of having cookie dough ready at your fingertips is just so exciting; imagine pulling out a couple whenever you need an afternoon pick-me-up or surprise guests dropping by! Just remember to thaw them at room temperature or give them a quick warm-up in the microwave when you’re ready to indulge.
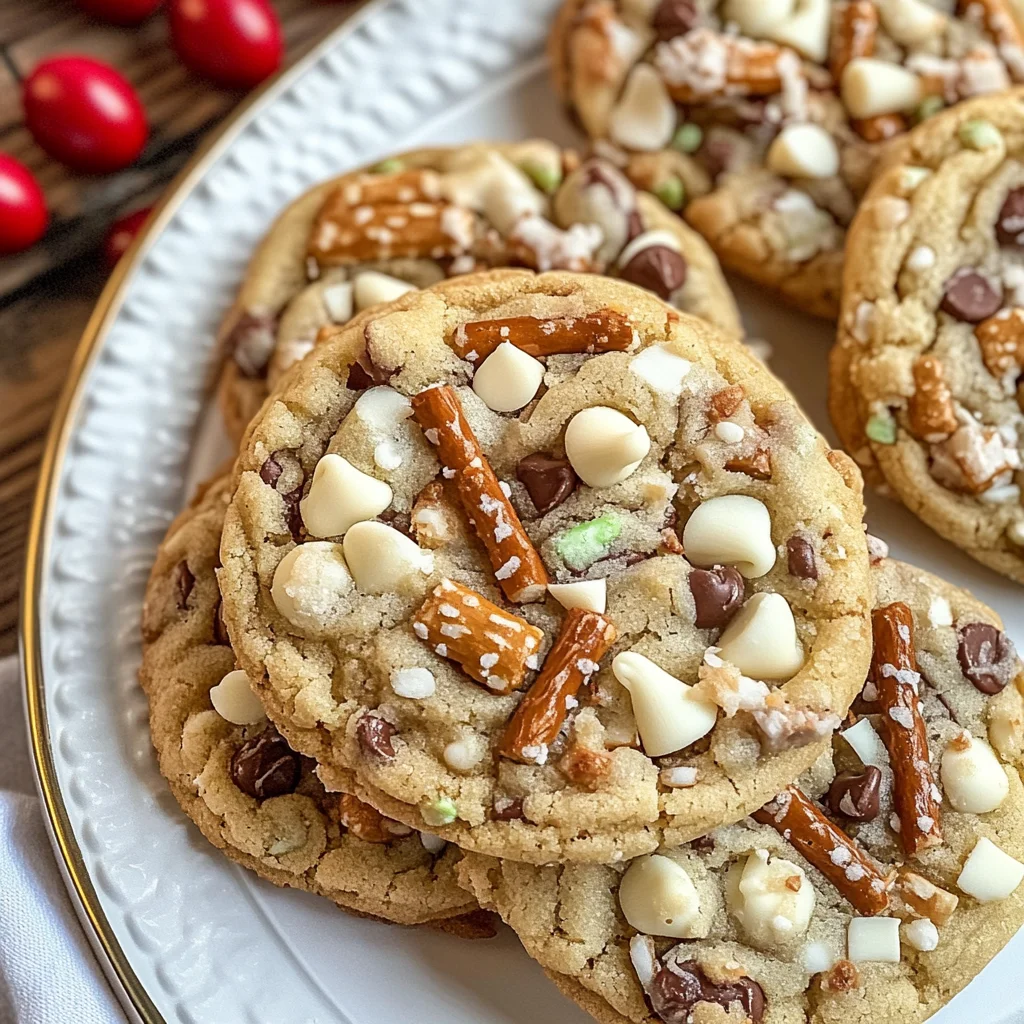
White Chocolate Trash Cookies

Indulge in the delightful experience of baking White Chocolate Trash Cookies, a perfect blend of sweet and salty flavors that will warm your heart and home. These cookies combine creamy white chocolate chips, crunchy pretzels, and rich toffee bits into a cookie that’s soft in the center with crispy edges. They are not just a treat but a memory-maker—ideal for sharing with family and friends during cozy gatherings or as a sweet surprise for loved ones. This easy recipe ensures that anyone can create these tasty delights without fuss. Get ready to enjoy the enchanting aroma wafting through your kitchen as you bake!
- Prep Time: 15 minutes
- Cook Time: 12 minutes
- Total Time: 27 minutes
- Yield: Approximately 24 cookies 1x
- Category: Dessert
- Method: Baking
- Cuisine: American
Ingredients
- ⅔ cup brown sugar
- ⅓ cup white sugar
- ½ cup softened butter
- 1 egg (or flaxseed meal with water as a substitute)
- 2¾ cups Bisquick
- 2 tsp vanilla extract
- ⅔ cup white chocolate chips
- ½ cup toffee bits
- ½ cup chopped pretzels
Instructions
- Preheat your oven to 375ºF (190ºC) and line baking sheets with parchment paper.
- In a mixing bowl, cream together brown sugar, white sugar, and softened butter until light and fluffy.
- Beat in the egg (or flaxseed mixture) and vanilla extract until well combined.
- Gradually fold in Bisquick until just incorporated.
- Gently mix in white chocolate chips, toffee bits, and chopped pretzels.
- Using a large cookie scoop, portion out dough onto prepared baking sheets, leaving space between each cookie.
- Bake for 10–12 minutes until edges are golden but centers remain soft. Let cool on wire racks.
Nutrition
- Serving Size: 1 cookie
- Calories: 150
- Sugar: 10g
- Sodium: 70mg
- Fat: 7g
- Saturated Fat: 4g
- Unsaturated Fat: 3g
- Trans Fat: 0g
- Carbohydrates: 20g
- Fiber: <1g
- Protein: 1g
- Cholesterol: 15mg