4th of July Chex Mix (Red White & Blue!)
There’s something undeniably magical about gathering with friends and family during the summer, especially as we celebrate the 4th of July. It’s not just about the fireworks lighting up the sky or the parades filled with laughter and cheer; it’s about sharing moments, creating memories, and indulging in delicious treats that bring us together. And nothing embodies that spirit quite like my 4th of July Chex Mix (Red White & Blue!). This delightful mix is more than just a snack; it’s a colorful celebration in a bowl, a crunchy blend that marries sweet and salty flavors, all while honoring our nation’s colors. The first bite will transport you to sun-soaked days, where laughter dances in the air like fireflies at dusk.
As you prepare this festive treat, you’ll find each ingredient plays a crucial role in crafting this delectable experience. The combination of textures from the cereals and pretzels creates an irresistible crunch that’s perfectly balanced by the creamy sweetness of vanilla almond bark. Imagine that satisfying crunch, followed by bursts of chocolatey joy from the M&Ms—it’s truly a symphony of flavors that will have everyone reaching for seconds! I promise you, this recipe is not only easy to whip up but also visually stunning and absolutely delicious. Your friends won’t be able to resist!
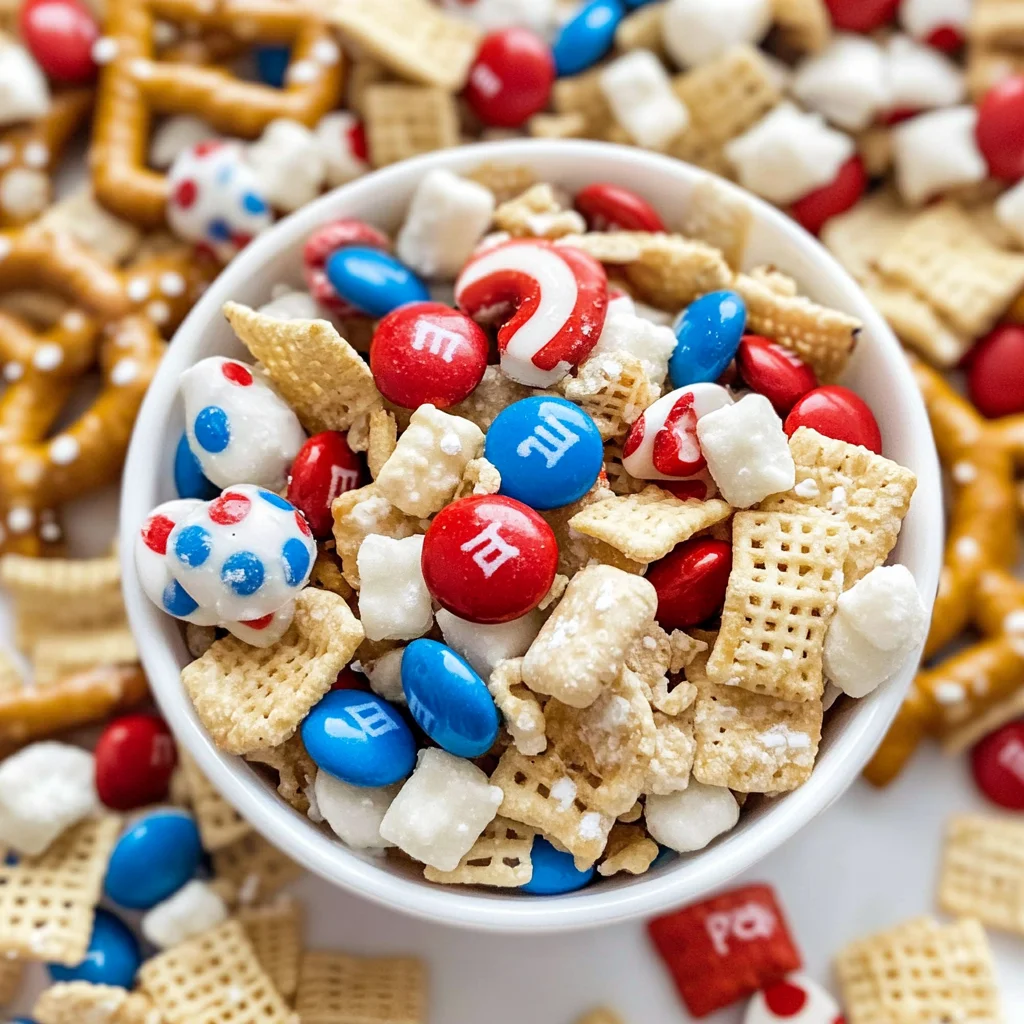
4th of July Chex Mix (Red White & Blue!): A Festive Crunch You Can’t Resist
This 4th of July Chex Mix (Red White & Blue!) is the perfect no-bake treat for your summer gatherings. The vibrant colors evoke a sense of patriotism while bringing joy to any party table. Plus, it’s so simple to make that you can easily involve your little ones in the kitchen—imagine their faces as they mix and sprinkle! With its delightful crunch and sweet notes, this Chex mix is bound to become a cherished tradition at your holiday celebrations.
Ingredients:
Embarking on this culinary journey means gathering some wonderful ingredients that will transform your kitchen into a place of joy and creativity. Each element here adds its own magic to our cheerful mix.
- 2 cups Rice Chex Cereal: This crunchy cereal serves as a fantastic base for our Chex mix, providing a light yet substantial texture that holds up beautifully against the other ingredients. Its mild flavor allows it to absorb some sweetness from the white chocolate without overpowering the overall taste. When selecting Rice Chex, look for varieties labeled gluten-free if that’s important to you—this ensures everyone can enjoy this treat without worry!
- 2 cups Corn Chex Cereal: Just like its rice counterpart, Corn Chex offers a crispness that’s simply delightful. It introduces a subtle sweetness that complements the saltiness of our peanuts and pretzels wonderfully. The interplay between corn and rice creates an inviting crunch that makes each handful feel like a little party in your mouth! Again, check that it’s gluten-free so everyone can partake in this celebratory mix.
- 1 1/2 cups Cheerios Cereal: Cheerios add an iconic familiarity to our mix while contributing extra crunchiness. Their oaty flavor brings warmth to every bite, harmonizing beautifully with both sweet and savory notes present in this recipe. If you’re feeling adventurous, consider using honey nut Cheerios for an additional layer of flavor—trust me; it’s worth trying!
- 2 1/2 cups Gluten-Free Pretzels: I personally prefer twists over sticks because they seem to hold onto all that delicious coating better! These pretzels offer just the right amount of saltiness to balance against our sweet elements, playing on those beloved sweet-and-salty contrasts we all adore. Be sure they’re gluten-free if needed; Snyder’s Gluten-Free twists are always my go-to choice!
- 1 cup Salted Peanuts: Adding salted peanuts into our mix introduces some hearty protein along with their irresistibly crunchy texture. They provide a lovely contrast against the sweetness of chocolate and candy without overwhelming it with flavor—just enough saltiness to keep things interesting! Personally, I recommend sticking with plain salted peanuts instead of seasoned varieties since we want them to complement rather than dominate.
- 1 cup red, white & blue M&Ms candies: These colorful gems are what truly make this snack festive! Whether you go for classic milk chocolate or opt for peanut butter M&Ms (my personal favorite), these candies add pops of color and bursts of sweetness throughout our mixture. Don’t forget—they’re also great for decorating at the end!
- 16 ounces Vanilla Almond Bark or White Candy Melts: The creamy coating is what binds everything together into one glorious sweet treat! Almond bark melts beautifully and hardens perfectly once cooled; it’s essential for achieving those lovely clusters we all love so much. If you’re using white chocolate chips instead, ensure they are well-tempered so they don’t seize when melting.
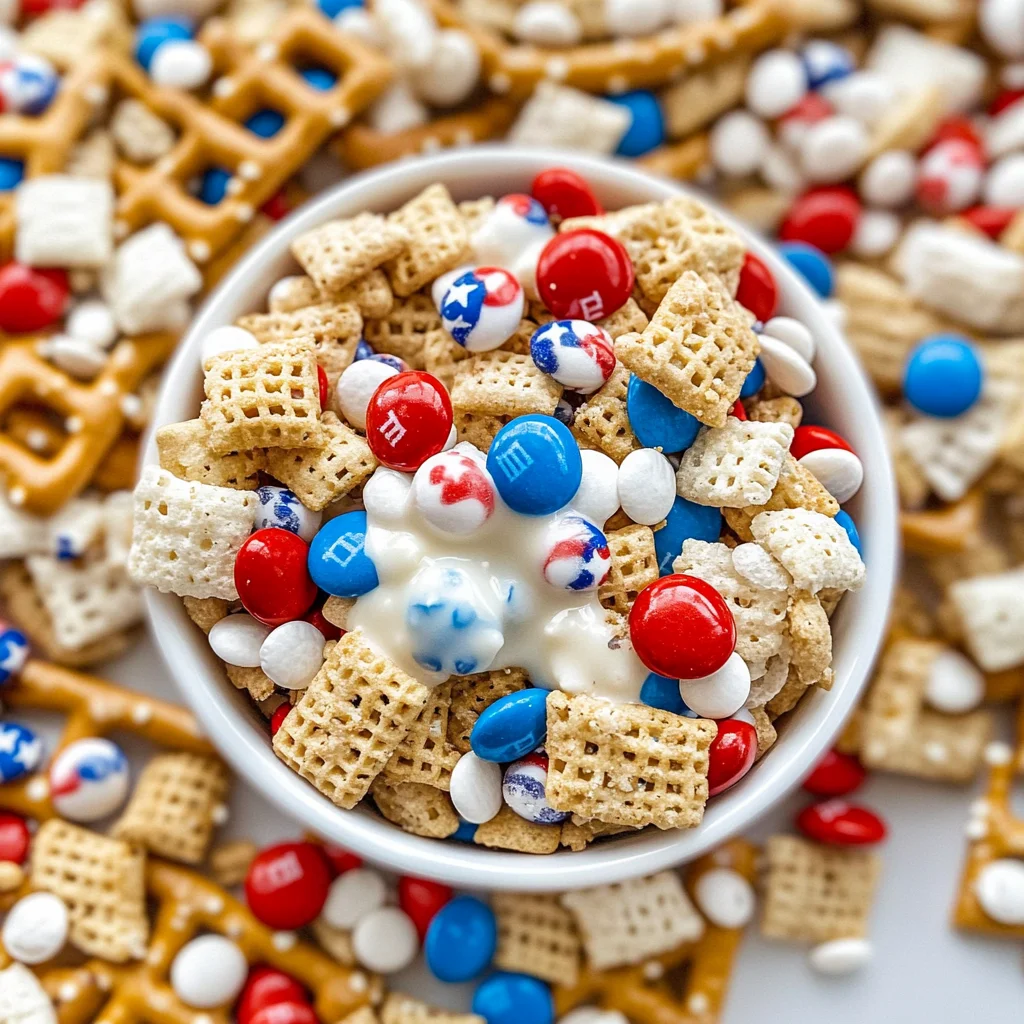
Equipment You’ll Need:
Having the right tools on hand makes crafting your 4th of July Chex Mix (Red White & Blue!) not only smoother but also incredibly enjoyable! Think of these tools as your trusty companions on this culinary adventure.
- Large Mixing Bowl: A spacious mixing bowl is essential when combining all those crunchy cereals and pretzels together—it allows room for tossing without scattering goodies everywhere! Opt for glass or stainless steel so you can see all that beautiful color coming together.
- Baking Sheets: You’ll need these lined with parchment paper for cooling your coated mix later on—this step prevents sticking while allowing airflow around each piece so they can set properly. If you’re short on baking sheets, don’t worry; use whatever flat surface you have available!
- Microwave-Safe Bowl: Since we’ll be melting our vanilla almond bark or candy melts here, having a microwave-safe bowl makes life easier! Ensure it’s large enough to hold all your chocolate while giving room for stirring as it melts—you want everything silky smooth without any lumps.
- Spatula or Large Spoon: A sturdy spatula or spoon will help combine your ingredients effectively when tossing them together after adding melted chocolate. Choose one with enough heft to handle thick mixtures easily without bending or breaking!
Now that we have everything ready let’s jump into preparing this festive delight together!
Step 1: Prep Your Work Surface
To start off on the right foot, lay down several sheets of parchment paper on your counter or baking sheet—this step is critical because it provides an easy cleanup surface once we pour out our mixture later on. Trust me on this one; there’s nothing worse than dealing with sticky messes afterwards! Ensure they’re flat with no wrinkles so everything cools evenly when we add our coated goodies later.
Step 2: Combine Your Dry Ingredients
In your largest mixing bowl (we’re aiming for one big enough because we’ll be stirring vigorously!), gently combine Rice Chex cereal, Corn Chex cereal, Cheerios cereal, gluten-free pretzels—and half of those vibrant red, white & blue M&Ms alongside salted peanuts if you’re using them too! Take care during mixing—try not to crush anything too much as we want those beautiful textures intact throughout our final product! This step sets up unique layers within each handful you’ll experience later.
Step 3: Melt That Chocolate Bliss
Next comes one of my favorite parts—melting down that luscious vanilla almond bark (or candy melts). In a microwave-safe bowl (remember?), microwave it in intervals of 20–30 seconds while stirring well after each session until it’s silky smooth without lumps lingering around—that’s usually around two minutes total depending on wattage levels at play here! This process ensures even heating throughout without scorching any pieces—so remain patient; good things come to those who wait!
Step 4: Coat Your Mixture
Once melted bliss awaits us—it’s time to pour over our previously combined dry ingredients steadily while quickly stirring until every morsel gets completely coated in heavenly goodness! You want total coverage here since every piece deserves their fair share—not too thickly though as it’ll clump together unnecessarily if rushed through…so take your time enjoying this moment where chaos meets artfulness before moving forward!
I can’t wait for you all to try making this delightful snack mix yourself—I promise it’ll be worth every second spent preparing each colorful bite! Stay tuned as we dive deeper into assembling everything beautifully right after letting those flavors meld together nicely…
Step 5: Pouring the Love – Coating Your Crunchy Mixture
Now that you have your delightful cereal mixture ready and waiting, it’s time to envelop it with a luscious layer of melted vanilla almond bark or white chocolate. This is where the magic happens! In a microwave-safe bowl, add your chosen chocolate and set your microwave to medium power. Heat it in 20-30 second intervals, stirring vigorously after each round. You’ll notice that as it heats up, the chocolate begins to melt and transform into this glorious liquid gold. The key is to be patient; stirring well at each interval helps prevent any scorching and ensures a silky-smooth finish. If you prefer using a double boiler on the stovetop, that’s absolutely fantastic too! Just remember, the goal here is to achieve a smooth, lump-free consistency because this coating is what ties all those crunchy bits together, creating an unforgettable experience for your taste buds.
Once your chocolate reaches that perfect velvety texture, it’s time for the grand pour! Gently drizzle this heavenly mixture over the cereal blend in your large bowl. Here’s where you really want to engage with your ingredients: use a spatula or a large spoon to carefully fold and stir everything together. This step is crucial because you want every piece of cereal and pretzel to get an even coating of that sweet goodness. Don’t rush this step! Take your time to ensure everything is coated well; these small moments of care will result in a profoundly satisfying snack mix later on. You’ll know you’ve done it right when you see every piece glistening with that beautiful white chocolate layer.
Step 6: Spreading Joy – Transferring Your Mix
With your cereal generously coated, it’s time to transfer this delightful concoction onto prepared sheets of parchment paper. I like to use a baking sheet for stability; it keeps everything nicely contained and makes cleanup a breeze. As you scoop the mixture out of the bowl, allow some clusters to form naturally instead of breaking everything apart completely. This can be hard because we’re often tempted to break things down into uniform sizes, but trust me—those clusters are what make this 4th of July Chex Mix (Red White & Blue!) truly extraordinary! They create little pockets of crunchy joy that are bursting with flavor.
As you spread the mixture out on the parchment paper, take care to distribute it evenly but without pressing down too hard. We want some air around those pieces so they can cool down properly without becoming mushy. Sprinkle on those remaining M&M candies and any sprinkles if you’re feeling festive; they’ll add pops of color and extra sweetness which will elevate this mix from delicious to downright spectacular! Now let this gorgeous creation sit at room temperature until it cools completely—this part requires patience, but I promise you that letting it set will give you those satisfying clusters we’re aiming for!
Step 7: The Waiting Game – Cooling and Setting
Now comes one of the most important parts—letting your Chex mix cool and set! I know waiting can sometimes feel torturous when there’s such deliciousness just sitting there, but trust me on this—it’s absolutely paramount for achieving the perfect texture and flavor balance. As your mix sits at room temperature for about 15-30 minutes, the melted chocolate will solidify into a delectable shell around each piece of cereal and pretzel. This not only enhances crunchiness but also provides a delightful contrast between the creamy sweetness of the coating and the salty crunch beneath.
Keep in mind that cooling allows those sugary coatings to harden properly; if they don’t cool long enough before being disturbed, you’ll end up with a sticky mess instead of those beautiful clusters we’ve been dreaming about! So resist that urge to dive in immediately; think about how much richer each bite will be once everything has had its chance to transform into pure bliss through patience. When you finally do get around to enjoying your masterpiece, you’ll appreciate every single bite much more knowing you waited just a little longer.
Step 8: The Final Touch – Storage or Immediate Indulgence
Once your Chex mix has cooled completely and feels firm enough to hold its shape when touched gently, it’s time for either immediate enjoyment or proper storage! If you’re planning on digging in right away (and who could blame you?), gather some friends around—this scrumptious snack mix is made for sharing! But if you’re saving it for the big day or just want some leftovers for later (which I highly recommend), transferring it into an airtight container is essential for preserving freshness. You can keep it at room temperature for up to one week without worrying about losing any flavor or crunch.
When storing, make sure not to crush those precious clusters you’ve formed; they should remain intact so each mouthful continues delivering that delightful symphony of flavors we’ve worked so hard to create together. And if by some miracle there are leftovers after your gathering? You might find yourself reaching into that container as often as possible—not just because it’s tasty but also because it brings back wonderful memories every time! Each handful embodies warmth and joy shared among loved ones during summer celebrations.
Conclusion:
As we come to the end of our delightful journey through creating this 4th of July Chex Mix (Red White & Blue!), I hope you feel as excited as I do about sharing this recipe with loved ones. The vibrant colors dance joyfully together while each crunchy bite offers an utterly intoxicating blend of textures—from the crisp cereal and pretzels to the sweet pops of M&Ms. It’s truly extraordinary how such simple ingredients can come together to create something so festive and fun! This mix captures the essence of summertime gatherings—laughter, sunshine, and cherished memories just waiting to be made.
This recipe is an absolute must-try not only for its wonderful taste but also for the joy that comes from creating something special together. Picture yourself preparing this colorful mix with family or friends, each step filled with laughter and shared stories. It’s versatile enough for any occasion—whether you’re celebrating Independence Day, hosting a backyard barbecue, or simply enjoying a cozy movie night at home. The moment you pull out your glorious creation from its storage spot is like unwrapping a present; the aroma wafting through the air beckons everyone over with anticipation.
Now let’s talk about serving suggestions! Imagine savoring one of these crunchy morsels alongside an ice-cold lemonade on a warm afternoon—it’s pure bliss! For an afternoon pick-me-up during those lazy summer days, pair it with refreshing fruit skewers bursting with juicy berries or even some creamy yogurt for dipping! And if you’re feeling indulgent after dinner? Enjoy some while curled up on the couch with your favorite book or movie—it’s a comforting treat that somehow elevates every experience.
Feeling adventurous? This recipe is wonderfully adaptable! You could swap in different cereals like Honey Nut Cheerios for added sweetness or toss in some dried cranberries for an extra pop of color and tartness that beautifully complements those rich chocolatey M&Ms. Or perhaps throw in some coconut flakes for a tropical twist! The possibilities are endless—and I invite you wholeheartedly to explore them. So gather your ingredients, share your creations with those around you, and don’t forget to come back and tell me how your adventures turned out—I can’t wait to hear all about them!
4th of July Chex Mix (Red White & Blue!)

Celebrate the spirit of summer and the 4th of July with our vibrant 4th of July Chex Mix (Red White & Blue!). This festive snack mix is the perfect blend of crunchy cereals, salty pretzels, and sweet M&Ms, creating a delightful balance that will have everyone reaching for seconds. Not only is this treat visually stunning with its patriotic colors, but it’s also a no-bake recipe that’s incredibly easy to whip up, making it a fantastic choice for family gatherings or backyard barbecues. Involve your kids in the kitchen as they mix and sprinkle this colorful delight, creating memories that will last a lifetime. Each handful is a taste of joy and laughter, ideal for celebrating Independence Day or any summer occasion.
- Prep Time: 15 minutes
- Cook Time: 0 minutes
- Total Time: 15 minutes
- Yield: Approximately 8 servings 1x
- Category: Dessert
- Method: No-bake
- Cuisine: American
Ingredients
- 2 cups Rice Chex Cereal
- 2 cups Corn Chex Cereal
- 1 1/2 cups Cheerios Cereal
- 2 1/2 cups Gluten-Free Pretzels
- 1 cup Salted Peanuts
- 1 cup red, white & blue M&Ms candies
- 16 ounces Vanilla Almond Bark or White Candy Melts
Instructions
- Prep your work surface with parchment paper.
- In a large mixing bowl, combine Rice Chex, Corn Chex, Cheerios, pretzels, salted peanuts, and half of the M&Ms.
- Melt the vanilla almond bark in a microwave-safe bowl in 20-30 second intervals until smooth.
- Pour the melted chocolate over the dry mixture and gently stir until evenly coated.
- Spread the mixture onto lined baking sheets and sprinkle with remaining M&Ms.
- Allow to cool completely at room temperature before breaking into clusters.
Nutrition
- Serving Size: 1/2 cup (60g)
- Calories: 290
- Sugar: 18g
- Sodium: 150mg
- Fat: 12g
- Saturated Fat: 5g
- Unsaturated Fat: 6g
- Trans Fat: 0g
- Carbohydrates: 43g
- Fiber: 2g
- Protein: 4g
- Cholesterol: 0mg