Chocolate Chip Cookie Dough Brownie Bites – The Best 3-Layer Treat Ever
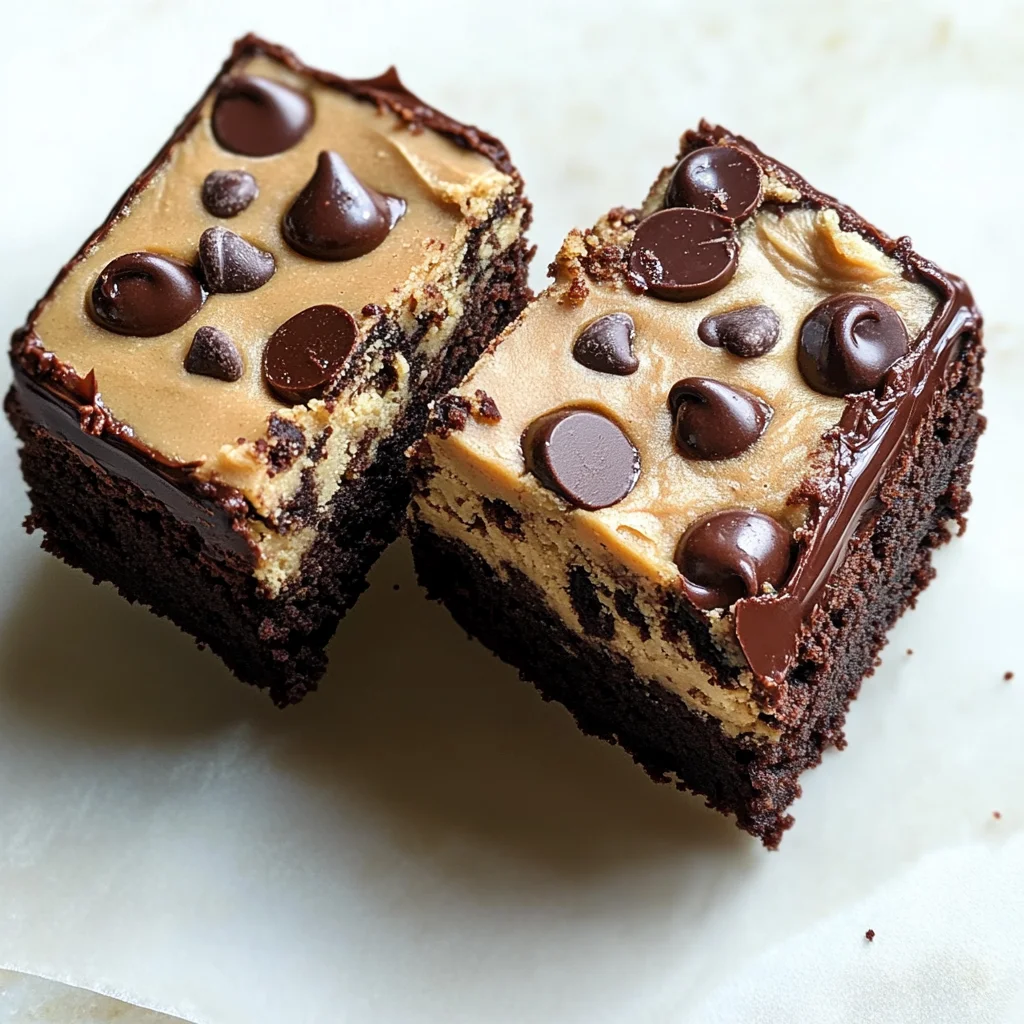
There’s something truly magical about the convergence of flavors and textures in a dessert, and that’s exactly what you’ll find in these Chocolate Chip Cookie Dough Brownie Bites – The Best 3-Layer Treat Ever. Imagine biting into a fudgy brownie, only to discover a luscious, creamy edible cookie dough center that’s studded with tiny chocolate chips, all enveloped in a glossy chocolate shell. It’s not just a treat; it’s an experience that dances on your taste buds and leaves you with a deeply satisfying smile. Each layer plays its part like musicians in an orchestra, harmonizing beautifully to create a symphony of flavors that is both nostalgic and innovative. Whether you’re indulging on a cozy evening or sharing them at a gathering, these bites are sure to elicit oohs and ahhs from everyone lucky enough to take a bite.
What makes this recipe particularly special is its versatility; it can be baked or prepared as no-bake, making it perfect for any occasion or mood! I remember the first time I made these delightful treats—it was during a family gathering, and they disappeared faster than I could keep up with the demand! My friends were enchanted by how something so indulgent could also feel comforting and familiar. Trust me when I say this: once you start preparing these brownies, the aroma wafting through your kitchen will have everyone peeking around the corner, eager for their turn to taste this three-layer marvel.
Chocolate Chip Cookie Dough Brownie Bites – The Best 3-Layer Treat Ever: A Decadent Delight
Let’s embark on this delightful culinary journey together! These Chocolate Chip Cookie Dough Brownie Bites are not just desserts; they’re little treasures that bring comfort and joy. You’ll be amazed at how simple ingredients can come together to create such extraordinary results—so grab your apron and let’s get started!
Ingredients:
As we gather our ingredients for these sumptuous bites, each component plays a vital role in crafting our masterpiece. Let’s dive into what you’ll need!
- ½ cup (1 stick or 113g) unsalted butter, melted. This melted butter is essential for achieving that rich flavor base in our fudgy brownie layer. It helps to create a moist crumb and contributes to the overall texture of the brownies. When choosing butter, look for high-quality brands that offer pure creamery butter without additives—this will enhance the taste immensely.
- 1 cup granulated sugar. This sugar isn’t just sweetening our treats; it also contributes to the texture by helping to create that perfect balance between chewy and fudgy. Granulated sugar dissolves easily when mixed with melted butter, ensuring an even sweetness throughout.
- 2 large eggs. Eggs serve as binders in our batter, providing structure while keeping everything moist and tender. I always recommend using eggs at room temperature because they incorporate better into the mixture, giving us that lovely consistency we crave.
- 1 tsp vanilla extract. Vanilla is like the secret ingredient that lifts all other flavors—it adds warmth and depth to our brownies and cookie dough filling alike. Opt for pure vanilla extract rather than imitation for an authentic flavor boost.
- ½ cup unsweetened cocoa powder. This ingredient brings the chocolatey goodness we all know and love! Unsweetened cocoa powder contributes intense chocolate flavor without unnecessary sweetness—be sure to choose high-quality cocoa powder for rich results.
- ½ cup all-purpose flour. Flour is what gives structure to our brownies while keeping them tender rather than dry—a crucial balance! When measuring flour, it’s best to spoon it into your measuring cup rather than scooping directly from the bag; this prevents packing too much flour into your cup.
- ¼ tsp baking powder. This leavening agent helps our brownies rise just slightly during baking while maintaining their dense texture—it’s all about achieving that perfect fudginess!
- ¼ tsp salt. Salt enhances flavors across the board; it brings out the sweetness of chocolate while balancing everything else perfectly. Never skip this step!
- ½ cup unsalted butter, softened (for cookie dough). Having softened butter ensures we can cream it effectively with sugars later on; this process is crucial for creating lightness in our edible cookie dough.
- ½ cup packed brown sugar. Brown sugar adds moisture along with deeper caramel notes compared to granulated sugar—this will make your cookie dough filling extra delicious!
- ¼ cup granulated sugar (for cookie dough). As with the brownie layer, some granulated sugar will help balance sweetness without overpowering those lovely caramel tones from brown sugar.
- 2 tbsp milk or cream. Adding milk or cream gives our cookie dough its creamy consistency—this makes it easier to roll into balls later! Full-fat options work beautifully here as they add richness.
- 1 tsp vanilla extract (for cookie dough). Just like before, don’t underestimate vanilla’s ability to elevate flavors in our edible cookie dough; it’s simply non-negotiable!
- 1 ¼ cups heat-treated all-purpose flour. It’s essential for safety since we won’t be baking this portion—we want it fully cooked before consuming! Heat-treating flour involves baking it briefly at 350°F (175°C) which eliminates potential pathogens while enhancing its flavor profile.
- 1 cup mini chocolate chips. Mini chips distribute evenly throughout the cookie dough layer, offering little bursts of chocolatey goodness in every bite! They’re also fun-sized—who doesn’t love mini treats?
- 2 cups semi-sweet chocolate chips OR candy melts (for coating). This coating is where things get really exciting! Semi-sweet chips lend themselves beautifully for melting over our bites but feel free to use candy melts if you want vibrant colors—it’s all about personal preference here!
- 1 tbsp coconut oil (optional). Using coconut oil when melting your chocolate creates a smoother coating while adding subtle tropical notes—if you want that glossy finish on your brownie bites, don’t skip this step!Equipment You’ll Need:
Having the right tools makes all the difference when bringing your culinary vision to life! While these aren’t technically ingredients, they are essential partners in creating something truly wonderful together.
- **Mixing bowls – A set of various sizes will be invaluable as you combine ingredients for both layers of your brownie bites; ensure they’re sturdy enough for thorough mixing without spilling everywhere! Glass bowls are particularly nice because they’re easy to clean and allow you to see when everything’s well-combined.
- **Whisk – This tool is key for incorporating air into your batter during mixing; whether you’re whisking together dry ingredients or creaming butter with sugars, having a good whisk makes every step effortless.
- **Rubber spatula – Perfect for scraping down sides of bowls as well as folding ingredients gently together without deflating them—trust me on this one!
- **Baking pan – An 8×8-inch baking pan works best here; if you don’t have one handy, feel free to use similar sized alternatives but keep an eye on bake time adjustments accordingly.
- **Parchment paper – Line your baking pan with parchment paper before pouring in batter; this makes removing those fudgy brownies afterward so much easier—no more sticky messes!
With everything gathered and ready at hand—the stage is set! Let’s dive headfirst into crafting these delightful Chocolate Chip Cookie Dough Brownie Bites – The Best 3-Layer Treat Ever together!
Step 1: Preparing the Brownie Layer
First things first—let’s get those brownies underway! Begin by preheating your oven to 350°F (175°C) while greasing an 8×8-inch baking pan generously with cooking spray or butter—it’s crucial we ensure nothing sticks! In a medium bowl, whisk together the melted unsalted butter and granulated sugar until thoroughly combined; you’re looking for a smooth mixture here without any clumps lingering around—that silky consistency means you’ve done it right! Next comes adding in two large eggs alongside one teaspoon of vanilla extract—these additions will not only enrich flavor but also contribute moisture which leads us closer toward fudginess perfection.
Once mixed smoothly again—which should take just another minute—we’re ready for dry ingredients: sift in half-a-cup of unsweetened cocoa powder followed by half-a-cup of all-purpose flour along with a quarter teaspoon each of baking powder & salt—all integral players in achieving balance within each bite! With gentle strokes using either spatula or wooden spoon mix until just combined (don’t overdo it!). It’s important not rushing through this step because over-mixing develops gluten leading us away from desirable tenderness—we want melt-in-your-mouth magic instead!
Alright now spread that luscious batter into prepared pan evenly using spatula ensuring corners fill adequately too—bake tracking time closely for approximately twenty-five minutes until toothpick inserted reveals moist crumbs upon removal; nothing worse than dry brownies ruining our dreams right? Once done remove from oven allowing cooling completely before proceeding onto next steps—but do resist temptation just yet…
Step 2: Make The Edible Cookie Dough
Now onto what many consider “the best part” —the edible cookie dough filling! Grab yourself another medium bowl where we’ll begin beating softened unsalted butter paired up delightfully alongside both packed brown sugar & granulated sugar until fluffy perfection emerges after few minutes whisking vigorously—a process known as creaming which incorporates air giving us lightness combined later on when rolling balls out nicely too! Add two tablespoons milk followed by one teaspoon vanilla extract mixing thoroughly once more till everything melds seamlessly together creating delectable base flavor here too…
Next step involves gradually introducing heat-treated flour into buttery mixture stirring gently until combined fully—you’ll notice how fluffiness transforms upon contact forming soft pliable texture ideal rolling later on… Now fold-in those irresistible mini chocolate chips creating pockets filled delightfully throughout layers ahead—using spatula again helps avoid deflation whilst still ensuring even distribution within filling itself… Once complete scoop out tablespoon-sized portions rolling quickly into one-inch balls then refrigerate momentarily till firm enough hold shape comfortably during assembly later…
Step 3: Assemble The Brownie Bites
The time has come—the assembly phase where magic truly happens lies ahead so gear up folks! Start by cutting cooled-down brownie slab into squares slightly larger than previously rolled cookie dough balls using sharp knife ensuring clean edges throughout each piece –remember precision matters here especially if aiming uniformity across final product appearances too… Next take square flatten gently between palms forming disc-like shapes allowing ample space contained within center place one ball inside thoughtfully wrapping edges around enclosing securely sealing completely shut wouldn’t want any surprises leaking out now would we?
Repeat same technique until all pieces formed enjoying every moment savoring anticipation building excitement amongst yourselves knowing scrumptious delights await everyone soon after finishing up—all should fit snugly atop parchment-lined trays waiting patiently till dip-coating occurs next…
Step 4: Dip In Chocolate Coating
Finally reaching grand finale folks here comes dipping stage that adds heavenly allure transforming simple brownie bites into show-stoppers worthy occasions beyond imagination—we’re melting semi-sweet chocolate chips alongside optional coconut oil placed microwavable bowl heating gently thirty seconds burst intervals stirring between intervals watching carefully prevent scorching while seeking silky-smooth consistency achieved throughout… Once melted blissfully dip each assembled brownie bite letting excess drip down enjoying sight watching transformation occur before placing back onto trays awaiting cool setting moments ahead…
And there you have it—the beginnings of something truly extraordinary unfolding beautifully right before eyes effortlessly combining joy food brings forth experiencing pleasure sharing treats loved ones cherish forevermore passing down recipes generations onward cementing bonds created through shared experiences surrounding kitchens everywhere around world…
Stay tuned as we continue exploring final touches leading towards chilling serving moments ahead ensuring delightful surprises await guests arriving soon thereafter too…
Step 5: Chill & Set – The Magic of Patience
Now that we’ve lovingly assembled our brownie bites, it’s time to let them chill and set. This step is absolutely paramount because it allows the chocolate coating to firm up beautifully, ensuring each bite is a perfect explosion of flavors and textures. After you’ve dipped your brownie bites into the melted chocolate, gently place them on a parchment-lined tray, making sure they aren’t touching. This gives them room to breathe and prevents any sticky situations later on. I usually pop these little treasures into the refrigerator for about 15 minutes, which might seem like an eternity when you’re staring at those delectable bites, but trust me—this brief chill session is where the magic happens.
During this time, the chocolate hardens into a glossy shell that not only looks stunning but also adds that satisfying snap when you take a bite. You’ll know they’re ready when the chocolate feels firm to the touch and has lost its shine—this transformation is nothing short of exhilarating! If you can resist the temptation to dig in right away, letting them chill for an additional 10 minutes can enhance their texture even further. This patience pays off big time; the contrast between the fudgy brownie base, rich cookie dough center, and silky chocolate coating creates a textural symphony that will leave everyone swooning.
Step 6: Presenting Your Masterpiece – The Art of Garnishing
Once your Chocolate Chip Cookie Dough Brownie Bites have chilled and set to perfection, it’s time for one of my favorite parts: garnishing! Presentation can elevate your treats from ordinary to extraordinary with just a little creativity. While you could certainly leave them as-is, adding a drizzle of white chocolate or a sprinkle of sea salt takes these delights to another level. To do this, simply melt some additional white chocolate in a microwave-safe bowl until it becomes smooth and pourable—30-second bursts work wonders here too. Use a fork or a piping bag if you have one handy to create elegant swirls over your brownie bites.
Why garnish? Well, not only does it make your treats visually appealing—it introduces another layer of flavor that complements the rich chocolate. A sprinkle of flaky sea salt adds an unexpected burst of savory goodness that enhances the sweetness beautifully. You’ll be amazed how this small touch transforms each bite into something truly unforgettable. Remember, garnishing is all about showcasing your personality; feel free to experiment with colorful sprinkles or even crushed nuts for added crunch! So go ahead and let your creative juices flow—your friends (and taste buds) will thank you!
Step 7: The Grand Reveal – Serving Your Chocolate Chip Cookie Dough Brownie Bites
Now comes one of the most exciting moments in our culinary journey—the grand reveal! Carefully transfer your beautifully decorated Chocolate Chip Cookie Dough Brownie Bites onto a serving platter or simply keep them on the parchment-lined tray if you prefer an informal gathering vibe. They are perfect for parties or cozy family gatherings; believe me when I say they will steal the show! As you present these delightful treats, take a moment to appreciate all the love and effort you’ve poured into crafting them; it’s an experience worth celebrating.
Before diving in, consider letting your brownie bites sit at room temperature for about five minutes—this little detail enhances their flavor profile remarkably. The fudge-like brownie becomes even more tender while allowing the cookie dough filling to soften just enough for that heavenly melty experience we crave. When you finally take that first bite—and I promise you will want to share this moment with someone special—you’ll experience contrasting flavors dancing on your palate: rich chocolate mingling with sweet cookie dough in an utterly intoxicating embrace.
Step 8: Storing Leftovers – Keeping Your Treats Fresh
If by some miracle you have any leftovers (which I highly doubt!), storing these heavenly Chocolate Chip Cookie Dough Brownie Bites correctly is crucial to maintaining their delectable taste and texture. Place any uneaten bites in an airtight container lined with parchment paper; this prevents them from sticking together while locking in freshness. They can be stored at room temperature for up to three days or in the refrigerator for about a week if you’re looking for longevity while still enjoying that fresh flavor.
However, if you’re like me and love indulging in these as often as possible without guilt, freezing is another excellent option! Just make sure they are fully set before placing them in a freezer-safe container separated by layers of parchment paper to avoid freezer burn or unintentional sticking together—nobody wants that! When you’re ready to enjoy them again, simply pull out what you need and allow them to thaw at room temperature for about 10-15 minutes before savoring once more. Each bite will still deliver all those glorious flavors as if they were freshly made!
Conclusion: A Sweet Love Letter
And there you have it—your very own Chocolate Chip Cookie Dough Brownie Bites – The Best 3-Layer Treat Ever! These treats embody everything we cherish about baking: creativity, joy, and connection with those we love through food. As I always say: cooking is not merely about nourishment; it’s about creating memories worth cherishing alongside scrumptious delights that fill our hearts as much as our stomachs.
So whether you’re whipping these up for a special occasion or simply because your sweet tooth calls (and trust me—it will), know that every step taken has led you closer to something profoundly satisfying. I hope these bites bring warmth and happiness into your home just as they have mine over countless family gatherings! Happy baking!
Storage and Enjoyment Tips for Your Chocolate Chip Cookie Dough Brownie Bites – The Best 3-Layer Treat Ever
Now that you’ve crafted these little bites of heaven, it’s time to revel in the joy of sharing—or savoring them all by yourself! Trust me, there’s nothing quite like biting into that fudgy brownie layer to reveal the creamy cookie dough center, all enveloped in a glossy chocolate coating. Whether you’re preparing for a gathering or just indulging in a sweet moment at home, these Chocolate Chip Cookie Dough Brownie Bites are ready to shine. But what about those delightful treats that might be left over? Let’s talk about how to keep them fresh and ready for whenever your sweet tooth strikes again.
Storing Leftover Chocolate Chip Cookie Dough Brownie Bites – The Best 3-Layer Treat Ever
To ensure your Chocolate Chip Cookie Dough Brownie Bites stay as delicious as when they were first made, I recommend storing them in an airtight container. This is absolutely paramount because it locks in the moisture and flavor, keeping each bite soft and wonderfully indulgent. You can place them in the fridge where they’ll remain delightful for up to a week. If you want to maintain that heavenly fudgy texture, try adding a slice of bread to the container—this little trick helps keep everything moist and prevents any drying out! As for taste, after storage, these bites develop an even deeper richness as all those magnificent flavors meld together. When you’re ready to enjoy them again, simply serve them chilled or let them sit at room temperature for a few minutes; either way, they’ll be utterly irresistible!
Freezing Cookie Dough Brownie Bites for Later
If you find yourself with a surplus of these scrumptious treats—or if you’re just planning ahead (which is always a smart move)—freezing them is a fantastic option! To freeze your Chocolate Chip Cookie Dough Brownie Bites properly, lay them out on a parchment-lined tray first so they’re not touching each other and pop them into the freezer until they’re solid. Once frozen, transfer them into an airtight freezer bag or container where they can stay fresh for up to three months. This method not only saves space but also ensures that each bite retains its decadent charm. When you’re ready to indulge again, simply take out however many you desire and let them thaw in the fridge or at room temperature. The convenience of having these delightful morsels on hand makes every day feel like a special occasion!
Chocolate Chip Cookie Dough Brownie Bites – The Best 3-Layer Treat Ever
Indulge in the delightful experience of Chocolate Chip Cookie Dough Brownie Bites – The Best 3-Layer Treat Ever! These decadent bites combine a rich, fudgy brownie base with a creamy edible cookie dough center, all enveloped in a glossy chocolate coating. Perfect for any occasion, these treats are sure to impress with their harmonious blend of flavors and textures. Whether you’re sharing them at a gathering or enjoying them during a cozy night in, each bite promises to evoke joy and nostalgia. This versatile recipe can be made either baked or no-bake, making it an ideal choice for all dessert lovers. Get ready to create a sweet masterpiece that is as enjoyable to make as it is to eat!
- Prep Time: 30 minutes
- Cook Time: 25 minutes
- Total Time: 55 minutes
- Yield: Approximately 16 servings 1x
- Category: Dessert
- Method: Baking
- Cuisine: American
Ingredients
- ½ cup unsalted butter, melted
- 1 cup granulated sugar
- 2 large eggs
- 1 tsp vanilla extract
- ½ cup unsweetened cocoa powder
- ½ cup all-purpose flour
- ¼ tsp baking powder
- ¼ tsp salt
- ½ cup unsalted butter, softened (for cookie dough)
- ½ cup packed brown sugar
- ¼ cup granulated sugar (for cookie dough)
- 2 tbsp milk or cream
- 1 tsp vanilla extract (for cookie dough)
- 1 ¼ cups heat-treated all-purpose flour
- 1 cup mini chocolate chips
- 2 cups semi-sweet chocolate chips OR candy melts (for coating)
- 1 tbsp coconut oil (optional)
Instructions
- Preheat your oven to 350°F (175°C) and grease an 8×8-inch baking pan.
- In a bowl, whisk melted butter and granulated sugar until smooth. Add eggs and vanilla extract, mixing well.
- Sift in cocoa powder, flour, baking powder, and salt; mix until just combined.
- Spread the brownie batter into the prepared pan and bake for about 25 minutes or until a toothpick comes out with moist crumbs. Let cool completely.
- For the cookie dough filling, cream softened butter with brown sugar and granulated sugar until fluffy. Add milk and vanilla extract; mix well.
- Gradually incorporate heat-treated flour and mini chocolate chips until combined. Roll into one-inch balls.
- Once brownies are cooled, cut into squares larger than the cookie dough balls. Flatten each brownie square slightly and wrap around the cookie dough ball securely.
- Melt semi-sweet chocolate chips with optional coconut oil until smooth. Dip each assembled brownie bite into the chocolate coating.
- Place on parchment-lined trays and chill in the refrigerator for about 15 minutes until set.
Nutrition
- Serving Size: 1 serving
- Calories: 160
- Sugar: 10g
- Sodium: 45mg
- Fat: 9g
- Saturated Fat: 5g
- Unsaturated Fat: 4g
- Trans Fat: 0g
- Carbohydrates: 18g
- Fiber: 1g
- Protein: 2g
- Cholesterol: 20mg