Salted Honey Pie: A Perfect Blend of Sweet and Salty
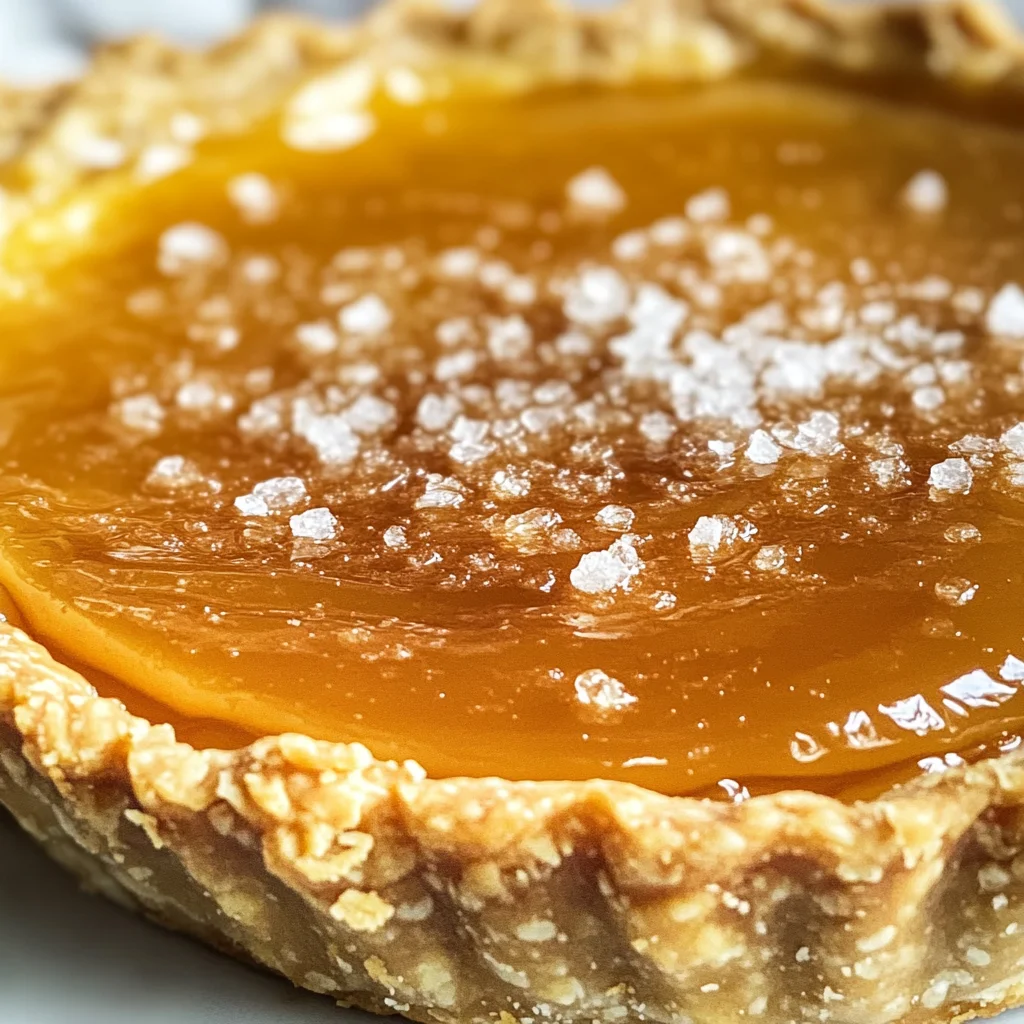
There’s a certain magic that happens when you create a dessert that embodies both the sweetness of life and a whisper of saltiness, isn’t there? This Salted Honey Pie: A Perfect Blend of Sweet and Salty is just that—a revelation. Each slice evokes feelings of warmth and nostalgia, as if you’ve gathered around a family table filled with laughter and love. Picture this: a velvety custard filling, rich with caramel notes, layered within a delicate pie crust that shatters beautifully at each bite. The honey sings through the creamy custard while the sea salt sprinkles its charm, creating an experience that lingers long after the last bite. It’s not merely dessert; it’s an embrace, a moment of indulgence that speaks to the heart.
I’ve always been captivated by desserts that dance between sweet and salty flavors—they tell a story, don’t they? The contrast heightens every note of flavor, turning something simple into something truly extraordinary. This pie is perfect for any occasion, whether it’s a cozy dinner at home or a festive gathering with friends and family. It brings people together, sparking conversations and creating memories. I promise you, once you serve this pie, it will become your go-to recipe for every celebration. As you embark on this culinary journey with me today, trust that every step is designed to guide you toward creating something absolutely unforgettable.
Salted Honey Pie: A Perfect Blend of Sweet and Salty: Dessert Bliss in Every Bite
Let’s dive into crafting this delightful pie! I can’t wait for you to experience the joy it brings—not just to you but to everyone fortunate enough to share in its deliciousness.
Ingredients:
As we gather our ingredients for this Salted Honey Pie, think of each one as an essential note in our symphony of flavors. Every component plays its role in transforming simple elements into an exquisite dessert masterpiece.
- 1 pie crust (refrigerated or homemade). The foundation of our Salted Honey Pie is crucial—whether you decide to use store-bought or whip up your own from scratch. A flaky crust not only provides structure but also adds texture and richness to the overall experience. If you’re going homemade, make sure it’s well-chilled before baking; this will prevent shrinkage and ensure that beautiful flakiness we all adore! If using store-bought, choose one made with quality ingredients; it makes all the difference in taste.
- 4 large egg yolks, lightly beaten. These golden gems are key to achieving that luscious custard texture we’re after. Egg yolks bring richness and depth while contributing to the overall creaminess of the filling. When beaten lightly before adding them to the mix, they help integrate more smoothly into our custard base without clumping—an essential step for achieving that silky finish we’re aiming for!
- 2 1/2 cups (600 ml) heavy whipping cream. This is where we get our decadent creamy texture! Heavy whipping cream has a high-fat content which gives our custard its luxurious mouthfeel. Be sure to use fresh cream because any off-flavors can affect the final product. And trust me—using heavy whipping cream rather than lighter alternatives will result in a far superior pie!
- 2/3 cup (150 g) packed light brown sugar. Oh, brown sugar! Not only does it add sweetness, but it also infuses our filling with deep caramel tones thanks to its molasses content. When combined with heat during cooking, brown sugar develops those lovely complex flavors that elevate our dessert from ordinary to extraordinary.
- 1/3 cup (45 g) cornstarch, sifted. Here’s where we ensure our custard sets beautifully without becoming grainy or lumpy. Cornstarch acts as a thickening agent; when mixed correctly with liquid ingredients and heated gradually, it swells up and thickens—creating that smooth consistency we desire in our pie filling.
- 1/2 tsp salt. A small amount goes a long way in enhancing flavors—this pinch balances sweetness while bringing out those rich notes from the honey and brown sugar beautifully! It’s non-negotiable; don’t skip this step if you want your pie’s flavors to shine.
- 1/2 cup (120 ml) honey. Liquid gold! Honey is not just sweet; it brings earthy undertones along with floral notes depending on its source. In this recipe, honey is the star ingredient—it adds complexity and depth while perfectly complementing the sweetness from brown sugar.
- 2 tsp vanilla extract. Vanilla is like a warm hug in dessert form! A good quality extract enhances all other flavors without overpowering them—adding an aromatic quality that’s simply divine.
- Flaky sea salt, for sprinkling. This finishing touch transforms each slice into something special! Sprinkling flaky sea salt on top creates contrast against the creamy filling while amplifying sweetness at every bite—a truly magical combination!
Now that we have everything prepared let’s gather some essential tools to help us create this masterpiece efficiently!
Equipment You’ll Need:
Having the right tools makes all the difference when embarking on your baking adventure—giving us confidence as we create magic in the kitchen together! While these may not be ingredients per se, they’re certainly vital partners in crafting something wonderful.
- Deep dish 8-inch or 9-inch pie pan: A sturdy pie pan ensures even baking throughout your crust while providing enough room for your luscious filling without spilling over as it rises in the oven.
- Medium saucepan: We’ll use this trusty tool for combining ingredients over medium heat—look for one with a heavy bottom so it distributes heat evenly without scorching those precious flavors we’re coaxing out.
- Whisk: An essential tool for combining ingredients smoothly—this little gadget will be instrumental during both tempering eggs and mixing everything together seamlessly!
- Rubber spatula: Perfect for scraping down sides of bowls or pots while ensuring no bits are left behind—this helps achieve optimal flavor throughout our mixture!
- Measuring cups & spoons: Precision is key when baking! Accurate measurements ensure we replicate gorgeous results time after time—treat these measuring tools like your best friends on this culinary journey!
Ready? Let’s get started on preparing your Salted Honey Pie—a delightful adventure awaits us!
Step 1: Chill Your Crust – Setting Up for Success
The first step begins even before making your filling: preparing your pie crust! If you’re using store-bought dough or making one from scratch (which I highly recommend), it’s crucial to chill your crust before use. By placing it in the fridge while we prep other ingredients, you’ll allow those cold fats within butter (or shortening) to firm up again after rolling out—which leads directly to flakiness once baked! The colder temperature helps prevent shrinkage during baking by keeping everything tightly formed around our luscious filling later on.
Step 2: Creating Creamy Magic
Now onto crafting our delectable custard filling! In a medium saucepan over medium heat combine heavy whipping cream with light brown sugar along with sifted cornstarch plus salt until well-mixed—the aromas will start swirling around your kitchen soon enough! As you’re stirring constantly (this part can’t be rushed!) watch closely for signs of bubbling; once reached bring attention back toward mixing consistently until smooth consistency emerges—this process thickens quickly so keep moving! Once boiling happens reduce heat slightly but continue stirring diligently until mixture coats back of spoon leaving behind trails visible—all those caramelized scents should entice anyone nearby at this point!
Step 3: Tempering Egg Yolks – Gentle Integration
After achieving perfect thickness remove saucepan from heat momentarily while preparing egg yolks next—a process called tempering allows us slowly introduce hot mixture into beaten yolks without scrambling them prematurely—we don’t want scrambled eggs here folks! Begin ladling small amounts directly into yolks whisking continuously as added volume increases gradually repeat adding more till fully incorporated—it feels like magic watching transformation happen right before eyes doesn’t it? This method ensures gentle integration allowing us create silky-smooth custard later down road!
Step 4: The Final Touches – Bringing It All Together
Once combined return tempered egg mixture back into saucepan along remaining cream mixture stirring thoroughly till homogenous blend appears—you can almost sense anticipation building among ingredients now adding honey plus vanilla extract brings everything closer together beautifully enhancing flavors throughout resulting creation even further than imagined possible before starting process itself—and trust me…that aroma wafting through kitchen? Utterly intoxicating!
We’re off to an incredible start so far; stay tuned as we continue crafting this delightful Salted Honey Pie through upcoming steps—each one designed specifically elevate experience beyond expectations set initially upon commencing adventure together today!
Step 5: Pouring the Golden Custard into the Crust
Once you’ve lovingly whisked together your egg mixture with the hot cream, it’s time to bring everything together in a way that is both delicate and rewarding. Carefully pour the smooth custard back into the saucepan containing the remaining cream mixture. This is where we blend all those rich flavors in a harmonious dance. As you stir gently, be sure to combine everything thoroughly, ensuring that each ingredient gets its moment to shine. You’ll notice how creamy and thick this custard is becoming; it should have a silky texture and a beautiful pale golden hue that promises an indulgent experience ahead.
Now comes the star of our show—honey! Add in that luscious half-cup of honey and the aromatic vanilla extract. This is not just about flavor; it’s about creating a symphony of sweetness that will tantalize your taste buds. Honey brings a unique depth to this Salted Honey Pie, infusing it with caramel-like notes that enhance every bite. Stir everything together until fully incorporated, letting those ingredients meld into one cohesive filling that’s simply irresistible. The warmth from the custard will coax out all those gorgeous flavors, but remember, trust your instincts here—if it looks smooth and inviting, you’re on the right track!
Step 6: Baking Your Perfect Custard
Now it’s time for what I like to call the transformative phase—the baking! Gently pour your creamy custard mixture into the chilled pie crust, taking care to spread it evenly so each slice has a uniform texture. At this point, you might marvel at how golden and inviting your mixture looks—this is your masterpiece coming to life! A quick tip here: if you notice any air bubbles rising to the surface as you pour, don’t fret! Just give it a gentle tap on the counter; this little movement encourages them to pop without disrupting your lovely filling.
Slide your pie into a preheated oven set at 375°F (190°C). The magic begins now! Bake for about 40-45 minutes, during which you’ll see it bubble up beautifully—a sign that all those ingredients are melding together perfectly. You want to keep an eye on it as it bakes; look for a golden top forming and slight bubbling around the edges. The center should still have a gentle jiggle when you give the pie a light shake—this jiggling will transform into that silky custard consistency once cooled! And remember, patience is key; overbaking can lead to a grainy texture in your filling, which we absolutely want to avoid.
Step 7: Cooling Your Masterpiece
After patiently waiting for those 40-45 minutes of baking bliss, remove your pie from the oven and place it on a wire rack or countertop to cool down. This cooling phase is crucial—it allows your custard to set properly while also letting those tantalizing flavors deepen as they meld together in their cozy little environment. While it’s hard not to dive in right away—trust me on this!—let your pie rest at room temperature for at least an hour before transferring it to the refrigerator.
Once it’s cooled enough, cover your pie loosely with plastic wrap or aluminum foil (but don’t press down too tightly) and let it chill in the fridge for at least four hours or overnight if you can resist temptation! This chilling process does wonders by allowing every silky layer of flavor to develop fully—it’s like giving your pie a spa day before revealing its true potential! Not only does this help firm up that beautiful custard filling so every slice holds its shape when served—it also enhances that magical interplay between sweet honey and salty goodness.
Step 8: The Finishing Touch of Flaky Salt
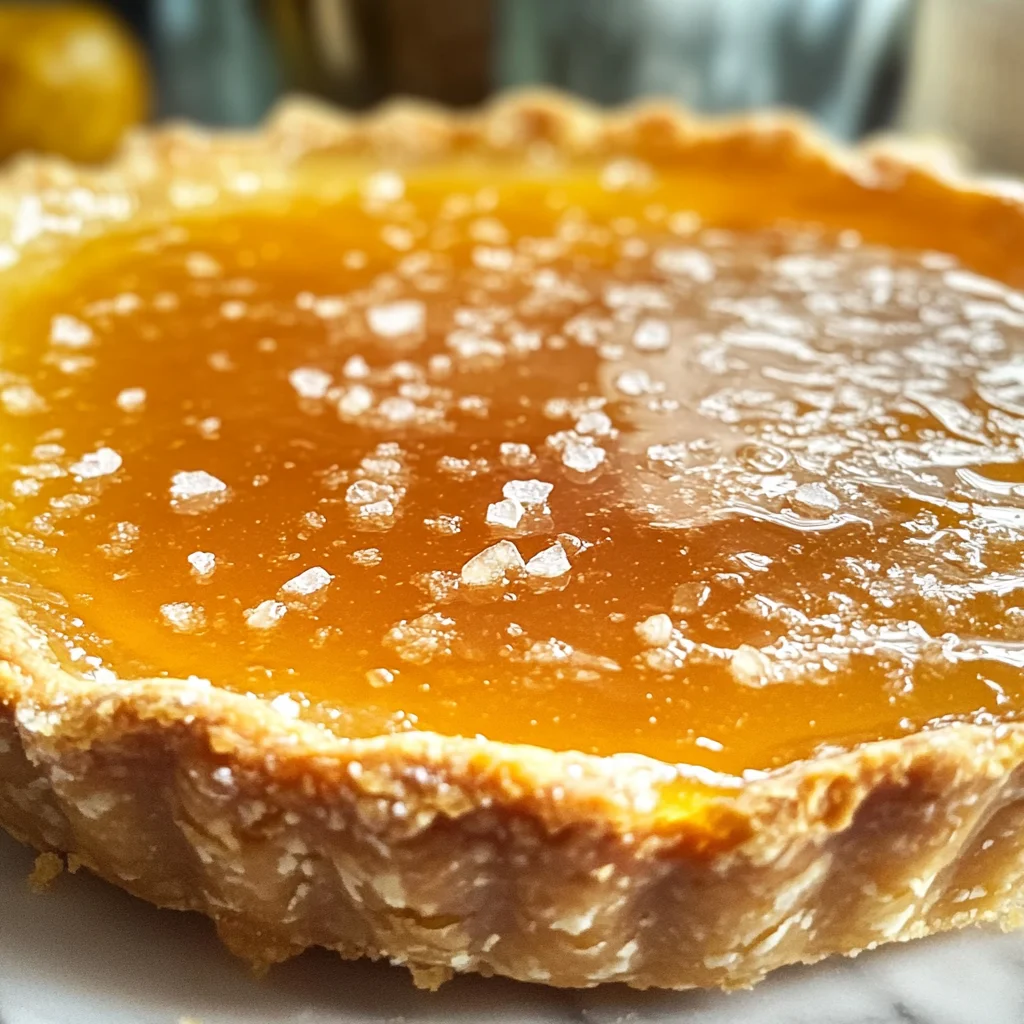
At long last, we arrive at one of my favorite parts—the finishing touches before serving this heavenly creation! Once you’ve allowed ample time for chilling (and I know this can feel like an eternity), pull out your Salted Honey Pie from the fridge and take a moment to admire its glossy surface. Before slicing into this masterpiece, sprinkle a generous amount of flaky sea salt over the top—a step that’s absolutely paramount for achieving that perfect sweet-and-salty balance we all crave.
The addition of flaky sea salt isn’t just visually appealing; it enhances every bite by accentuating the sweetness of honey while providing an exhilarating contrast against that creamy custard filling. Sea salt’s larger crystals offer delightful pops of flavor that elevate each mouthful from merely delicious to truly extraordinary. As you sprinkle it over the top, let yourself indulge in how satisfying—and downright sophisticated—this final touch looks. It’s these thoughtful details that show love goes beyond mere ingredients; they create an unforgettable experience for everyone who gets to savor this stunning dessert.
Final Touches: Serving Your Salted Honey Pie
As you prepare to serve this magnificent Salted Honey Pie, grab a sharp knife (a serrated one works wonders) and slice through that flaky crust with ease. Aim for 8-10 portions depending on how indulgent you feel—you won’t regret sharing generous slices! Serve each piece chilled so everyone can enjoy that glorious creamy texture paired with crunchy sea salt on top.
And there you have it—your very own Salted Honey Pie: A Perfect Blend of Sweet and Salty! Each bite will transport you through layers of flavor—from rich caramel notes courtesy of honey, through velvety custard with just enough salty intrigue dancing on your palate. It’s not just dessert; it’s an experience filled with warmth, nostalgia, and love—the kind our families cherish around holiday tables or cozy gatherings alike. I promise you’ll find joy in every slice as much as I do each time I share this beloved recipe with friends and family alike! Happy baking!
Storage and Enjoyment Tips for Your Salted Honey Pie: A Perfect Blend of Sweet and Salty
Now that you’ve mastered the art of creating this Salted Honey Pie, the only thing left to do is enjoy it! The beauty of this pie is not just in its delightful creation but also in how it brings people together around the table, inviting them to savor every luscious bite. But what if you find yourself with leftovers? Fear not! This pie can be beautifully preserved so you can indulge in its sweet and salty symphony later.
Storing Leftover Salted Honey Pie: A Perfect Blend of Sweet and Salty
To keep your leftover Salted Honey Pie fresh and delicious, I recommend placing it in an airtight container. If you don’t have one handy, simply cover it tightly with plastic wrap. Store the pie in the refrigerator, where it will remain lovely for up to four days. As a pro tip, consider placing a slice of bread in the container with the pie; this little trick helps maintain moisture without compromising taste! When it comes to flavor, you’ll find that chilling enhances the honey’s sweetness while allowing the gentle saltiness to shine through. If you’re ready to serve again, simply slice into cold perfection – no reheating needed unless you prefer a warm custard affair!
Freezing Salted Honey Pie for Later
Feeling like you want to save some slices for when a craving hits? Freezing is an excellent option! To freeze your Salted Honey Pie properly, wrap each slice individually in plastic wrap and then place them into a freezer-safe bag or container. This way, it keeps fresh for up to three months! When you’re ready to enjoy a piece from frozen, simply let it thaw in the refrigerator overnight. Trust me; having this indulgent treat at your fingertips whenever you want is a game-changer – perfect for spontaneous gatherings or cozy nights in when only something sweet will do!
Salted Honey Pie: A Perfect Blend of Sweet and Salty

Indulge in the delightful experience of making Salted Honey Pie: A Perfect Blend of Sweet and Salty. This stunning dessert features a silky custard infused with honey and a hint of flaky sea salt, all nestled within a buttery crust. Each slice promises a wonderful balance of flavors, striking the perfect harmony between sweet and salty. Ideal for gatherings or cozy nights in, this pie evokes warmth and nostalgia with every bite. Serve it chilled for an elegant treat that will surely impress friends and family alike.
- Prep Time: 20 minutes
- Cook Time: 45 minutes
- Total Time: 1 hour 5 minutes
- Yield: Serves about 8 slices 1x
- Category: Dessert
- Method: Baking
- Cuisine: American
Ingredients
- 1 pie crust (refrigerated or homemade)
- 4 large egg yolks
- 2 1/2 cups heavy whipping cream
- 2/3 cup packed light brown sugar
- 1/3 cup cornstarch
- 1/2 tsp salt
- 1/2 cup honey
- 2 tsp vanilla extract
- Flaky sea salt for sprinkling
Instructions
- Preheat your oven to 375°F (190°C) and chill the pie crust.
- In a medium saucepan, combine heavy cream, brown sugar, cornstarch, and salt over medium heat, stirring until thickened.
- Temper the egg yolks by gradually adding the hot mixture while whisking continuously.
- Return the combined mixture to the saucepan, add honey and vanilla, and stir until smooth.
- Pour the custard into the chilled pie crust and bake for 40-45 minutes until set but still slightly jiggly in the center.
- Cool at room temperature for an hour before refrigerating for at least four hours or overnight.
- Before serving, sprinkle flaky sea salt on top for an extra touch.
Nutrition
- Serving Size: 1 slice (100g)
- Calories: 400
- Sugar: 25g
- Sodium: 150mg
- Fat: 30g
- Saturated Fat: 18g
- Unsaturated Fat: 10g
- Trans Fat: 0g
- Carbohydrates: 36g
- Fiber: 1g
- Protein: 5g
- Cholesterol: 210mg