Deviled Eggs
When it comes to culinary experiences that evoke warmth, joy, and nostalgia, few dishes can hold a candle to Deviled Eggs. Every time I prepare this classic appetizer, I’m reminded of sunny afternoons spent with family, where laughter mingled with the tantalizing aroma of perfectly seasoned eggs wafting through the kitchen. This is more than just a recipe; it’s an invitation to share in the love and tradition that has been passed down through generations. The simplicity of hard-boiled eggs is transformed into a symphony of flavors and textures when combined with creamy mayonnaise, zesty mustard, and the delightful crunch of dill pickles. Each bite offers a comforting familiarity that dances on your palate, making these Deviled Eggs an irresistible treat for gatherings or quiet nights at home.
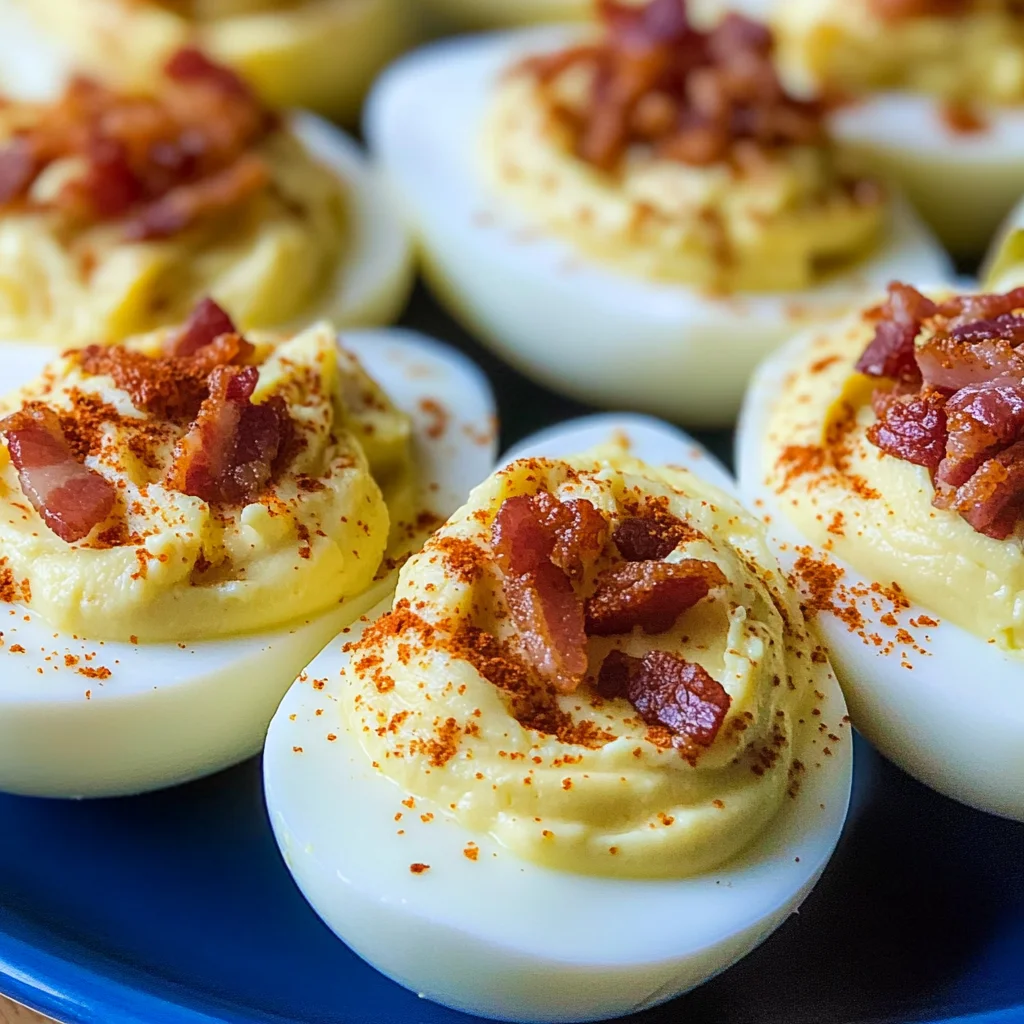
Imagine serving a platter of these beautifully garnished eggs to friends or family, each half brimming with a creamy filling that’s both rich and tangy. The contrasting textures—the silky yolk mixture against the crispness of bacon bits—create an utterly intoxicating experience that will have everyone asking for seconds (or thirds!). What makes these deviled eggs truly special is their versatility. They’re perfect for any occasion: brunches, picnics, holiday gatherings, or simply as a snack to enjoy while sipping your favorite beverage. Trust me when I say that once you whip up this recipe, you’ll find yourself coming back for more because they are simply unforgettable.
Deviled Eggs: A Timeless Classic with a Crunchy Twist
Welcome to my kitchen! Today, we’re diving into a beloved recipe that’s sure to bring smiles all around: Deviled Eggs. It’s incredible how something so simple can become such a delightful treat when you add a few thoughtful touches. With crispy bacon crumbles on top and the surprising crunch of dill pickles mixed into the creamy yolk filling, these deviled eggs are bound to steal the show at your next gathering.
Ingredients:
Before we get started on this delicious journey, let’s take a moment to appreciate each ingredient that brings our Deviled Eggs to life. Every component plays its part in creating that harmonious balance of flavors and textures we all crave.
- 8 hard-boiled eggs (peeled and halved). The star of our dish! When selecting eggs, freshness is key; look for those with firm whites and vibrant yolks. Hard-boiling them properly ensures you’re left with tender whites that hold together beautifully when halved. Remember to let them cool completely before peeling—this minimizes frustration and helps create smooth surfaces for stuffing.
- 1/4 cup mayonnaise. This velvety ingredient is essential for achieving that creamy goodness we all adore in deviled eggs. It acts as the binding agent that holds everything together while adding richness without overwhelming the other flavors. For a lighter option, feel free to use Greek yogurt or avocado mayo; both offer unique twists while still keeping things luscious.
- 2 tsp dill pickle juice. A splash of tanginess from dill pickle juice elevates the flavor profile significantly! It adds acidity and brightness that cuts through the richness of the mayonnaise and yolks. You can even adjust the amount based on your personal preference—some like it zippier than others!
- 1/2 tsp yellow mustard (or Dijon mustard), or to taste. Mustard introduces another layer of flavor—its sharpness balances out the creaminess beautifully and adds complexity to each bite. Yellow mustard provides classic flavor while Dijon brings a sophisticated kick; choose whichever suits your taste buds best!
- Pinch of salt (or to taste). Salt enhances every element in our dish; it’s not just seasoning but rather an enhancer that brings out all those hidden flavors in your ingredients! Be cautious here—start small since you can always add more later if needed.
- 1/8 tsp black pepper. A dash of freshly cracked black pepper adds depth without overpowering other components—it’s like a gentle whisper rather than a shout! It complements the mustard’s heat while giving just enough contrast against the creaminess.
- 1/8 tsp garlic powder. This aromatic spice imparts subtle warmth and savory notes that take our filling from ordinary to extraordinary! Garlic powder diffuses evenly throughout your mixture so every spoonful bursts with flavor.
- 2 baby dill pickles (very finely diced). These crunchy bites are absolute gems in our Deviled Eggs! They lend not only texture but also an addictive briny flavor—a perfect contrast against the smooth filling. Choose fresh pickles for better crunch!
- 1/8 tsp paprika (to garnish). Paprika isn’t just for looks—it offers mild sweetness and vibrant color! A sprinkle on top transforms our deviled egg halves into eye-catching appetizers worthy of any table setting.
- 3 oz bacon (4 strips) chopped and browned, for topping. Ahh…bacon—the crowning glory atop our deviled eggs! Its smoky-salty crunch elevates everything else beneath it while adding an irresistible layer of richness that rounds out each bite perfectly.
Equipment You’ll Need:
Having the right tools at hand makes cooking feel effortless and enjoyable! While they may not be ingredients themselves, these pieces of equipment are essential partners in crafting beautiful Deviled Eggs.
- **Medium mixing bowl – This bowl is where all magic happens! A sturdy mixing bowl gives you ample space for mashing those yolks together without worrying about spills or messes; its size allows easy incorporation of all ingredients so they blend seamlessly into one cohesive filling.
- **Fork – Your trusty fork will work wonders here! Use it not only for mashing but also for mixing everything together until you achieve smooth creaminess—a vital aspect of great deviled eggs is ensuring there are no lumps hiding within!
- **Teaspoon – Perfectly portion out your egg filling with accuracy using this simple tool! A teaspoon allows you to fill each egg half generously without losing any deliciousness along the way—every morsel counts!
- **Serving platter – Presenting your stunning creations on an elegant platter makes all difference in showcasing them beautifully! Choose one large enough to accommodate all 16 halves comfortably while also allowing garnishes like paprika or bacon bits space to shine!
Preparing the Deviled Eggs
Step 1: Halving & Scooping
First things first—let’s cut those hard-boiled eggs in half lengthwise! Place them gently on your chosen serving platter as if they were precious jewels awaiting their moment in the spotlight. With care, scoop out each yolk into your medium mixing bowl using either a spoon or fork; we want every crumb collected because every bit matters here!
Step 2: Mashing & Mixing
Now comes one of my favorite parts: mashing those yolks until they resemble fine crumbs—a process known as “creaming.” This step is absolutely paramount; why? Because achieving that silky texture depends heavily upon how well you break down those yolks before adding other ingredients! Once you’ve achieved crumbly perfection, introduce your mayonnaise alongside pickle juice, mustard, salt, black pepper, and garlic powder—all blending harmoniously together creates liquid gold before us!
Step 3: Incorporating Pickles
With everything combined nicely into creamy goodness—you’ll now fold in those finely diced baby dill pickles like precious little surprises waiting inside every egg half! Mixing them thoroughly ensures each bite bursts forth with delightful crunchiness while delivering tangy zest throughout—trust me on this!
Step 4: Filling & Garnishing
Lastly—spoon generous teaspoons’ worth back into those lovely egg white halves like you’re crafting tiny edible works of art! Don’t rush this step; allow time for creative garnishing by dusting lightly with paprika before topping off liberally with crispy bacon bits—what truly elevates these deviled eggs from good…to absolutely extraordinary!
And there you have it—a timeless recipe transforming humble ingredients into unforgettable memories shared around tables filled laughter! As always—I promise you will return again and again once you’ve tasted these delightful bites bursting full flavor love created straight from heart kitchen…enjoy!
The Deviled Eggs Recipe Everyone Will Ask For!
Oh, how I adore deviled eggs! They bring back memories of family gatherings, picnics in the park, and festive celebrations. Each bite is like a little burst of nostalgia, a reminder of laughter and love shared around a table. The creamy filling, enhanced by the subtle tang of dill pickles and the delectable crunch of bacon on top, makes these deviled eggs utterly irresistible. Trust me when I say, once you serve these at your next gathering, they will disappear faster than you can say deviled eggs!
Now, let’s dive into the details of this cherished recipe. With each step, I’ll guide you through creating a dish that not only tastes incredible but also looks beautiful on your table. Let’s embark on this culinary adventure together!
Step 5: Mash Those Yolks to Perfection
Once you’ve carefully removed the yolks from the hard-boiled eggs and placed them in a mixing bowl, it’s time to transform them into a creamy filling. Begin by using a fork to mash the yolks into fine crumbs—this may seem simple, but it’s an absolutely crucial step. You want to ensure that there are no large lumps because those lumps can disrupt the silky texture we’re aiming for in our filling. As you mash, take in the rich aroma of the yolks; it’s truly delightful! Once they resemble fine crumbs rather than chunky pieces, that’s when you know you’re ready for the next phase.
Now comes the fun part—adding flavor! To your mashed yolks, introduce 1/4 cup of mayonnaise. This acts as the creamy base that binds everything together and adds a luscious mouthfeel to each bite. But don’t stop there; drizzle in 2 teaspoons of dill pickle juice for that zingy flavor that will have everyone coming back for more. Then add half a teaspoon of yellow mustard (or Dijon if you’re feeling adventurous), along with a pinch of salt, an eighth teaspoon of black pepper, and an eighth teaspoon of garlic powder. Each ingredient plays its part in creating what I like to call “the symphony of flavors.” Mix everything together until it’s smooth and creamy—this is where your patience pays off! If it feels too thick or isn’t blending well, feel free to add a touch more mayo until it reaches your desired consistency.
Step 6: Incorporate Those Crunchy Dill Pickles
Now that your yolk mixture is creamy and flavorful, let’s elevate it even further by folding in those finely diced dill pickles! Using two baby dill pickles adds not just crunch but also those delightful bursts of flavor that contrast beautifully with the smoothness of the yolk mixture. When chopping your pickles, aim for tiny dice so they blend seamlessly into the filling without becoming overwhelming with texture. This step is essential because it introduces contrasting elements that make each bite exciting!
As you mix these pickles into your egg filling, think about how this balance enhances every aspect of your dish—sweetness from the mayonnaise, tanginess from the mustard and pickle juice, and now crunch from those diced pickles. It’s like creating an orchestra where every note complements another! Remember to taste as you go; adjusting seasonings is key here. You might find you want just a pinch more salt or mustard for that extra kick—this is all part of crafting something truly extraordinary!
Step 7: Fill Those Egg Whites Generously
Now comes one of my favorite parts—the filling! Carefully spoon or pipe your rich egg mixture into each half of the egg whites. If you’re using a spoon, aim for about a generous teaspoon per half; this ensures every deviled egg gets its fair share without being too stingy! Alternatively, if you really want to impress (and let’s be honest—it’s super fun), use a piping bag fitted with a star tip to create beautiful swirls atop each egg half. The visual appeal is non-negotiable here; we eat with our eyes first!
As you fill each egg white half with this tantalizing mixture, take care not to overfill them—just enough so they look heaping and inviting but not so much that they spill over. This step allows for creativity; you could even sprinkle some extra minced dill pickle on top for added flair before garnishing with paprika later on! When finished filling all your egg halves, take a moment to admire your work—you’ve created something beautiful already.
Step 8: The Essential Paprika & Bacon Garnish
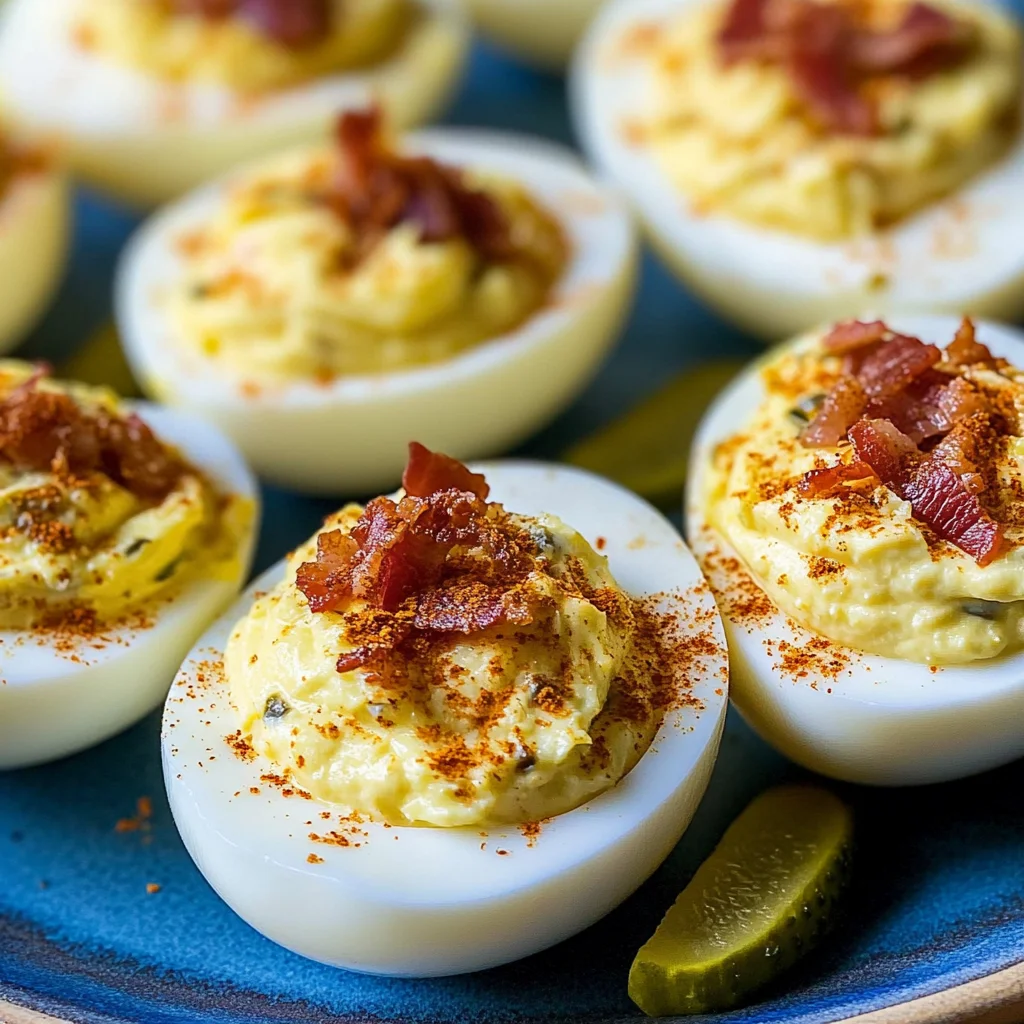
Finally, let us transform these exquisite deviled eggs into show-stoppers with two finishing touches: paprika and crispy bacon bits! Grab your eighth teaspoon of paprika and sprinkle it generously over each filled egg half like confetti at a celebration—it adds both color and subtle warmth. The vibrant red against the pale yellow filling is visually striking; it beckons everyone closer to take a taste.
Now let’s talk about bacon—a delightful addition that brings an unbeatable crunchiness contrasting perfectly with our creamy filling! Chop up three ounces (about four strips) into small pieces and sauté them until they’re dark brown and crispy—think liquid gold bubbling away in your frying pan! Once cooked, be sure to drain them on paper towels to absorb any excess grease before sprinkling them lavishly atop each deviled egg. This last touch transforms an already delicious dish into something profoundly satisfying; it’s pure indulgence.
Final Touches
Step 9: Chill & Serve with Love
Before serving these gems at your gathering (or enjoying them yourself!), allow them to chill in the refrigerator for about 30 minutes—trust me on this one! Chilling does wonders as it allows all those flavors to meld beautifully together while also giving the filling time to firm up slightly. This step isn’t just about temperature; chilling enhances every nuance in flavor while providing an enticingly cool bite when served.
When you’re ready to present these stunning deviled eggs at your next gathering or simply enjoy them during lunch at home (I won’t judge!), arrange them elegantly on a platter or individual serving plates. Each bite should be met with delight—the creaminess balanced by crunchy pickles and smoky bacon bits will leave everyone asking for seconds—and possibly even thirds! So go ahead; savor every moment spent preparing these delectable treats because cooking should always be about joy and connection.
I promise you this deviled eggs recipe will become one that you’ll cherish forever—and maybe even pass down through generations like I hope to do someday. Happy cooking!
Storage and Enjoyment Tips for Your Deviled Eggs
Now that your Deviled Eggs are beautifully crafted and arranged on a platter, it’s time to dig in and enjoy this delightful appetizer! But let’s be honest, sometimes we may have a few leftovers (though they’re so delicious, that’s often hard to believe!). If you find yourself with some extras, fear not! I’m here to share my best tips on how to keep those scrumptious bites fresh and tasty for when you’re ready to indulge again.
Storing Leftover Deviled Eggs
To store your leftover Deviled Eggs, simply place them in an airtight container. This is key because it keeps those delicate flavors intact while preventing any absorbent odors from your fridge from sneaking into your delicious creation. Ideally, you’ll want to make sure they’re stored in the coldest part of your refrigerator; anywhere between 3-5 days is perfect for maintaining their peak freshness. Now, here’s a little pro tip that I swear by: placing a slice of bread in the container can help absorb excess moisture and keep your eggs from becoming rubbery. Trust me, the taste remains just as vibrant and creamy – absolutely paramount for those lingering flavors. When you take them out after a couple of days, you might even notice how the tastes have melded together beautifully – making each bite just as satisfying as the first.
Freezing Egg Yolks for Later
If you’re someone who loves to plan ahead, freezing the egg yolk mixture is a fantastic option! Just scoop out the yolk filling into an ice cube tray or similar freezer-safe container. Be sure to press down firmly so it holds its shape once frozen, then wrap it tightly with plastic wrap or foil to prevent freezer burn. They can be kept like this for about 2-3 months without losing quality! When you’re ready to enjoy them again, simply thaw overnight in the refrigerator before spooning them back into fresh egg whites. This method is incredibly convenient and allows you to whip up this beloved dish on a whim without having to start from scratch. How wonderful is that? You’ll always have that creamy goodness at your fingertips!
Deviled Eggs

Deviled Eggs are a classic appetizer that brings comfort and joy to any gathering. These delightful bites transform simple hard-boiled eggs into a creamy, tangy treat, perfect for family gatherings, picnics, or a cozy night in. With a blend of rich mayonnaise, zesty mustard, and crunchy dill pickles, each bite offers a burst of flavor that will have your guests coming back for more. Topped with crispy bacon bits and a sprinkle of paprika, these Deviled Eggs are not only delicious but also visually appealing. Easy to prepare and endlessly versatile, you can customize them with your favorite ingredients to create your own signature touch. Get ready to impress your friends and family with this timeless recipe!
- Prep Time: 15 minutes
- Cook Time: 10 minutes
- Total Time: 25 minutes
- Yield: Serves 16 (8 whole eggs) 1x
- Category: Appetizer
- Method: Cooking
- Cuisine: American
Ingredients
- 8 hard-boiled eggs (peeled and halved)
- 1/4 cup mayonnaise
- 2 tsp dill pickle juice
- 1/2 tsp yellow mustard
- Pinch of salt
- 1/8 tsp black pepper
- 1/8 tsp garlic powder
- 2 baby dill pickles (very finely diced)
- 1/8 tsp paprika (for garnish)
- 3 oz cooked bacon (optional, for topping)
Instructions
- Cut the hard-boiled eggs in half lengthwise and scoop out the yolks into a medium mixing bowl.
- Mash the yolks until fine crumbs form. Mix in the mayonnaise, dill pickle juice, mustard, salt, black pepper, garlic powder, and diced pickles until smooth.
- Spoon or pipe the yolk mixture back into the egg white halves.
- Garnish with paprika and crispy bacon bits if desired.
- Chill in the refrigerator for at least 30 minutes before serving.
Nutrition
- Serving Size: 1 egg half (25g)
- Calories: 70
- Sugar: 0g
- Sodium: 150mg
- Fat: 6g
- Saturated Fat: 1g
- Unsaturated Fat: 4g
- Trans Fat: 0g
- Carbohydrates: 1g
- Fiber: 0g
- Protein: 3g
- Cholesterol: 55mg