Cheesy Broccoli
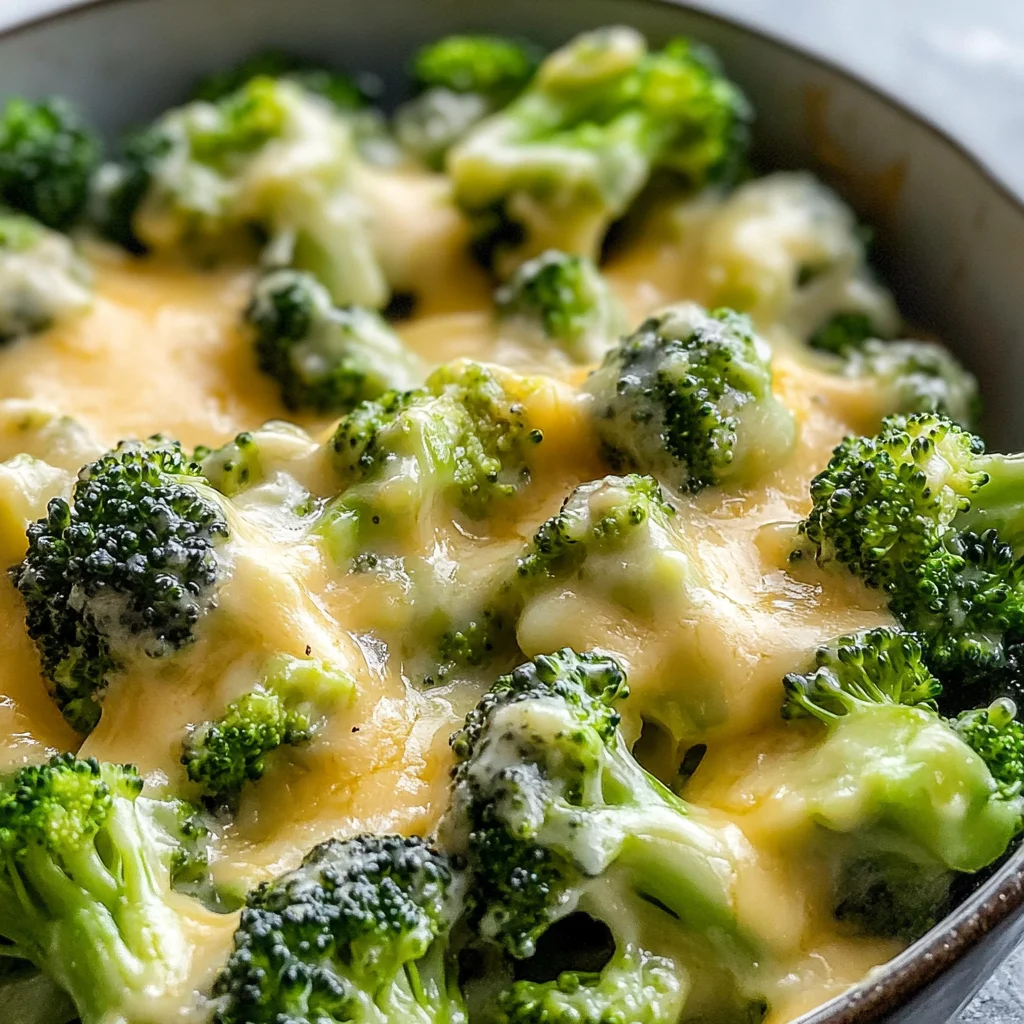
There’s something undeniably magical about cooking—a kind of alchemy that transforms simple ingredients into heartfelt dishes that can evoke memories, create joy, and bring people together. When I think of comfort food that resonates with both the young and the young at heart, my mind immediately wanders to cheesy broccoli. This Cheesy Broccoli recipe isn’t just a side dish; it’s an experience that invites you into the kitchen to create a warm hug of flavors. Imagine vibrant green broccoli cloaked in a creamy, velvety cheese sauce, each bite offering a delightful balance of nutrition and indulgence. The rich flavors of cheddar meld seamlessly with the bright freshness of the broccoli, creating a symphony of flavors that is both satisfying and uplifting.
This recipe is not merely about cooking; it’s a bridge between tradition and innovation. It harnesses the nostalgia of family dinners while embracing modern simplicity—perfect for any weeknight meal or special occasion. Whether it’s sitting down for a casual dinner with friends or preparing a feast for your loved ones, this Cheesy Broccoli will undoubtedly steal the spotlight on your table. I promise you, once you whip up this creamy goodness, you’ll find yourself making it over and over again!
Cheesy Broccoli: A Comforting Classic
Welcome to my kitchen! Today, we’re diving into this easy-to-make yet utterly delicious Cheesy Broccoli recipe that has become a staple in my home. Not only is this dish kid-friendly, but it’s also quick to prepare and features a homemade cheese sauce that truly elevates the dish from ordinary to extraordinary. So, roll up your sleeves; let’s embark on this culinary journey together!
Ingredients:
As we gather our ingredients for this delightful adventure, remember that each component plays a vital role in crafting the perfect cheesy broccoli experience. Let’s dive into what you’ll need:
- 1 pound broccoli (cut into florets – about 6 cups florets). Fresh broccoli is the star of this show! Look for deep green florets with tightly closed buds—this indicates freshness and peak flavor. Not only does broccoli provide a wonderful crunch and vibrant color to our dish, but it’s also packed with vitamins K and C, fiber, and numerous antioxidants that are fantastic for health. You can substitute with frozen broccoli if needed; just ensure it’s well-drained before using.
- Water. Water may seem like an afterthought here, but it’s essential for steaming our beautiful broccoli without losing its lovely green hue or crisp texture. We want just enough water to create steam—not drowning our florets—which helps preserve their nutrients while cooking.
- 2 tablespoons butter. Oh, butter—our beloved friend in the kitchen! This little bit of liquid gold adds richness and depth to our cheese sauce while helping us achieve that luxurious mouthfeel we crave in comfort food. Always go for unsalted butter here so you can control the seasoning more effectively.
- 2 tablespoons flour. This is our thickening agent—the glue that binds everything together into a creamy masterpiece! By creating a roux with flour and butter, we’re laying the foundation for a smooth cheese sauce rather than one that clumps together like an awkward high school dance.
- 1 cup milk (I used 1%). Milk brings creaminess to our sauce without overwhelming it with richness. If you’re looking for alternatives due to dietary preferences or lactose sensitivity, unsweetened almond milk or oat milk can work beautifully as well.
- 2/3 cup shredded cheddar cheese. Ahh—the heart of our cheesy goodness! Opt for sharp cheddar as it offers more flavor than mild varieties—it will elevate your sauce from good to heavenly! Make sure to shred it yourself from a block rather than using pre-shredded cheese; those often contain anti-caking agents which can affect melting quality.
- 2 tablespoons grated Parmesan cheese. Just like adding salt brings out flavor in chocolate desserts, Parmesan adds an umami kick that enhances our cheddar cheese’s profile beautifully!
- 1/4 teaspoon kosher salt (plus additional to taste). Salt is an essential seasoning that accentuates all the other flavors in your dish—don’t skimp on it! Kosher salt is ideal because its larger grains dissolve nicely in sauces.
- Pinch ground mustard (optional). If you want to add another layer of flavor complexity without making it “mustardy,” this pinch will work wonders! It provides subtle tanginess which balances out richness.
- Pinch cayenne (optional). A dash of cayenne pepper introduces warmth without overpowering your dish—a secret weapon for many cooks! If you’re serving kids or anyone sensitive to spice, feel free to leave it out.
Now that we have everything lined up like eager participants waiting for their turn in the spotlight, let’s move on!
Equipment You’ll Need:
Having the right tools makes all the difference when creating something wonderful in your kitchen! These essential partners will ensure smooth sailing through your cheesy broccoli preparation:
- Large saucepan: A sturdy pan is crucial for steaming our broccoli evenly while also providing ample space for whisking up our velvety cheese sauce later on. Make sure it’s large enough so you don’t crowd your ingredients—this ensures even cooking.
- Whisk: A good whisk is non-negotiable when combining flour and butter into a roux or stirring in cheeses smoothly into milk; it prevents any lumps from forming and creates that desired silky texture we’re after!
- Measuring cups & spoons: Precision matters here! Using standard measuring tools will help ensure consistent results every time you make this dish—you want those flavors balanced perfectly!
- Cutting board & knife: Essential tools for prepping your broccoli florets safely and efficiently. A sharp knife ensures clean cuts while preserving freshness.
With all our ingredients ready and tools at hand, we’re set up beautifully to make this unforgettable Cheesy Broccoli dish!
Step 1: Steaming Your Broccoli to Perfection
Let’s kick things off by focusing on our star ingredient: the broccoli! Start by placing your cut florets into a large saucepan—a vessel where some serious magic will happen shortly. Cover them with just enough water—about one cup—to create steam rather than submerging them completely; remember we want them tender yet crisp-tender rather than mushy disaster territory! Bring this pot over high heat until it begins bubbling vigorously before covering tightly with a lid—it traps all those beautiful steam molecules inside like precious jewels ready to be unveiled after their short sauna session lasting roughly four to five minutes.
What you’re looking for is bright green coloration alongside tenderness when pierced with a fork—but don’t let them linger too long! Drain them promptly once they reach perfection so they keep their lovely structure intact; then transfer them gently into a bowl where they can stay warm while we whip up what I consider liquid gold—the cheese sauce!
Step 2: Crafting Your Roux
Now comes one of my favorite parts—the creation of the roux! With a towel handy—because safety first—we’re going back into our now-dry saucepan over medium-low heat; melt those two tablespoons of butter until they’re bubbling joyfully but not browning—this step sets us up nicely without having burnt flavors creeping in later on which would ruin everything we’ve worked so hard for thus far!
Once melted blissfully together, sprinkle two tablespoons of flour over top while whisking continuously—you’ll notice how quickly everything begins melding together beautifully! We’re aiming here for golden goodness within about one full minute as everything melds harmoniously together; trust me when I say patience pays off here since rushing could lead us astray towards lumpy sauce territory instead!
Step 3: The Transformation Begins
Next comes one crucial moment: slowly pouring one cup of milk into our bubbling roux mixture while whisking constantly—this prevents any pesky lumps from forming which would detract from achieving perfection later on! As you stir rhythmically—it almost feels meditative—you’ll notice how gradually it thickens before your very eyes within approximately three minutes once simmered gently away.
The beauty lies within watching transformation unfold before us—a silky smooth consistency emerging as if by magic right under fingertips through sheer determination alone; take care not too rush through as letting those flavors develop properly makes all difference between good versus extraordinary results worth celebrating!!
Step 4: Cheese Time!
Now comes everyone’s favorite part—adding in glorious layers upon layers upon layers of scrumptious flavor via cheddar cheese!! Lower down heat level even further allowing us ample room without risk scorching anything else along way…we’ll begin working small handfuls at time whisking diligently until fully melted each addition brings forth utter deliciousness transforming simple white saucy concoction suddenly bursting alive vibrantly colored richness ready embrace delicate nuances expressed through every single bite thereafter!!
Feel free sprinkle grated parmesan during process too…it’ll blend seamlessly enhancing overall profile achieved previously combined ingredients allowing us relish undeniable comfort found within cheesy goodness created right here today!! Taste test frequently adjusting seasoning along way adding pinch extra salt if desired until perfection reached ultimately fulfilling every craving imaginable!!
I hope you’re feeling as excited as I am because soon enough you’ll be serving up bowls filled with beautifully coated cheesy broccoli ready please everyone gathered round table sharing laughter love memories made lasting moments forever etched hearts spirits alike!!
Mastering the Art of Cheesy Broccoli: A Comforting Classic
Ah, the moment has finally arrived! We’re diving deep into the heart of this delightful Cheesy Broccoli recipe, a dish that truly embodies comfort and satisfaction with every bite. As I mentioned before, broccoli is such an underrated vegetable; it’s not only packed with vitamins but also has a delightful texture that holds up beautifully under a creamy cheese sauce. Now, let’s continue our journey through this recipe, ensuring each step is infused with love and excitement.
Step 5: Creating the Velvety Cheese Sauce
Once your broccoli is perfectly steamed—bright green and crisp-tender—it’s time to focus on creating that luscious cheese sauce that will drape over your vegetables like a warm embrace. In your previously used saucepan (which should be nice and warm after steaming), melt 2 tablespoons of butter over medium-low heat. This step is crucial; you want to ensure the butter melts gently without browning, as we’re about to make a roux—a classic technique in cooking that acts as a thickening agent for sauces. Once the butter is melted, sprinkle in 2 tablespoons of flour while continuously whisking. This whisking motion is vital because it prevents lumps from forming and allows the flour to cook evenly; you’re aiming for a golden hue here, which usually takes about one full minute.
Now comes the fun part! Slowly pour in 1 cup of milk while whisking constantly—this action creates a smooth base for your cheese sauce. I recommend using 1% milk for a slightly creamier texture without feeling too heavy. As you pour the milk in, you might notice that at first it seems like it won’t blend well; don’t worry! Keep whisking vigorously until everything comes together into a beautiful mixture. Let this simmer for about three minutes while continuing to whisk; during this time, you’ll notice it thickens ever so slightly—a perfect stage for adding those delightful cheeses.
Step 6: The Cheesy Transformation
With your base now ready and bubbling gently, it’s time to introduce the stars of our show: the cheeses! Start by reducing your heat to low—this is absolutely paramount because we don’t want our sauce to boil anymore; boiling can cause separation and ruin the silky texture we’re aiming for. Add shredded cheddar cheese gradually—about a small handful at a time—whisking thoroughly between each addition until it’s completely melted before adding more. This slow incorporation allows each bit of cheese to meld beautifully with the sauce, creating that gooey consistency we all crave.
As you stir in the cheese, take a moment to savor the intoxicating aroma wafting from your saucepan—it’s truly something special! I often find myself getting lost in this moment—the rich scent mingling with memories of family dinners and laughter around the table. Don’t forget to add 2 tablespoons of grated Parmesan cheese along with a pinch of kosher salt and optional spices like ground mustard or cayenne if you’re feeling adventurous! These ingredients will elevate your cheese sauce from ordinary to extraordinary, adding depth and complexity that will tantalize your taste buds.
Step 7: The Perfect Balance
After whisking in all of your glorious cheeses and seasoning them just right (trust me on tasting at this stage!), it’s time to bring everything together in harmony. If you’ve taken my advice on seasoning earlier, you should have an utterly intoxicating cheese sauce that isn’t overly salty yet packs enough flavor to enhance our beloved broccoli without overpowering it. If you feel like it needs just a touch more salt, go ahead and adjust it—this recipe is all about making it suit your personal taste preferences.
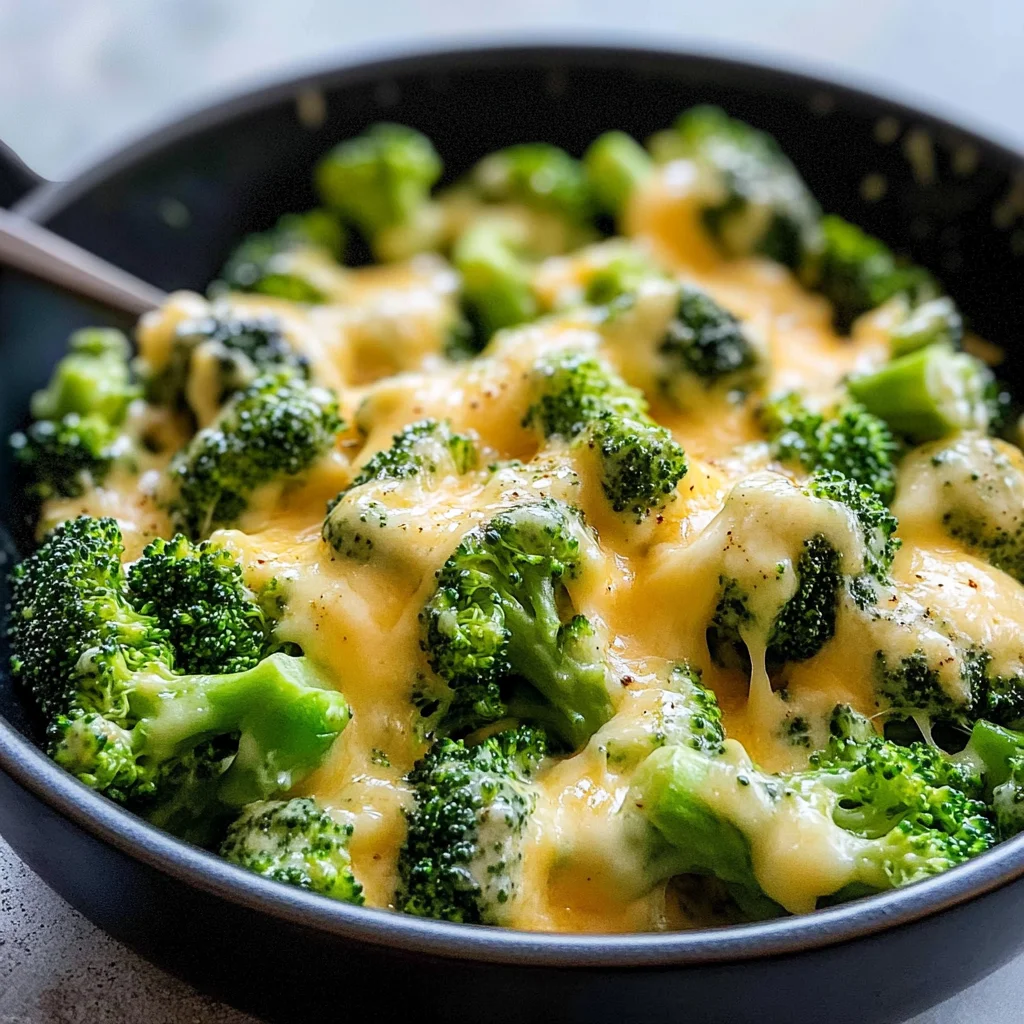
Now it’s time for one last stirring session! Gently introduce your warm broccoli back into the saucepan if you’re mixing them together directly or drizzle that heavenly cheese sauce over individual portions if you’d prefer to keep them separate for presentation purposes (because let’s face it, we eat with our eyes first!). If you’ve chosen to mix them together, use a spatula or large spoon and fold gently; you want each floret kissed by that cheesy goodness without breaking them apart too much. The visual appeal here is just as important—the vibrant green of broccoli against that rich yellow-orange cheese sauce creates such a beautiful contrast on any plate.
Step 8: Serving Up Your Cheesy Delight
Now that everything is beautifully combined or plated separately (whichever style you prefer), it’s time for what I consider one of the most exciting moments—the actual serving! I always recommend serving Cheesy Broccoli warm because that’s when it’s most delicious—the flavors are vibrant, and every bite feels like an indulgence. You can even garnish with an extra sprinkle of grated Parmesan or freshly cracked black pepper for an added touch of sophistication if you’re feeling fancy!
If you’re preparing this dish ahead of time for guests or meal prep, I promise you can reheat leftovers wonderfully by placing them back on low heat on the stovetop while stirring occasionally until warmed through again—just be careful not to overcook it! Remember: patience pays off in cooking. So whether you’re enjoying this dish as part of a cozy weeknight dinner or as a delightful side at gatherings with friends and family, I assure you this Cheesy Broccoli will leave everyone asking for seconds—or maybe even thirds!
Final Touches: Elevating Your Experience
As we wrap up our culinary journey today, I hope you’ve felt my passion resonate through each step we’ve taken together. This Cheesy Broccoli isn’t just another side dish; it’s an invitation to create lasting memories around your table. The joy derived from cooking—and sharing—these comforting recipes is truly unparalleled. So gather those loved ones around—you’ve created something special today!
Don’t hesitate to experiment with different types of cheeses or add-ins like sautéed garlic or roasted red peppers next time—you’ll find countless ways to make this dish uniquely yours! Enjoy every bite my friends, knowing you’ve not only made something delicious but also filled hearts along with bellies today! Happy cooking!
Storage and Enjoyment Tips for Your Cheesy Broccoli
Now that you’ve crafted this mouthwatering cheesy broccoli, it’s time to revel in the joy of serving it! Picture yourself gathering around the table with family or friends, sharing stories while delighting in each creamy bite. This dish is not just a side; it’s a celebration of simple yet profound flavors that bring people together. But what happens if you have some leftover? Fear not! I have some fantastic tips for storing this delectable creation so that you can savor it again and again.
Storing Leftover Cheesy Broccoli
To preserve your cheesy broccoli goodness, you’ll want to reach for an airtight container; glass or BPA-free plastic works beautifully. Once cooled to room temperature, transfer the broccoli into your chosen container and store it in the refrigerator. You can expect it to stay fresh for about 3-4 days, although I must say, it’s hard to resist devouring it all in one sitting! To maintain its delightful texture and flavor, consider placing a slice of bread in the container. This little trick absorbs excess moisture and keeps your cheesy broccoli from becoming too soggy. While reheating, I suggest gently warming it up on the stovetop over low heat or using the microwave in short intervals, stirring gently until warmed through. Trust me, even after a day or two in the fridge, this cheesy delight retains its deliciousness; it’s a perfect way to brighten up your lunch!
Freezing Cheesy Broccoli for Later
If you’re looking to extend the life of this cheesy delight even further, freezing is a fantastic option! Allow your cheesy broccoli to cool completely before portioning it into freezer-safe bags or containers. Be sure to squeeze out as much air as possible before sealing them up tight—this will keep freezer burn at bay and preserve those delightful flavors. When stored properly, your cheesy broccoli can last in the freezer for up to three months. When you’re ready to enjoy it again, simply thaw overnight in the refrigerator or defrost in the microwave. Then reheat on the stovetop or bake in the oven until heated through and bubbling with that unmistakable cheesy allure. The convenience of having such an indulgent side dish at your fingertips is simply irresistible!
Cheesy Broccoli

Indulge in the warmth and comfort of this Cheesy Broccoli recipe—a delightful blend of fresh broccoli florets enveloped in a creamy, homemade cheese sauce. This dish is not just a side; it’s a culinary experience that brings family and friends together around the table. Featuring sharp cheddar for depth and a hint of Parmesan for umami goodness, every bite is a satisfying combination of nutrition and indulgence. Perfect for weeknight dinners or special gatherings, this kid-friendly recipe is both quick to prepare and full of flavor, making it an instant favorite among all ages.
- Prep Time: 10 minutes
- Cook Time: 15 minutes
- Total Time: 25 minutes
- Yield: Serves 4
- Category: Side Dish
- Method: Steaming
- Cuisine: American
Ingredients
- 1 pound broccoli florets
- 2 tablespoons butter
- 2 tablespoons flour
- 1 cup milk (1%)
- 2/3 cup shredded sharp cheddar cheese
- 2 tablespoons grated Parmesan cheese
- Salt to taste
- Optional: pinch ground mustard and cayenne
Instructions
- Steam the broccoli in a large saucepan with about one cup of water until bright green and crisp-tender (about 4-5 minutes). Drain and set aside.
- In the same saucepan, melt butter over medium-low heat. Whisk in the flour until golden, about one minute.
- Gradually add the milk while whisking continuously until thickened (about 3 minutes).
- Stir in the cheddar and Parmesan cheeses until fully melted and smooth.
- Add salt to taste along with optional spices before mixing in the steamed broccoli.
- Serve warm as a comforting side dish.
Nutrition
- Serving Size: 1 cup (240g)
- Calories: 190
- Sugar: 3g
- Sodium: 330mg
- Fat: 12g
- Saturated Fat: 7g
- Unsaturated Fat: 4g
- Trans Fat: 0g
- Carbohydrates: 15g
- Fiber: 4g
- Protein: 9g
- Cholesterol: 30mg