Perfect Coconut Cake
There’s something truly magical about baking that transcends mere sustenance; it’s an experience that wraps you in warmth, nostalgia, and a sense of accomplishment. When I think of the Perfect Coconut Cake, I’m transported back to sun-drenched afternoons spent in my grandmother’s kitchen, where the air was perfumed with the sweet aroma of coconut and vanilla. This cake is more than just food; it’s a celebration of life’s simple pleasures, a symbol of love, and the perfect centerpiece for any gathering. The way the light bounces off its fluffy layers and the rich, creamy frosting beckons you to take a bite—it’s utterly intoxicating. Trust me when I say this recipe will not only satisfy your sweet tooth but also create lasting memories with every slice.
And let’s be honest—who can resist the allure of tender cake layered with luscious coconut frosting? The texture is insane; each forkful melts in your mouth like a soft cloud kissed by tropical breezes. Whether you’re celebrating a birthday, hosting a brunch, or simply indulging after a long week, this Perfect Coconut Cake has that special something that elevates every occasion. It bridges tradition with innovation, as we take classic flavors and transform them into something utterly extraordinary. So grab your apron and let’s dive into this delightful journey together—I promise you’ll want to share this cake with everyone you know!
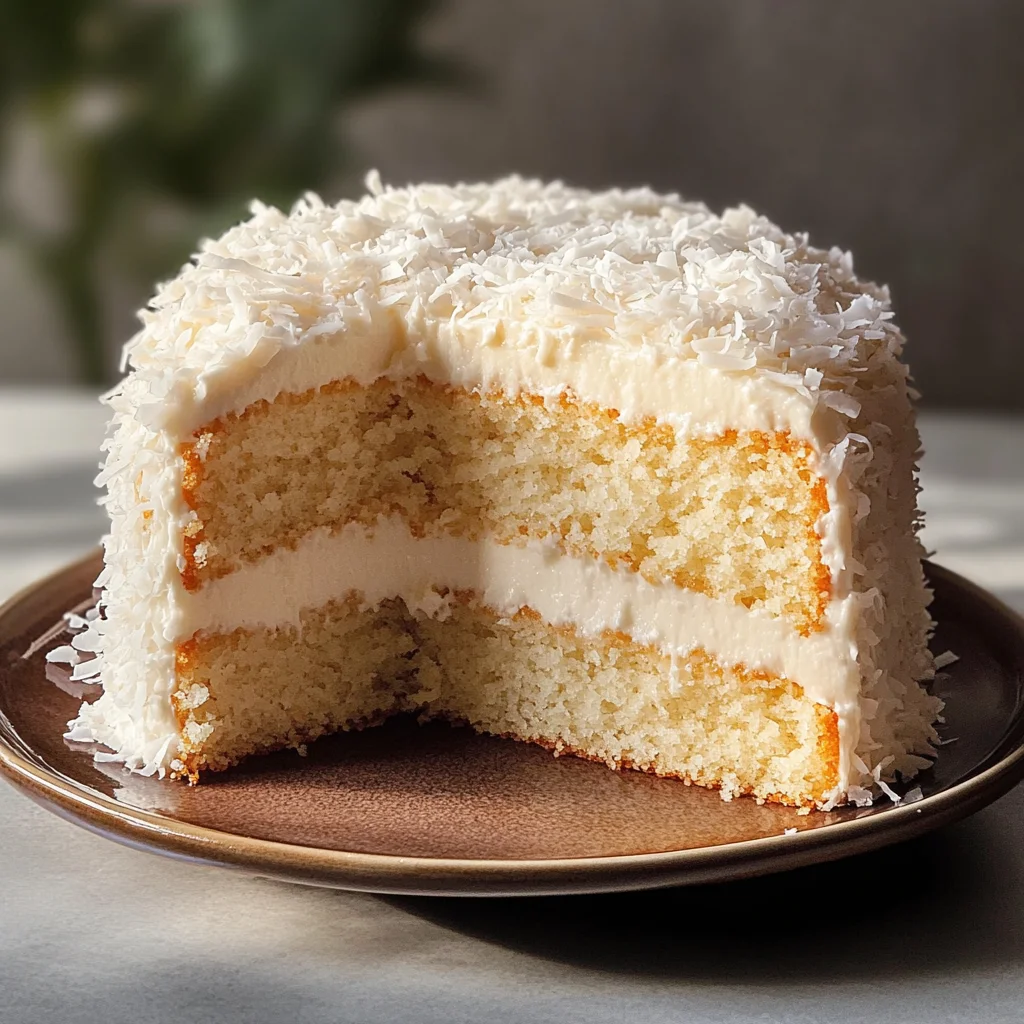
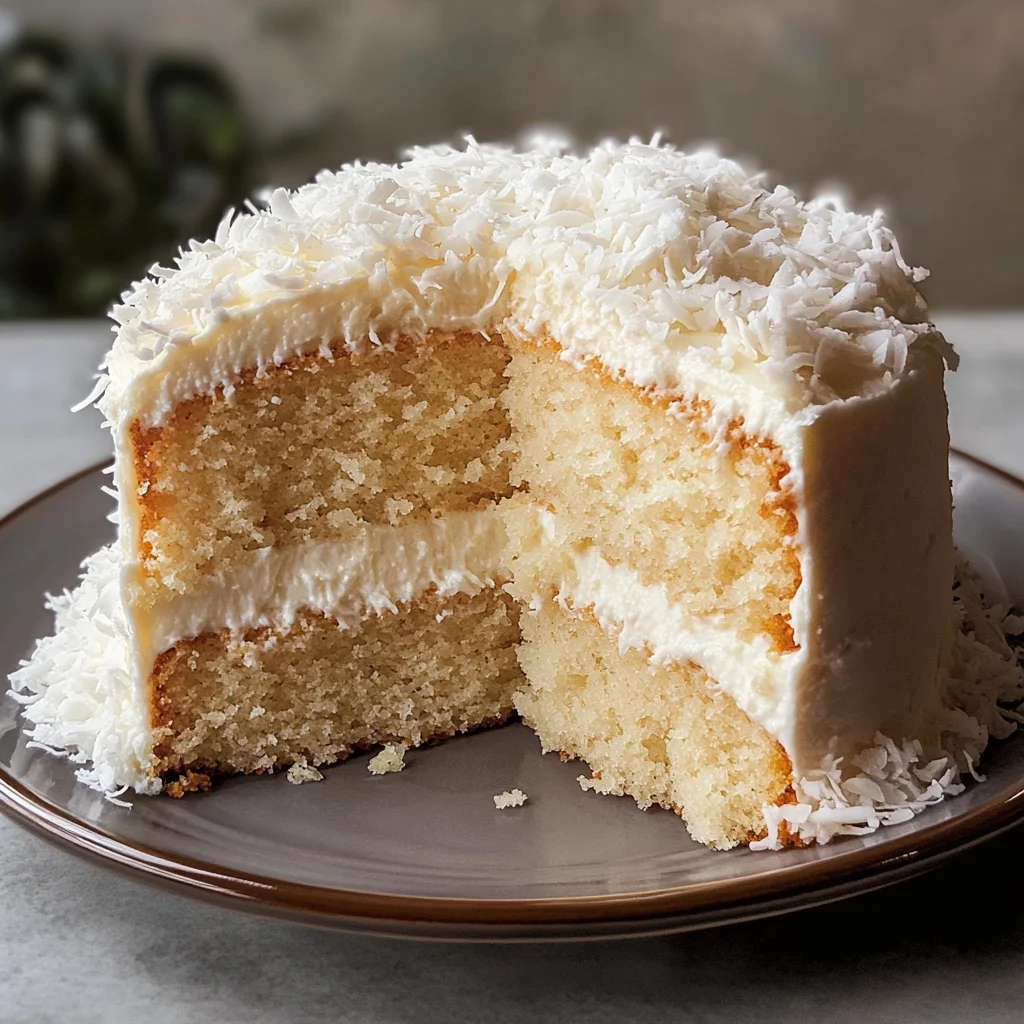
Perfect Coconut Cake: A Slice of Paradise
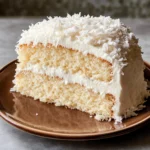
This perfect coconut cake is insanely moist and tender! You will love this recipe because it is soft and fluffy and full of coconut flavor.
Ingredients:
Embarking on this culinary journey starts with gathering our key players—each ingredient plays an essential role in crafting this delightful masterpiece. Let’s take a closer look at what we’ll need to create this heavenly cake.
- 3 cups cake flour, measured, then sifted. Cake flour is fundamental for achieving that light, airy texture we crave in our Perfect Coconut Cake. It has a lower protein content compared to all-purpose flour, which means less gluten formation—allowing for a softer crumb. Sifting isn’t just for aesthetics; it aerates the flour and ensures there are no clumps, which could lead to uneven baking. Look for high-quality brands for the best results.
- 1 teaspoon baking powder. This leavening agent is crucial because it helps our cake rise beautifully as it bakes. Baking powder releases carbon dioxide when mixed with moisture and heat, creating those lovely little air pockets that give our cake its characteristic fluffiness. Always check the expiration date on your baking powder; if it’s old or expired, your cake may not rise as expected.
- 1/2 teaspoon baking soda. While baking powder does its job well alone, adding baking soda maximizes leavening power by reacting with acidic ingredients (in this case, sour cream and buttermilk). This reaction contributes to an even lighter texture while balancing out flavors! Ensure it’s fresh for optimal results; old baking soda can lead to disappointing outcomes.
- 1/2 teaspoon kosher salt. Salt is often overlooked in desserts but trust me—this ingredient enhances flavors and balances sweetness beautifully! Kosher salt dissolves easily into batters without leaving gritty remnants behind. Using kosher salt also allows you more control over seasoning compared to table salt due to its larger grain size.
- 1 cup unsalted butter, room temperature. Butter is the heart of our cake’s flavor profile! Using unsalted butter allows us to control how much salt goes into our batter while providing rich creaminess that makes every bite melt-in-your-mouth irresistible. Make sure it’s softened enough so it creams easily with sugar—this process creates tiny air bubbles that contribute significantly to the cake’s rise.
- 1 3/4 cups granulated sugar. Sugar does much more than just sweeten; it caramelizes during baking, creating depth of flavor while also contributing moisture through hygroscopic properties (it attracts water). The result? A perfectly moist cake! For best results, opt for fine granulated sugar—it dissolves better when creamed with butter.
- 2 large eggs & 3 large egg whites, both at room temperature. Eggs provide structure and richness—they’re vital for binding everything together while contributing to our cake’s tenderness! Room temperature eggs mix more uniformly into batters than cold ones do; they help emulsify fats evenly throughout the mixture.
- 1/2 cup full-fat sour cream, room temperature. Sour cream adds moisture along with a slight tanginess that beautifully balances sweetness! Opting for full-fat ensures richness while enhancing flavor complexity—a non-negotiable step if you ask me!
- 2 teaspoons pure vanilla extract & 1 teaspoon coconut extract each add layers of aromatic depth! Vanilla brings warmth and familiarity while coconut extract amplifies that tropical flair we adore! Always use pure extracts rather than imitation; quality makes all the difference here—it elevates your entire dessert!
- 1 cup buttermilk at room temperature provides tanginess akin to sour cream but also keeps our batter hydrating without being overly heavy thanks to its lower fat content compared to regular milk! Plus—don’t skip bringing it up to room temp beforehand so it incorporates smoothly!
- 10 ounces sweetened shredded coconut gives us both texture and flavor bomb elements! Sweetened versions are preferred because they enhance overall sweetness levels without needing additional sugars elsewhere in recipes! Be sure to choose high-quality brands without additives—this will make every bite worth savoring!
The frosting requires:
– 6 large egg whites & 1 1/2 cups granulated sugar, being whipped together until glossy peaks form creates an ethereal meringue-like frosting that’s lightly sweet yet firm enough for decorating purposes!
- 1 teaspoon salt enhances overall taste profiles once again—in balance lies perfection!
- 1 1/2 cups butter (3/4 pound), room temperature, ensures smoothness alongside richness when combined seamlessly during mixing stages!
- 1/4 cup coconut milk powder, sifted through fine mesh strainers prevents clumping within mixtures allowing smoother blending phases during final assembly processes ensuring nobody ends up biting down on lumps unexpectedly later down line!
Equipment You’ll Need:
Having the right tools at your disposal can make all the difference between an enjoyable baking experience and one filled with frustration! These essential partners will set you up for success as we create something truly wonderful together—the Perfect Coconut Cake.
- Mixing Bowls – A sturdy set of mixing bowls in various sizes will serve as your primary workhorses throughout this process! Utilize larger ones when combining dry ingredients or whisking egg whites—these pieces allow ample space so everything blends smoothly without overflow messes occurring!
- Stand Mixer (with paddle attachment) – If you’ve ever tried mixing batter by hand after creaming butter & sugar together—you know how labor-intensive that task becomes quickly! A stand mixer takes care of heavy lifting while ensuring even blending occurs effortlessly—a true lifesaver when preparing complex cakes like ours here!
- Sifter or Fine Mesh Strainer – Essential for aerating dry ingredients before incorporation steps commence—this tool helps prevent lumps forming within mixtures ensuring seamless textures remain intact throughout final product phases ahead!
- 8-inch Round Cake Pans (x3) – Evenly sized pans ensure uniform bake times across all layers resulting in stunning presentation upon assembly stages later down line! Opting for non-stick varieties simplifies release from pan surfaces afterward too making cleanup easier post-baking sessions conclude!
Preparing the Perfect Coconut Cake
Step 1: Preheat Your Oven & Prepare Your Pans
Start by preheating your oven to 350°F (175°C). This step is crucial because starting your cakes in a hot oven allows them to rise properly right from the get-go—ensuring even cooking throughout their bake time! While waiting on those temperatures rising up nicely inside ovens around kitchens everywhere—it’s time we tackle preparing our pans too so everything runs smoothly later on during assembly phases ahead: Take three 8-inch round pans out now; butter generously along their insides followed by lining bottoms using parchment paper cutouts precisely shaped accordingly before applying another layer of buttery goodness atop those papers too followed finally by dusting each pan lightly using flour as protective coating against sticking issues occurring once baked goods cool post-baking sessions wrap up later down road ahead here too…
Step 2: Mix Dry Ingredients
In a medium-sized bowl fitted snugly into counters nearby—we shall whisk together our previously sifted cake flour alongside both baking powder & baking soda along with kosher salt until evenly distributed throughout entire mixture making sure no lumps linger behind either… Remember: Sifting matters greatly here since clumps left unchecked could lead towards uneven textures developing once batters hit ovens eventually leading towards disappointment instead of joyful triumphs achieved after putting in hard work efforts involved throughout these processes ahead today…
Step 3: Cream Butter & Sugar
Now let’s move onto creaming that beautiful unsalted butter along with granulated sugar inside bowl attached firmly onto stand mixers fitted appropriately using paddle attachments attached securely underneath… Setting speeds medium-high enables us achieving light fluffy consistency desired within approximately five minutes total time needed here… Don’t forget scraping down sides regularly ensuring nothing gets stuck hiding unnoticed beneath surfaces causing inconsistencies later down line whilst adding eggs one-by-one afterwards too followed closely by incorporating egg whites next thereafter until fully combined—all should come together beautifully despite initial curdled appearance seeming slightly alarming initially… Trust me though—that visual oddity disappears effortlessly shortly thereafter once sour cream vanilla extracts get added soon afterward giving life back into mixtures transforming dullness around us transforming into glorious delights awaiting further steps next onwards ahead…
Step 4: Alternate Adding Flour Mixture & Buttermilk
Lower mixer speed gently before introducing alternating additions containing previously prepared dry flour blend alongside buttermilk arriving gracefully entering stage left… Begin first part dry mixture followed directly afterward by introducing half amount buttermilk finishing finale off strong wrapping things nicely completing cycles ending ultimately returning back around towards last halves remaining portions altogether culminating beautifully achieving goals laid forth initially setting ourselves up perfectly heading towards success soon awaiting us patiently waiting here now…
I can feel your excitement building already as we journey deeper into creating this delightful Perfect Coconut Cake together! Each step brings us closer to something truly remarkable—the kind of dessert that brings smiles around tables shared among friends or family gatherings alike celebrating life itself through delicious bites enjoyed warmed hearts surrounding us always reminding each other why cooking matters most amidst chaos outside world beyond kitchens walls surrounding beloved spaces filled laughter warmth joy found tucked away safely behind closed doors always… Now let’s keep moving forward crafting magic awaiting us still yet ahead together!
Step 5: Mixing it All Together – The Art of Incorporation
Now that we’ve prepared our flour mixture and creamed the butter with sugar to a delightful fluffy texture, it’s time to bring everything together into a harmonious batter. With your stand mixer still at a low speed, you’ll want to add the flour mixture and buttermilk in alternating additions. This technique is known as “alternating dry and wet ingredients,” and it’s absolutely paramount for achieving that perfect coconut cake texture we’re after. Starting with the flour ensures that the dry ingredients are evenly distributed throughout the batter, while adding buttermilk helps keep everything moist and tender. Trust me on this—this step makes all the difference!
As you gradually mix, begin with about half of your flour mixture, followed by half of the buttermilk, then another round of flour, and finish with the remaining buttermilk. This method allows you to control how much you’re mixing—overmixing can lead to a dense cake rather than the light and airy masterpiece we’re creating. Stop mixing just when there are no more visible streaks of flour; don’t worry if the batter looks slightly lumpy—that’s completely normal! The key here is to be gentle; using a spatula to scrape down the sides of the bowl ensures everything is well incorporated without overdoing it. Remember, we want our batter to breathe!
Step 6: Folding in Coconut – A Tropical Embrace
Oh, this is where things get exciting! Fold in those luscious shreds of sweetened coconut with a spatula—this is not merely an ingredient addition; it’s an invitation to a tropical paradise right in your kitchen! Folding is a gentle technique that helps maintain the airiness of your batter while distributing those coconut flakes evenly throughout. As you do this, picture each fluffy bite bursting with rich coconut flavor—a true delight for anyone who takes a slice!
When folding in your coconut, aim for an even distribution without deflating your batter. You’ll want to use a gentle motion—think of it as cradling the batter rather than mixing violently. This step brings that signature coconut flavor front and center while keeping your cake light and fluffy. If you see some coconut clumps forming as you fold, don’t fret—they’ll spread out beautifully during baking. Once you’re satisfied with how well incorporated everything is, it’s time for the next exciting step!
Step 7: Dividing & Prepping for Baking – Equal Love for Each Layer
With your batter now perfectly infused with that irresistible coconut goodness, it’s time to divide it among our three prepared pans. Use a scale or measuring cup if you’re feeling particularly precise—after all, consistency between layers means even baking! Pour an equal amount into each pan; this attention to detail will ensure that each layer rises beautifully and bakes evenly.
Once you’ve divided your batter, give each pan a gentle tap on the counter—it’s like giving them a little pep talk before they head into the oven! This tap helps eliminate any air bubbles trapped within the batter that could potentially disrupt its rise during baking. Now comes perhaps one of my favorite parts: baking! Slide those pans into your preheated oven and set your timer for about 35-45 minutes. Keep an eye on them because every oven can behave differently; you’ll know they’re ready when they spring back lightly when touched or when a toothpick inserted into the center comes out clean or with just a few moist crumbs attached.
Step 8: Cooling Down – The Critical Resting Phase
Patience is key here as we bring these beauties out of their warm embrace in the oven! Once baked through, allow them to cool in their pans for about 10-15 minutes on a wire rack before carefully turning them onto the rack itself. Why do we cool them like this? Cooling cakes gradually helps maintain their structure; if you try to remove them too soon, they may break apart or become unevenly shaped—a heartbreaking outcome after all our hard work!
As they cool down completely—and I really do mean completely—resist any temptation to frost or slice just yet! Allowing cakes to cool fully not only improves their texture but also makes them easier to manage when it’s time for frosting or stacking layers together later on. Just imagine how utterly intoxicating it will be when you finally cut into these luscious layers, revealing their soft crumb packed with delightful coconut flavor!
Conclusion:
As we reach the end of our journey through crafting this Perfect Coconut Cake together, I feel an overwhelming sense of joy knowing you’re about to create something so utterly extraordinary! This recipe isn’t just about mixing ingredients; it’s about bringing warmth and sweetness into your home and sharing moments with loved ones over slices of fluffy goodness. The combination of soft layers bursting with rich coconut flavor harmonizes beautifully with the creamy frosting—a symphony of flavors that elevates this cake into something truly special.
This recipe is a must-try not just for its enchanting taste but also for the sheer joy it brings while baking! There’s something magical about watching those layers rise perfectly in the oven while your heart races with anticipation. Imagine pulling out those golden cakes and letting them cool as their delicious scent fills every corner of your kitchen—a sensory experience like no other! Whether it’s for birthdays, celebrations, or even a cozy afternoon treat with friends over tea, this coconut cake shines bright on any occasion.
As you prepare to serve this stunning creation, think about pairing a slice with fresh berries drizzled with honey or perhaps alongside a scoop of dairy-free vanilla ice cream—just picture that creamy contrast against the lightness of the cake! For an afternoon pick-me-up, serve it alongside your favorite cup of coffee or tea; there’s nothing quite like savoring each bite as you unwind from your busy day. And don’t forget: if you’re feeling adventurous, topping it off with toasted coconut flakes will not only enhance its appearance but also add another layer of texture and flavor—a true delight!
Feeling adventurous? This recipe is wonderfully adaptable—try swapping out some of that shredded coconut for finely chopped pineapple or even adding a bit of lime zest for an extra tropical twist! You could also experiment by incorporating different extracts or adding chocolate chips if you’re craving something richer. The possibilities are endless! So go forth and bake your Perfect Coconut Cake; I can’t wait for you to share your experiences. Remember—cooking is all about love and creativity—and I know you’ll pour both into every bite!
Perfect Coconut Cake
Indulge in the delightful taste of our Perfect Coconut Cake, a soft and fluffy dessert that captures the essence of tropical bliss. Each slice transports you to sunlit shores with its rich coconut flavor and creamy frosting. This cake is perfect for all occasions—birthdays, brunches, or simply as a sweet treat after a long week. With layers that melt in your mouth and an ethereal meringue-like frosting, this cake isn’t just a dessert; it’s a celebration of life’s sweet moments! Gather your ingredients and prepare to create lasting memories with every slice.
- Prep Time: 30 minutes
- Cook Time: 40 minutes
- Total Time: 1 hour 10 minutes
- Yield: Serves approximately 12 slices 1x
- Category: Dessert
- Method: Baking
- Cuisine: Tropical
Ingredients
- 3 cups cake flour
- 1 teaspoon baking powder
- 1/2 teaspoon baking soda
- 1/2 teaspoon kosher salt
- 1 cup unsalted butter, softened
- 1 3/4 cups granulated sugar
- 2 large eggs
- 3 large egg whites
- 1/2 cup full-fat sour cream
- 2 teaspoons pure vanilla extract
- 1 teaspoon coconut extract
- 1 cup buttermilk
- 10 ounces sweetened shredded coconut
Instructions
- Preheat your oven to 350°F (175°C). Prepare three 8-inch round cake pans by greasing them and lining the bottoms with parchment paper.
- In a medium bowl, whisk together the cake flour, baking powder, baking soda, and kosher salt.
- In a stand mixer, cream the softened butter and granulated sugar until light and fluffy. Add eggs one at a time followed by egg whites until fully combined.
- Mix in sour cream, vanilla extract, and coconut extract. Gradually add the dry mixture alternating with buttermilk until just combined.
- Gently fold in the sweetened shredded coconut.
- Divide the batter evenly among the prepared pans. Tap each pan gently on the counter to release air bubbles.
- Bake for about 35–45 minutes or until a toothpick comes out clean.
- Allow cakes to cool in pans for 10–15 minutes before transferring them to a wire rack to cool completely.
Nutrition
- Serving Size: 1 slice ~90g
- Calories: 350
- Sugar: 34g
- Sodium: 210mg
- Fat: 18g
- Saturated Fat: 11g
- Unsaturated Fat: 6g
- Trans Fat: 0g
- Carbohydrates: 43g
- Fiber: <1g
- Protein: 3g
- Cholesterol: 90mg