Dill Pickle Deviled Eggs
There’s something truly magical about sharing food that transcends mere sustenance; it’s a connection to our past, a celebration of our present, and an embrace of the future. When I think about Dill Pickle Deviled Eggs, I am transported back to countless family gatherings where laughter filled the air, and the vibrant colors of our platters mirrored the warmth in our hearts. Each bite is not just a flavor explosion but an experience steeped in nostalgia—a delightful juxtaposition of creamy richness and zesty tang that dances on your palate. The subtle crunch of dill pickles mingling with the smooth texture of egg yolks creates a symphony of flavors that tells a story as old as time but feels refreshingly new every single time.
I remember the first time I made these deviled eggs; they were for a friend’s picnic, and I was a bundle of nerves. I wanted them to be perfect, not just for my taste buds but for everyone who would partake in this little culinary adventure. As I sat there mixing the ingredients together, it wasn’t just about following a recipe; it was about creating something that would evoke smiles and spark conversations. Dill Pickle Deviled Eggs are more than an appetizer—they’re a bridge between generations, igniting fond memories while creating new ones. Perfect for potlucks, picnics, or even a simple Sunday brunch at home, these little bites are sure to impress and satisfy.
Dill Pickle Deviled Eggs: A Taste That Transcends Time
Let me take you on this delightful journey of making Dill Pickle Deviled Eggs—simple yet utterly extraordinary. These little beauties are not only incredibly easy to whip up but also pack a punch of flavor that will leave everyone asking for seconds. Trust me when I say that once you try this recipe, you’ll be hooked! With each creamy bite infused with the tangy essence of pickles and sprinkled with a hint of smoked paprika, these eggs will quickly become your go-to appetizer.
Ingredients:
Embarking on this culinary journey requires gathering some essential ingredients that come together to create pure bliss on your plate. Each component plays its part beautifully—from the humble egg to zesty dill pickles—bringing depth and richness to our dish.
-
12 large eggs, hard boiled. This is the foundation of our deviled eggs! Select fresh eggs for the best results; they should have firm whites and rich yolks. Hard boiling can be tricky—make sure you don’t rush! The perfect hard-boiled egg has a tender white and a bright yellow yolk without any greenish tinge around it; this indicates overcooking. Once they’re cooled down after boiling, peeling them gently will help maintain their pristine appearance.
-
1/3 cup mayonnaise. This ingredient adds creaminess and richness that binds all the flavors together beautifully. When choosing mayonnaise, opt for high-quality brands or even homemade if you’re feeling adventurous! The right mayo will elevate your filling from good to extraordinary; look for one made with real ingredients—this is absolutely paramount for achieving that coveted silky texture in your filling.
-
2 tablespoons mustard. Mustard brings not just flavor but also acidity which balances out the richness from the mayonnaise and eggs perfectly. You can use yellow mustard for its classic tanginess or Dijon for something with more depth—both work wonderfully! Adjust according to your taste preferences; after all, cooking should be an expression of yourself!
-
1/4 cup finely diced dill pickles. Here’s where we truly shine! The crispness and tartness from dill pickles introduce an exciting crunch to each mouthful while adding that signature flavor we all adore in deviled eggs. Choose good-quality dill pickles—preferably those brined naturally—as they will impart an authentic flavor profile that’s simply irresistible.
-
2 teaspoons pickle juice. This seemingly small addition packs a punch! Adding pickle juice deepens the flavor profile without overwhelming it; plus, it helps achieve that creamy consistency we’re aiming for when mixing everything together! Think of it like liquid gold—it brings all elements into harmony.
-
1/4 teaspoon salt. Just enough salt is crucial as it enhances all other flavors without standing out itself—this is where balance comes into play! Use fine sea salt or kosher salt depending on what you have on hand; both will do beautifully!
-
1/4 teaspoon ground pepper. Freshly cracked black pepper adds warmth and complexity to our filling mixture; don’t skimp on this step! Its aromatic qualities complement the tangy punch from the mustard and pickles wonderfully.
-
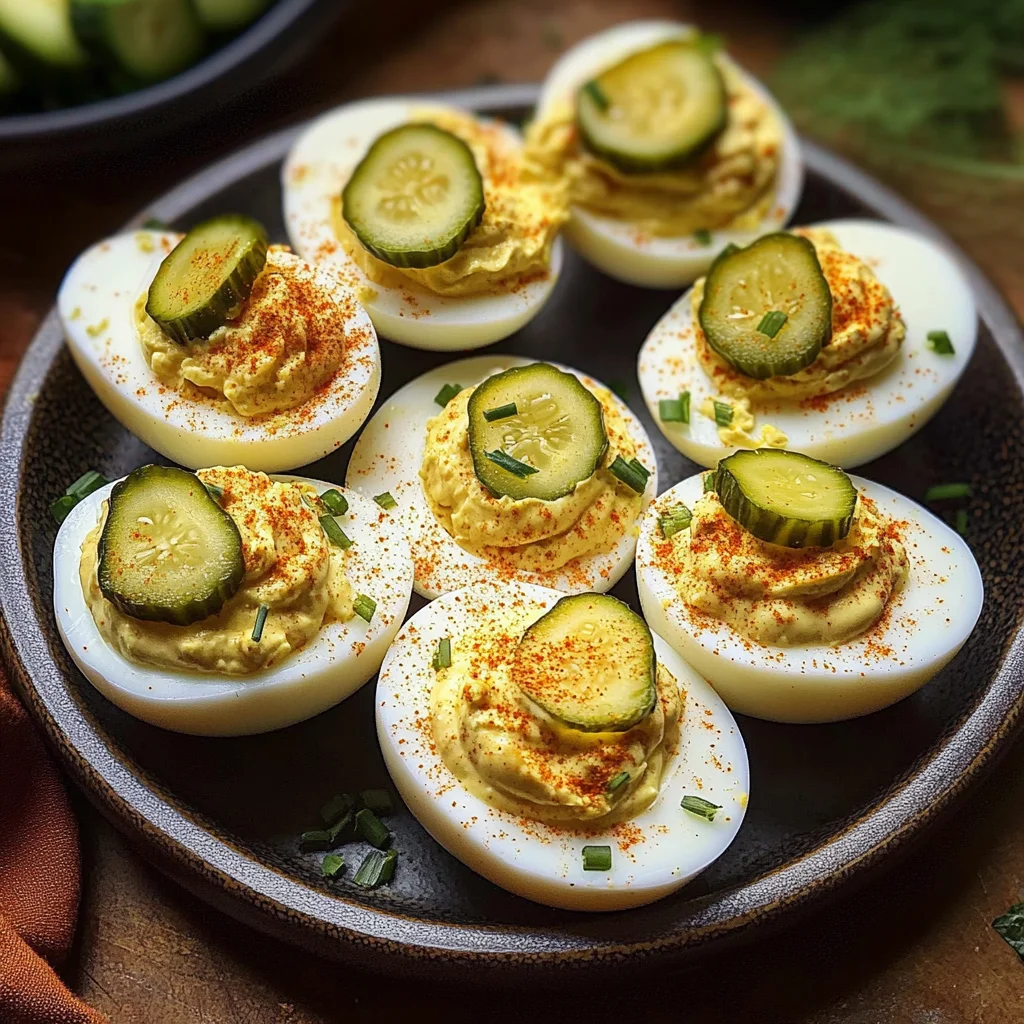
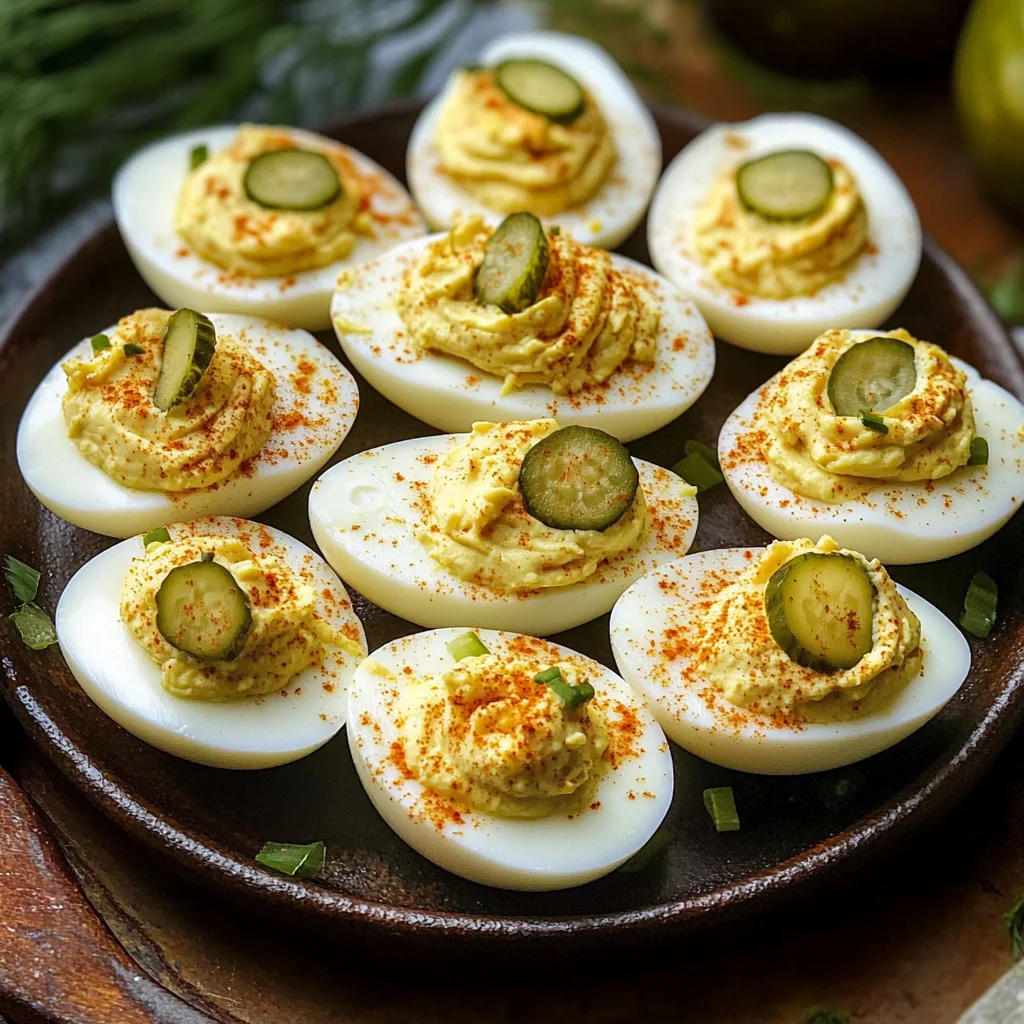
Dash smoked paprika. Finally, we finish off with a sprinkle of smoked paprika right before serving! This aromatic spice introduces subtle smokiness while giving our deviled eggs that beautiful reddish hue—visually stunning as well as delicious!
Equipment You’ll Need:
Having the right tools makes all the difference in creating these delightful Dill Pickle Deviled Eggs smoothly and joyfully! While they may not be ingredients, these essential partners will aid you in crafting something truly wonderful.
-
Medium saucepan (for boiling eggs). A good quality saucepan makes boiling eggs effortless! It should fit all twelve eggs comfortably without overcrowding them so they cook evenly—a non-stick surface helps prevent sticking too!
-
Slotted spoon (for transferring boiled eggs). This handy tool allows you to easily lift the hot eggs from boiling water without splashing yourself—a must-have when working with hot liquids!
-
Mixing bowl (for egg yolks). Choose one large enough to accommodate all your ingredients comfortably; mixing should feel like an enjoyable dance rather than a cramped struggle!
-
Fork or pastry blender (for mashing yolks). A fork works well if you prefer simplicity while mashing yolks into submission—but if you want more control over texture, consider using a pastry blender instead!
-
Piping bag or spoon (for filling egg whites). If you want those gorgeous swirls atop each egg half (and who wouldn’t?), using a piping bag fitted with a wide star tip is ideal—but fear not if you don’t have one handy; simply use a spoon!
Preparing the Dill Pickle Deviled Eggs
Step 1: Boiling Perfection
First things first: let’s get those eggs boiled! Place your large eggs gently into your medium saucepan filled with cold water—enough to cover them by at least an inch or so—to ensure even cooking throughout each egg’s body as they heat up gradually together rather than facing sudden temperature shocks which can lead to cracking shells during boiling! Bring it all up to high heat until bubbling vigorously then lower down slightly so you achieve gentle rolling boil—not too aggressive here or else we risk overcooking those delicate whites resulting in undesirable rubbery textures later on! Set your timer for exactly 9–10 minutes depending upon how well done you like your yolks (9 minutes yields slightly softer centers while 10 gives fully set yolks). Once done cooking remove immediately from heat source then transfer carefully into ice bath prepared beforehand—the sudden chill helps stop cooking process instantly ensuring perfect creamy consistency within yolks without any greenish discoloration forming around edges due excess heat exposure!
Step 2: Peeling Made Easy
After allowing those beauties time cooling off completely now it’s time begin peeling—the most satisfying part if done right! Gently tap each cooled egg against countertop until cracks form everywhere then roll lightly between palms applying slight pressure while doing so helps loosen shell from white underneath effortlessly resulting in smooth surfaces unmarred by stubborn bits stuck clinging tightly onto them otherwise ruining presentation later on when serving guests who’ll surely appreciate gorgeous aesthetic appeal alongside delectable taste profiles too much—trust me when I say this step matters greatly here folks!, So take extra care during peeling process which might require patience at times especially if working with fresher eggs whose shells tend cling tighter than older ones do—but don’t worry practice makes perfect!
Step 3: Mastering The Filling
Next comes my favorite part—the mixing magic begins now!. Slice each peeled egg neatly down center lengthwise then place all yolks into separate bowl awaiting their transformation momentarily—grab either fork or pastry blender depending upon preference here & start breaking them apart until crumbled evenly throughout before adding remaining components one after another beginning with mayonnaise followed closely behind by mustard followed closely again behind by finely diced dill pickles along pickle juice salt & pepper—all contributing distinct layers building harmoniously towards rich creamy filling textures desired outcome ultimately leading towards heavenly bites awaiting us ahead!, Use fork once again mash contents thoroughly until combined properly resembling thick paste like consistency easily piped/fillable later ahead once ready!.
Step 4: Filling Those Whites
Now comes exciting part where we bring everything together visually appealing plate worthy presentation awaits us ahead!. Grab either piping bag fitted wide star tip (if using) fill generously prepared mixture inside gently squeezing through opening at top creating beautiful swirls across each empty white half peeking back at us eagerly awaiting final touches sprinkling dash smoked paprika atop them before serving gives added color contrast alongside hint smokiness elevating overall experience even further—you won’t believe how beautiful they look laid out arrayed like colorful jewels shimmering under sunlight glistening invitingly beckoning guests eager indulge themselves soon enough!.
And there you have it—a journey filled with love, laughter—and oh-so-delicious Dill Pickle Deviled Eggs waiting patiently ready serve family friends alike whenever occasion arises next time around!!
The Art of Assembling Your Dill Pickle Deviled Eggs
Step 5: Filling the Egg Whites with Love
Now that you have your creamy filling ready, it’s time to bring those egg whites back into the spotlight! This step is where the magic truly happens, as you get to fill those little white cups with the delightful yolk mixture. If you’ve opted for a piping bag—trust me, it can elevate your presentation to a whole new level—you should fit it with a wide star tip for that gorgeous, textured finish. If you don’t have a piping bag handy, no worries at all! A simple spoon will do just fine; after all, it’s the taste that counts.
When you’re filling each egg white half, take your time and allow yourself to savor this moment. I like to overfill just a tad because who doesn’t love a generous dollop? As you fill, give each egg a little shake or gentle tap on your work surface to help the filling settle nicely. Visually, you want them to look like they’re bursting with flavor—trust me when I say that presentation can make all the difference when serving. Remember, these Dill Pickle Deviled Eggs are not only about taste but also about inviting people into an experience that looks as good as it tastes!
Step 6: The Finishing Touch
Once all the egg halves are filled and looking absolutely irresistible, it’s time for the grand finale—sprinkling a dash of smoked paprika on top! This step may seem trivial at first glance, but let me assure you, it’s absolutely paramount to elevating your dish both visually and flavor-wise. The smoked paprika adds an exquisite depth and subtle smokiness that complements the tangy pickle perfectly. It’s like giving each egg a kiss from flavor heaven!
The trick here is moderation; you want just enough paprika to enhance without overpowering. So grab a small pinch between your fingers and sprinkle over each filled egg with grace and precision. If you have any fresh dill or even chives lying around in your kitchen garden or fridge, feel free to toss those in as well for a burst of color and freshness! The visual appeal is important because we eat with our eyes first—a beautifully garnished dish sets the stage for what’s to come.
Step 7: Chilling for Perfection
Now comes one of my favorite parts—the chilling phase! After you’ve filled and garnished your Dill Pickle Deviled Eggs, it’s essential to let them rest in the refrigerator for at least 30 minutes before serving them up at your gathering. Why chill? Well, resting allows all those incredible flavors to meld together harmoniously; think of it as letting friends mingle before they hit the dance floor! The cool temperature also helps firm up your creamy filling so it holds its shape beautifully when served.
While waiting might feel torturous—especially if you’re eager to dig in—I promise this step is worth every minute. When flavors combine in this way, they create a truly extraordinary bite that resonates on multiple taste levels. You’ll notice how much more vibrant and cohesive everything tastes after chilling; it’s simply transformative! So resist the temptation to skip this step; set a timer if needed and use those extra moments to prepare any sides or drinks for your gathering.
Step 8: Serving Your Masterpiece
Finally, we arrive at the moment we’ve been anticipating—the unveiling of your exquisitely crafted Dill Pickle Deviled Eggs! As you take them out from their chilly retreat in the refrigerator, take a moment to admire how beautiful they look adorned with their smoky paprika topping. You want to serve these delightful bites cold; nothing beats that refreshing sensation against their rich filling. Arrange them artfully on a platter or even individual mini plates if you’re feeling fancy—presentation matters!
As you’re serving these deviled eggs at potlucks or picnics (or maybe just indulging at home!), make sure they’re placed out of direct sunlight or heat sources because we want them maintained at their ideal temperature—cool and creamy! Trust me; there’s nothing quite like watching friends’ faces light up as they take their first bite into one of these little treasures. Their eyes will widen with delight as they experience that perfect balance of creaminess with zesty dill pickle notes—a symphony of flavors indeed!
Final Touches for an Unforgettable Experience
Step 9: Enjoying Every Bite
Let’s not forget about one final detail that ties everything together: sharing stories while enjoying these delectable Dill Pickle Deviled Eggs with loved ones! Food has this remarkable ability to connect us on deeper levels—it becomes part of our shared experiences and memories. So gather around that table, raise some glasses (of sparkling water or lemonade), and revel in conversations fueled by laughter and joy while savoring these delights.
And remember—the beauty of this recipe lies not only in its deliciousness but also in its versatility! Feel free to tweak proportions based on personal preferences; perhaps add some finely chopped chives or even a hint of garlic powder if you’re feeling adventurous! My friends often ask for variations—they love experimenting with different pickles or spices—and I wholeheartedly encourage it because cooking is all about expressing yourself through food.
So there you have it—a comprehensive guide brimming with warmth and enthusiasm on how to make Dill Pickle Deviled Eggs that are sure to steal the show wherever they go. I hope you’ll carry this recipe forward into your gatherings and share its magic far and wide! Happy cooking!
Storage and Enjoyment Tips for Your Dill Pickle Deviled Eggs
Now that your Dill Pickle Deviled Eggs are all dressed up and ready to impress, let’s talk about how to keep them fresh and delicious for as long as possible. Trust me when I say you’ll want to savor every last bite of these beauties! The creamy filling, infused with that delightful tang from the dill pickles, is something you’ll want to enjoy again and again. So, whether you’re saving some for later or planning a gathering, I’ve got all the tips you need to ensure they stay as scrumptious as the moment they were made.
Storing Leftover Dill Pickle Deviled Eggs
When it comes to storing your leftover Dill Pickle Deviled Eggs, presentation matters just as much as flavor! Place them in an airtight container; this is absolutely paramount because it helps maintain their moisture and keeps those flavors locked in. Ideally, they should be stored in the refrigerator where they will stay fresh for up to four days. Now, if you’re worried about them drying out (which we definitely don’t want), here’s a little pro tip: place a slice of bread in the container with the eggs! This quirky hack absorbs excess moisture while ensuring that the eggs remain perfectly creamy. After a day or two in storage, you might notice that the tastes have mingled together beautifully—it’s like magic! When it’s time to serve again, there’s no need for reheating; just bring them out of the fridge and let them come to room temperature before indulging once more.
Freezing Egg Yolks for Later
If you find yourself with extra egg yolks after making your delectable Dill Pickle Deviled Eggs (though I doubt there will be any leftovers!), freezing them can be a fantastic option. Begin by placing each yolk into an ice cube tray—this way, you can portion them out easily later on. Just be sure to add a tiny pinch of salt or sugar before freezing, as this will help preserve their texture. They can stay frozen for about three months without losing their flavor or quality. When you’re ready to use them, simply thaw overnight in the fridge and mix them into your favorite deviled egg recipe or even sneak them into other dishes like homemade pasta or custards! The convenience of having prepped yolks ready to go saves time on busy days while still allowing you to create something extraordinary.
So whether you’re enjoying these right away or tucking some away for later enjoyment, there’s an undeniable thrill in knowing you’ve got a taste sensation at your fingertips!
Dill Pickle Deviled Eggs

Dill Pickle Deviled Eggs are a delightful twist on the classic appetizer that will tantalize your taste buds and elevate any gathering. These creamy, zesty bites combine hard-boiled eggs with tangy dill pickles, creating a flavor explosion that is both nostalgic and refreshingly modern. Ideal for potlucks, picnics, or brunch, these deviled eggs are easy to prepare and will leave your guests clamoring for more. The addition of smoked paprika adds a subtle smokiness that enhances their visual appeal and taste. Perfect for sharing, these little gems bridge generations and spark joy in every bite.
- Prep Time: 15 minutes
- Cook Time: 10 minutes
- Total Time: 25 minutes
- Yield: Makes 24 egg halves (12 servings) 1x
- Category: Appetizer
- Method: Boiling
- Cuisine: American
Ingredients
- 12 large hard-boiled eggs
- 1/3 cup mayonnaise
- 2 tablespoons mustard (yellow or Dijon)
- 1/4 cup finely diced dill pickles
- 2 teaspoons pickle juice
- 1/4 teaspoon salt
- 1/4 teaspoon ground pepper
- Dash of smoked paprika
Instructions
- To boil the eggs, place them in a medium saucepan covered with cold water. Bring to a boil, then reduce heat to maintain a gentle simmer. Cook for 9-10 minutes.
- Transfer the eggs to an ice bath until cooled. Once cool, gently peel the shells off.
- Slice each egg in half lengthwise and place yolks in a mixing bowl.
- Add mayonnaise, mustard, diced pickles, pickle juice, salt, and pepper to the yolks; mash until smooth.
- Fill each egg white half with the yolk mixture using a piping bag or spoon.
- Sprinkle with smoked paprika before serving.
Nutrition
- Serving Size: 1 egg half (30g)
- Calories: 70
- Sugar: 0g
- Sodium: 100mg
- Fat: 5g
- Saturated Fat: 1g
- Unsaturated Fat: 4g
- Trans Fat: 0g
- Carbohydrates: 1g
- Fiber: 0g
- Protein: 6g
- Cholesterol: 186mg