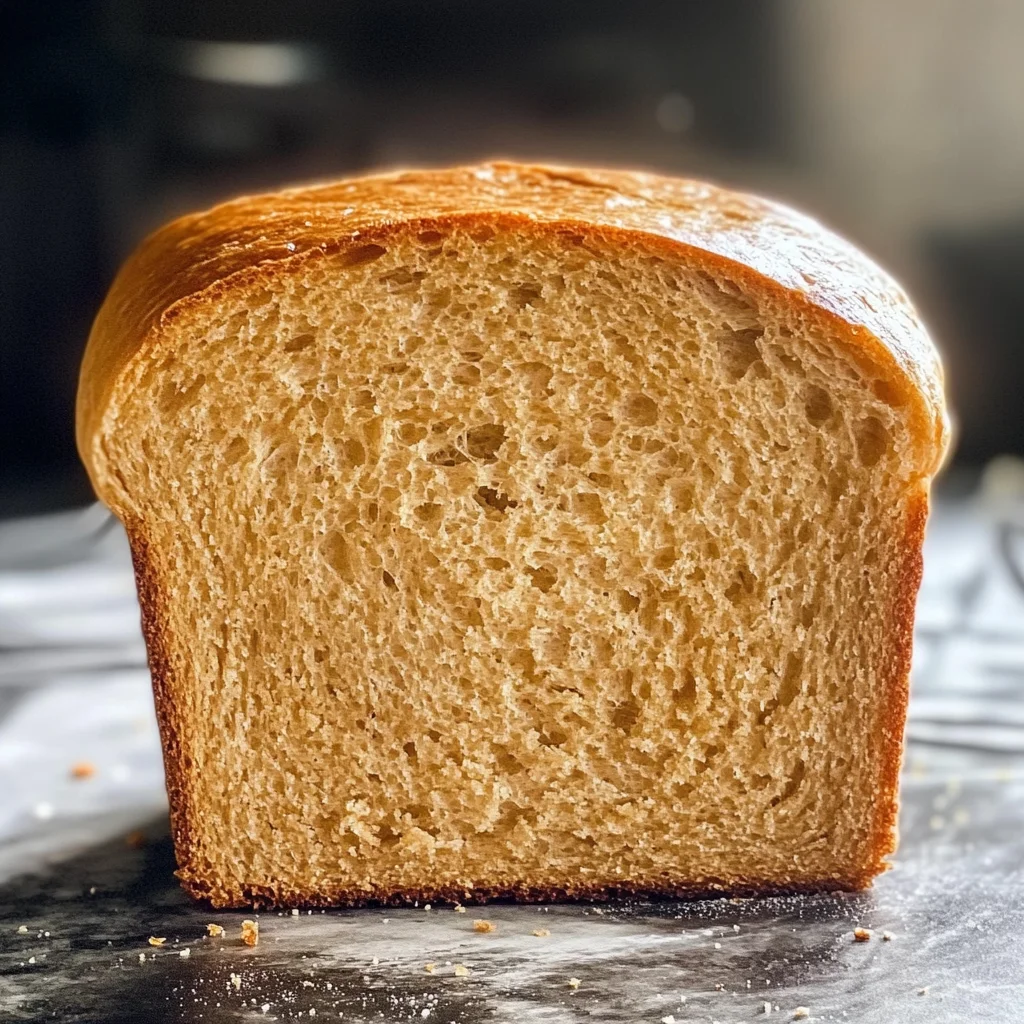
Simple Honey Wheat Bread
There’s something profoundly magical about the aroma of freshly baked bread wafting through your home, isn’t there? The soft, warm embrace of a loaf fresh from the oven is more than just nourishment; it’s a symphony of flavors that dances on your palate and brings comfort to your soul. This Simple Honey Wheat Bread recipe is not just a collection of ingredients; it’s an experience, a connection that weaves together tradition and innovation in every slice. Made with half whole wheat flour and half bread flour, this bread boasts a delightful balance of wholesome goodness and a hint of sweetness from the honey. As you knead the dough, you’ll feel the texture transform under your hands, reminding you that good things take time and care.
I remember the first time I attempted to bake bread on my own. It was a rainy afternoon, and I found myself in my kitchen surrounded by flour-dusted counters and an eager heart. With each step I took—measuring, mixing, kneading—I felt as though I were partaking in a time-honored ritual passed down through generations. The joy of watching the dough rise and double in size was exhilarating, like waiting for a secret to be revealed. Trust me when I say that making your own Simple Honey Wheat Bread is not just about eating; it’s about creating memories and savoring moments that linger long after the last crumb has disappeared.
Simple Honey Wheat Bread: A Heartfelt Classic
Baking this Simple Honey Wheat Bread is like wrapping yourself in a cozy blanket on a chilly evening—it’s warm, comforting, and absolutely satisfying. This recipe features uncomplicated ingredients that you likely have in your pantry right now. And while it may seem intimidating at first glance, I promise you this process is wonderfully rewarding! The fluffy texture combined with the subtly sweet notes of honey makes it perfect for any occasion, whether you’re slathering on homemade jam for breakfast or serving it alongside soup for dinner.
Ingredients:
As we embark on this culinary journey together, let’s delve into each ingredient’s role in crafting our lovely loaves of honey wheat bread. Each component brings something unique to the table (quite literally!), contributing to both flavor and texture.
- 2 cups warm milk (about 110-115 degrees). Milk is like liquid gold in baking; it adds moisture and richness to our bread while helping create a tender crumb. The warmth of the milk activates the yeast more effectively than cold milk would, so be sure not to skip this step! If you’re short on milk or want to switch things up for dietary preferences, feel free to use plant-based milk; just ensure it’s unsweetened.
- 1-1/2 Tbsp instant yeast. Yeast is our little magic worker here! Instant yeast can be mixed directly into dry ingredients without needing proofing first, which saves time and effort—who doesn’t love that? It’s crucial because it’s what helps our dough rise beautifully into those fluffy loaves we crave! Always check your yeast’s expiration date before using; old yeast can lead to disappointing results.
- 1 tsp sugar. This tiny amount serves as food for our yeast during fermentation; it helps activate those bubbly organisms so they can do their job effectively! While it may seem small compared to other ingredients, sugar plays an important role in developing flavor and texture too—just enough sweetness without overpowering our honey!
- 1/2 cup warm water. Water also aids in activating the yeast but helps balance out the milk’s richness. Using warm water ensures everything mixes well together without shocking our precious yeast. If you ever find yourself short on milk or prefer less dairy overall, substituting with additional warm water works wonders too!
- 2-1/2 cups whole wheat flour. Ahh, whole wheat flour—the heart of our recipe! It provides not only essential nutrients but also adds depth of flavor that white flour simply cannot match. Whole wheat flour absorbs more liquid than all-purpose flour due to its higher fiber content, so make sure to adjust as needed based on how your dough feels during mixing.
- 3 to 3-1/2 cups bread flour or all-purpose flour (start with 3 and add more as needed). This ingredient lends structure to our loaves while providing strength for rising—and trust me when I say that we want strong loaves here! Depending on humidity levels or how packed your flour might be in its container, you might need more or less than indicated here; always start with less and add gradually until that ideal dough consistency is achieved.
- 3 Tbsp shortening (I like butter flavored). Shortening contributes tenderness by coating some gluten strands while allowing others to develop properly during kneading—this balance creates that light texture we’re aiming for! If you prefer a dairy-free option or aren’t keen on shortening’s mouthfeel, feel free to use coconut oil instead—it works beautifully!
- 1/4 cup honey. Here comes the star ingredient—the honey! Not only does it provide natural sweetness that enhances flavors throughout but also acts as a humectant (which means it retains moisture). That means your bread will stay soft longer than if made with sugar alone! When selecting honey, look for raw varieties if possible—they tend to pack more flavor punch.
- 1 Tbsp salt. Salt isn’t just there for seasoning; it’s essential for controlling fermentation rates by slowing down yeast activity slightly while enhancing overall flavor profiles within baked goods—we want all those flavors singing together harmoniously! Always use fine-grained salt rather than coarse since it dissolves better during mixing.
- Egg wash: 1 egg whisked with 1 Tbsp water. An egg wash gives our loaves that beautiful golden-brown finish when baking—a visual treat that beckons people closer before they even taste one bite! If you’re looking for an egg-free alternative here due to dietary restrictions or preferences? Simply brush with almond milk instead!
Equipment You’ll Need:
Having the right tools at hand transforms cooking (and baking!) from mere chores into joyous experiences filled with creativity and passion! While these items aren’t ingredients, they are essential partners in creating something wonderful—let’s explore what you’ll need:
- Mixing bowl – A sturdy bowl provides ample space for mixing ingredients without risk of spilling over—that’s crucial when you’re working with wet doughs like ours! Opt for glass or stainless steel models since they’re less reactive than plastic options.
- Dough hook attachment – If you’ve got access to a stand mixer (an absolute game-changer!), having this specialized attachment makes kneading effortless compared to doing it by hand—trust me when I say your arms will thank you later!
- Measuring cups & spoons – Precision matters tremendously when baking; accurate measurements ensure consistent results every time—after all who wants guesswork ruining their hard-earned efforts?
- Pastry mat or clean countertop – Flour dusted surfaces become playgrounds where magic happens as we shape our dough into perfect loaves—using these prevents sticky messes from forming while providing traction for rolling out!
Preparing the Simple Honey Wheat Bread
Step 1: Activate Your Yeast
To begin this delightful journey towards homemade heaven known as Simple Honey Wheat Bread, we must activate our yeast—a vital step that sets everything else into motion! Start by pouring those two cups of warm milk into your mixer bowl before sprinkling over one-and-a-half tablespoons of instant yeast along with one teaspoon of sugar—it’ll help coax out all those bubbles from sleepy organisms lying dormant within each granule! Give everything a gentle stir then let it sit undisturbed for about five minutes; if done correctly, you’ll notice tiny bubbles forming atop the surface—a sure sign that fermentation has begun! This foamy layer indicates we’re ready to move forward confidently knowing there’s life brewing beneath us!
Step 2: Mix It All Together
Once you’ve confirmed successful activation by witnessing frothy bubbles dancing atop your mixture like little joy-filled fairies celebrating their newfound purpose—it’s time we embrace harmony between wet and dry elements together! Add half-a-cup of warm water alongside two-and-a-half cups worth of whole wheat flour plus three cups initially reserved from either type: all-purpose or bread flour—as well as three tablespoons worth shortening followed closely behind by one-quarter cup luscious honey drizzled gently over top… Oh boy does this sound divine already?! Finally sprinkle in one tablespoon salt before turning on low speed with your mixer fitted snugly using its trusty dough hook attachment—I’d recommend scraping down sides periodically so no rogue flour escapes unnoticed until fully incorporated into cohesive ball forms emerge after about two minutes time spent kneading away gently!
Step 3: Knead For Perfection
Now we’re entering an important phase known as kneading—which involves stretching gluten strands formed thus far whilst simultaneously allowing them coherence through gentle handling techniques employed throughout process itself too… Don’t rush through this step—patience pays off immensely here friends because achieving desired consistency takes practice—but trust me when I say feeling those changes occur under fingertips brings immense joy unlike anything else experienced prior… Aim towards obtaining soft yet tacky textures reminiscent freshly picked fruit juices upon touch—not sticky clumps clinging stubbornly onto fingers mind you though either way don’t hesitate adding small amounts extra flour until ideal state reached comfortably without fear losing gracefulness gained thus far… Continue allowing mixer work its magic kneading away another two minutes once satisfied about right consistency achieved!
Step 4: Let It Rise
With perfectly kneaded dough safely cradled within bowl now ready board stage next act—a rising adventure awaits us ahead dear friends… Gently scrape entire mass back towards center forming smooth ball shape then cover its home snugly beneath layers plastic wrap followed closely behind soft clean towel—this protects precious warmth generated during previous steps ensuring optimal conditions conducive growth thrive unhindered throughout rising period lasting roughly one hour depending temperature environment present around us today… For best results find cozy spot nearby radiator perhaps turning oven lowest setting briefly minutes cooling afterwards allows us create ideal habitat perfect nurturing budding creations blossoming fully realizing potential nestled within them!
The beauty lies not only within tangible outcomes awaiting us shortly thereafter but also sense satisfaction derived knowing effort invested translates tangible rewards await those willing follow along journey laid forth here today… Remember friends don’t rush meet next milestone savor every moment shared between ourselves alongside delicious aroma tempting taste buds even before final product unveiled ultimately revealing secrets hidden behind closed doors leading straight towards heavenly slices awaiting devoured eagerly soon enough afterwards…
Stay tuned as we continue exploring steps toward creating this wonderful loaf together—you won’t want miss out excitement brewing along way ahead promising delights beyond imagination await each turn around corner here next chapter unfolds shortly thereafter too… Happy baking everyone!!
Simple Honey Wheat Bread Recipe
There’s something truly magical about the aroma of freshly baked bread that fills your home, isn’t there? I’ve always been captivated by that warm, comforting scent wafting through the air as it dances around you, inviting everyone to gather in the kitchen. This Simple Honey Wheat Bread recipe is my go-to for those moments when I want to create a profound connection with my family and friends. Made with half whole wheat flour and half bread flour, it strikes that perfect balance between wholesome nutrition and delightful flavor. I promise you, every bite is a symphony of flavors that will have your taste buds singing!
Step 5: Kneading Your Dough into Perfection
Now, let’s talk about what happens after that first rise—an incredibly crucial step in our bread-making journey! Gently turn your dough out onto a lightly floured pastry mat or countertop. Here’s where you’ll want to embrace the tactile nature of baking; knead the dough for just a minute to release any trapped air bubbles and get it ready for shaping. When we knead, we’re developing gluten, which is absolutely paramount for creating that lovely chewy texture we all adore in bread.
After a minute of kneading, divide the dough into two equal portions. This is where your creation begins to take shape! Roll each piece out slightly—not too thin; we want to maintain some structure—then fold each piece over in thirds, pressing down firmly with the heel of your hand. This folding technique not only helps strengthen the dough but also creates those beautiful layers that yield a lovely crumb when baked. Tuck in the ends to secure everything nicely and place each loaf seam side down into two lightly greased 9×5 bread pans. Trust me on this; giving your dough a warm and cozy space will help it rise beautifully.
Step 6: The Second Rise—Patience is Key!
Now comes one of my favorite parts—the second rise! Cover your pans lightly with plastic wrap and let them sit in a warm environment for about 30 minutes. You might be wondering why this step is so important? Well, during this time, yeast continues its magic by producing carbon dioxide gas, which causes the dough to puff up and become airy—think of it as giving your loaves a little spa treatment!
Don’t rush this step; allow the dough to double in size until it looks puffy and feels light to the touch. If you’re unsure whether it’s ready, press gently on the surface with your finger; if it springs back slowly, you’re good to go! If it doesn’t spring back at all, well, maybe you’d like to give it another few minutes of warmth before moving on.
Step 7: Prepping for Baking Bliss
Once your loaves have risen beautifully—oh, aren’t they just gorgeous?—it’s time to preheat our oven to 350°F (175°C). This temperature is ideal because it allows for even cooking throughout without browning too quickly on the outside. Carefully remove the plastic wrap from each pan and brush the tops gently with an egg wash made from whisking one egg with one tablespoon of water. This step is not just for show; this egg wash creates that delectable golden crust we all love while sealing in moisture.
As you prepare them for baking, take a moment to admire your handiwork—you’ve just created something truly extraordinary! Place them in the oven once it’s preheated and get ready for some heavenly aromas as they bake! The estimated baking time is around 30 minutes; however, every oven behaves differently so keep an eye on those loaves as they transform into golden perfection.
Step 8: Testing for Doneness
The moment you’ve been waiting for is almost here—the smell alone could make anyone weak in the knees! However, before pulling those glorious loaves from their warm cocoon in the oven, let’s ensure they are baked through properly. The best way to check doneness is by using an instant-read thermometer: aim for an internal temperature of about 190°F (88°C). This ensures that your bread has cooked through without being overbaked or dry.
Another great way to test if your bread is done is by tapping the bottom; if it sounds hollow and feels firm yet light when held up, then it’s ready! And remember: patience pays off here—if they’re not quite there yet, don’t hesitate to give them another minute or two in that cozy oven until they reach perfection!
Conclusion:
As we wrap up this delightful journey through baking Simple Honey Wheat Bread together, I can hardly contain my excitement! From the moment those fragrant loaves filled my kitchen with warmth and comfort, I knew we were creating something truly special. The gentle sweetness of honey melded seamlessly with the nutty whole wheat flour, creating a symphony of flavors that elevates this bread far beyond ordinary recipes. Each slice is not just sustenance; it’s an experience—a profound satisfaction that comes from creating something so utterly intoxicating.
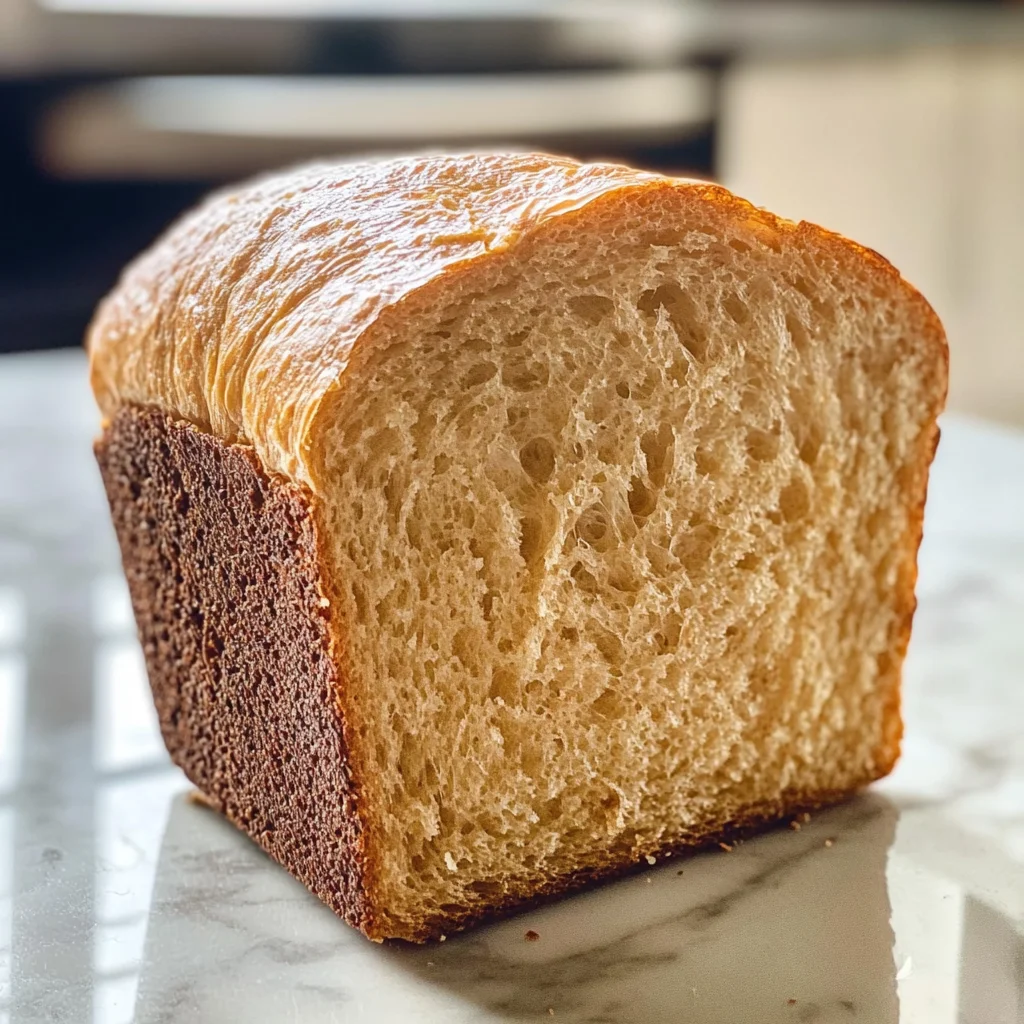
This recipe is a must-try because it embodies everything wonderful about homemade cooking: it’s accessible, versatile, and brimming with love. Whether it’s served alongside a hearty soup during family gatherings or simply enjoyed as toast with jam in quiet moments, this bread shines on every occasion! Picture yourself pulling these beautiful loaves from the oven—the golden crust gleaming as you brush them with melted butter—your heart will swell with pride knowing you’ve crafted something incredible.
For serving suggestions, imagine savoring a warm slice slathered with creamy almond butter for breakfast or transforming it into delightful sandwiches filled with fresh veggies and hummus for lunch. For an afternoon pick-me-up, try pairing it with a rich cheese spread and seasonal fruits—oh my goodness, what a treat! And if you’re feeling adventurous in the evening, how about crafting mini sliders filled with roasted vegetables? Each bite will transport you to culinary bliss; I promise!
Feeling adventurous? This recipe is wonderfully adaptable! You could experiment by adding seeds like sunflower or pumpkin for an extra crunch or even swirl in some cinnamon and raisins for a delightful sweet twist—what fun! The beauty of this Simple Honey Wheat Bread lies in its flexibility; each variation enriches your baking experience while keeping the essence of home-cooked goodness alive. So gather your ingredients and share your creations; I can’t wait to hear how your own baking adventures unfold!
Simple Honey Wheat Bread
Experience the joy of baking with this Simple Honey Wheat Bread recipe that fills your home with a warm, inviting aroma. Combining half whole wheat flour and half bread flour, this wholesome loaf offers a delightful balance of nutrition and sweetness from honey. Whether enjoyed fresh from the oven or toasted for breakfast, every slice is a testament to the art of homemade bread. Perfect for sandwiches or as a side to your favorite soup, this recipe is not just about sustenance; it’s about creating cherished memories around your table.
- Prep Time: 15 minutes
- Cook Time: 30 minutes
- Total Time: 45 minutes
- Yield: Approximately 12 servings 1x
- Category: Bread
- Method: Baking
- Cuisine: American
Ingredients
- 2 cups warm milk (or unsweetened plant-based milk)
- 1–1/2 Tbsp instant yeast
- 1 tsp sugar
- 1/2 cup warm water
- 2–1/2 cups whole wheat flour
- 3 to 3-1/2 cups bread flour (start with 3)
- 3 Tbsp shortening (or coconut oil)
- 1/4 cup honey
- 1 Tbsp salt
Instructions
- Activate yeast by mixing warm milk, yeast, and sugar in a bowl; let sit until foamy (5 minutes).
- Combine activated yeast mixture with warm water, whole wheat flour, and shortening in a mixing bowl. Gradually add bread flour until dough forms.
- Knead dough on a floured surface for about a minute, then shape into a ball and place in a greased bowl. Cover and let rise until doubled (about 1 hour).
- Punch down the dough and divide into two pieces. Shape each into loaves and place in greased pans, covering them to rise again for about 30 minutes.
- Preheat oven to 350°F (175°C). Optional: Brush tops with an egg wash or almond milk before baking.
- Bake for approximately 30 minutes or until golden brown and hollow-sounding when tapped.
Nutrition
- Serving Size: 1 slice (50g)
- Calories: 130
- Sugar: 3g
- Sodium: 150mg
- Fat: 2g
- Saturated Fat: 0g
- Unsaturated Fat: 1g
- Trans Fat: 0g
- Carbohydrates: 25g
- Fiber: 3g
- Protein: 4g
- Cholesterol: 0mg