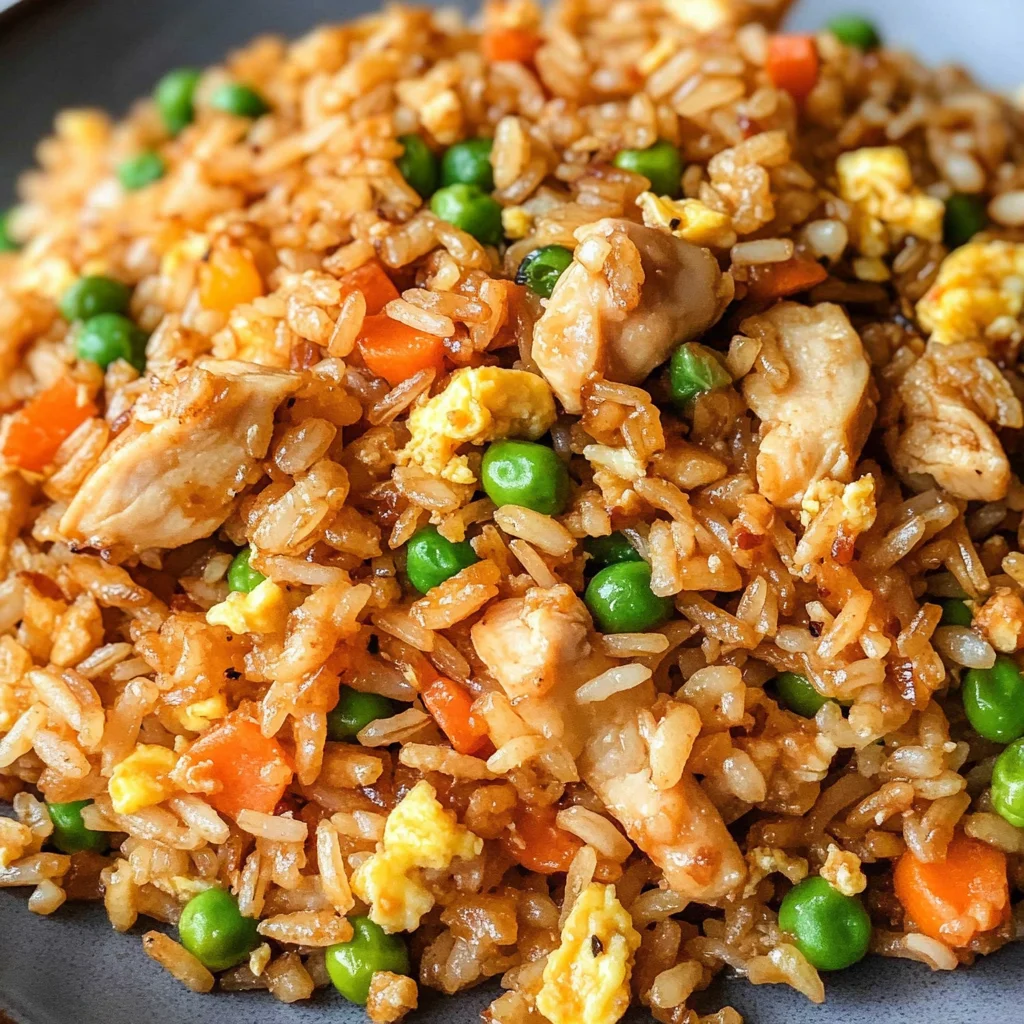
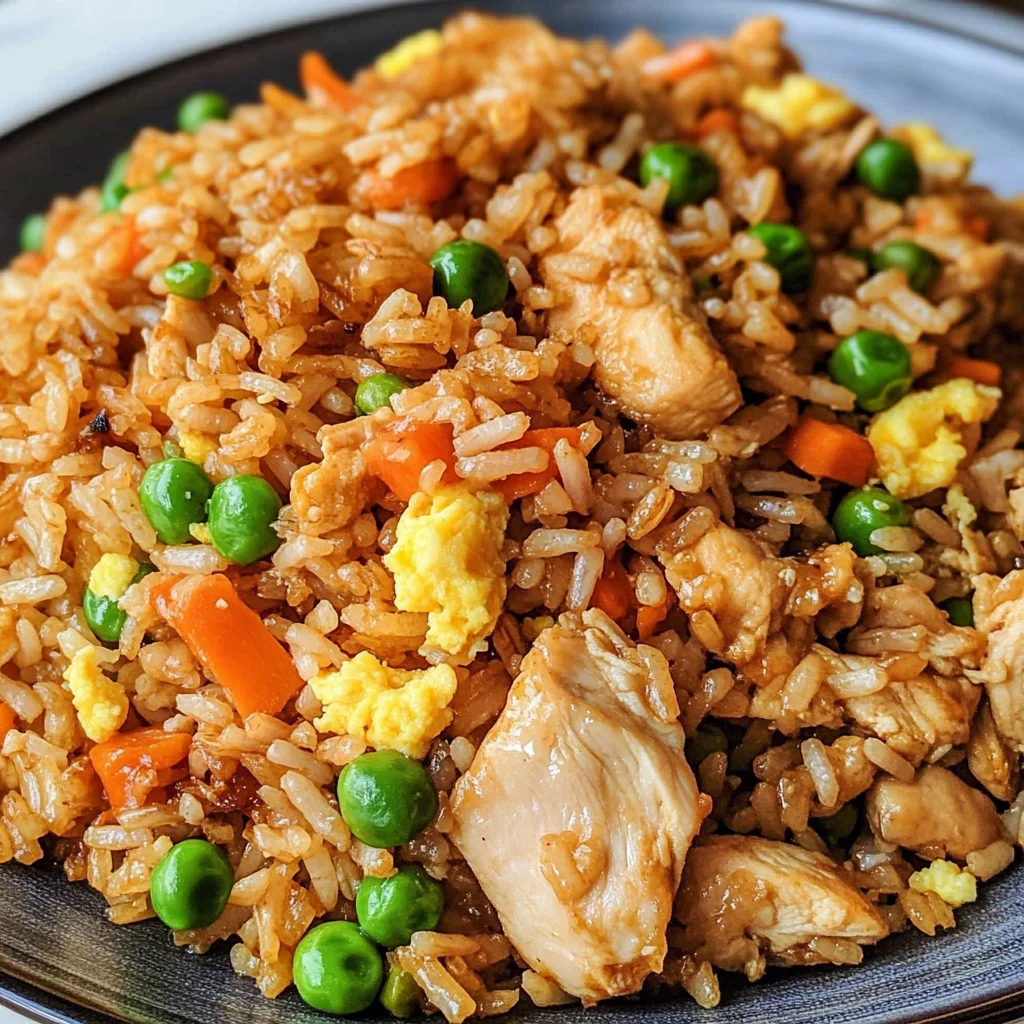
Quick & Easy Chicken Fried Rice
I’m so excited to share with you a recipe that feels like a warm hug on a plate: Quick & Easy Chicken Fried Rice. This dish is more than just food; it’s an experience, a beautiful symphony of flavors that brings together tender chicken, vibrant vegetables, and perfectly seasoned rice in a whirlwind of sizzling delight. Picture the moment when you take your first bite—the comforting warmth envelops you, and suddenly, all your worries fade away. The rich aroma fills your kitchen as you stir-fry everything together, creating an atmosphere of joy and nostalgia that reminds me of bustling family dinners and laughter echoing through the air.
This recipe is not just about nourishment; it’s about connection. It’s the kind of dish that invites everyone to gather around the table and share stories over steaming bowls of deliciousness. In less than 30 minutes, you can create something that rivals your favorite takeout without having to leave the comfort of your home. Trust me when I say this Quick & Easy Chicken Fried Rice will become a staple in your weeknight dinner rotation, and you’ll find yourself making it again and again—each time with a little twist or personal touch to make it uniquely yours.
Quick & Easy Chicken Fried Rice: A Heartwarming Meal for Any Occasion
This recipe is perfect for busy weeknights when time is of the essence but flavor cannot be compromised. Whether you’re cooking for family or friends, this dish will undoubtedly impress. It’s versatile too; serve it as a main course or as a delightful side alongside other favorites. And don’t worry if you have leftover rice from last night—this dish thrives on day-old rice! So let’s dive into this culinary adventure together.
Ingredients:
As we embark on this culinary journey together, let’s take a moment to explore each ingredient that makes this Quick & Easy Chicken Fried Rice so extraordinary. Each one plays a crucial role in bringing out the best flavors and textures, creating a dish that’s both satisfying and delicious.
- 4 ½ cups cooked jasmine rice: The star of our show! Day-old jasmine rice is ideal because it has had time to chill in the fridge, which helps keep each grain separate during frying—no mushy mess here! If you’re starting with uncooked rice, rinse it well under cold water until the water runs clear before cooking to remove excess starch. This step ensures fluffy grains rather than clumpy ones.
- ½ lb skinless boneless chicken thighs: I prefer using chicken thighs for their tenderness and flavor compared to chicken breasts, which can dry out easily. Thinly slicing them allows for quicker cooking while ensuring they absorb all those lovely marinade flavors during our quick fry.
- 1.5 cups frozen peas and carrots: These vibrant veggies not only add color but also sweetness that balances beautifully with the savory elements in our dish. Using frozen vegetables saves time since they’re pre-washed and pre-chopped—perfect for those busy evenings!
- 3 large eggs: Beaten until golden, these eggs provide richness and protein while adding a wonderful texture contrast against the rice and veggies. They’ll fluff up gently as they cook, creating delightful little curds throughout your fried rice.
- 1 small shallot (or ¼ onion): Finely diced shallots lend a subtle sweetness and depth of flavor that elevates our fried rice from ordinary to extraordinary. If you can’t find shallots or prefer onion’s robustness instead, go ahead—it will still taste fantastic!
- 3 garlic cloves: Minced garlic is non-negotiable in this recipe! The aroma alone is enough to make anyone’s mouth water as it sizzles in the pan—trust me; it’s essential for depth!
- 4 teaspoons vegetable oil (or any neutral tasting oil): This oil serves multiple roles—it prevents sticking while also facilitating browning for that lovely caramelized flavor we crave in fried rice. Opt for oils like canola or grapeseed if you want something mild yet effective.
- 1 teaspoon regular soy sauce: Regular soy sauce introduces umami depth to our dish without overpowering it. It’s like liquid gold in terms of flavor enhancement!
- 1 teaspoon Shaoxing Cooking apple vinegar (or dry apple juice / dry white grape juice / chicken broth): This adds brightness to our fried rice by cutting through some of the richness from the chicken and eggs while complementing their flavors exquisitely.
- 1 teaspoon cornstarch: While it may seem odd at first glance, cornstarch helps thicken our sauce slightly without making it gloppy—a little goes a long way here!
- 2 tablespoons regular soy sauce (or light soy sauce): This additional dose amplifies our soy flavor profile even further while also helping achieve those gorgeous brown bits on our rice—a hallmark of great fried rice!
- ½ tablespoon dark soy sauce: Dark soy sauce contributes not only color but also an extra layer of richness that enhances overall taste without being salty.
- 2 teaspoons sesame oil: A drizzle at the end brings an utterly intoxicating nuttiness that completes this dish beautifully! It’s essential—not optional—so don’t skip this step!
- 1 teaspoon chicken bouillon powder: This seasoning gives us savory depth without needing actual stock or broth—perfect for those times when you’re short on ingredients but still want bold flavor.
- ⅛ teaspoon white pepper (or black pepper): Adding just enough heat without overwhelming any other flavors makes white pepper perfect here; however, feel free to use black pepper if that’s what you have on hand!
Equipment You’ll Need:
Cooking can be such an enjoyable experience when you have the right tools at your disposal! While they may not be ingredients, these essential partners contribute immensely to creating something wonderful in your kitchen.
- Large skillet or wok: A spacious skillet or wok is vital for stir-frying as it provides ample room for tossing ingredients without overcrowding them—this ensures even cooking and those coveted charred bits we love so much.
- Spatula or wooden spoon: Choose something sturdy yet gentle enough not to scratch your cookware; you’ll want an implement that allows easy mixing without breaking up delicate ingredients like scrambled eggs too much.
- Medium-sized bowl: Perfect for marinating your chicken! Using glass or stainless steel helps with easier cleanup later on since they won’t retain odors like plastic might over time.
Now that we’ve gathered all our ingredients and equipment, let’s prepare to bring this Quick & Easy Chicken Fried Rice recipe to life!
Step 1: Marinating Your Chicken
In a medium-sized bowl, take those lovely sliced chicken thighs and toss them with the marinade ingredients you’ve set aside earlier—the regular soy sauce, Shaoxing Cooking apple vinegar (or its alternatives), cornstarch, and perhaps just a touch more oil if you’re feeling generous. Letting them marinate for about 5–10 minutes isn’t just about flavor; it’s about tenderizing too—the cornstarch forms a protective layer around each piece which keeps moisture locked inside while cooking. This step truly enhances texture while infusing every bite with mouthwatering goodness! As you mix everything together gently with your hands or using chopsticks (if you’re feeling adventurous!), you’ll notice how quickly these simple ingredients meld into something luscious already!
Step 2: Preparing Your Sauce
While waiting for those thighs to soak up all those incredible flavors from their marinade bath, let’s shift gears slightly by preparing our sauce mixture in a small bowl—combine two tablespoons of regular soy sauce (and light soy if preferred), half tablespoon dark soy sauce followed by mixing well until combined seamlessly into one cohesive liquid gold mixture ready-to-go when we need it later on! Having everything prepped will streamline our cooking process so we won’t miss out on any precious moments during frying once we start heating things up! Plus who doesn’t love being organized?
Step 3: Cooking Your Chicken
Now comes one of my favorite parts—heating up some oil in that trusty large skillet over medium-high heat until shimmering hot before introducing marinated magical chicken pieces into its embrace! Listen closely—the sound should resemble sizzling excitement as they hit the pan—a sure sign of success ahead! Allowing them adequate space means no crowding during frying; otherwise they’ll steam instead of sear leading us down paths we do NOT want! It usually takes about 5–7 minutes total depending upon thickness; ensure each piece turns golden brown before carefully removing them from pan onto plate nearby—you’ll want every bit cooked through but moist inside too!
Step 4: Sautéing Aromatics
With chicken resting peacefully off-side now let’s turn attention back towards creating layers upon layers of mesmerizing aroma wafting through your home! Add another teaspoonful (5 ml) vegetable oil directly into empty canvas left behind after removing chicken then immediately toss minced garlic along diced shallots straight away—keep stirring quickly lest garlic burn within mere seconds leaving behind bitter notes instead delicious ones intended here today! That sweet oniony fragrance starts filling air almost instantly…ahh blissful memories already forming around dinner tables past…and present alike…keep stirring roughly ten seconds until fragrant enough before adding frozen peas-carrots medley next allowing mixture dance vibrantly around hot pan surface momentarily before pushing everything towards edge letting them sauté separately giving chance vegetables blush ever-so-slightly too!
I can’t wait for you all to try making this amazing Quick & Easy Chicken Fried Rice at home—it’s going to be such fun sharing moments over bowls filled with hearty goodness together soon enough! Stay tuned as we continue crafting this delightful meal step-by-step through flavorful exploration awaiting us ahead…
Step 5: Stirring Up Magic with Your Eggs
Once your chicken is cooked to a beautiful golden brown and removed from the pan, it’s time to create that fluffy, irresistible egg component of our Quick & Easy Chicken Fried Rice. In the same sizzling pan, drizzle in another teaspoon of vegetable oil, letting it heat up for just a moment. You want to hear that delightful sizzle when you add your beaten eggs. Now, this step is crucial because the eggs will act as a binding element in our dish, adding richness and a lovely texture that brings everything together.
Let the eggs sit undisturbed for about 20 seconds; this allows them to form a soft curd before you start scrambling. Trust me on this – if you dive in too quickly, you’ll miss out on that delightful fluffiness! After those initial moments, gently break the eggs into bite-sized pieces. As you fold them into the sautéed garlic and shallots already in your pan, you’ll witness how they absorb those aromatic flavors, creating an utterly intoxicating base that’ll have everyone asking for seconds. Make sure not to overcook the eggs; they should remain tender and slightly creamy rather than dry and rubbery. This is where patience pays off!
Step 6: The Heart of the Dish – Adding Rice & Chicken
Now comes one of my favorite parts! It’s time to introduce our star ingredients: the cold day-old jasmine rice and your perfectly cooked chicken. Gently add both into the pan with that glorious mixture of eggs and vegetables. I can’t stress enough how important it is to use day-old rice; its firmness means it won’t clump together during cooking — we want separate, fluffy grains that are easy to toss around in the pan! As you incorporate everything together, you’ll notice that each grain of rice starts to pick up all those wonderful flavors from the garlic, shallots, and chicken.
Using a spatula or wooden spoon, carefully fold everything together rather than stirring aggressively; this technique ensures that your rice stays intact while still getting adequately mixed with all those flavors. You might find that some rice grains cling together at first—don’t worry! Just keep folding gently until every bit is heated through and coated in deliciousness. What you’re aiming for here is that perfect harmony where every ingredient shines but works together like a well-rehearsed orchestra.
Step 7: The Flavor Finale – Pouring on the Sauce
With everything beautifully combined in your pan, it’s time for what I like to call the flavor finale! Pour your pre-mixed sauce around the edges of the pan instead of directly onto the rice—this method allows it to toast slightly before mingling with all those fantastic components. Yes, I know it may seem like an extra step, but trust me here: giving your sauce just a few seconds to caramelize creates depth and complexity that’s absolutely paramount for elevating this dish from ordinary to extraordinary.
As soon as you pour it in, let it sizzle for about five seconds without stirring; listen closely—the sound alone will tell you when it’s ready! Afterward, toss everything together gently once more until every grain of rice is coated with that luscious sauce. It should take on a beautiful golden hue with hints of dark soy sauce peeking through—this color change tells you that you’re nearly there! You may notice some small crispy bits forming at the bottom of the pan; these are culinary gold! Just be careful not to let anything burn as you continue tossing until every bite is infused with flavor.
Step 8: Final Touches & Serving Your Masterpiece
Now comes the moment you’ve been waiting for—the final touches before serving up your Quick & Easy Chicken Fried Rice! Once everything is thoroughly mixed and heated through (about 2-3 minutes), taste a small spoonful—this step is non-negotiable because it’s where you’ll decide if any additional seasoning is needed. Maybe just a sprinkle more soy sauce or a dash of white pepper? Each palate varies, so feel free to adjust according to your personal preference!
When you’re satisfied with its flavor profile, remove it from heat and let it rest for just a minute or two—it’s tough waiting when it smells this good, but I promise you this little pause allows all those vibrant flavors to settle beautifully within each bite. Now scoop generous portions onto plates or into bowls and finish with a drizzle of sesame oil for an extra touch of luxury—it adds such an inviting aroma that’s simply irresistible!
Serve hot alongside some fresh green onions or even toasted sesame seeds if you’re feeling fancy! Watching friends gather ‘round with eager forks brings me such joy; there’s something so profoundly satisfying about sharing food made with love—and trust me when I say this dish will leave everyone smiling long after their last bite.
Final Thoughts on Your Quick & Easy Chicken Fried Rice
Congratulations! You’ve now mastered an incredibly versatile dish that’s perfect not only for weeknight dinners but also as a delightful meal prep option or even served at gatherings—trust me when I say it’s better-than-takeout quality right at home! The beauty lies in its simplicity yet profound satisfaction; every forkful bursts with flavor while being oh-so-comforting.
Whether enjoyed solo or shared among family and friends, I hope this recipe becomes one of those cherished meals you’ll return to again and again. So go ahead—make this Quick & Easy Chicken Fried Rice, savor every mouthful, and relish in knowing you’ve created something truly extraordinary! Happy cooking!
Storage and Enjoyment Tips for Your Quick & Easy Chicken Fried Rice
Now that you’ve whipped up this beautiful dish of Quick & Easy Chicken Fried Rice, it’s time to dig in and savor every bite! I can already imagine the enticing aromas wafting through your kitchen, filling the air with warmth and comfort. But let’s be honest—sometimes we end up with leftovers, and that’s a wonderful opportunity to enjoy this dish even more! Properly storing your leftover fried rice ensures that every flavorful morsel remains as delicious as it was on the first day.
Storing Leftover Quick & Easy Chicken Fried Rice
To keep your leftover Quick & Easy Chicken Fried Rice fresh and flavorful, I recommend using an airtight container. This is crucial because it locks in moisture and prevents any unwanted odors from mingling with your precious fried rice. Store it in the refrigerator, where it will stay good for about 3-4 days—perfect for those busy weeknights when you want a quick meal without all the fuss! If you notice your rice seems a little dry upon reheating, consider placing a slice of bread in the container before sealing; this little trick works wonders in maintaining moisture. When reheating, I suggest using a microwave or skillet—just add a splash of water to help steam it back to life. Trust me; you’ll be amazed at how those flavors come rushing back!
Freezing Your Quick & Easy Chicken Fried Rice for Later
If you find yourself with extra servings or simply want to prepare ahead for a future meal, freezing is an excellent option! Allow your chicken fried rice to cool completely before transferring it into freezer-safe bags or containers—be sure to squeeze out as much air as possible to prevent freezer burn. When stored correctly, your fried rice can last up to three months in the freezer. When you’re ready to enjoy this delightful dish again, just pull it from the freezer and let it thaw overnight in the refrigerator. You can then reheat it directly in a skillet for that freshly-cooked taste or pop it in the microwave if you’re short on time. The convenience of having a homemade meal ready to go is absolutely delightful—imagine pulling out this gem on a busy day and relishing its comforting flavors without any hassle!
Quick & Easy Chicken Fried Rice
Enjoy delightful flavors in under 30 minutes with our Quick & Easy Chicken Fried Rice! Perfect for busy nights—give it a try today!
- Prep Time: 10 minutes
- Cook Time: 20 minutes
- Total Time: 30 minutes
- Yield: Serves about 6
- Category: Main
- Method: Frying
- Cuisine: Asian
Ingredients
- 4 ½ cups cooked jasmine rice (preferably day-old)
- ½ lb skinless boneless chicken thighs
- 1.5 cups frozen peas and carrots
- 3 large eggs
- 1 small shallot (or ¼ onion)
- 3 garlic cloves
- 4 teaspoons vegetable oil
- 3 teaspoons regular soy sauce
- 1 teaspoon Shaoxing Cooking apple vinegar (or alternatives)
- 2 teaspoons sesame oil
Instructions
- In a medium bowl, marinate chicken thighs with soy sauce, vinegar, cornstarch, and a bit of oil for 5–10 minutes.
- Heat vegetable oil in a large skillet over medium-high heat. Cook marinated chicken until golden brown (about 5–7 minutes). Remove from pan.
- In the same skillet, sauté minced garlic and diced shallots until fragrant, then add frozen peas and carrots.
- Push veggies to the side and scramble beaten eggs in the pan.
- Add cooked chicken and day-old rice to the skillet; gently mix everything together.
- Pour the sauce around the edges of the pan and stir to combine until heated through.
- Finish with a drizzle of sesame oil before serving.
Nutrition
- Serving Size: About 1 cup (240g)
- Calories: 355
- Sugar: 3g
- Sodium: 600mg
- Fat: 10g
- Saturated Fat: 2g
- Unsaturated Fat: 7g
- Trans Fat: 0g
- Carbohydrates: 55g
- Fiber: 3g
- Protein: 14g
- Cholesterol: 180mg