Asiago Bread Recipe
There’s something truly magical about baking bread at home—it’s an experience that transcends the mere act of cooking. The moment you combine flour, water, and yeast, you’re not just mixing ingredients; you’re conjuring warmth, comfort, and a sense of belonging. The aroma of freshly baked Asiago Bread wafting through your home is nothing short of intoxicating. It beckons friends and family to gather around the kitchen, sharing stories and laughter as they wait with eager anticipation for that first warm slice slathered in butter or dipped in olive oil. I promise you, this Asiago Bread Recipe is more than just a delicious loaf; it’s a heartfelt invitation to create memories that linger long after the last crumb has been savored.
Baking this Asiago Bread isn’t just about satisfying your taste buds—it’s about connecting with tradition while allowing your creativity to shine. Each step in the process reveals the beauty of simple ingredients transforming into something extraordinary. You’ll find that the rich nuttiness of Asiago cheese melds beautifully with the crusty exterior and soft interior of the bread, creating a delightful contrast that’s hard to resist. Whether it’s served alongside a hearty soup or simply enjoyed on its own, this bread is perfect for any occasion—from casual weeknight dinners to festive gatherings. So roll up your sleeves, put on your favorite apron, and let’s embark on this culinary adventure together!
Asiago Bread Recipe: A Symphony of Cheese and Crust
This Asiago Bread Recipe is not only approachable but also incredibly rewarding. The flavors are sophisticated yet comforting, making it an ideal choice for both novice bakers and seasoned pros alike. Imagine pulling a golden-brown loaf from the oven, its crust crackling as you slice through it to reveal pockets of melted cheese inside. It’s an experience that brings joy with every bite.

Ingredients:
As we embark on this journey to create your very own Asiago Bread, let’s take a moment to appreciate each ingredient that plays a pivotal role in crafting this beautiful loaf.
- 4 cups (approximately 500 grams) bread flour – This ingredient is crucial for our Asiago Bread Recipe because bread flour contains higher protein levels than all-purpose flour. This extra protein is non-negotiable; it’s what allows gluten to develop effectively during kneading, resulting in that wonderfully chewy texture we crave in artisan-style breads. If you must substitute with all-purpose flour, keep in mind that while you might achieve decent results, the chewiness will be slightly diminished. Trust me when I say that for optimal results—especially if you’re aiming for that bakery-style loaf—you’ll want to stick with bread flour.
- 2 ¼ teaspoons (one packet) active dry yeast – Yeast is our little magician here! It’s responsible for transforming our dough from a dense ball into a light, airy masterpiece during baking. Before we add it to our dry ingredients, we need to proof it by mixing it with warm water—a crucial step that ensures our yeast is alive and kicking. Always check the expiration date on your yeast packet; fresh yeast means better rise!
- 1 ½ cups (approximately 355 ml) warm water – Water may seem mundane compared to other ingredients, but don’t underestimate its importance! We need lukewarm water—around 105-115°F (40-46°C)—to activate our yeast properly. Too hot? You risk killing off those hardworking organisms; too cold? They won’t spring into action at all! Using a thermometer here can save you from potential baking heartbreak.
- 1 tablespoon granulated sugar – Just a touch of sugar goes into our dough—not just for sweetness but also as food for our yeast! Sugar helps kickstart the fermentation process and contributes subtle flavor notes while promoting browning on that beautiful crust we desire. It’s like giving our yeast a little boost so they can work their magic faster!
- 2 teaspoons salt – Salt isn’t just there to season; it’s vital in controlling yeast activity and strengthening gluten structure within our dough. Think of salt as the guardian of flavor—it enhances everything without making the bread taste salty itself. So please don’t skip this step; it’s absolutely paramount for creating well-balanced flavor profiles!
- 2 tablespoons olive oil – Ahh, liquid gold! Olive oil enriches our dough while promoting a softer crumb and adding richness to flavor profiles. You can choose extra virgin olive oil for its robust taste or go with regular olive oil if you prefer something milder. Either way, this addition helps create that enticingly crisp crust we love while keeping the inside tender.
- 1 ½ cups shredded Asiago cheese (approximately 170 grams) – And here lies the star of our show! The nutty essence of high-quality Asiago cheese melts beautifully into every slice of bread while providing deep flavor complexity that sings harmoniously with every bite. Whether you buy pre-shredded or shred it yourself—aim for coarse shreds so you get those delightful gooey pockets within each loaf—it will elevate your baking experience immensely.
- Optional: Fresh rosemary or thyme (1-2 tablespoons finely chopped) – While not essential, incorporating fresh herbs like rosemary or thyme introduces an aromatic freshness that complements the richness of Asiago beautifully. If using dried herbs instead due to convenience or availability, about one teaspoon will suffice. Adding these herbs is like putting on an accessory—it elevates everything!
Equipment You’ll Need:
Before we dive into mixing and kneading away, let’s set ourselves up for success by gathering some essential tools! Having the right equipment makes this entire experience smoother and more enjoyable.
- Large mixing bowl – You’ll need a sturdy mixing bowl to combine all your ingredients effectively without worrying about spills or messes. A glass or stainless-steel bowl works perfectly since they’re easy to clean and allow you to see your dough rise beautifully.
- Measuring cups and spoons – Accurate measurements are key when baking! Invest in good-quality measuring cups and spoons—this ensures consistency across batches so you’ll achieve perfect results every time.
- Kitchen scale (optional but recommended) – For even better precision in ingredient measurements—especially when it comes to flour—a kitchen scale provides accuracy that’s hard to beat! This tool can help take your baking skills up another notch by allowing you to follow recipes exactly as intended.
- Wooden spoon or spatula – A sturdy wooden spoon helps incorporate all those ingredients together seamlessly without damaging anything; alternatively, use a silicone spatula which makes scraping down sides easier when combining wet/dry mixtures.
- Dough scraper – This handy tool aids tremendously during kneading sessions by helping lift sticky dough off surfaces quickly while keeping things tidy—an absolute lifesaver!
Step 1: Proofing Your Yeast
To begin making your Asiago Bread Recipe successfully, let’s start by proofing our yeast—a critical step in ensuring our leavening agent is alive and ready for action! In your mixing bowl or another small container, combine two-and-a-quarter teaspoons of active dry yeast along with one tablespoon of granulated sugar into one-and-a-half cups of warm water—the perfect temperature being between 105°F (40°C) and 115°F (46°C). Gently stir them together until dissolved then allow them to sit undisturbed for about five minutes until frothy bubbles form on top; this indicates that your yeast is active! If nothing happens after five minutes? You might want to consider starting over with fresh ingredients because dead yeast means no rise—and nobody wants dense bread!
Step 2: Mixing Dry Ingredients
While waiting patiently for those frothy bubbles—a stage filled with excitement—we can prepare our dry ingredients! In another large mixing bowl, measure out four cups of bread flour along with two teaspoons of salt before whisking them together gently until combined evenly throughout—that first whiff alone will have you dreaming about how incredible this loaf will soon be! At this point also consider adding any optional fresh herbs if desired; feel free to toss them in now so their flavors marry beautifully into every bite later on as well.
Step 3: Combining Wet Ingredients
Once you’ve confirmed fermentation success from earlier steps—and oh boy does it smell inviting at this stage—we’ll carefully integrate everything together now! Pour those bubbly yeast-water-sugar mixtures directly into your bowl containing dry ingredients along with two tablespoons olive oil too…yes please! Use either a wooden spoon or spatula here—whatever feels most comfortable—to mix until everything begins coming together into one cohesive mass resembling shaggy dough (don’t stress yet if there are still some dry spots).
Step 4: Kneading Time!
Now comes one of my absolute favorite parts—the kneading process! Lightly dust your countertop surface with flour before transferring out all that shaggy goodness onto said surface carefully greasing hands lightly beforehand if needed since sticky dough can be tricky sometimes too! Start folding over edges towards center repeatedly before pushing down firmly using palms against countertop surface while simultaneously turning quarter turns clockwise after each fold—you’ll want this workout trust me because kneading develops gluten structure which leads us toward achieving perfectly chewy textures later down road… Aim for around ten minutes total until smooth & elastic forms without sticking excessively anymore!
This delightful journey continues as we move forward through shaping techniques and rising periods—but remember: patience pays off dividends when crafting artisanal-style loaves like these so don’t rush any steps along way either! Stay tuned because there’s so much more magic ahead…
Step 5: Kneading the Dough to Perfection
Once your yeast mixture is bubbling and fragrant, it’s time to bring everything together. In a large mixing bowl, combine the bread flour and salt. Now, here’s where the magic happens: create a well in the center of your flour mixture and pour in that glorious yeast mixture along with the olive oil. You want to mix these ingredients until they start to form a shaggy dough. Don’t be afraid to get your hands in there! This tactile experience is not just about combining ingredients; it’s about feeling the dough transform under your fingers. As you mix, you’ll notice how the flour absorbs the liquid, creating a sticky mass that seems to come alive.
Now comes the crucial step—kneading! Turn your dough out onto a lightly floured surface. With clean hands, begin pushing down and forward on the dough using the palms of your hands while folding it back over itself. This technique, known as kneading, activates the gluten in the bread flour which is absolutely paramount for achieving that chewy texture we all adore in Asiago Bread. I recommend kneading for about 8-10 minutes until the dough becomes smooth and elastic—this is when you’ll feel it bounce back when you poke it gently with your finger. It’s like nurturing a living thing! If at any point it feels too sticky, sprinkle just a touch more flour; however, resist the temptation to add too much—over-flouring can lead to dry bread.
Step 6: The First Rise – Letting It Rest
Once you’ve kneaded your dough into submission (in the best way possible!), shape it into a ball and place it in a large bowl that has been greased lightly with olive oil. This step is essential because it prevents sticking and helps maintain moisture as your dough rises. Cover the bowl tightly with plastic wrap or a damp kitchen towel—this keeps humidity in and creates a warm environment for fermentation, which is what we want! It’s important to let this dough rise in a draft-free spot; an unheated oven works beautifully if you turn on just the light for warmth.
Now comes the waiting game—let it rise for about 1-1.5 hours or until it has doubled in size. During this time, take a moment to relish in anticipation! The yeast will consume sugars, releasing carbon dioxide gas that causes those delightful bubbles we see forming in our dough. You might even catch that intoxicating smell wafting up from your kitchen—a sign that something wonderful is happening within that bowl! After this time has passed, gently poke your dough; if it springs back slowly but leaves an indent, it’s ready for shaping.
Step 7: Shaping Your Dough
With your beautifully risen dough ready for its next adventure, turn it out onto a lightly floured surface once again. This moment feels incredibly rewarding as you press down on that cloud-like mass; every ounce of air trapped inside indicates all those lovely flavors developing beneath its surface. Gently flatten it into a rectangle with your hands or a rolling pin—don’t rush this step! We want to keep as much gas as possible for that airy crumb later on.
Next comes adding our star ingredient: Asiago cheese! Sprinkle half of the shredded cheese evenly over one half of the rectangle and fold over the other half like you’re tucking in some delicious treasure inside, sealing those cheesy pockets of goodness within by pinching the edges together firmly. This isn’t just playing chef; this step will create beautiful layers of cheese throughout your bread when it’s baked—the ultimate culinary surprise! Gently shape this filled loaf into whatever form you desire—a round boule or an elongated batard both work wonderfully—and place it seam-side down on parchment-lined baking sheets.
Step 8: The Second Rise – Patience is Key
Now that our loaf is shaped and ready to shine, we need to give it another chance to rise before hitting that hot oven. Cover your shaped loaf loosely with plastic wrap or a clean kitchen towel again—remembering not to squish those precious air bubbles we worked so hard to create during shaping! Allow this second rise for about 30-45 minutes at room temperature until it’s puffed up nicely again; think of it as giving your bread more time to develop character and depth.
During this time, preheat your oven to 375°F (190°C). On occasion during preheating, don’t forget about how critical steam is during baking—it creates that coveted crust while keeping moisture locked inside! For even better results, place an empty metal baking tray on the bottom rack of your oven while preheating; we’ll add water later for steaming action! As you wait patiently (I know it’s tough!), take some time to appreciate how far you’ve come—the aroma filling your kitchen will draw everyone closer as they eagerly await tasting this masterpiece.
Baking Your Perfect Asiago Bread Recipe
Step 9: A Beautiful Bake – The Grand Finale
Once you’ve reached that thrilling moment where you’re ready to bake your loaf, carefully transfer it into your preheated oven on the middle rack—you can even score its top with a sharp knife or lame if you’re feeling fancy! This scoring allows steam to escape while creating gorgeous patterns on top of our bread—a visual treat that’s equally important as flavor!
After placing your loaf inside, quickly pour about one cup of hot water into that empty baking tray at the bottom of your oven—sounds dramatic? It truly is! The steam generated will help create an irresistible crust while keeping our bread moist inside without compromising its structure. Bake for around 25-30 minutes until golden brown and sounding hollow when tapped on the bottom—that’s our telltale sign of doneness!
As you’re waiting (and trust me—it’ll feel like forever), I promise you won’t be able to resist peeking through that oven door just once or twice! Your home will soon be enveloped by an utterly intoxicating aroma—a symphony of cheesy warmth mingling with freshly baked bread notes inviting everyone nearby into taste-testing mode once it’s finally cool enough! When pulled from its hot sanctuary, let it cool on wire racks before slicing—that patience pays off in perfectly intact pieces instead of crumbling bits!
And there you have it—the Asiago Bread Recipe that combines simplicity with gourmet flair effortlessly! Serve warm alongside soups or salads or simply slathered with butter—it’ll bring smiles around any table and become an instant family favorite forevermore!
Storage and Enjoyment Tips for Your Asiago Bread Recipe
Now that you’ve crafted this delightful Asiago Bread, the moment of enjoyment is just around the corner! The aroma wafting through your kitchen is intoxicating, and I can almost hear the praises from family and friends as they take their first bite. But what happens when you inevitably have some leftover? No need to worry! I’m here to share how to store your masterpiece properly, ensuring it retains all that glorious flavor and texture.
Storing Leftover Asiago Bread Recipe
To keep your Asiago bread fresh and delicious, store it in an airtight container or wrap it tightly in plastic wrap. Place it at room temperature for up to three days, but trust me—this bread is so good, it might not last that long! If you’re looking to maintain its quality over a longer period, consider slicing the bread before storing; this allows you to take out just what you need without exposing the entire loaf to air. After a day or two, you may notice that the crust softens slightly—this is perfectly normal! To revive that delightful crustiness, simply pop slices in a toaster or under the broiler for a quick reheat. Enjoying this bread at its peak freshness is absolutely paramount!
Freezing Asiago Bread for Later
If you want to save some for those busy weeknights or future gatherings (and trust me, you’ll want some on hand!), freezing is a fantastic option. Wrap your cooled Asiago bread tightly in aluminum foil or freezer-safe plastic wrap, making sure there are no air pockets—this will help prevent freezer burn. You can freeze it for up to three months without losing any of its flavor magic! When you’re ready to indulge again, just take out the desired amount and let it thaw at room temperature. For an extra touch of warmth and comfort, reheat it in the oven at 350°F (175°C) for about 10-15 minutes until it’s warmed through. I promise this makes for a cozy treat anytime you crave something indulgent!
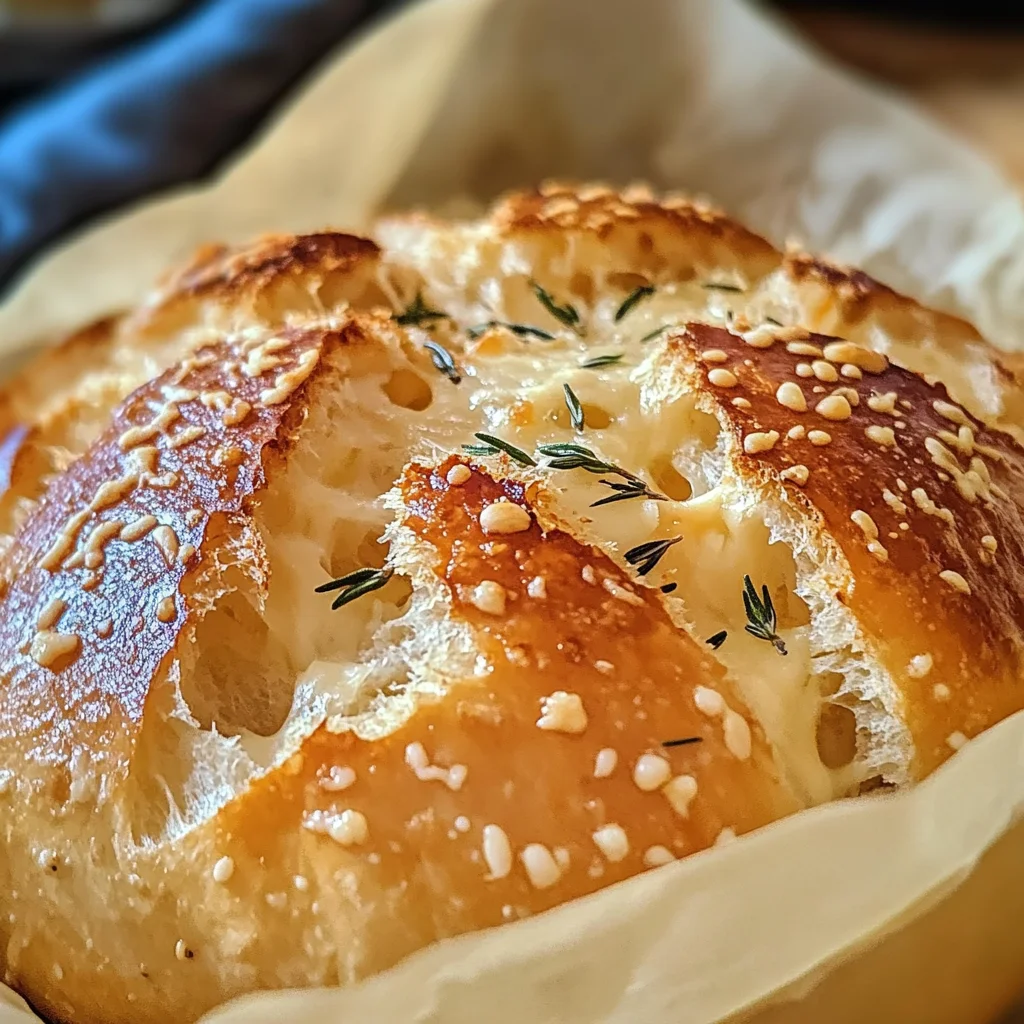
Asiago Bread Recipe
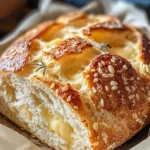
Indulge in the experience of homemade Asiago Bread, where the warm aroma and cheesy goodness create a comforting atmosphere perfect for family gatherings or cozy evenings. This recipe features a delightful blend of bread flour and shredded Asiago cheese, resulting in a crusty exterior and soft, cheesy interior that will elevate any meal. Whether served alongside a hearty soup or enjoyed on its own with a drizzle of olive oil, this Asiago Bread is an invitation to savor each moment and create lasting memories. Get ready to roll up your sleeves and embark on this satisfying baking adventure!
- Prep Time: 20 minutes
- Cook Time: 30 minutes
- Total Time: 50 minutes
- Yield: Approximately 12 servings 1x
- Category: Bread
- Method: Baking
- Cuisine: Italian
Ingredients
- 4 cups bread flour
- 2 ¼ teaspoons active dry yeast
- 1 ½ cups warm water
- 1 tablespoon granulated sugar
- 2 teaspoons salt
- 2 tablespoons olive oil
- 1 ½ cups shredded Asiago cheese
- Optional: Fresh rosemary or thyme, finely chopped
Instructions
- Proof the yeast by combining warm water, sugar, and yeast in a bowl. Let it sit for about five minutes until frothy.
- In another bowl, mix the bread flour and salt together.
- Combine the yeast mixture with the dry ingredients and add olive oil. Stir until a shaggy dough forms.
- Transfer the dough to a floured surface and knead for 8-10 minutes until smooth and elastic.
- Place the dough in a greased bowl, cover, and let it rise in a warm area until doubled in size (about 1-1.5 hours).
- Shape the dough into a loaf after punching down gently, fold in shredded Asiago cheese, then place it on parchment-lined baking sheets.
- Allow it to rise again for about 30-45 minutes before baking.
- Preheat your oven to 375°F (190°C). Bake for approximately 25-30 minutes until golden brown.
Nutrition
- Serving Size: 1 slice (70g)
- Calories: 180
- Sugar: 0g
- Sodium: 200mg
- Fat: 5g
- Saturated Fat: 1g
- Unsaturated Fat: 3g
- Trans Fat: 0g
- Carbohydrates: 29g
- Fiber: 1g
- Protein: 6g
- Cholesterol: 0mg