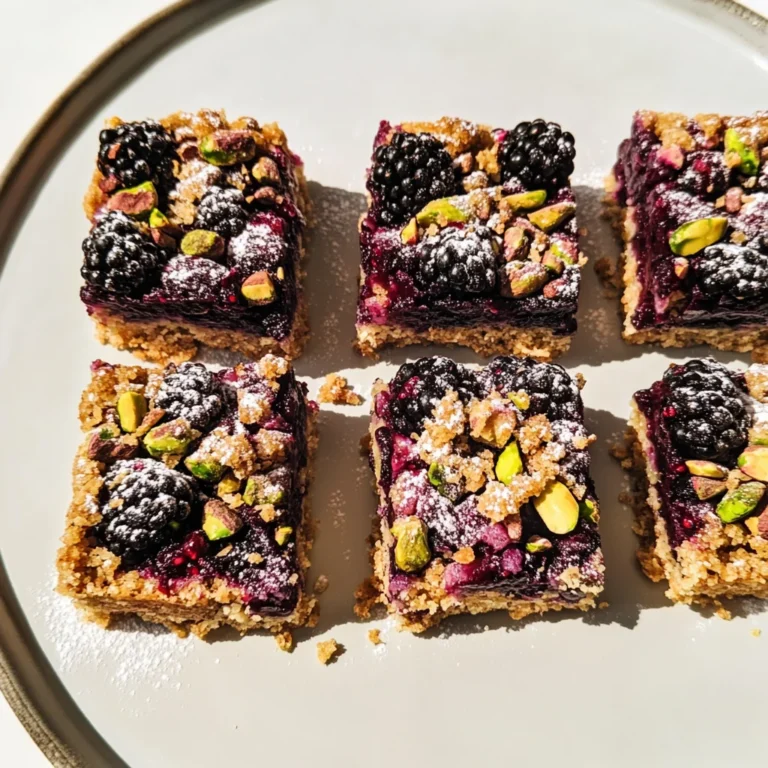
Wholesome Frozen Blueberry Yogurt Clusters
There’s something so enchanting about food that speaks to our souls, isn’t there? It’s more than just sustenance; it’s an experience that we share with loved ones. As I think back to those sun-drenched afternoons last summer, I remember the joyous sound of laughter mingling with the chirping of birds as my kids begged for ice cream. It dawned on me then: why not create a healthier alternative that still brings them joy? That’s how my Wholesome Frozen Blueberry Yogurt Clusters came to life—a delightful bridge between tradition and innovation. With their vibrant colors and rich textures, these little bites are not just snacks; they’re tiny bursts of happiness frozen in time, waiting to be savored.
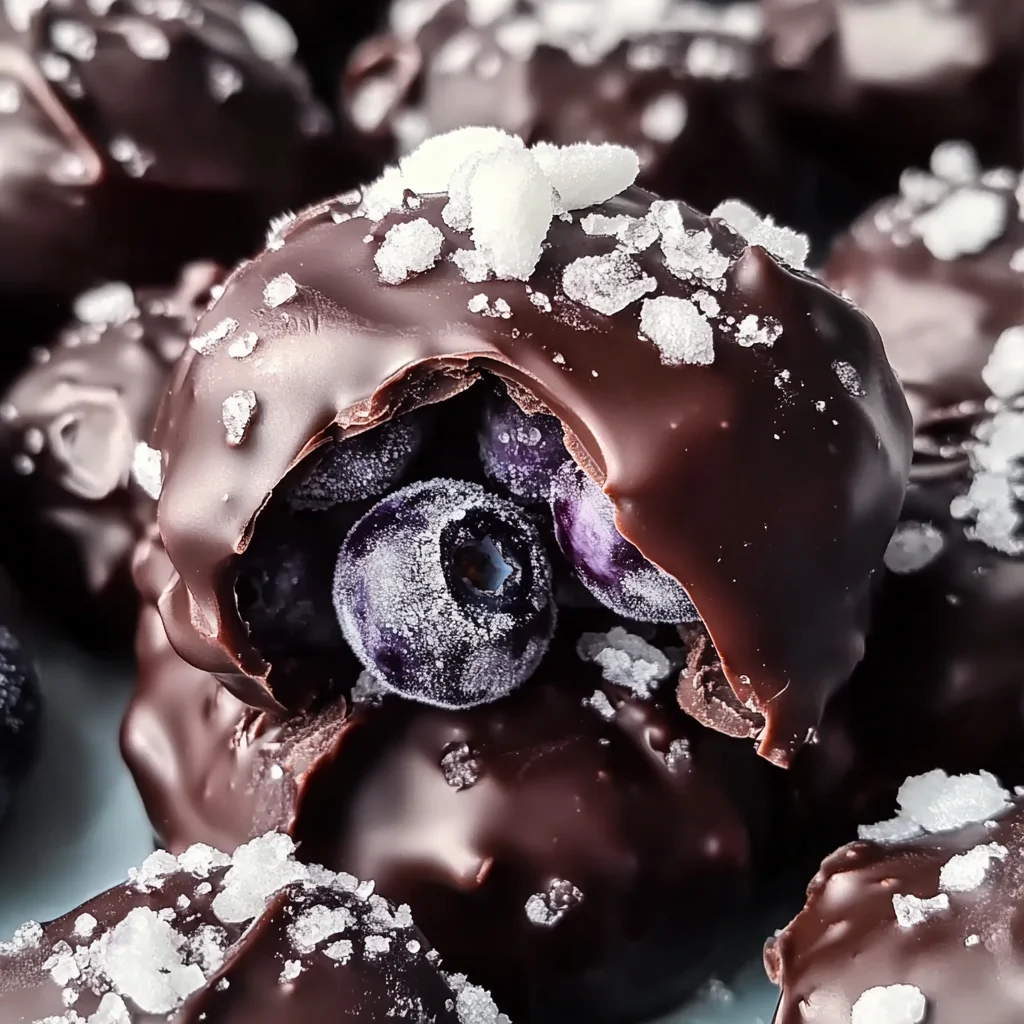
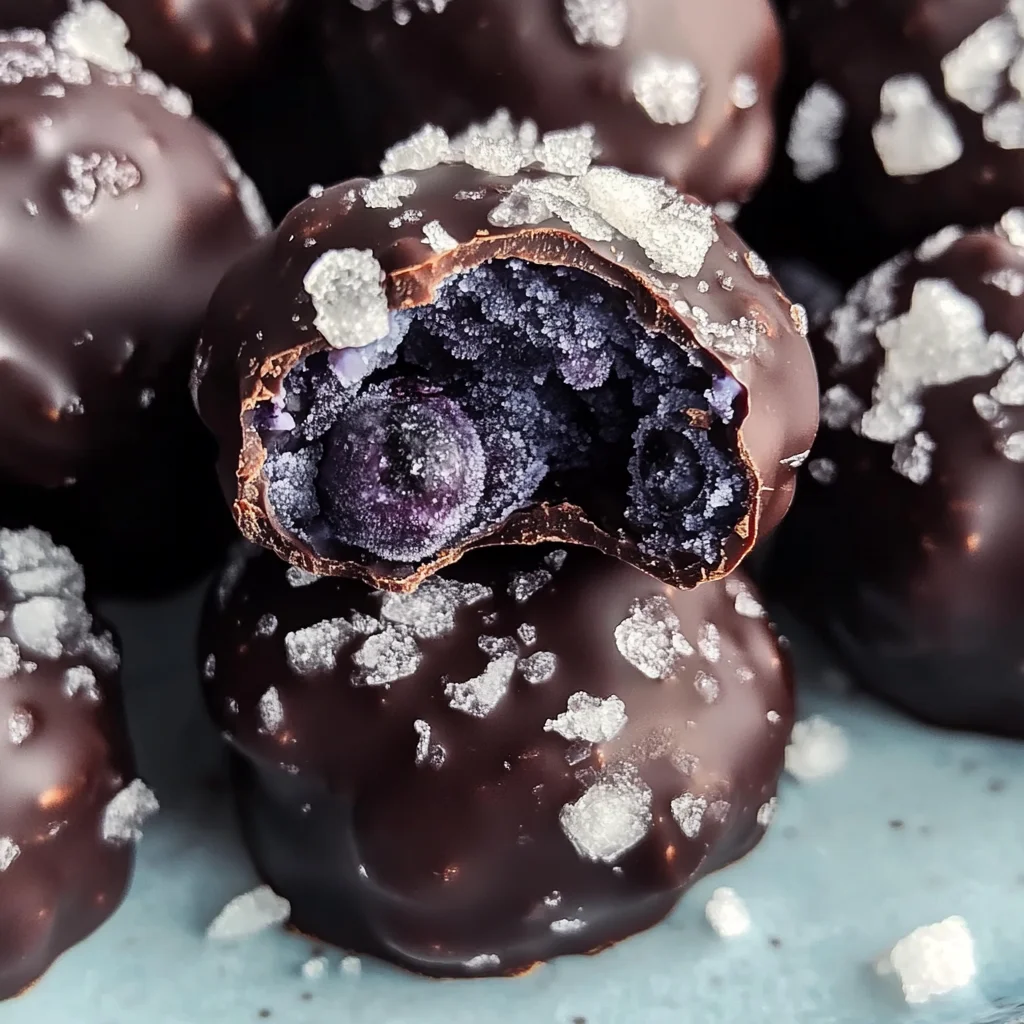
Imagine the scene: you open your freezer, and there they are—frozen yogurt clusters dotted with blueberries, shimmering like jewels. The sweet, creamy vanilla Greek yogurt wraps around the bright blueberries, while a delicate sprinkle of flaky salt enhances every tantalizing bite. Trust me when I say this is a revelation in snacking! Not only do these clusters satisfy sweet cravings, but they also provide a moment of bliss whenever you need it. They’re perfect for busy weeknights when you need a quick dessert idea or as part of your meal prep strategy for healthier eating throughout the week. So grab your ingredients because together we’re going to create something truly extraordinary!
Wholesome Frozen Blueberry Yogurt Clusters: A Delightful Treat for Every Occasion
Let’s dive into making these amazing Wholesome Frozen Blueberry Yogurt Clusters! This recipe is simple yet so rewarding—it feels like a hug in snack form. You’ll feel like a kitchen magician as you transform everyday ingredients into something utterly intoxicating that will have everyone asking for seconds!
Ingredients:
As we embark on this delicious culinary journey together, let’s take a moment to appreciate each ingredient’s role in creating these clusters. Each one contributes uniquely to the texture and flavor profile, ensuring that every bite is filled with joy.
- 1 cup fresh blueberries. These little gems are bursting with antioxidants and natural sweetness, giving our clusters their bright color and delectable flavor. When choosing blueberries, look for plump berries with a deep blue hue—these are usually the ripest and sweetest. Their juicy nature contrasts beautifully with the creamy yogurt, creating a delightful burst in your mouth with every bite. If fresh blueberries aren’t available, you can certainly use frozen ones; just make sure to thaw them first and drain any excess moisture before mixing them in.
- 1/2 cup chopped walnuts. These nuts add a wonderful crunch and nuttiness that complements the soft blueberries perfectly. Walnuts are also packed with healthy fats and protein, making this snack not just tasty but nourishing too! When chopping walnuts, aim for uniform pieces so they distribute evenly throughout the yogurt mixture—this ensures each cluster has that satisfying crunch when you bite into it. If someone in your family has nut allergies or if you’re looking for alternatives, feel free to swap in sunflower seeds or pumpkin seeds instead!
- 3/4 cup 2-5% vanilla Greek yogurt. The star of our show! Greek yogurt provides that creamy texture we all love while offering protein-rich goodness that keeps us full longer. Vanilla adds a sweet touch without overpowering the flavor of the blueberries—it’s like liquid gold! When selecting your yogurt, opt for brands that don’t contain excessive sugars or additives; you want pure deliciousness here! If you prefer dairy-free options or want something lighter, coconut yogurt works beautifully as well.
- A sprinkle of flaky salt for topping. This might seem like an afterthought, but trust me when I say it’s absolutely paramount! A touch of flaky sea salt elevates the sweetness of both the yogurt and blueberries by adding depth to each cluster’s flavor profile. It creates an irresistible balance between salty and sweet—just like those fancy desserts at upscale restaurants! Grab some quality flaky sea salt (like Maldon) if you can; it makes all the difference.
- 1 1/2 cups dark chocolate chips. Ahh…chocolate—the ultimate comfort food! Choose dark chocolate chips (aiming for 60% cocoa or higher) for their rich flavor and health benefits; they’re lower in sugar compared to milk chocolate while still providing that indulgent taste we all crave. Melting chocolate can be tricky—make sure to do it gently over low heat to avoid burning it! If you’re feeling adventurous or want to keep this entirely plant-based, try using dairy-free chocolate chips; they’re equally delightful.
- 3 tablespoons coconut oil. This magical oil plays a crucial role in ensuring our chocolate melts smoothly and adheres beautifully to our clusters without hardening too quickly once cooled down in the freezer. It adds subtle richness without overwhelming flavors—just enough to make those dark chocolate chips shine through! Plus, coconut oil has its own health benefits thanks to its medium-chain fatty acids which may provide energy boosts throughout your day.
Equipment You’ll Need:
Before we dive into creating our delightful clusters, let’s gather our trusty kitchen companions—the tools that will make this process seamless and enjoyable! Having the right equipment can transform cooking from a chore into pure pleasure.
- Mixing bowl – A sturdy mixing bowl is essential for combining ingredients effectively without worrying about spills or messes. Choose one that’s large enough to comfortably hold all your ingredients; glass or stainless steel bowls work beautifully because they’re durable and easy to clean.
- Silicone baking mat or parchment paper – When it comes time to freeze our clusters on a baking sheet, having either a silicone mat or parchment paper prevents sticking while allowing easy removal once they’re ready to enjoy! Plus, they help maintain an even surface temperature during freezing.
- Rubber spatula – This versatile tool is perfect for folding ingredients together gently without breaking apart those precious blueberries while ensuring everything is evenly mixed throughout your yogurt base.
- Baking sheet – A flat baking sheet provides ample space for laying out your delicious dollops of goodness before freezing them into perfection! Preferably choose one with raised edges (a rimmed baking sheet) so nothing rolls off during preparation.
Preparing the Wholesome Frozen Blueberry Yogurt Clusters
Step 1: Combine Your Creamy Base
Begin by taking that lovely bowl you’ve set aside and adding in your Greek yogurt along with half of those gorgeous fresh blueberries—you want them nestled within already so they get coated as we mix! Use your rubber spatula (trust me on this!) to gently fold everything together until well-combined—don’t rush this step since incorporating air creates lightness while maintaining chunks of blueberry bliss throughout each cluster later on!
Step 2: Incorporate Your Crunch Factor
Once your creamy base looks invitingly smooth (with luscious blueberry specks dancing through), it’s time to add those chopped walnuts into the mix! Again using gentle folding motions ensures those crunchy bites remain intact rather than getting crushed under pressure—which would ruin their satisfying texture we’d worked so hard on achieving earlier! As you do this step-by-step motion remember: patience pays off here!
Step 3: Prepare Your Chocolate Coating
In another small saucepan over low heat (or using a microwave-safe bowl), combine both dark chocolate chips along with coconut oil—this process is known as tempering chocolate—and requires attentive care because burnt chocolate can ruin everything we’ve created thus far! Stir continuously until fully melted into silky consistency resembling molten lava—oh yes please!! Remove from heat immediately once done since residual heat can continue cooking beyond desired point leading towards bitterness if overlooked…
Step 4: Coat Those Clusters!
Now comes one of my favorite parts—the fun messy bit where creativity meets indulgence! Using two spoons (or even forks if feeling adventurous) scoop generous dollops of our blueberry-yogurt mixture onto prepared baking sheets lined up earlier then dip each cluster individually into melted chocolaty goodness making sure they’re well-coated but not drowning entirely… We want just enough coverage here allowing nutty bits & fruity surprises peek through enticingly once frozen solidly later…
Stay tuned—we’re almost there! After finishing up all clusters allow them some time resting patiently before heading toward freezer adventure ahead…
Creating Your Wholesome Frozen Blueberry Yogurt Clusters
Step 5: A Berry Beautiful Coating
Now that your blueberries are perfectly prepped, let’s dive into the delightful world of yogurt coating. In a mixing bowl, take that luxurious vanilla Greek yogurt—the star of our clusters—and pour in your freshly washed blueberries. Gently fold the blueberries into the yogurt with a spatula or wooden spoon, taking care to avoid smashing them. This is crucial because we want those plump berries to remain intact, bursting with flavor when you take a bite. The creamy yogurt mixed with the vibrant blueberries creates a truly extraordinary mixture—imagine a symphony of flavors waiting to dance on your palate!
Once every blueberry is coated beautifully, it’s time to add in the chopped walnuts. Not only do they bring an earthy crunch to the table, but they also enhance the nutritional profile of our clusters. Walnuts are rich in omega-3 fatty acids and provide a wonderful textural contrast to the creamy yogurt and juicy fruit. This balance is absolutely paramount for achieving that satisfying mouthfeel we all crave in snacks. After everything is combined, I encourage you to taste just a dab of this blueberry-yogurt mixture—it’s like nature’s candy and will have you dreaming of summer days!
Step 6: Forming Delightful Clusters
The moment has arrived to shape these heavenly bites! Using a spoon, scoop out small dollops of your blueberry-yogurt-walnut mixture onto a parchment-lined baking sheet. Aim for about one tablespoon per cluster; this size is perfect for snacking without overwhelming yourself. As you drop each scoop onto the sheet, remember that spacing matters; leave about an inch between each dollop so they have room to freeze evenly without merging into one another.
Now, here’s where patience becomes your best friend! You’ll want to gently press each cluster down slightly with the back of your spoon; this step ensures that they freeze together more cohesively rather than as loose blobs. Trust me on this—if you skip it, you might end up with some clusters falling apart upon serving. After you’ve shaped all your clusters, it’s time for them to chill out in the freezer for at least 60 minutes. This transformative step allows the yogurt coating to firm up beautifully, turning our delicious mixture into bite-sized treats you can grab whenever that sweet tooth strikes!
Step 7: Melting Chocolate Magic
While those delightful clusters are freezing into perfection, let’s prepare their luscious outer layer—the dark chocolate coating! In a microwave-safe bowl (or using the double boiler method if you’re feeling fancy), combine dark chocolate chips and coconut oil. The coconut oil is essential here; it helps create a glossy finish and makes dipping much easier by thinning out the chocolate slightly without losing its rich texture.
Heat this mixture in short bursts—about 30 seconds at a time—stirring well after each interval until fully melted and smooth. Be careful not to overheat it; burnt chocolate can turn grainy and lose its gorgeous sheen! When it’s glossy and velvety like liquid gold, remove it from the microwave and allow it to cool just slightly before moving on to the next step. This cooling phase helps maintain that perfect temperature for dipping while ensuring your clusters don’t melt into oblivion upon contact with the warm chocolate.
Step 8: Dipping Into Decadence
With your clusters now frozen and your chocolate ready, it’s time for what I consider one of the most fun parts—dipping those delightful morsels into your silky chocolate! One by one, take each frozen cluster and carefully dip it into the melted chocolate; I love using two forks for this task—a fork for holding and another for rolling it around until it’s completely coated. Make sure every nook and cranny gets enveloped in that rich dark chocolate goodness—it’s absolutely paramount for infusing every bite with decadent flavor!
After each cluster has been dipped, gently shake off any excess chocolate before placing them back on the parchment-lined baking sheet. This little detail might seem trivial, but too much chocolate can lead to uneven bites which might be overly sweet or messy when enjoyed later. Once all your clusters have been dipped and look utterly intoxicating in their chocolate robes, sprinkle them with just a touch of flaky salt while they’re still wet; this adds an amazing contrast that elevates every single bite into something special.
Final Touches: The Sweet Chill
Now comes the moment of truth—return your beautifully coated clusters back to the freezer for another 10 minutes or so until everything hardens completely! The slight chill not only solidifies that luscious chocolate coating but also brings us back full circle with our original mission: creating easy-to-grab snacks that are nutritious yet indulgent at heart. I promise you—the transformation during this final chill is what makes these Wholesome Frozen Blueberry Yogurt Clusters genuinely irresistible.
Once they’re firm enough to hold their shape but still soft enough not to be rock-hard (think firm yet forgiving), transfer them into an airtight container or zip-top baggie for storage. They can last in your freezer for up to two weeks—but trust me when I say they won’t stick around long once friends or family discover them! Enjoy these delightful bites anytime you’re looking for something refreshing yet satisfying—they’re perfect as an afternoon pick-me-up or even as dessert after dinner.
And there you have it—a recipe that’s not just about feeding our bodies but nourishing our souls through delightful flavors and textures! So go ahead—make these Wholesome Frozen Blueberry Yogurt Clusters, gather around with loved ones, share stories over snacks, and relish every wonderful moment together because food is meant to be enjoyed—and oh boy, will you enjoy these!
Storage and Enjoyment Tips for Your Wholesome Frozen Blueberry Yogurt Clusters
Now that your Wholesome Frozen Blueberry Yogurt Clusters are perfectly frozen and ready to enjoy, let’s talk about how to keep this delightful treat fresh and flavorful! You’ll find that these little bites of joy not only make for a fantastic snack but also have a knack for brightening up your day whenever you reach into the freezer. Trust me, having these beauties on hand is like keeping a secret stash of happiness at your fingertips!
Storing Leftover Wholesome Frozen Blueberry Yogurt Clusters
When it comes to storing your leftover Wholesome Frozen Blueberry Yogurt Clusters, I recommend using an airtight container or a resealable freezer bag. This is crucial because it helps prevent any unwanted freezer burn that could dull their vibrant flavor and texture. If stored properly, they can last in the freezer for up to three months without losing their charm! To maintain their delightful quality, consider placing a slice of bread in the container with them—this little trick helps absorb moisture and keeps everything tasting fresh. After storage, you’ll be pleasantly surprised to discover that each cluster retains its creamy yogurt exterior and bursts with blueberry goodness, just as if they were freshly made! For serving, simply pull out a few clusters whenever you need a quick pick-me-up; there’s no need to thaw them first as they’re delightful straight from the freezer!
Freezing Blueberries for Later
If you find yourself with an abundance of fresh blueberries (which is always a delightful problem), consider freezing them for later use in your Wholesome Frozen Blueberry Yogurt Clusters. To do this, simply wash and dry the blueberries thoroughly before spreading them out on a baking sheet in a single layer. Pop them in the freezer until they’re solid—a process known as flash freezing—which will take about an hour or so. Once they’re frozen, transfer them to an airtight container or freezer bag where they’ll keep well for up to six months! This method not only preserves their vibrant color but also ensures that you can whip up these clusters anytime you want without worrying about spoilage. Think of how convenient it would be to have frozen blueberries ready at a moment’s notice; it truly transforms everyday snacking into something special!
Wholesome Frozen Blueberry Yogurt Clusters
Enjoy delicious Wholesome Frozen Blueberry Yogurt Clusters for a refreshing treat anytime! Try this easy recipe today!
- Prep Time: 20 minutes
- Cook Time: 10 minutes
- Total Time: 30 minutes
- Yield: Approximately 12 servings (24 clusters) 1x
- Category: Dessert
- Method: Freezing
- Cuisine: American
Ingredients
- 1 cup fresh blueberries
- 1/2 cup chopped walnuts (or sunflower seeds)
- 3/4 cup vanilla Greek yogurt
- A sprinkle of flaky salt
- 1 1/2 cups dark chocolate chips
- 3 tablespoons coconut oil
Instructions
- In a mixing bowl, combine the Greek yogurt and half of the blueberries. Gently fold until well mixed.
- Add in the chopped walnuts and fold until evenly distributed.
- Scoop tablespoon-sized dollops of the mixture onto a parchment-lined baking sheet and press them down slightly.
- Freeze for at least 60 minutes until firm.
- While freezing, melt dark chocolate chips with coconut oil over low heat until smooth.
- Dip each frozen cluster into the melted chocolate and place back on the baking sheet.
- Sprinkle with flaky salt and freeze again for 10 minutes until set.
Nutrition
- Serving Size: 2 clusters (45g)
- Calories: 180
- Sugar: 9g
- Sodium: 25mg
- Fat: 11g
- Saturated Fat: 5g
- Unsaturated Fat: 6g
- Trans Fat: 0g
- Carbohydrates: 19g
- Fiber: 3g
- Protein: 4g
- Cholesterol: 0mg