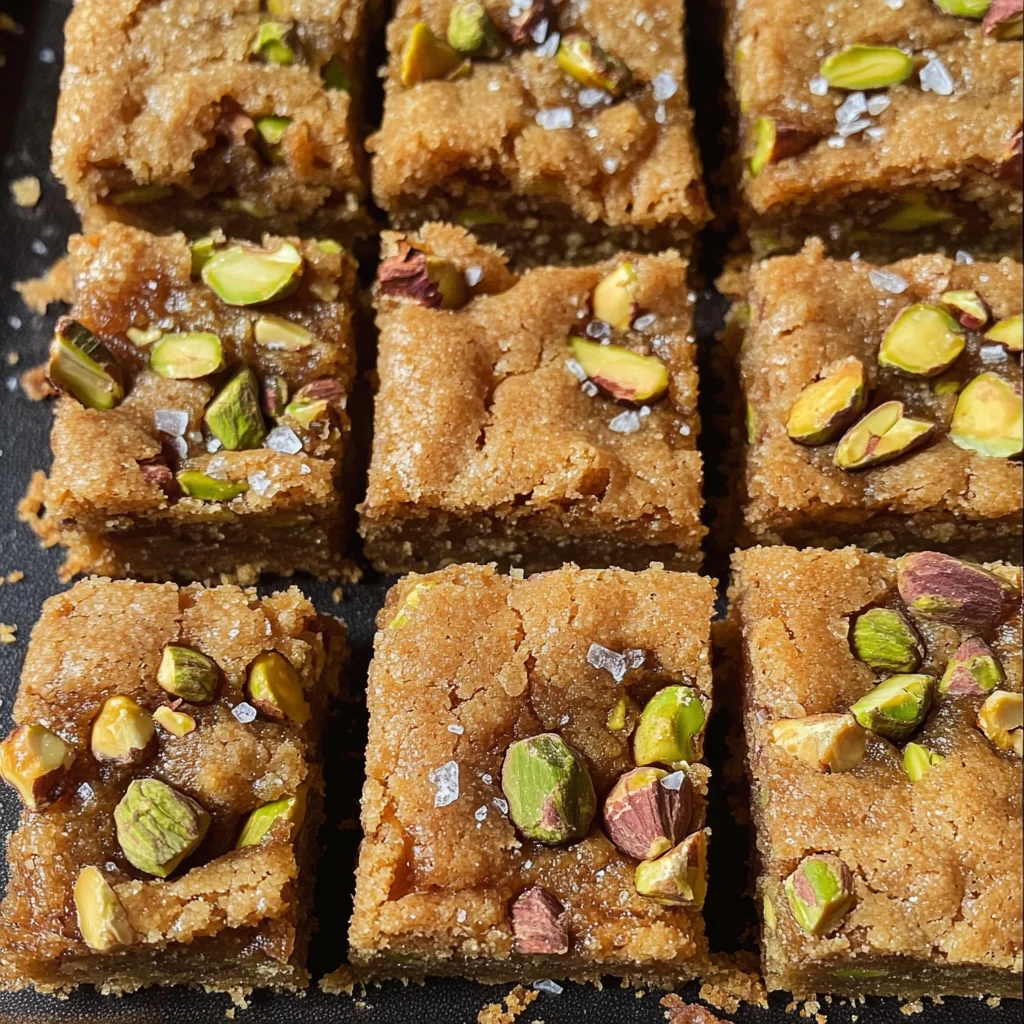
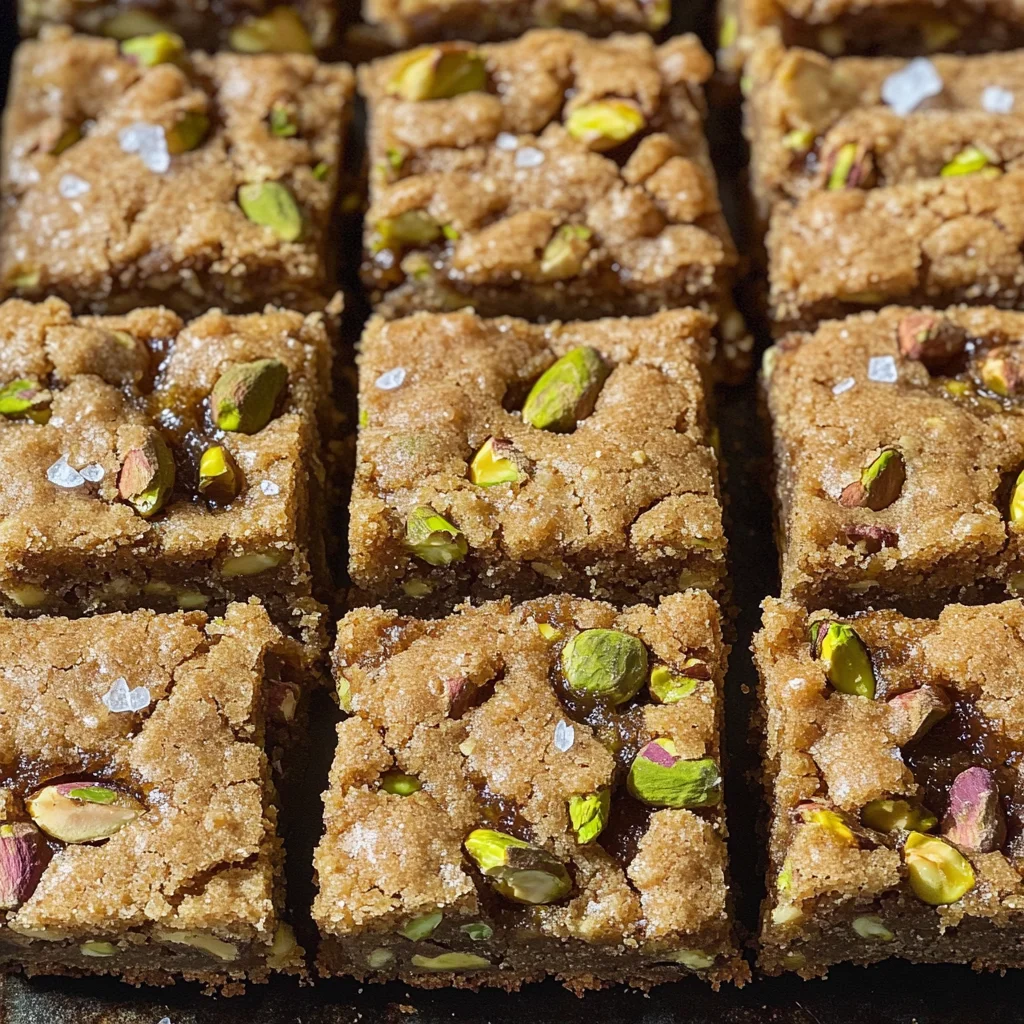
Brown Butter and Honey Pistachio Cookie Bars Recipe
There’s something truly magical about baking that transcends mere sustenance; it becomes an experience, a ritual, a beautiful alchemy of ingredients that transforms into something utterly intoxicating. As you embark on this culinary journey to create Brown Butter and Honey Pistachio Cookie Bars, you’re not just preparing a treat for yourself or your loved ones; you’re nurturing connections, sharing love through flavors, and creating memories that linger long after the last crumb has been savored. The rich aroma of nutty brown butter wafting through your kitchen, the golden hue of honey blending with the earthy crunch of pistachios—it’s these moments that make cooking a heartfelt endeavor. Trust me when I say this recipe is more than just a collection of ingredients and steps; it’s an invitation to indulge in the profound satisfaction that comes with baking.
As you gather your ingredients and tools, feel free to let your imagination run wild! The blend of sweet honey and nutty pistachios creates a harmonious balance that will dance upon your palate in ways you might not expect. It’s like a warm hug on a cold day—comforting yet exciting. These cookie bars are perfect for any occasion: whether it’s an afternoon pick-me-up with a cup of tea or the star of the dessert table at a gathering with friends and family. They invite you to explore the delightful contrast between sweet and salty, soft and crunchy—a flavor profile people yearn for. So roll up your sleeves and prepare to create something truly extraordinary with this Brown Butter and Honey Pistachio Cookie Bars Recipe!
Brown Butter and Honey Pistachio Cookie Bars Recipe: A Sweet Symphony of Flavors
Welcome to one of my all-time favorite recipes! These Brown Butter and Honey Pistachio Cookie Bars are not only easy to make but also profoundly satisfying in every bite. With their rich caramel notes from brown butter, delicate sweetness from honey, and delightful crunch from pistachios, they are bound to become a cherished addition to your recipe repertoire. So let’s dive right into the ingredients that will help us craft this delicious treat!
Ingredients:
As we embark on this delightful baking adventure together, let’s take a moment to appreciate each ingredient that will contribute its unique charm to our scrumptious cookie bars.
- 1 cup (2 sticks or 226g) unsalted butter. This is crucial for achieving the right texture in our bars. Unsalted butter allows us full control over the salt content in our recipe, ensuring we can balance flavors perfectly without unexpected surprises. Browning the butter adds depth—this process infuses each bite with an irresistible nuttiness that’s simply divine. Make sure your butter is fresh; you’ll want it to have that lovely creamy aroma without any off smells.
- 2 ½ cups (about 310g) all-purpose flour, spooned and leveled. Flour is the backbone of our cookie bars—it provides structure while allowing them to maintain that chewy texture we adore. Spoon it gently into your measuring cup rather than scooping directly from the bag; this prevents compacting and ensures accuracy in measurement. Remember, too much flour can lead to dry bars, so let’s keep it light!
- 1 teaspoon baking soda. This leavening agent plays a pivotal role in giving our cookie bars that lovely rise as they bake, resulting in a softer texture while still holding their shape beautifully. Ensure your baking soda is fresh by checking the expiration date; if it’s past its prime, it may not work effectively.
- ¾ teaspoon salt (use ½ teaspoon if using salted pistachios). Salt enhances flavor remarkably by balancing sweetness and elevating all other ingredients’ profiles in our recipe. It can be tempting to skip or reduce salt in desserts, but trust me—this small amount makes all the difference! Just remember to adjust if you’re using salted nuts later on.
- ¾ cup (165g) packed light brown sugar. This sugar adds moisture and contributes rich caramel notes due to its molasses content—it’s what gives our bars that delightful chewiness! Be sure to pack it firmly into your measuring cup for an accurate measure; otherwise, you might end up with drier results.
- ½ cup (100g) granulated sugar. While brown sugar brings depth, granulated sugar helps create those perfectly crispy edges we all crave! Together with brown sugar, they create a beautiful harmony of sweetness throughout our cookie bars.
- ½ cup (170g) honey—Clover or wildflower honey works well here! Honey adds not only sweetness but also moisture; it lends a floral undertone that beautifully complements the nuttiness of pistachios. Choose high-quality honey for vibrant flavors—you won’t regret it!
- 2 large eggs, at room temperature. Eggs provide richness and stability in our recipe while helping bind everything together beautifully. Room temperature eggs incorporate better into mixtures than cold ones do—just set them out about 30 minutes before you begin baking for optimal results.
- 2 teaspoons pure vanilla extract. Vanilla is like magic in baking—it amplifies flavors without drawing attention away from them! Always opt for pure extract over imitation for authentic taste; it’ll elevate every bite into something truly special.
- 1 ½ cups (about 210g) shelled pistachios, raw and unsalted, roughly chopped (reserve ¼ cup for topping). These crunchy gems offer delightful texture along with their earthy flavor profile—perfectly complementing our sweet bars! When purchasing pistachios, look for vibrant green hues—they indicate freshness—and avoid those pre-shelled versions as they often lack flavor.
- Flaky sea salt, for sprinkling on top (optional but highly recommended). This finishing touch enhances both flavor complexity and visual appeal—a sprinkle of flaky salt works wonders against sweetness while providing a gorgeous contrast.
Let’s gather these wonderful ingredients so we can create something remarkable together!
Equipment You’ll Need:
Before we dive into making these heavenly cookie bars, let’s chat about some essential tools you’ll want by your side throughout this process—the right equipment ensures everything runs smoothly while making baking feel like pure joy!
- 9×13 inch baking pan – This size is perfect for creating deliciously thick cookie bars without overcrowding them during baking! If you don’t have one available at home yet, consider investing because it’s versatile enough for many baked goods beyond just these lovely treats.
- Parchment paper – Using parchment paper makes lifting out those precious cookie bars effortless once baked! It eliminates sticking issues so you can enjoy clean cuts without any hassle while keeping cleanup simple too—a win-win situation!
- Electric mixer or sturdy whisk – An electric mixer saves time when creaming butter & sugars together until lightened & fluffy—a vital step towards achieving perfectly textured cookies! If using a whisk instead? Just channel some serious arm strength because that’s no small feat!
- Rubber spatula or wooden spoon – These trusty tools help combine ingredients gently without overmixing (which leads down dangerous paths toward toughness!). They also aid in folding nuts into dough evenly—essential for proper distribution throughout every delicious bite.
These essential items will serve as fantastic partners on this flavorful journey we’re embarking upon together!
Preparing the Brown Butter and Honey Pistachio Cookie Bars Recipe
Step 1: The Art of Melting Butter
We begin our journey by melting one cup of unsalted butter over medium heat until it transforms from solid gold into liquid gold! As it starts foaming and sizzling away—a beautiful transformation begins—the water content evaporates slowly while captivating us with its enticing aroma filling the kitchen air around us! Continue swirling occasionally so every bit heats evenly—be vigilant now because timing matters greatly here! After about five minutes or so—you’ll notice golden specks forming at bottom—it should turn amber-colored while exuding an intensely nutty scent that’ll make your heart race with anticipation! Once you’ve achieved this glorious hue—immediately remove from heat; pour everything into large heatproof bowl—including those toasted milk solids—that’s where flavor lies hidden within—as we move along towards greatness together!
Step 2: Cooling Down
Now comes an important step: allowing our browned butter time to cool down slightly before proceeding further! Let it sit undisturbed at room temperature for around fifteen minutes—or if you’re feeling impatient like I often do—pop it quickly into fridge stirring occasionally until cool enough yet still liquidy—not solidified at all either mind you! This ensures no scrambling occurs when introducing eggs later on during mixing phase—trust me here folks; skipping this could lead straight towards disaster territory which none among us desire!
Step 3: Getting Organized
While waiting patiently (or eagerly!) during cooling period—we should take advantage by prepping everything else needed ahead-of-time too including greasing up that trusty nine-by-thirteen-inch baking pan lightly then lining base nicely using parchment paper leftover edges hanging out just enough over sides enabling easy lifting post-baking later down road—believe me when I say it’ll save countless headaches come cutting time after cookies have cooled completely!.
Step 4: Mixing Magic Begins
Once cooled sufficiently—we’re ready now—to create some magic as we gather together browned butter alongside both sugars within large mixing bowl using electric mixer set medium speed allowing everything incorporate thoroughly resulting smooth consistency lightened color taking shape before very eyes within few short minutes!. Then add those lovely room-temperature eggs one-by-one beating well after each addition until fully blended followed closely behind by splash pure vanilla extract making sure scrape down sides along way too just ensuring even distribution happening throughout whole mixture which is absolutely paramount towards final outcome achieved eventually later on!.
Stay tuned as we continue crafting these delightful Brown Butter and Honey Pistachio Cookie Bars together—it only gets better from here!
Step 5: Cooling the Golden Nectar of Brown Butter
Now that we’ve coaxed our unsalted butter into a rich, nutty brown goodness, it’s time to let this fragrant liquid gold cool down a bit. Pour the beautiful, amber-hued brown butter into a large heatproof bowl—you want to capture every last drop, including those delicious toasted milk solids settled at the bottom. Allowing the butter to cool for about 15-20 minutes is crucial because it affects the texture and structure of our cookie bars. If you skip this step, you run the risk of cooking the eggs when they’re added later, which can create an undesirable texture.
If you’re in a hurry, you can pop it into the refrigerator for about 10 minutes, but don’t let it harden! You want it to remain liquid but cool enough that when you touch it, it feels pleasantly warm rather than hot. This balance is vital; too hot and your eggs will scramble; too cold and we’ll end up with a clumpy mess. Trust me on this one—patience pays off in baked goods, and achieving that perfect creamy consistency will make your Brown Butter and Honey Pistachio Cookie Bars Recipe utterly divine!
Step 6: Preparing Your Baking Pan
While your brown butter is cooling beautifully, let’s turn our attention to preparing the baking pan. Greasing a 9×13 inch baking dish with a touch of extra butter is paramount because we want to ensure easy release for our cookie bars once they’re baked to perfection. Next, line the greased pan with parchment paper; I recommend leaving an overhang on two opposite sides. This sling will be your best friend later when it’s time to lift out and cut your bars—it makes everything so much easier!
You might be wondering why we go through this extra effort instead of just pouring the batter directly into the greased pan. The parchment paper not only helps with lifting out the entire slab intact but also prevents any potential sticking that could ruin our lovely edges. Plus, who wants to be scraping their delicious bars off the bottom of a pan? A little foresight here will ensure that every bite remains intact and beautiful.
Step 7: Mixing It All Together
With your warm brown butter ready and your baking pan prepared, we’re diving into mixing together our sugars and liquids! Grab your electric mixer or whisk—whatever suits your fancy—and combine the cooled brown butter with the light brown sugar and granulated sugar in that large bowl. Beat them together on medium speed for about 2-3 minutes until everything is well combined and smooth. You want this mixture to lighten slightly in color as air gets whipped into it; this aeration creates a lovely texture in our finished bars.
As you mix, take a moment to inhale deeply—the sweet aroma of caramelized sugar mingled with nutty notes from the brown butter is simply intoxicating! It’s all about building flavors here. Once you’ve achieved that glorious smoothness, it’s time to add in our star ingredients: two large eggs at room temperature! Adding them one at a time allows each egg to fully incorporate before introducing its sibling; this gives us stability in our batter while keeping everything moist and tender. Make sure to scrape down the sides of your bowl as needed—this ensures no dry bits are left behind longing for love!
Step 8: The Art of Folding in Flavors
Now comes one of my favorite parts: folding in those gorgeous chopped pistachios! After mixing in pure vanilla extract until it’s fully combined (and oh boy does that smell heavenly!), carefully add in your raw, unsalted pistachios using a rubber spatula or wooden spoon. Folding is different from mixing; it’s about gently incorporating ingredients without overworking them. This step is absolutely crucial because if you were to mix vigorously here, you’d risk developing gluten from the flour too much—leading us straight into tough territory instead of those coveted chewy cookie bars.
Trust me when I say that gentle movements are key; think of it as cradling your ingredients rather than throwing them around! You want those vibrant green bits evenly distributed throughout the dough so every bite bursts with their unique flavor and crunch. When you see no more streaks of dry flour peeking through—that’s your cue! Remember that overmixing can lead us down an unfortunate path towards density rather than delightful chewiness.
Next Major Phase – Baking Your Perfect Brown Butter and Honey Pistachio Cookie Bars Recipe
Step 9: Pressing Into Perfection
Let’s talk about how we get this luscious dough into our prepared baking pan! Using either the back of a spoon or an offset spatula (or even just your lightly greased fingertips), gently press the cookie dough evenly across the bottom of your lined pan. Take care here—the goal is not just to fill every corner but also to ensure that surface is as level as possible for even baking throughout.
Why does leveling matter? Well, uneven surfaces can lead to uneven baking—a thicker part may stay gooey while thinner edges get overly crispy or burnt. As you’re pressing down, allow yourself a moment to take in that irresistible aroma wafting up—I’m telling you now, it’s going to be hard not to sneak a taste! If you’d like an extra sprinkle of pizzazz on top (and who wouldn’t?), now’s also your chance to scatter those reserved chopped pistachios across the surface along with a pinch of flaky sea salt for that delightful contrast in flavor.
Step 10: Baking Bliss
Finally, it’s time for these beauties to head into their warm haven—the oven! Preheat it properly first so we can achieve that ideal bake temperature; aim for around 350°F (175°C). Slide your pan onto the middle rack and set your timer for 25-30 minutes; however, keep an eye on things after about 23 minutes—it’s always better safe than sorry! The edges should turn lovely golden brown while maintaining just a hint of softness in the center.
Here’s where experience comes into play: use a toothpick test as your trusty guide! Insert it gently into various spots in the center; ideally, you want it emerging with moist crumbs clinging but no wet batter attached—that’s how you know you’ve struck gold! If things look slightly underbaked but not jiggly or wet anymore (which means they’ve likely finished cooking outside), then trust me—the chewier texture will be worth it!
Step 11: Cooling Your Creation
Once they’re done baking beautifully, resist all urges (I know it’s hard!) and let these cookie bars cool completely right inside their pan before attempting any lifting or cutting action—this typically takes at least 2-3 hours but can vary depending on room temperature conditions. Patience here truly matters since allowing them ample time sets their structure perfectly—it keeps them from crumbling apart during cutting sessions!
If you’re wondering why cooling is such an important phase—consider this: as they cool down gradually within their own warmth trapped inside that cozy pan space, they firm up just enough while still preserving their wonderful chewy texture we’ve worked so hard for! Cutting prematurely leads straight down crumbly chaos lane—not what we want after all this loving effort!
Step 12: Cutting Into Perfect Portions
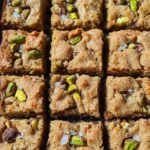
Once cooling time has passed—oh what joy awaits you! Using a large sharp knife (wiping clean between cuts ensures neat edges), slice these tempting bars into whatever size tickles your fancy—a classic grid pattern works wonderfully whether you’re aiming for smaller bites or larger indulgences. A suggestion? Aim for either a generous grid yielding around 15 larger portions or perhaps an appealing square formation giving about 24 manageable bites—all perfect friends or family sharing sizes!
And there you have it—the culmination of rich flavors melded together through love and care inspiring joy at every single bite! Serve these magnificent Brown Butter and Honey Pistachio Cookie Bars Recipe straight away while they still hold onto some warmth—or store them away carefully once completely cooled—we both know they’ll delight anyone fortunate enough to enjoy them later too!
I promise you these treats will become household favorites faster than you can say cookie bar! Enjoy sharing them with friends or savoring solo; either way—they’re bound to leave everyone asking for seconds! Happy baking!
Storage and Enjoyment Tips for Your Brown Butter and Honey Pistachio Cookie Bars Recipe
Now that you’ve created your delightful Brown Butter and Honey Pistachio Cookie Bars, it’s time to bask in the glory of your kitchen triumph! These bars are not just a treat; they’re an experience to savor. As you enjoy their rich, nutty aroma wafting through your home, you’ll find that they taste even better after a little time to rest. The flavors meld together beautifully, creating a symphony of sweetness and nuttiness that will leave you reaching for just one more bite. But what happens if you have leftovers? Fear not! I’ve got you covered with some fantastic storage tips to keep those bars fresh and delicious.
Storing Leftover Brown Butter and Honey Pistachio Cookie Bars Recipe
To ensure your Brown Butter and Honey Pistachio Cookie Bars stay fresh and delectable, store them in an airtight container at room temperature. This helps maintain their chewy texture while keeping the flavors vibrant. If stored properly, they’ll remain delightful for about 4-5 days – although I have to warn you, they might not last that long! For an extra touch of moisture retention, consider placing a slice of bread in the container along with the bars; this trick infuses a gentle softness into each bite. The beauty of these cookie bars is that they actually get tastier as they sit, allowing the honey to deepen its flavor profile while the brown butter continues to impart its warm notes. When it comes time to enjoy them again, just grab one straight from the container or give them a quick warm-up in the microwave for about 10 seconds to bring back that luscious melt-in-your-mouth quality.
Freezing Brown Butter and Honey Pistachio Cookie Bars Recipe for Later
If you’re thinking about saving some for later (which is always a great idea!), freezing these cookie bars is incredibly simple and convenient. Start by cutting them into squares or rectangles – whatever size suits your fancy – then wrap each piece tightly in plastic wrap or place them in a freezer-safe bag or container. They can be frozen for up to three months without losing their scrumptious charm. When you’re ready to indulge again, simply remove the desired number of bars from the freezer and let them thaw at room temperature for about 30 minutes or pop them in the microwave for a few seconds. Trust me when I say this is one of the best ways to always have a sweet treat on hand without any fuss! The joy of pulling out a perfectly preserved cookie bar and feeling that warmth spread through you as it softens is simply unbeatable.
Brown Butter and Honey Pistachio Cookie Bars
Experience the delightful fusion of flavors in our Brown Butter and Honey Pistachio Cookie Bars Recipe. These scrumptious bars feature the nutty richness of brown butter combined with the sweet, floral notes of honey, all perfectly balanced by the crunchy texture of pistachios. Ideal for sharing with loved ones or enjoying as a solo treat, they evoke warmth and comfort in every bite. Easy to make and even easier to love, these cookie bars are perfect for any occasion—from afternoon snacks to dessert tables at gatherings. Get ready to indulge in a sweet experience that will leave everyone asking for more!
- Prep Time: 15 minutes
- Cook Time: 30 minutes
- Total Time: 45 minutes
- Yield: Approximately 24 servings 1x
- Category: Dessert
- Method: Baking
- Cuisine: American
Ingredients
- 1 cup unsalted butter
- 2 ½ cups all-purpose flour
- ¾ teaspoon baking soda
- ¾ teaspoon salt
- ¾ cup packed light brown sugar
- ½ cup granulated sugar
- ½ cup honey
- 2 large eggs
- 2 teaspoons vanilla extract
- 1 ½ cups shelled pistachios, roughly chopped
Instructions
- Preheat your oven to 350°F (175°C) and prepare a 9×13 inch baking pan with grease and parchment paper.
- Melt the unsalted butter over medium heat until browned; let cool slightly.
- In a large bowl, mix together the cooled brown butter, brown sugar, and granulated sugar until smooth.
- Add the eggs one at a time, mixing well after each addition, followed by vanilla extract.
- In another bowl, whisk together flour, baking soda, and salt; gradually fold into the wet mixture until just combined.
- Gently fold in chopped pistachios.
- Press the dough evenly into the prepared pan and sprinkle with reserved pistachios and flaky sea salt if desired.
- Bake for 25-30 minutes until golden brown; allow to cool completely before cutting into bars.
Nutrition
- Serving Size: 1 cookie bar (40g)
- Calories: 190
- Sugar: 10g
- Sodium: 75mg
- Saturated Fat: 6g
- Unsaturated Fat: 4g
- Trans Fat: 0g
- Carbohydrates: 22g
- Fiber: 1g
- Protein: 3g
- Cholesterol: 30mg