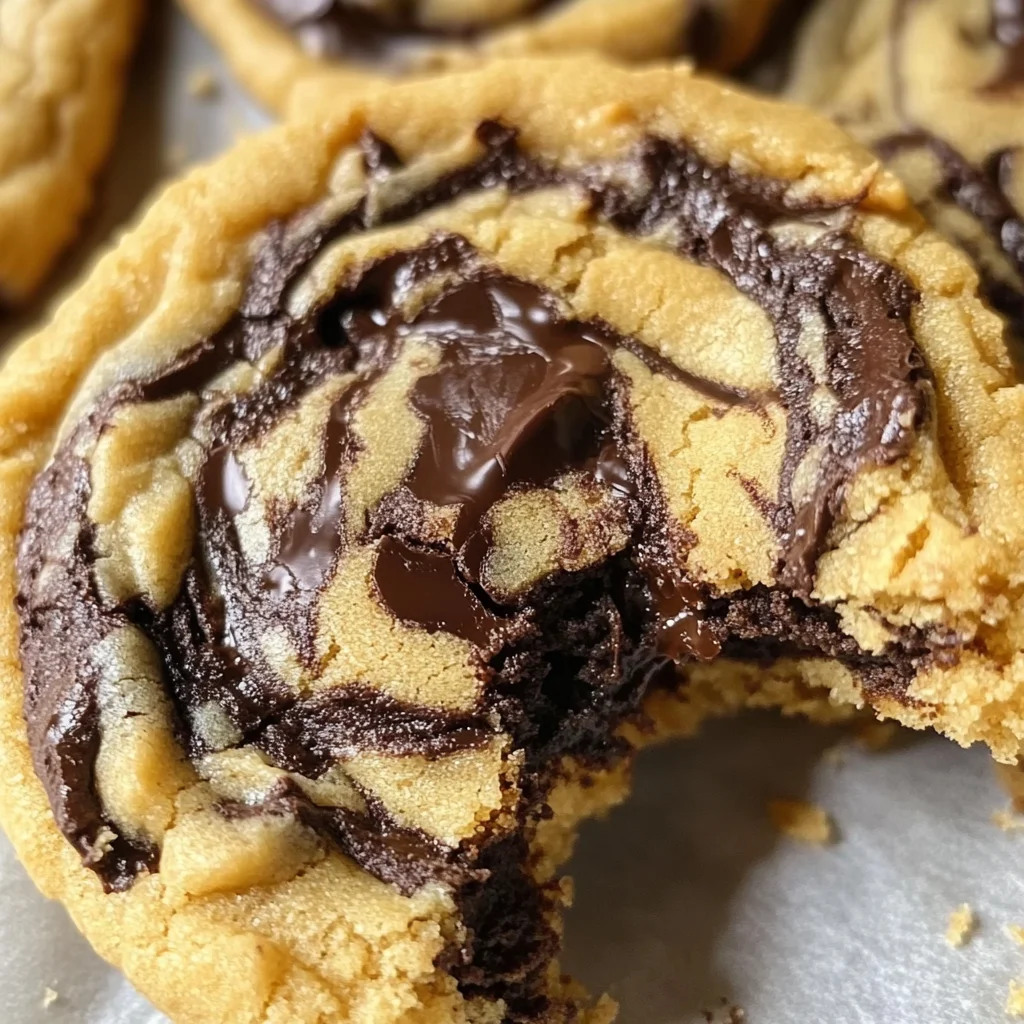
Peanut Butter Brownie Swirl Cookies
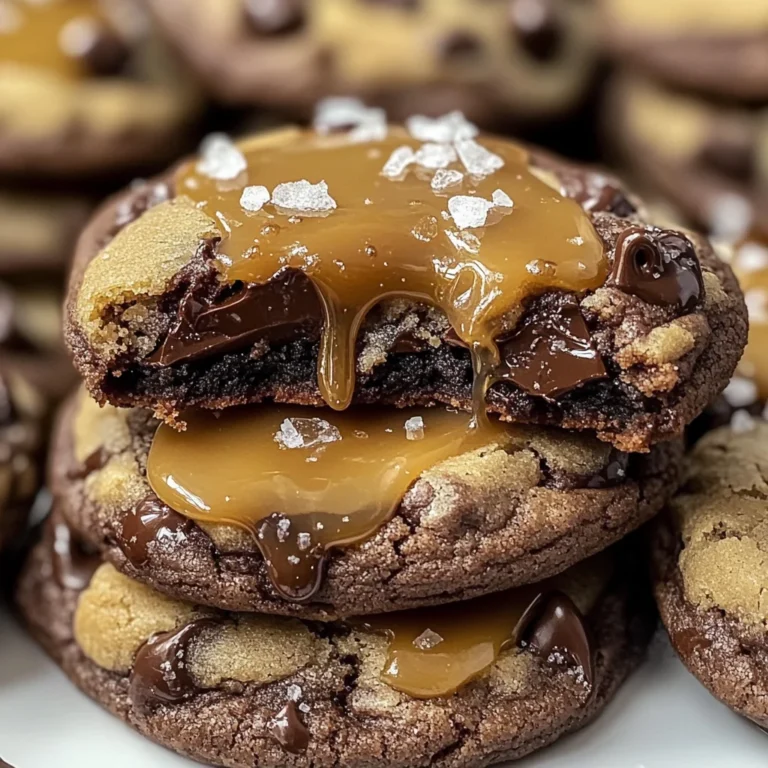
There’s something profoundly magical about the act of baking, isn’t there? It’s not just about mixing flour and sugar; it’s an experience that stirs the heart and ignites the senses. When I first stumbled upon this recipe for Peanut Butter Brownie Swirl Cookies, I knew I had found a little slice of heaven. Picture this: a warm kitchen filled with the intoxicating aroma of melted chocolate and nutty peanut butter swirling together in perfect harmony. As you pull these delightful cookies from the oven, their tops glisten with a sprinkle of sweetness, inviting you to take a bite and savor the delightful contrast between chewy brownie and creamy peanut butter. Each cookie is more than just a treat; it’s a memory waiting to be made, a moment to share with friends, family, or even just yourself after a long day.
Now, let me tell you why these Peanut Butter Brownie Swirl Cookies are not only delicious but also so incredibly special. They embody that perfect marriage of flavors: the rich decadence of chocolate brownies intertwined with the creamy goodness of peanut butter. It’s like having your cake and eating it too! You know those days when you simply can’t decide between cookies or brownies? This recipe eliminates that dilemma in the most glorious way possible! As they bake, the sweet aroma wafts through your home, captivating everyone nearby and drawing them into the kitchen like moths to a flame. Trust me, these cookies are destined to become your new favorite indulgence—ideal for any occasion or simply as a reward after conquering life’s little battles.
Peanut Butter Brownie Swirl Cookies: A Decadent Delight
I’m absolutely thrilled to share with you my take on these scrumptious Peanut Butter Brownie Swirl Cookies! They are so easy to prepare yet deliver such an impressive result that you’ll find yourself baking them again and again. The best part? Each bite offers that delightful combination of textures and flavors—a soft cookie exterior giving way to fudgy brownie bliss swirled within. It’s comfort food at its finest, perfect for cozy nights in or as a sweet surprise for guests.
Ingredients:
Embarking on this culinary journey means gathering some truly essential ingredients that come together in perfect harmony to create your Peanut Butter Brownie Swirl Cookies.
- 1/2 cup creamy peanut butter. Ah, peanut butter—the star of our show! This liquid gold adds not only creaminess but also a rich nutty flavor that elevates our cookies from ordinary to extraordinary. Look for natural varieties without added sugars or oils for the purest taste; trust me, it makes all the difference in flavor and texture. Plus, its fat content helps keep our cookies soft and chewy—an absolute must!
- 1/4 cup butter (softened). Softened butter is crucial here because we want it to cream beautifully with our sugars. This process incorporates air into our dough, leading to lightness in our cookies instead of dense lumps. If your butter is too cold or too melted, you’ll miss out on that airy texture we’re striving for—aim for room temperature where it’s still pliable but not oily.
- 1/2 cup brown sugar. This ingredient introduces moisture and depth to the flavors in our cookies, thanks to its molasses content. Brown sugar also contributes chewiness—one bite will have you hooked! Don’t forget to pack it tightly when measuring; otherwise, you might end up with less sweetness than intended.
- 1 egg. Eggs act as binders in baking while providing richness and moisture. In this recipe, they help hold everything together while adding a tender crumb texture that’s oh-so-satisfying. Make sure your egg is at room temperature; if it’s cold from the fridge, it could cool down your dough and affect how well everything combines.
- 1 tsp vanilla extract. Vanilla is like music in cooking—it enhances all other flavors without stealing the spotlight! A good quality vanilla extract can elevate your baked goods dramatically; look for pure vanilla extract rather than artificial versions for optimal flavor.
- 1 cup all-purpose flour. This ingredient serves as the backbone of our cookies by providing structure. When choosing flour, opt for unbleached all-purpose flour as it has better flavor qualities than bleached varieties which can alter your final product’s taste subtly but importantly.
- 1/2 tsp baking soda. Baking soda is our leavening agent here; it reacts with acidic components (like brown sugar) during baking to create those lovely bubbles that give rise to lightness in our cookies. Make sure it’s fresh—old baking soda can lead to flat cookies that don’t rise properly.
- 1/4 tsp salt. A pinch of salt enhances sweetness by balancing flavors—it’s absolutely non-negotiable! Salt helps highlight all those beautiful notes in chocolate and peanut butter making every bite more satisfying.
- 1/2 cup butter (melted). For our brownie layer, melted butter ensures a smooth texture when mixed with sugar and cocoa powder; it brings everything together effortlessly while maintaining richness without being overly greasy.
- 1 cup white sugar. White sugar provides sweetness but also contributes to structure through its ability to dissolve into liquids during mixing—this helps create those lovely chewy edges we crave!
- 1/3 cup cocoa powder. Unsweetened cocoa powder is where we get all that deep chocolate flavor from! Choose high-quality cocoa powder for more intense flavor; Dutch-process varieties lend an incredible richness while balancing acidity wonderfully.
- 1 egg (again!). Just like earlier mentioned—it binds everything beautifully in this brownie layer ensuring every bite remains moist and decadent!
- 1 tsp vanilla extract (you guessed it!). Double shot of vanilla ensures both layers sing harmoniously together!
- 3/4 cup all-purpose flour (just slightly more). We need additional flour here for balance since this layer has more liquid ingredients compared to our cookie base—it keeps things structured without making them dry!
- 1/4 tsp baking powder. A little extra boost when combined with baking soda will ensure our brownies rise nicely while staying fudgy rather than cakey—nobody wants dry brownies!
- 1/4 tsp salt (yes again!). Just rounding out flavors once more—subtle but essential!
- 1/2 cup chocolate chips. These little morsels are what dreams are made of—they melt beautifully within each cookie creating pockets of molten chocolate bliss that will make you swoon! Choose semi-sweet or dark chips depending on how rich you want your cookies.
Equipment You’ll Need:
Having the right tools makes all the difference when you’re crafting something wonderful like these Peanut Butter Brownie Swirl Cookies—it turns cooking into an enjoyable experience rather than just another task on your list!
- Mixing bowls – A set of various-sized mixing bowls allows you flexibility when combining ingredients separately before bringing them together—a crucial step especially in layered recipes like this one! Opt for glass or stainless steel as they’re easier to clean and won’t retain odors from previous uses.
- Electric mixer or whisk – An electric mixer saves time and energy when creaming but if you’re feeling adventurous (or nostalgic), using a good old-fashioned whisk gives you control over texture—and hey, who doesn’t love getting their arm workout while making treats?
- Measuring cups & spoons – Precise measurements ensure consistency across batches! Invest in nesting measuring cups along with clear measuring spoons so there can be no confusion about whether you’re scooping half a tablespoon versus two teaspoons.
- Parchment paper or silicone baking mats – Both options help prevent sticking while making cleanup easier after indulging in cookie heaven! Parchment paper can be reused multiple times until it’s too stained or torn; silicone mats last longer overall if treated well.
Now that we’ve gathered our ingredients and tools let’s roll up those sleeves and dive into preparing these heavenly treats!
Step 1: Crafting Your Peanut Butter Dough
To kick things off, let’s start by making that luscious peanut butter dough which will serve as one half of this delectable duo! In a large mixing bowl, combine your creamy peanut butter with softened butter and brown sugar using an electric mixer set at medium speed until light and fluffy—that creaming process is key because it incorporates air into your mixture creating tenderness later on during baking! Scrape down those sides occasionally ensuring every bit gets mixed thoroughly—trust me on this step because nobody wants unevenly flavored cookies! After achieving fluffy perfection here add one egg followed closely by vanilla extract blending until fully incorporated—you’ll notice how beautifully fragrant this becomes as soon as those wet ingredients mingle together!
Next comes dry ingredient magic: whisk together flour along with baking soda plus salt separately before gradually incorporating them into your wet mixture until just combined—it’s crucial not to overmix at this point since doing so could lead us toward tough cookies instead of delicate ones bursting forth with flavor upon biting down! Set aside once done—we’ll let this rest shortly while we work on brownie dough goodness next!
Step 2: Creating Your Decadent Brownie Dough
Now onto crafting that indulgent brownie layer which will swirl beautifully alongside our earlier creation—a true partnership worth celebrating! In another bowl (yes another) whisk melted butter alongside white sugar until smooth then add cocoa powder stirring vigorously until well blended—this step ensures no lumps remain which could ruin texture later on when biting into fudgy goodness! Once smooth add another egg followed by vanilla once again blending smoothly before folding through previously measured flour along with baking powder plus salt gently—remember kindness matters here too don’t rush through mixing as we want everything fully combined without overdoing it! Finally toss in those tantalizing chocolate chips giving one last gentle stir before setting aside ready for assembly—
Step 3: Chilling Time!
It might feel strange but trust me… chilling both doughs is absolutely paramount before proceeding further—this simple step significantly improves their overall texture by allowing gluten development from flour relax thus preventing spreading during baking which leads us towards desired cookie shapes instead of pancake-like disasters…it’s science folks! Allow both types of doughs roughly thirty minutes nestled comfortably within refrigerator allowing flavors meld beautifully together making each bite even more satisfying upon completion!
Step 4: Scooping & Swirling
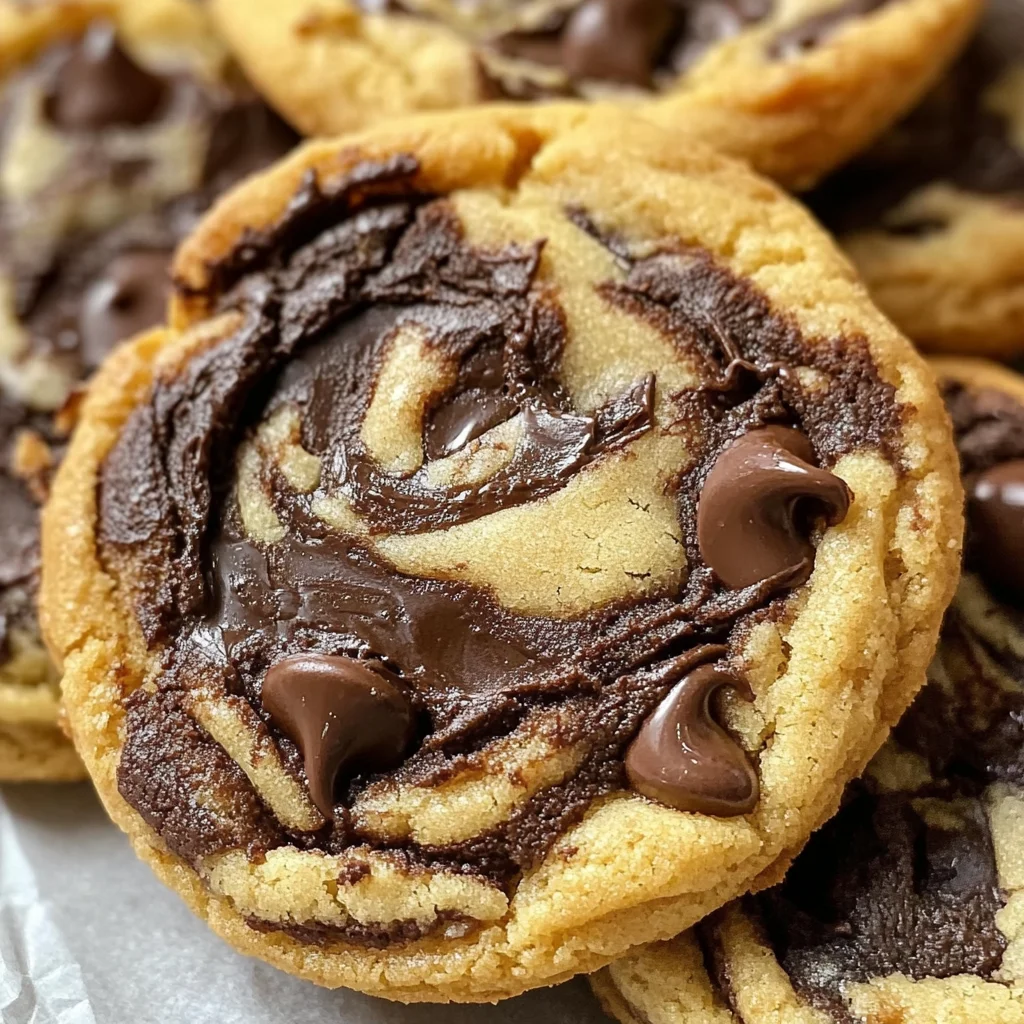
Once chilled sufficiently grab parchment-lined baking sheets readying ourselves now towards magic creation time ahead… using two tablespoons scoop portions from each type side-by-side onto prepared sheet creating small mounds forming pairs resembling cute little clouds readying themselves prior whirlpool dance action about occur next! Now here comes my favorite part—take toothpick or skewer gently swirling back-and-forth through mounds forming marble patterns showcasing both colors equally throughout…don’t worry if uneven pops up occasionally embrace imperfection since beauty lies within uniqueness altogether adding character reflecting artistic expression behind each cookie batch made lovingly crafted by hands eager share joy experienced through culinary adventures shared amongst loved ones around tables spread alive laughter warmth moments cherished forevermore…
I can’t wait for you all try these amazing Peanut Butter Brownie Swirl Cookies—they’re downright euphoric bites filled rich flavors warmth happiness wrapped tight within every single morsel made special just waiting reach out touch hearts souls alike transforming ordinary days extraordinary unforgettable experiences cherished build memories continue grow long after crumbs settle!
Step 5: Chill for Cookie Magic
Now, I know this might sound like a step you could skip, but trust me—chilling both the peanut butter dough and brownie dough is absolutely pivotal. By placing them in the refrigerator for about 30 minutes, you’re allowing the fats to solidify. This helps create cookies that are chewy on the inside with crispy edges instead of a flat, sad mess. As they chill, the flavors meld beautifully; the peanut butter becomes more pronounced while the chocolate gets a chance to deepen in flavor, resulting in a symphony of taste that’s utterly intoxicating. So don’t rush this step! While you wait, take a moment to breathe in the delightful aromas wafting from your kitchen—it’s a sneak peek into the deliciousness that awaits!
As you patiently wait for those doughs to chill, it’s also a good time to prepare your baking sheets. Line them with parchment paper; this non-stick surface will ensure your cookies release easily and maintain their gorgeous shape. Remember, every little detail counts when you’re crafting something as special as these Peanut Butter Brownie Swirl Cookies. When the timer goes off and your dough is ready, you’ll notice it’s become firmer yet still pliable—a perfect consistency for shaping.
Step 6: The Art of Swirling
With both doughs chilled and ready to go, it’s time for one of my favorite parts: assembling these beautiful cookies through swirling! Using a cookie scoop or just two tablespoons, take 1-2 tablespoons of each dough and place them side by side on your parchment-lined baking sheet. Now comes the fun part—grab a toothpick or skewer and gently swirl them together in a marble pattern. Picture yourself creating art; you’re not just mixing them up but rather weaving together two magnificent flavors into one harmonious creation. This technique is crucial because it ensures each bite holds that magical combination of rich chocolate and creamy peanut butter.
While swirling, be gentle! You want the colors to blend slightly but not completely lose their individuality—that distinction between dark chocolaty brownie goodness and luscious peanut butter should remain intact for maximum visual appeal. If you over-mix or apply too much pressure, you’ll end up with one muddy color instead of those beautiful swirls we’re aiming for. So take your time with this step; it’s an opportunity to engage with your ingredients on a deeper level.
Step 7: Baking Your Masterpiece
Now that your cookies are beautifully swirled and sitting on their baking sheet like little works of art, it’s time to send them off on their journey into the oven! Preheat your oven to 350°F (about 175°C) if you haven’t already—this temperature is key because it allows the cookies to rise evenly while keeping that wonderful chewiness intact. You’ll want to bake these beauties for about 9-11 minutes. Keep an eye on them during the last couple of minutes; you’ll notice that magical transformation happening as they puff up slightly and develop those telltale cracks on top.
When they’re done baking, they should be lightly crackly on top while still soft in the center—that’s an essential visual cue! These cookies will continue to cook even after they come out of the oven due to residual heat, so it’s perfectly normal if they feel slightly underbaked when you pull them out. If you bake them until they’re completely firm, you’ll lose that glorious gooey texture we’re after! Trust me—you want that perfect balance where the edges are just set while the centers remain soft and fudgy.
Step 8: Cooling and Enjoying Every Bite
Once you’ve pulled these heavenly Peanut Butter Brownie Swirl Cookies from the oven, allow them to cool on the baking sheet for about 5-10 minutes before transferring them onto a wire rack. This resting period is critical because it allows them to firm up just enough so they won’t fall apart when you attempt to move them—they’re still delicate at this stage! As they cool down, savor the aroma—each inhale brings hints of nutty sweetness mingled with rich chocolate.
After they’ve had their cool-down session (and perhaps you’ve been tempted by one or two during this process), transfer your cookies onto a wire rack where they can finish cooling completely. This step ensures air circulation around all sides of each cookie, preventing any sogginess from forming underneath as moisture builds up. And here’s where patience pays off—allowing these cookies to cool fully enhances their texture even further: chewy centers paired with subtly crisp edges will create an utterly satisfying experience when you finally take that first bite!
Final Touches: A Cookie Experience Like No Other
Step 9: Savoring Every Moment
At last, we arrive at one of life’s greatest pleasures: enjoying your freshly baked Peanut Butter Brownie Swirl Cookies! As you take that first bite, allow yourself a moment of pure bliss—the combination of gooey chocolate chips melting against rich peanut butter will send your taste buds dancing with joy! Each cookie promises an explosion of flavor with every mouthful; I can almost guarantee there won’t be any leftovers once friends or family catch wind of what you’ve created!
But don’t rush through this moment; appreciate each bite fully! Perhaps pair these delectable treats with a glass of cold almond milk or coffee—it enhances those flavors even more beautifully. And remember, sharing isn’t just caring; it’s an invitation for others to experience this profound joy right alongside you. I promise you’ll find smiles all around as everyone savors these extraordinary cookies together.
So there you have it—the complete journey towards making Peanut Butter Brownie Swirl Cookies from scratch! From mixing ingredients with love to savoring every last crumb after baking—this recipe isn’t just about food; it’s about creating memories infused with warmth and happiness in every bite. Happy baking!
Storage and Enjoyment Tips for Your Peanut Butter Brownie Swirl Cookies
Ah, the moment has finally arrived! Those gorgeous Peanut Butter Brownie Swirl Cookies are ready to be devoured, and trust me, they’re just as delightful the next day (if you can resist them!). Whether you’re indulging right away or saving some for later, I’m here to guide you through storing these little gems in a way that keeps their flavor and texture intact.
Storing Leftover Peanut Butter Brownie Swirl Cookies
Once you’ve made your batch of these utterly intoxicating cookies, you’ll want to be sure they stay fresh for as long as possible. The best way to do this is by storing them in an airtight container at room temperature. This simple step is crucial because it locks in moisture and prevents those precious cookies from becoming too hard or crumbly. They should stay delicious for about 4-5 days—but trust me, they likely won’t last that long! If you want to keep them even fresher, place a slice of bread inside the container; this little trick helps maintain moisture while allowing the cookies to breathe. After a couple of days, you’ll find that the flavors continue to meld beautifully, creating a rich experience with every bite. When you’re ready to enjoy them again, simply take one out and savor it with a cup of tea or coffee—heavenly!
Freezing for Later
Now, let’s talk about how to preserve your Peanut Butter Brownie Swirl Cookies for those times when cookie cravings hit unexpectedly! Freezing is an absolute game-changer; simply place your cooled cookies into a freezer-safe bag or container lined with parchment paper between layers. This will prevent them from sticking together and makes it easy to grab just one (or two!) whenever you need a sweet fix. They’ll keep well in the freezer for up to three months—talk about convenience! When you’re ready to indulge, just pull them from the freezer and let them thaw at room temperature for about 30 minutes. You can even pop them in the microwave for a few seconds if you prefer that warm, gooey texture reminiscent of freshly baked cookies. This option not only saves time but also ensures that whenever the mood strikes, you have something delicious waiting just for you!
Peanut Butter Brownie Swirl Cookies

Experience the bliss of homemade Peanut Butter Brownie Swirl Cookies, where rich chocolate brownie and creamy peanut butter collide in perfect harmony. These cookies are not just a treat; they’re a memory waiting to be made. With every bite, you’ll enjoy a delightful contrast between chewy brownie texture and the smoothness of peanut butter, making them an irresistible indulgence for any occasion. Easy to prepare yet undeniably impressive, these cookies are destined to become your new favorite go-to dessert.
- Prep Time: 20 minutes
- Cook Time: 11 minutes
- Total Time: 31 minutes
- Yield: Approximately 24 cookies 1x
- Category: Dessert
- Method: Baking
- Cuisine: American
Ingredients
- 1/2 cup creamy peanut butter
- 1/4 cup softened butter
- 1/2 cup brown sugar
- 1 egg (room temperature)
- 1 tsp vanilla extract
- 1 cup all-purpose flour
- 1/2 tsp baking soda
- 1/4 tsp salt
- 1/2 cup melted butter (for brownie layer)
- 1 cup white sugar
- 1/3 cup cocoa powder
- 1 egg (for brownie layer)
- 3/4 cup all-purpose flour (for brownie layer)
- 1/4 tsp baking powder
- 1/4 tsp salt (for brownie layer)
- 1/2 cup chocolate chips
Instructions
- Preheat oven to 350°F (175°C) and line baking sheets with parchment paper.
- In a mixing bowl, combine peanut butter, softened butter, and brown sugar until fluffy. Mix in egg and vanilla.
- Gradually add flour, baking soda, and salt to the mixture until combined.
- In another bowl, whisk melted butter with white sugar and cocoa powder until smooth. Add an egg, then mix in flour, baking powder, and salt before folding in chocolate chips.
- Chill both doughs for about 30 minutes.
- Scoop tablespoons of each dough onto the baking sheet side by side and swirl gently with a toothpick.
- Bake for 9-11 minutes until slightly crackled on top but still soft in the center.
- Cool on the sheet for a few minutes before transferring to wire racks.
Nutrition
- Serving Size: 1 serving
- Calories: 150
- Sugar: 10g
- Sodium: 95mg
- Fat: 7g
- Saturated Fat: 3g
- Unsaturated Fat: 3g
- Trans Fat: 0g
- Carbohydrates: 20g
- Fiber: 1g
- Protein: 3g
- Cholesterol: 20mg