Simple Soy Glazed Hibachi Zucchini – Homefoodkitchen
I never knew what the big deal was about zucchini until I had it at a hibachi restaurant. Growing up, my mom would always steam it until it was mushy, and honestly, that left me quite indifferent to this vibrant green vegetable. But then, I encountered a dish that transformed my perception entirely: Simple Soy Glazed Hibachi Zucchini – Homefoodkitchen. The zucchini was perfectly tender yet still had that delightful bite; it was infused with savory soy sauce and aromatic sesame oils that turned an ordinary vegetable into a culinary wonder. Each bite was a harmonious blend of flavors that danced on my palate, bringing joy with every forkful. This recipe isn’t just about food; it’s an experience that bridges tradition and innovation, inviting you to rediscover a humble ingredient in the most enchanting way.
As I began to explore the world of cooking beyond my childhood kitchen, I realized that food can tell stories—it can spark memories and create new ones around the dining table. The allure of hibachi is not just in the theatrics but in the simple yet profound ways it elevates everyday ingredients like zucchini. When you prepare this dish, you’re not merely cooking; you’re participating in a rich tapestry of flavors and cultures. It’s perfect for weeknight meals when you want something healthy yet satisfying or as a side for gatherings where you want to impress your friends with something both easy and extraordinary. Trust me when I say this Simple Soy Glazed Hibachi Zucchini will become a cherished staple in your culinary repertoire.
Simple Soy Glazed Hibachi Zucchini – Homefoodkitchen: A Flavorful Journey Awaits
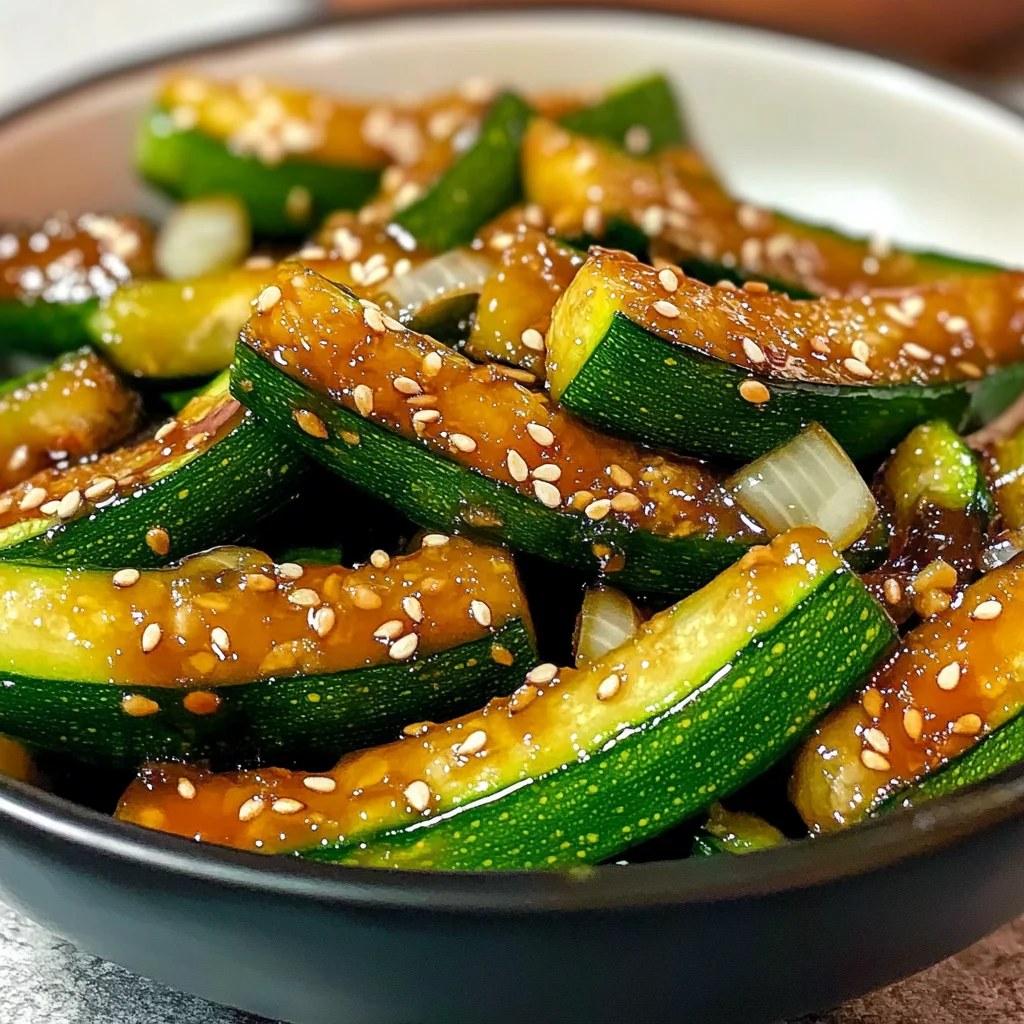
This recipe is a radiant celebration of flavors that will brighten your dinner table! It’s quick to prepare and delivers results that are profoundly satisfying—your taste buds will thank you. The combination of soy sauce and toasted sesame oil creates an utterly intoxicating glaze that clings lovingly to every piece of zucchini, while the crunch of sesame seeds adds a delightful contrast. Let’s embark on this culinary journey together!
Ingredients:
As we dive into our Simple Soy Glazed Hibachi Zucchini, let’s take a moment to appreciate each ingredient that brings this dish to life. Each element plays a crucial role in delivering that unforgettable flavor profile we crave.
- 2 medium zucchini – These vibrant green beauties are not only versatile but also packed with nutrients! Look for zucchinis that are firm and shiny; they should feel heavy for their size, indicating juiciness inside. When cooked correctly, zucchini maintains its structure while absorbing flavors beautifully—trust me when I say no one wants a mushy veggie! If you’re looking for substitutes, yellow squash works wonderfully too; it offers similar texture and taste.
- 1 medium onion – A humble onion might seem like just another ingredient, but its sweetness when caramelized adds depth to our dish. Opt for yellow onions for their balanced flavor; they provide a lovely foundation upon which our other ingredients can shine. Always chop them evenly so they cook uniformly—this ensures each bite is as flavorful as the last!
- 1 tsp minced garlic – Garlic infuses our dish with an aromatic punch that’s simply irresistible! When choosing garlic, fresh cloves are always best—avoid pre-minced varieties if possible for maximum flavor impact. As you mince garlic, take care not to overdo it; too much can lead to bitterness rather than enhancing our beautiful zucchini.
- 1 tsp minced ginger – Ginger adds warmth and spice, creating an intriguing contrast with the sweet soy glaze. Fresh ginger is non-negotiable here; its zestiness awakens the palate in ways dried ginger simply cannot replicate. Don’t be shy—use a microplane or fine grater for an even distribution throughout the dish.
- 1 tbsp neutral oil – We need oil to sauté our vegetables without imparting any strong flavors—think canola or grapeseed oil here. This step is crucial as it helps achieve that lovely caramelization on our onions and zucchini without overwhelming their natural goodness.
- 2 tbsp soy sauce – Ah, the star of our show! Soy sauce brings umami richness that’s utterly transformative. Opt for low-sodium varieties if you’re watching your salt intake; this allows better control over seasoning throughout the cooking process without sacrificing flavor.
- 1 tbsp toasted sesame oil – This liquid gold is packed with nutty goodness! A little goes a long way here—the toasted version imparts an almost magical depth to our glaze unlike any other oil can offer. Just remember: don’t substitute regular sesame oil; toasted sesame oil has undergone special roasting processes that give it its unique profile.
- 1 tbsp sesame seeds – These tiny treasures add crunch and visual appeal to our dish! Toast them lightly before adding them in if you’d like—a brief visit on medium heat enhances their nutty aroma even further.
- 1/2 tsp salt – While we’ve got soy sauce providing much of the seasoning, salt still helps elevate all these flavors and encourages proper browning during cooking. Use kosher salt for more control—it dissolves easily without leaving an overpowering residue behind.
- 1/4 tsp ground black pepper – A pinch of freshly ground pepper brightens everything up! It’s amazing how such simple additions can transform your dish into something truly extraordinary; don’t skip this step!
Equipment You’ll Need:
Before we get started on creating this delectable dish, let’s talk about some essential tools you’ll need—after all, having the right equipment makes everything smoother and more enjoyable!
- Chef’s knife – A good quality chef’s knife will be your best friend in the kitchen! It allows precise cuts and makes chopping veggies effortless—seriously, investing in one high-quality knife pays off tremendously over time!
- Cutting board – Choose a sturdy cutting board where you feel comfortable prepping your ingredients without worrying about slipping or damaging surfaces below.
- Large skillet or wok – We need ample space for sautéing everything evenly while allowing moisture to escape—a well-heated skillet ensures we achieve those lovely brown bits full of flavor!
- Spatula or wooden spoon – These utensils are essential for stirring things around as they cook—you want every piece of zucchini coated perfectly in your glaze!
Now that we’ve gathered all our delightful ingredients and necessary tools let’s move forward into preparing this scrumptious Simple Soy Glazed Hibachi Zucchini together!
Step 1: Prepare Your Ingredients
Start by washing your zucchinis thoroughly under cold water—this removes any dirt or residues from farming practices while ensuring they’re clean before slicing. Cut off both ends before slicing them into half-moon shapes about half an inch thick so they cook evenly without falling apart during sautéing; thicker pieces may require longer cooking times which could lead us astray from achieving optimal tenderness paired beautifully with crispy edges later on! Next, finely chop your onion since it’ll form part of our aromatic base alongside garlic and ginger later on—uniformity matters here too!
Step 2: Get Your Skillet Ready
Heat your large skillet over medium-high heat until it’s hot enough that water sizzles upon contact—a sign it’s primed for action! Once ready, add one tablespoon of neutral oil directly into the pan followed by those chopped onions immediately so they start softening up while releasing their natural sweetness into everything else we’ll add soon after! Stir occasionally using your spatula until translucent (about 3 minutes)—this process known as sweating encourages even cooking while developing those lovely golden tones we crave.
Step 3: Add Aromatics
With onions softened nicely now (you should see some browning starting), it’s time to introduce minced garlic and ginger into the mix—a move that’ll elevate aromas filling your kitchen instantly! Sauté them together for approximately 30 seconds just until fragrant—not too long though as burnt garlic tends towards bitterness ruining what could have been spectacular harmony instead! At this point trust yourself—don’t rush through this step because building layers upon layers leads us closer toward achieving perfection within every bite!
Step 4: Incorporate Zucchini
Now comes perhaps my favorite part—the introduction of those luscious zucchini slices into our fragrant mixture dancing merrily alongside sautéed aromatics already present within skillet’s embrace! Gently toss them around using spatula ensuring they coat evenly while absorbing all those heavenly flavors released earlier by onions’ sweetness mingled beautifully alongside pungent notes from garlic & ginger combo waiting patiently nearby… Be mindful here too though: keep stirring frequently allowing them slight char marks developing over surface area—that beautiful contrast between tender insides meets crispy exteriors makes each mouthful incredibly satisfying beyond words!
Stay tuned as we continue crafting this delightful side dish together—the next steps promise even more magic awaits us ahead!
Step 5: Sautéing the Aromatics to Build Flavor
Now that we have our zucchini and onion prepped, it’s time to dive into one of my favorite techniques: sautéing. Heat your neutral oil in a large skillet over medium-high heat until it shimmers like liquid gold—this is your cue that the pan is hot enough. Add the minced garlic and ginger first; you’ll want to listen for that delightful sizzle as they hit the pan. This step is absolutely crucial because sautéing these aromatics at high heat brings out their natural oils, creating a fragrant base that will infuse your zucchini with an utterly intoxicating flavor. You should see the garlic turn a light golden brown and smell its warm, inviting aroma wafting through your kitchen. Be careful not to let it burn! Just a minute or two will do—once you’ve achieved that heavenly aroma, it’s time to move on.
As you stir those sizzling aromatics, keep an eye on their color and texture. You’re looking for that perfect balance where the garlic becomes fragrant and appears slightly softened but not overly browned—because burnt garlic can turn bitter and ruin all your hard work. Trust me on this! If you find yourself getting ahead of the game, don’t rush this step; allowing those flavors to meld for just the right amount of time is key to achieving a symphony of flavors in your final dish. Once everything is beautifully fragrant, it’s time to add in our star ingredient: the zucchini.
Step 6: Introducing the Zucchini – A Colorful Transformation
With your garlic and ginger perfectly sautéed, it’s time to add the sliced zucchini and onion into the mix. Gently toss them into the skillet—and hear that satisfying sound? That’s the sound of magic happening! The moment you add those vibrant green slices, you’ll notice how they begin to soak up all those aromatic flavors around them. Stir everything together well so that each piece gets coated in that delectable mixture. This step is more than just tossing vegetables around; it’s about ensuring each slice of zucchini has an opportunity to absorb all those fragrant notes from earlier. As they cook, you’ll want to watch for their transformation—they’ll start off bright green and gradually soften while becoming slightly translucent.
Cook them for about 5-7 minutes, stirring occasionally until they reach a tender-crisp texture—you want them soft but still with a bit of bite left in them. It might be tempting to keep cooking until they’re completely mushy, but I promise you, keeping that slight crunch will elevate this dish from ordinary to extraordinary. Remember, veggies continue cooking even after you take them off the heat due to residual warmth—so you want to get them out of there while they still have some life left!
Step 7: The Glaze – A Rich Soy Seduction
Now comes one of my favorite moments in this entire process—the creation of our soy glaze! It’s simple yet profoundly satisfying; we’re going to add our soy sauce and toasted sesame oil directly into the skillet with those sautéed vegetables. As soon as you pour it in, give everything a good toss so that each piece of zucchini is generously coated with this luscious mixture—just imagine how those rich flavors will blend together! This glaze isn’t just for flavor; it also adds a beautiful sheen that makes your dish visually stunning. You’ll notice how quickly this transforms into something truly special, almost like magic.
Let this simmer for another 2-3 minutes while stirring occasionally; here’s where patience pays off! This process allows the sauce to thicken slightly while reducing down into a syrupy consistency that clings beautifully onto each piece of zucchini. Keep an eye on it during this time; if things start bubbling too vigorously, simply lower your heat—this isn’t a race! You’re aiming for a glossy finish without burning anything. Don’t forget to taste as you go along; adjusting seasoning with salt or pepper is always encouraged as personal preference plays such an important role in making sure this dish sings with flavor.
Step 8: Finishing Touches – The Artistry of Garnishing
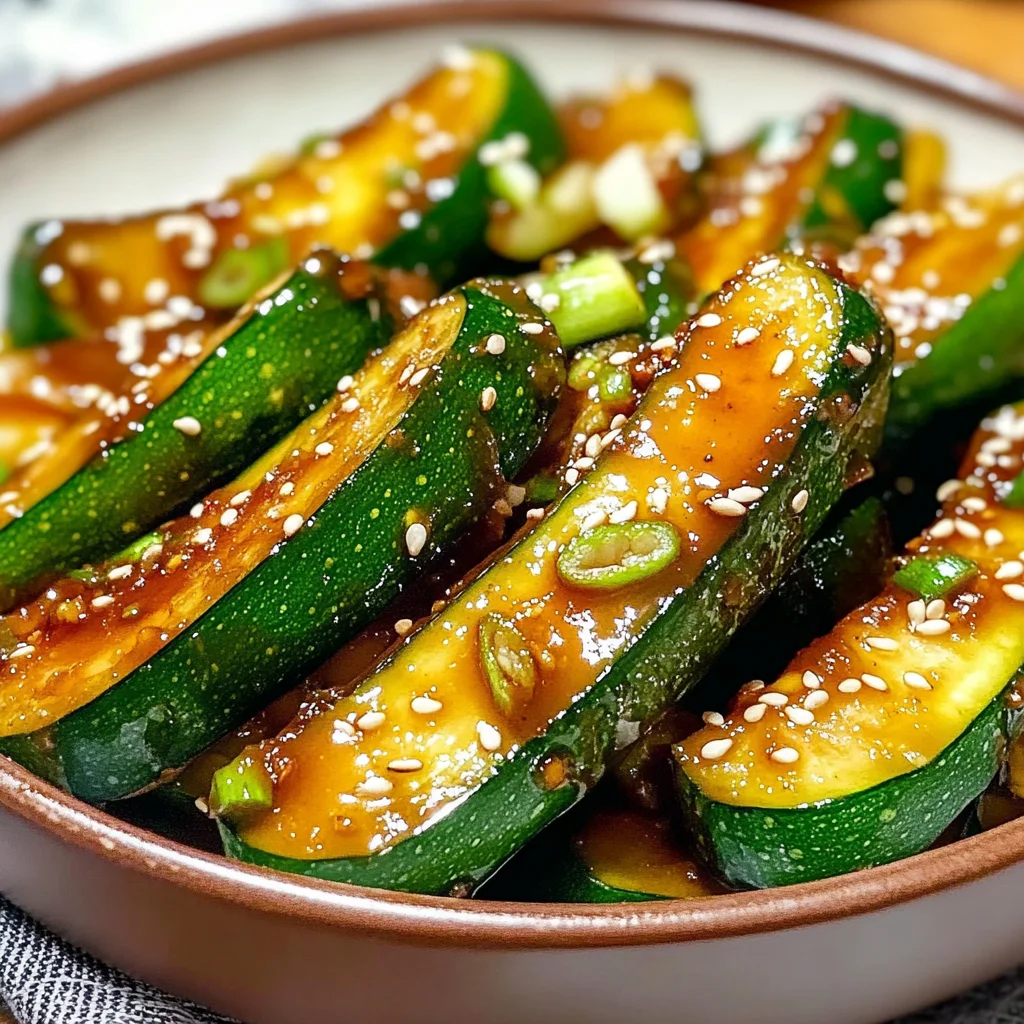
Once your Simple Soy Glazed Hibachi Zucchini looks glossy and deliciously thickened, we’re ready for one last flourish—the garnish! Turn off the heat and sprinkle those beautiful sesame seeds over everything before serving. Not only do they provide a delightful crunch that contrasts beautifully with tender zucchini slices, but they also bring a nutty aroma that elevates this dish even further—a tiny detail that makes all the difference!
At this point, let your dish rest for just a minute or two before spooning it onto plates or into bowls; allowing it to sit briefly helps settle those flavors even more deeply throughout every bite. Can you smell it already? I bet your kitchen smells divine right now! When plating up, consider adding fresh herbs like cilantro or scallions if you’re feeling adventurous; these little bursts of freshness can absolutely transform each bite into an experience worth savoring.
Conclusion:
As we wrap up our culinary journey through the world of Simple Soy Glazed Hibachi Zucchini, I hope you feel as inspired as I do by this recipe! From the moment those zucchinis hit the pan and start sizzling away with aromatic garlic and ginger to when they are drizzled with that heavenly soy sauce glaze, each step unfolds like a beautiful story that captivates both heart and palate. What makes this dish truly extraordinary is how simple ingredients come together to create such depth—it’s all about balance! The umami notes from soy sauce harmonize perfectly with the nutty richness of sesame oil and toasted sesame seeds, while the zucchini maintains its vibrant crunch. It’s like a symphony of flavors dancing on your tongue!
Why is this dish a must-try? Not only does it boast incredible taste but also offers endless versatility—perfect for busy weeknights or when entertaining friends! Imagine pulling it out from the stove with steam swirling around like an invitation for everyone to gather around the table. This recipe shines on its own but also complements practically any main course beautifully; whether you’re enjoying it alongside grilled chicken or tofu stir-fry or serving it as part of a vibrant veggie platter during gatherings—it’s sure to impress!
Now let’s talk pairings: imagine savoring one delicious bite of this glazed zucchini alongside fluffy jasmine rice; it’s pure bliss! Or perhaps serve it next to grilled fish where those soy notes elevate everything beautifully; you’ll feel like you’ve transported yourself straight into a hibachi restaurant right at home. For an afternoon pick-me-up that feels comforting yet light, consider enjoying some alongside a fresh salad topped with citrus dressing—oh, what a delightful experience!
Feeling adventurous? This recipe is wonderfully adaptable! Consider swapping out zucchini for summer squash or adding other vegetables like bell peppers or mushrooms; each addition brings unique flavor profiles that can transform this dish entirely! You could even experiment by incorporating different sauces—think teriyaki or hoisin—for an exciting twist on flavor. I encourage you to dive into this cooking adventure and make it yours; try it out, share your experiences with friends and family, and let’s connect through our love of food! After all, every great recipe starts with sharing joy—and there’s nothing more satisfying than bringing people together over good food.
Simple Soy Glazed Hibachi Zucchini – Homefoodkitchen

Experience the vibrant flavors of zucchini like never before with this Simple Soy Glazed Hibachi Zucchini recipe. Inspired by the traditional hibachi style, this dish elevates humble zucchini into an extraordinary culinary delight. The combination of savory soy sauce and nutty toasted sesame oil creates a rich glaze that clings to each perfectly sautéed piece, while the addition of garlic and ginger infuses every bite with aromatic warmth. Quick and easy to prepare, this dish is perfect for weeknight dinners or as a standout side at gatherings. Rediscover zucchini in a way that will impress your family and friends!
- Prep Time: 10 minutes
- Cook Time: 15 minutes
- Total Time: 25 minutes
- Yield: Approximately 4 servings 1x
- Category: Side Dish
- Method: Sautéing
- Cuisine: Asian
Ingredients
- 2 medium zucchinis
- 1 medium onion
- 1 tsp minced garlic
- 1 tsp minced ginger
- 1 tbsp neutral oil (canola or grapeseed)
- 2 tbsp soy sauce (low-sodium recommended)
- 1 tbsp toasted sesame oil
- 1 tbsp sesame seeds
- 1/2 tsp salt
- 1/4 tsp ground black pepper
Instructions
- Wash zucchinis and slice them into half-moon shapes about half an inch thick. Chop the onion finely.
- Heat a large skillet over medium-high heat and add the neutral oil.
- Add chopped onions to the skillet and sauté for about 3 minutes until translucent.
- Stir in minced garlic and ginger; sauté for 30 seconds until fragrant but not burnt.
- Add zucchini to the skillet, tossing gently to coat with aromatics, and cook for 5-7 minutes until tender-crisp.
- Pour in soy sauce and toasted sesame oil; stir well to coat the zucchini evenly and let simmer for another 2-3 minutes until glazed.
- Sprinkle sesame seeds over the dish before serving.
Nutrition
- Serving Size: Approximately 1 cup (150g)
- Calories: 120
- Sugar: 4g
- Sodium: 600mg
- Fat: 6g
- Saturated Fat: 1g
- Unsaturated Fat: 5g
- Trans Fat: 0g
- Carbohydrates: 12g
- Fiber: 3g
- Protein: 4g
- Cholesterol: 0mg