Pickle de Gallo – Dill Pickle Salsa
Every now and then, a recipe comes along that feels like a warm embrace; one that wraps you in nostalgia while simultaneously exciting your taste buds. That’s exactly how I feel about Pickle de Gallo – Dill Pickle Salsa. This vibrant concoction is not just a salsa; it’s an experience—a celebration of crunchy textures and zesty flavors that will take your snacking game to the next level. Imagine biting into a spoonful of this delightful mix, where the crispness of cucumbers dances with the tartness of dill pickles, all while being uplifted by the bright notes of fresh onions and peppers. Just thinking about it makes my mouth water!
What makes this recipe even more special is its versatility. It can be enjoyed as a refreshing dip with tortilla chips, a lively topping for tacos, or even as an accompaniment to grilled meats or fish. Every scoop offers a symphony of flavors that bridge tradition and innovation, making it perfect for summer barbecues, cozy gatherings, or even a simple weeknight meal. If you’ve ever been captivated by the charm of homemade pickles or the zestiness of pico de gallo, then Pickle de Gallo is about to become your new favorite thing. Trust me on this—once you make it, you’ll find yourself reaching for it at every opportunity!
The Irresistible Allure of Sweet and Salty
Isn’t it fascinating how certain flavor combinations evoke joy? There’s something magical about the way salty and sweet elements come together to create harmony on our palates. In this case, the tangy dill pickles play beautifully with the crunch of fresh vegetables, resulting in an utterly intoxicating bite that’s both refreshingly light and deeply satisfying. This salsa isn’t just for special occasions; it’s also perfect for casual snacking when you want something quick yet delightful. Think about those moments when you need a burst of flavor between meals or want to elevate your everyday dishes—this Pickle de Gallo will be there for you!
Now that I’ve painted a picture of why this recipe is so close to my heart, let’s embark on this culinary journey together.
Pickle de Gallo – Dill Pickle Salsa: A Crunchy Delight Awaits
Welcome to a world where every bite bursts with flavor! Prepare yourselves because you’re about to dive into making one of the most refreshing salsas you’ll ever encounter: Pickle de Gallo – Dill Pickle Salsa. This dish combines everything you adore about garlicky dill pickles with an irresistible medley of fresh vegetables. It’s not just food; it’s pure happiness in a bowl!
Ingredients:
As we gather our ingredients for this delightful salsa, remember that each element plays a crucial role in creating that vibrant medley we all love. Let’s explore what we’ll need:
- 1 seedless cucumber (cut in half, seeds scraped out, finely diced or pulsed in the food processor). The cucumber provides that refreshing crunch we crave while balancing the rich flavors from our other ingredients. When selecting your cucumber, look for ones that are firm and glossy; these are signs of freshness. If you’re feeling adventurous or want more texture, leave some seeds intact! But trust me—removing them keeps things crisp and avoids extra moisture.
- 1 cup dill pickles (finely diced—about 4 whole pickles depending on size). Ahh, here’s where we add that punch! Dill pickles bring their unique tanginess to the party; they’re like little bursts of flavor that elevate everything around them. When choosing your pickles, opt for those that have been made with quality ingredients—they’re worth it! If you prefer more heat or sweetness, consider using bread-and-butter pickles instead.
- 1/2 cup sweet onion (finely diced). Sweet onions add depth and complexity without overwhelming our salsa with sharpness. They balance beautifully against the acidity from the pickles and brightness from the cucumbers. Vidalia onions are my personal favorite for their mild sweetness—but any sweet onion variety will do wonderfully here.
- 1/2 red bell pepper (stem and seeds removed, finely diced or pulsed in the food processor). The red bell pepper introduces vibrant color and sweetness to our mix! Plus, they’re packed with Vitamin C! When chopping them up, ensure they’re finely diced so their lovely flavor permeates throughout without dominating your salsa.
- 1 clove garlic (peeled and finely minced). Garlic brings warmth and aromatic richness to our dish—it’s practically non-negotiable! Freshly minced garlic adds pizzazz compared to powdered versions because it releases oils as you chop them up. Use young garlic if available; it’s milder but still packs flavor!
- 1/2 teaspoon kosher salt. Salt enhances flavors—it’s truly magic in cooking! It draws out moisture from veggies while also seasoning them perfectly without overpowering their natural taste.
- 1/2 cup pickle brine. This liquid gold is essential for tying all these wonderful ingredients together! The brine brings acidity and balances out sweetness while elevating every single ingredient’s essence—don’t skip this part!
- 1 teaspoon fresh jalapeño (minced; adjust based on spice preference). For those who love a kick! Fresh jalapeños add just enough heat without being overwhelming—feel free to deseed if you’re sensitive to spice levels!
- 1/2 teaspoon fresh habanero (minced; adjust based on spice preference). If you really want to turn up the heat dial on your salsa experience! Habaneros have fruity undertones that’ll complement all other flavors perfectly when used judiciously.
Now that we’ve gathered everything needed for our flavorful masterpiece let’s get excited about what comes next!
Equipment You’ll Need:
Before diving into preparation mode, let’s chat about essential tools that’ll help us craft this delicious salsa smoothly—you’ll find they’re invaluable partners in our culinary adventure!
- Cutting board: A sturdy cutting board is paramount; it provides stability when chopping vegetables efficiently while protecting your countertops from knife marks—a kitchen workhorse indeed!
- Sharp chef’s knife: A good-quality chef’s knife makes all chopping tasks easier—it glides through vegetables seamlessly rather than crushing them! Trust me; investing in one will change your cooking experience forever.
- Mixing bowl: A large mixing bowl is crucial for combining all ingredients evenly without spilling over edges—opt for glass or stainless steel which won’t retain odors after use.
- Measuring cups/spoons: Precision matters when following recipes closely! Having measuring cups/spoons handy ensures accuracy as we create our flavorful symphony together.
With all our tools ready at hand—and excitement bubbling within us—let’s dive into preparing our glorious Pickle de Gallo – Dill Pickle Salsa!
Step 1: Tossing It All Together
Begin by gathering all your prepared ingredients—the cucumbers, dill pickles, sweet onions, red bell pepper, minced garlic cloves alongside those fiery jalapeños & habaneros if desired—and place them into your large mixing bowl prominently displayed before you. Now comes one of my favorite parts: gently toss everything together using either clean hands or spatula until each piece is well-coated in excitement! This step allows flavors to mingle right from the start—the sweetness from onions meeting tangy pickle delights—they’re already flirting at this stage!
Step 2: Drizzling That Liquid Gold
Once everything looks harmonious within its bowl confines—a feast visually waiting—we’ll drizzle half a cup of pickle brine over this colorful mix before tossing again gently but thoroughly so every ingredient absorbs some zingy goodness from brine itself—it enhances each bite substantially while also ensuring proper hydration throughout salsa as well.
Step 3: Patience Is Key
Now here comes perhaps one of my most important tips: cover tightly with plastic wrap/cling film or simply place another bowl upside down over top—not letting air escape during resting time inside fridge—for at least one hour before serving up those tasty delights ahead! During chilling time magic happens—the cold temperatures allow individual flavors to meld beautifully into something extraordinary—and I promise you won’t regret allowing them time apart before showcasing their talents together later on!
Step 4: Serving Up Smiles
After patiently waiting an hour (I know—it feels long!), remove from refrigerator; give another gentle mix before serving alongside crispy tortilla chips or dolloped onto grilled proteins like chicken/fish tacos—as an accompaniment adding crunchiness whilst enhancing overall experience tremendously! Trust me—you’ll feel proud every time someone takes their first bite because they’ll undoubtedly fall head over heels too just like I did upon discovering its wonders myself years ago!
There you have it—your very own deliciously crafted Pickle de Gallo – Dill Pickle Salsa ready impressively waiting upon table awaiting compliments galore once shared amongst family/friends alike during those cherished gatherings filled laughter joyfully echoing around kitchen atmosphere making memories even sweeter than salsa itself!
Step 5: Tossing the Ingredients Together
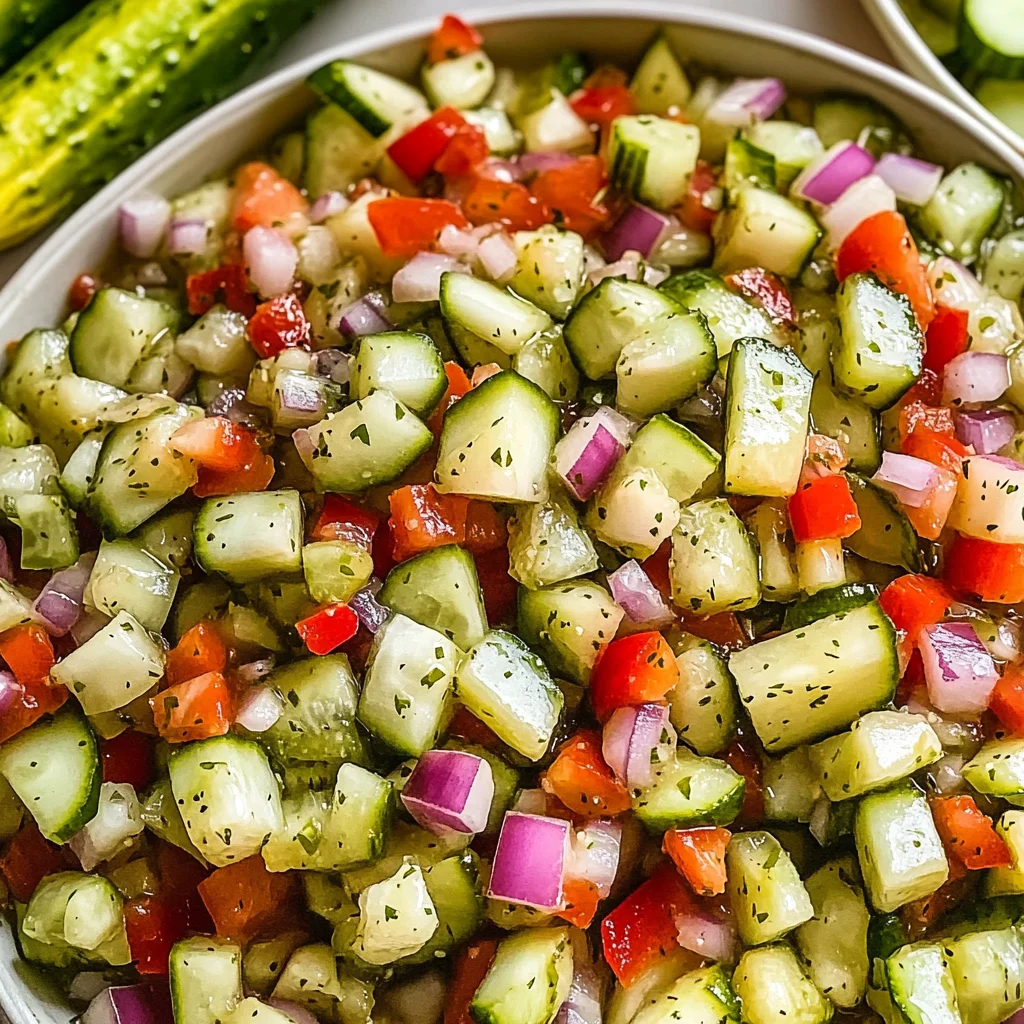
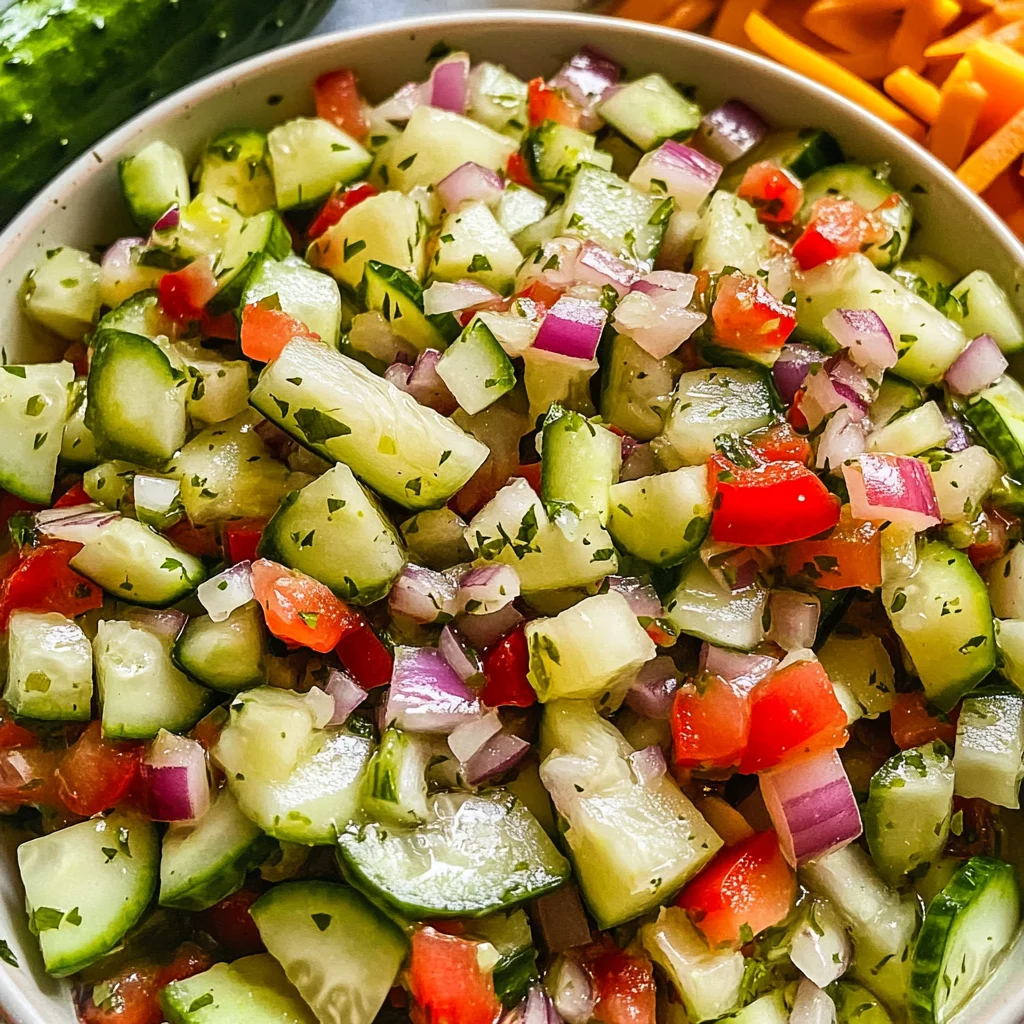
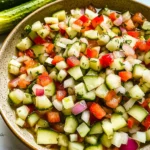
Now that we have our vibrant produce prepped, it’s time for the fun part: tossing everything together! In a large mixing bowl, gently combine the finely diced cucumber, dill pickles, sweet onion, and red bell pepper. As you do this, take a moment to appreciate the symphony of colors before you. The bright green of the cucumbers and pickles contrasts beautifully with the vivid reds and whites of the peppers and onions. It’s not just about flavor—visual appeal plays a significant role in how we experience food. I always say, “We eat with our eyes first!” This step is absolutely crucial because it ensures that every bite of your Pickle de Gallo is a delightful medley of flavors and textures.
As you mix, be gentle but thorough; you want all those beautiful ingredients to meld together without crushing them. This is where you can really feel like an artist at work—each ingredient has its own personality and brings something special to the dish. The crunch of cucumber, the sweetness of onion, and the tangy bite of dill pickles will create a satisfying contrast when tasted together. Remember to pay attention to the aroma as well; garlic should start wafting through your kitchen! Trust me when I say this harmony of ingredients sets the stage for something truly extraordinary.
Step 6: Adding Spice with Pickle Brine
Once all your fresh ingredients are happily mingling in their bowl, it’s time to add that secret ingredient: pickle brine! Drizzle half a cup of pickle brine over your mixture and toss again until everything is well-coated. This step might seem simple, but it’s absolutely paramount to achieving that crave-worthy dill pickle salsa flavor we’re aiming for. The brine isn’t just salty—it brings a tanginess that enhances all those fresh ingredients while binding them into one cohesive concoction.
Think of pickle brine as liquid gold—it’s packed with flavor from spices used in pickling, which will infuse your vegetables with depth. Don’t rush this step; take your time to ensure everything is evenly coated so that each bite delivers that signature punch you’ve been dreaming about. You might notice the brine pooling at the bottom of your bowl—that’s perfectly normal! It will help keep everything moist as it chills in the refrigerator later on.
Step 7: Covering and Chilling – A Crucial Resting Period
Now comes a moment that requires just a pinch of patience but offers profound rewards: covering and chilling your creation! Once you’ve tossed everything together with the pickle brine, cover the bowl tightly using plastic wrap or a lid. Then pop it into the refrigerator for at least an hour—though if you can wait two hours or more, you’ll be rewarded handsomely! Why chill? Well, during this resting period, all those vibrant flavors have a chance to mingle and marry into something truly magical.
This step is not just about keeping your Pickle de Gallo cool; it’s about allowing time for those flavors to evolve. The salt from the cucumbers will draw out more moisture while allowing all those delightful spices from the pickle brine to penetrate deeper into each vegetable piece. When you finally take that first taste after chilling, you’ll find that each bite bursts with flavor as if they were meant to be together all along! And let me tell you—the texture transformation is equally remarkable; every ingredient softens slightly yet retains its crunchiness.
Step 8: Serving Your Pickle de Gallo – The Grand Finale
After patiently waiting for those flavors to develop in harmony within the cool confines of your fridge, it’s finally time for the grand reveal—serving your Pickle de Gallo! Retrieve your masterpiece from refrigeration and prepare for an explosion of flavor that awaits you. Grab some tortilla chips or serve it alongside grilled veggies or fish; there are so many possibilities here! The vibrant colors will shine brightly on any table setting, making it not just a dish but also an artwork.
Before serving, give it one last gentle stir—not too vigorous though—as you want to maintain that lovely texture we’ve worked hard to achieve. Taste before presenting; make sure everything feels balanced—if you’d like an extra kick, consider adding more minced jalapeño or habanero at this point! I promise you; this dip isn’t just an appetizer—it’s an experience meant for sharing with friends around a lively dinner table or during casual movie nights on cozy weekends.
Final Touches: Enjoying Every Bite
As you gather everyone around to share in this delightful creation, take a moment to bask in what you’ve made—a fresh twist on traditional salsa that’s bursting with personality! Each bite should feel profoundly satisfying as crunchy cucumbers meet zesty dill pickles with every scoop onto crispy chips or fresh veggies. Don’t forget—the joy doesn’t stop here! Experiment with additions like avocado or even some fresh herbs like cilantro if you’re feeling adventurous next time!
I hope this recipe brings warmth and happiness into your home like it has mine. So go ahead and dive into this utterly intoxicating Pickle de Gallo – Dill Pickle Salsa experience—you’ve earned it!
Storage and Enjoyment Tips for Your Pickle de Gallo – Dill Pickle Salsa
Now that you’ve created this vibrant and utterly intoxicating Pickle de Gallo, it’s time to relish the moment! The fresh crunch of cucumbers, the zesty kick from the jalapeños, and that delightful tartness from the dill pickles create a symphony of flavors that is sure to leave your taste buds dancing with joy. But what if you find yourself with leftovers? Not to worry! This salsa is not only delicious but also easy to store for future enjoyment.
Storing Leftover Pickle de Gallo – Dill Pickle Salsa
To keep your Pickle de Gallo in its prime, transfer it to an airtight container—glass works beautifully here, as it helps maintain the freshness while allowing you to see that gorgeous green and red medley inside. Store it in the refrigerator where it will happily keep for about 3 to 5 days. Now, you might be wondering how to ensure that this delightful mixture retains its crunch and flavor. A nifty trick is to place a slice of bread in the container; this absorbs excess moisture and helps preserve that delightful texture. Trust me on this—after a few days in the fridge, those flavors continue to deepen, creating a tangy explosion that’s even more profound than when you first made it! When you’re ready to serve, simply give it a gentle stir, and enjoy it cold or at room temperature—no reheating required for this refreshing delight.
Freezing Pickle de Gallo – Dill Pickle Salsa for Later
If you find yourself with an abundance of this scrumptious salsa or want to make a big batch ahead of time, consider freezing some! To freeze properly, spoon portions into freezer bags or airtight containers, leaving a bit of space at the top for expansion. This method not only preserves its vibrant flavor but makes for super quick meal prep later on. You can freeze your Pickle de Gallo for up to three months without sacrificing any of its delightful taste. When you’re ready to use it, simply thaw overnight in the refrigerator or let it sit at room temperature for a couple of hours. The convenience factor here is absolutely paramount—imagine pulling out a bag of your homemade salsa on busy weeknights when you need something fresh and zesty in a pinch!
Pickle de Gallo – Dill Pickle Salsa
Indulge in the vibrant flavors of Pickle de Gallo – Dill Pickle Salsa, a refreshing twist on traditional salsa that is sure to elevate any meal or snack time. This zesty blend unites the crispness of cucumbers with the tangy bite of dill pickles, complemented by sweet onions and colorful bell peppers. The result is a crunchy, savory delight that’s perfect as a dip for tortilla chips, topping for tacos, or a lively side dish for grilled meats. Easy to prepare and bursting with flavor, this salsa is not only a crowd-pleaser but also an ideal addition to summer barbecues and casual gatherings. You’ll find yourself reaching for it time and again!
- Prep Time: 15 minutes
- Cook Time: None
- Total Time: 0 hours
- Yield: Approximately 4 servings 1x
- Category: Appetizer
- Method: No-Cook
- Cuisine: American
Ingredients
- 1 seedless cucumber
- 1 cup dill pickles
- 1/2 cup sweet onion
- 1/2 red bell pepper
- 1 clove garlic
- 1/2 teaspoon kosher salt
- 1/2 cup pickle brine
- Optional: fresh jalapeño and habanero
Instructions
- Begin by finely dicing the cucumber, dill pickles, sweet onion, red bell pepper, and garlic. Combine all ingredients in a large mixing bowl.
- Drizzle the pickle brine over the mixture and toss gently until well coated.
- Cover the bowl tightly and refrigerate for at least one hour to allow flavors to meld.
- Serve chilled with tortilla chips or as a topping for grilled proteins.
Nutrition
- Serving Size: 1/4 cup (60g)
- Calories: 20
- Sugar: 2g
- Sodium: 200mg
- Fat: 0g
- Saturated Fat: 0g
- Unsaturated Fat: 0g
- Trans Fat: 0g
- Carbohydrates: 5g
- Fiber: 1g
- Protein: 0g
- Cholesterol: 0mg