Chicken Piccata
There’s something utterly magical about cooking that goes beyond merely preparing a meal—it’s an experience filled with rich aromas, vibrant colors, and a symphony of flavors that dance across your palate. This Lemon Chicken Piccata is not just any dish; it’s a celebration of zest and brightness that can transform your ordinary dinner into something truly extraordinary. Picture this: tender chicken breasts bathed in a luscious sauce made from white grape juice and fresh lemon juice, punctuated by the delightful brininess of capers. Each bite transports you to an Italian trattoria, where the warm sun filters through the windows, casting a golden hue on your plate of culinary delight. I promise you, this dish will not only nourish your body but also fill your heart with joy, as it carries the essence of comfort food while whispering tales of sunny afternoons spent cooking with loved ones.
As I delve into this cherished recipe, I can’t help but think about how it embodies the perfect balance between tradition and innovation. The classic Chicken Piccata often incorporates white wine to create its signature sauce, but here we’re embracing a delightful alternative: dry white grape juice. This substitution maintains that lovely acidity and sweetness without needing to rely on alcohol. You see, cooking is all about adapting and making dishes your own, bringing in flavors that resonate with you personally while still honoring their roots. Whether you’re preparing this for a casual family dinner or planning a special gathering with friends, this Lemon Chicken Piccata is versatile enough to fit any occasion—and trust me, it will leave everyone clamoring for seconds!
Chicken Piccata: A Bright Twist on a Classic
Let’s embark on this culinary journey together! You’ll find that making Chicken Piccata at home is not only achievable but incredibly rewarding. The process is straightforward yet allows you to showcase your skills in the kitchen while impressing those around you with a dish that tastes like it came straight from a five-star restaurant. So roll up those sleeves—we’re about to create something unforgettable!
Ingredients:
As we gather our ingredients for this delightful dish, remember that each component plays an integral role in crafting the final masterpiece. Let’s dive into what we need for our Lemon Chicken Piccata!
- 2 large boneless skinless chicken breasts. Choosing high-quality chicken breast is paramount here; they should be plump and firm to the touch. The absence of skin and bones allows for even cooking and easy slicing once they’re perfectly sautéed. Make sure to pound them gently to an even thickness before cooking; this step not only ensures they cook uniformly but also makes them tender and juicy.
- 1 teaspoon salt. Salt is not just an afterthought; it’s essential for enhancing flavors throughout the dish. It helps draw out moisture from the chicken during cooking while seasoning it thoroughly so that every bite bursts with flavor.
- ½ teaspoon pepper. Freshly ground black pepper adds depth to our chicken piccata by introducing just the right amount of warmth and complexity. I recommend using whole peppercorns ground right before use for maximum flavor impact.
- ½ cup flour. We’ll use flour to create a light coating on our chicken before searing it in olive oil. This step is crucial as it forms a beautiful golden crust while locking in moisture—think of it as creating a protective barrier against dryness.
- ¼ cup Parmesan cheese (finely grated). Adding Parmesan not only imparts a lovely nutty flavor but also enhances the texture of our flour coating when combined together—it’s like adding little nuggets of savory goodness throughout each bite.
- 1 teaspoon garlic powder. While fresh garlic is wonderful, garlic powder provides an intense burst of flavor that’s evenly distributed throughout the chicken coating—as if every morsel has been kissed by fragrant garlic goodness.
- 3 Tablespoons olive oil. Extra virgin olive oil is my go-to here for its fruity notes and health benefits! Not only does it help achieve that gorgeous golden-brown crust on our chicken, but it also contributes richness to our sauce later on.
- 1 Tablespoon salted butter. Butter brings unmatched creaminess and depth to our dish; it’s what turns an ordinary sauce into liquid gold! The combination of butter with olive oil prevents burning while enriching flavors throughout.
- ½ cup dry white grape juice (like chardonnay or pinot grigio). This ingredient serves as our main liquid for deglazing the pan after searing—the acidity cuts through richness beautifully and complements our lemon juice perfectly without any alcohol content.
- 4 cloves garlic (thinly sliced). Fresh garlic will infuse our sauce with aromatic charm—slicing thinly allows for quick release of its oils during sautéing, making sure every bit contributes its robust flavor.
- 2 Tablespoons capers (drained). Capers bring their unique tangy pop—a briny burst that elevates our dish dramatically! They are often overlooked but are absolutely paramount in achieving that authentic piccata taste.
- 1 cup chicken broth. Using low-sodium chicken broth gives us control over seasoning while providing an additional layer of flavor to our sauce without overpowering other ingredients—always opt for quality broth when possible!
- 2 Tablespoons lemon juice. Freshly squeezed lemon juice adds brightness and acidity; it’s crucial for balancing flavors alongside our grape juice! The zestiness plays beautifully against the richness from butter and cheese.
- 2 Tablespoons cold salted butter. Adding cold butter at the end helps create an emulsion in our sauce—it thickens slightly while adding shine and creaminess without losing freshness—a true chef’s secret!
- 1/4 cup fresh parsley (roughly chopped). As we finish up, fresh parsley not only adds color but also provides a refreshing herbaceous note—its vibrancy brightens up both presentation and taste!

Equipment You’ll Need:
Before we dive into preparation, let’s ensure we have all the right tools at hand—these aren’t just items; they are essential partners in creating something wonderful! With these tools by your side, you’ll find that cooking becomes smoother and more enjoyable.
- Large skillet or frying pan – A good-quality skillet ensures even heat distribution which is vital when searing chicken breasts so they develop that beautiful golden crust without burning or sticking—a non-stick option works well too if you’re worried about sticking!
- Meat mallet or rolling pin – If you’ve never pounded meat before, don’t worry! This tool helps flatten those chicken breasts evenly for consistent cooking—just be gentle! You want them even rather than paper-thin.
- Tongs – These handy utensils make flipping over those sizzling chicken breasts easy while keeping your hands safe from hot oil splatters!
- Cutting board & knife – A sturdy cutting board paired with a sharp knife makes prepping ingredients effortless—slicing garlic thinly becomes quick work when you’re equipped properly!
- Liquid measuring cup – Precision matters in cooking! Having one handy ensures accurate measurements for liquids like broth or grape juice—you don’t want any surprises halfway through!
Now that we’ve gathered everything we need let’s jump into making this heavenly Chicken Piccata together—you won’t regret it!
Preparing the Chicken Piccata
Step 1: Tenderizing Your Chicken
Begin by placing your boneless skinless chicken breasts between two sheets of plastic wrap or parchment paper on your cutting board—this prevents splatter while keeping everything tidy! Using your meat mallet or rolling pin, gently pound each breast until they are about ½ inch thick; this step may seem trivial but trust me—it’s absolutely crucial for ensuring even cooking throughout each piece without dryness setting in later on! Once pounded evenly, season both sides generously with salt and freshly cracked black pepper; these foundational seasonings set us up beautifully as we move forward.
Step 2: Dredging Delight
Now comes one of my favorite parts: dredging those seasoned beauties in flour mixed with grated Parmesan cheese and garlic powder! In one shallow bowl combine half a cup of flour along with the finely grated Parmesan cheese (which adds such incredible umami flavor) plus one teaspoon of garlic powder—it may sound simple but these three elements work together harmoniously creating an irresistible coating! Gently press each piece of seasoned chicken into this mixture until completely coated on both sides—don’t rush this step as having ample coverage results in crispy perfection once cooked!
Step 3: Searing Perfection
With everything prepped, let’s bring some heat! In your large skillet over medium-high heat add three tablespoons of olive oil along with one tablespoon salted butter until shimmering—this combination creates magic as it cooks evenly without smoking too quickly due to different smoke points; trust me—you’ll love how beautifully browned these will become! Carefully place your dredged chickens into hot oil (avoid overcrowding which could lead them steaming instead) allowing them to sear undisturbed for about five minutes on each side until golden brown—you should hear satisfying sizzles as they cook away beautifully!
Step 4: Building Flavorful Depth
Once browned perfectly remove those succulent pieces onto a plate temporarily covered loosely with foil—they’ll stay warm as we build layers upon layers within this gorgeous dish! Into that same skillet add four thinly sliced cloves of garlic along with two tablespoons drained capers allowing them both time releasing their enticing aromas—the moment those flavors intermingle? Pure bliss fills every corner of your kitchen—I promise you won’t want to miss out on savoring every second here because soon after pouring half cup dry white grape juice followed by one full cup low-sodium chicken broth straight into pan brings forth even more depth transforming all bits left behind from earlier browning into rich deliciousness amplifying everything tenfold!
Stay tuned; there’s much more excitement ahead as we continue crafting our delectable Lemon Chicken Piccata together!
Step 5: Searing the Chicken to Golden Perfection
Now that your chicken breasts are beautifully coated in that flavorful mixture of flour, Parmesan cheese, and garlic powder, it’s time to bring out the magic by searing them. Heat a large skillet over medium-high heat and add three tablespoons of olive oil. The oil should shimmer like liquid gold; this is your cue that it’s ready for the chicken. Gently place the chicken into the pan, ensuring there’s enough space between each piece—overcrowding will lead to steaming instead of that glorious browning we’re after.
Sear each side for about five to seven minutes until they develop a lovely golden crust. This step is crucial because not only does it create a beautiful color, but it also locks in those succulent juices, making each bite profoundly satisfying. You’ll want to keep an eye on them; if they start to smoke or brown too quickly, lower the heat a bit. Flip them carefully using tongs—this avoids piercing the meat and losing precious juices! Once they are perfectly browned and cooked through, you can use an instant-read thermometer to check the doneness; you’re aiming for 165°F (74°C). Once done, transfer the chicken to a plate and cover it loosely with foil to keep warm while you work on that utterly intoxicating sauce.
Step 6: Creating Your Flavorful Sauce Reduction
With your chicken resting in all its glory, it’s time to whip up a sauce that will elevate this dish from good to extraordinary! In the same skillet where you seared the chicken (don’t you dare wash it yet; those delicious brown bits left behind are flavor gold!), add one tablespoon of salted butter and let it melt over medium heat. As it sizzles and begins to foam, toss in those thinly sliced garlic cloves. You’ll want to sauté them gently for about one minute until they’re fragrant but not browned—overcooking garlic can turn it bitter, which we absolutely want to avoid.
Next comes the star of this show: pour in half a cup of dry white grape juice. Trust me on this; this ingredient provides a sweet yet tangy contrast that perfectly complements the richness of the butter and chicken. Let this mixture simmer for about two minutes; as it reduces slightly, you’ll notice how beautifully aromatic your kitchen becomes! Then, add in those delightful capers—don’t skip these! They pack an incredible punch of brininess that brings a vibrant layer of flavor. Finally, pour in one cup of chicken broth along with two tablespoons of fresh lemon juice. Stir everything together and allow it to bubble away for another five minutes until it’s reduced by about a third. This reduction process is essential because it concentrates all those flavors into something truly remarkable.
Step 7: The Finishing Touches with Cold Butter Emulsion
Now that our sauce has reached its peak flavor potential through reduction, we’re going to finish this off with two tablespoons of cold salted butter—yes, you heard me right! Remove the skillet from heat and add in those cold butter pieces one by one while whisking vigorously. This technique is called emulsifying; incorporating cold butter creates an ultra-smooth texture and gives your sauce a glossy finish that’s simply irresistible. It’s like magic happening right before your eyes!
As you stir in this final element, take a moment to appreciate how truly transformative this step is; not only does it enhance flavor with creamy richness, but it also adds that luxurious mouthfeel that elevates every bite of Chicken Piccata into something special. If you find your sauce seems too thin for your liking after adding the butter, don’t fret! Just return it briefly to low heat and allow it to reduce further while whisking gently until thickened slightly.
Step 8: Bringing It All Together
Now comes the moment we’ve been waiting for—combining everything into one magnificent dish! Return those beautifully seared chicken breasts back into the skillet with your luscious sauce at medium heat for just a couple more minutes so they can absorb some of that divine flavor. You want them swimming happily in this fragrant concoction while warming through again; just about three minutes is perfect here since they’re already cooked through.
And what makes this part so delightful? It’s all about ensuring every inch of that chicken gets coated in this remarkable sauce! As you spoon some over each piece, watch how they glisten under the light—a sight so beautiful you might just find yourself swooning! Don’t forget to sprinkle on freshly chopped parsley right at the end—it adds not only color but also freshness that brightens up every bite.
Final Touches: Serving Your Lemon Chicken Piccata
As you plate up your Chicken Piccata—perhaps alongside some fluffy rice or al dente pasta—you can feel proud knowing you’ve created something akin to restaurant-quality cuisine right in your very own kitchen! Drizzle any leftover sauce generously over each serving because trust me when I say there’s no such thing as too much flavor here! Serve immediately while everything is warm and inviting; I promise you’ll have everyone at your table marveling at how easy yet extraordinary homemade meals can be.
This delightful dish embodies joy with every bite—the burst of lemon balancing perfectly against savory notes from garlic and capers is nothing short of spectacular. So gather around your dining table with friends or family and dig into this lovely Chicken Piccata together; there’s nothing quite like sharing good food made from love!
Storage and Enjoyment Tips for Your Chicken Piccata
Now that you’ve meticulously crafted your Chicken Piccata, it’s time to revel in the delightful experience of enjoying this dish! The vibrant flavors and aromas are sure to elevate your meal, whether you’re savoring it on a quiet evening or sharing it with loved ones. But let’s not forget about those glorious leftovers! In the spirit of making every bite count, I’ve got some handy storage tips to ensure your Chicken Piccata stays just as delicious as when you first whipped it up.
Storing Leftover Chicken Piccata
To keep your Chicken Piccata fresh and flavorful, transfer any leftovers into airtight containers. Glass containers are particularly advantageous because they help maintain the quality of the dish without imparting any unwanted flavors. Pop them into your refrigerator where they’ll stay good for about 3 days. If you’ve packed them properly, you can expect the rich, zesty sauce to cling lovingly to the chicken without compromising its taste. Here’s a little pro tip: if you’re worried about the chicken drying out, tuck a slice of bread into the container before sealing it up. This might sound quirky, but it helps absorb excess moisture while keeping your chicken succulent. When reheating, gently warm it in a skillet over low heat, adding a splash of chicken broth or water to restore that luscious sauce texture. Trust me; you want each mouthful of flavor to sing!
Freezing Chicken Piccata for Later
If you’re looking to extend the life of your culinary masterpiece even further, freezing is an excellent option! First, allow the Chicken Piccata to cool completely before portioning it into freezer-safe bags or airtight containers; this will prevent ice crystals from forming and ruining that heavenly sauce. Your dish can be safely stored in the freezer for up to 3 months without losing its charm. When you’re ready to enjoy this frozen treasure, simply thaw it in the refrigerator overnight before gently reheating as mentioned earlier—this way, you’ll still get that gorgeous burst of flavor upon serving! The convenience factor here is absolutely paramount; imagine having a restaurant-quality meal at your fingertips on busy nights or when unexpected guests arrive. It’s like bringing a bit of culinary magic into your home whenever you desire!
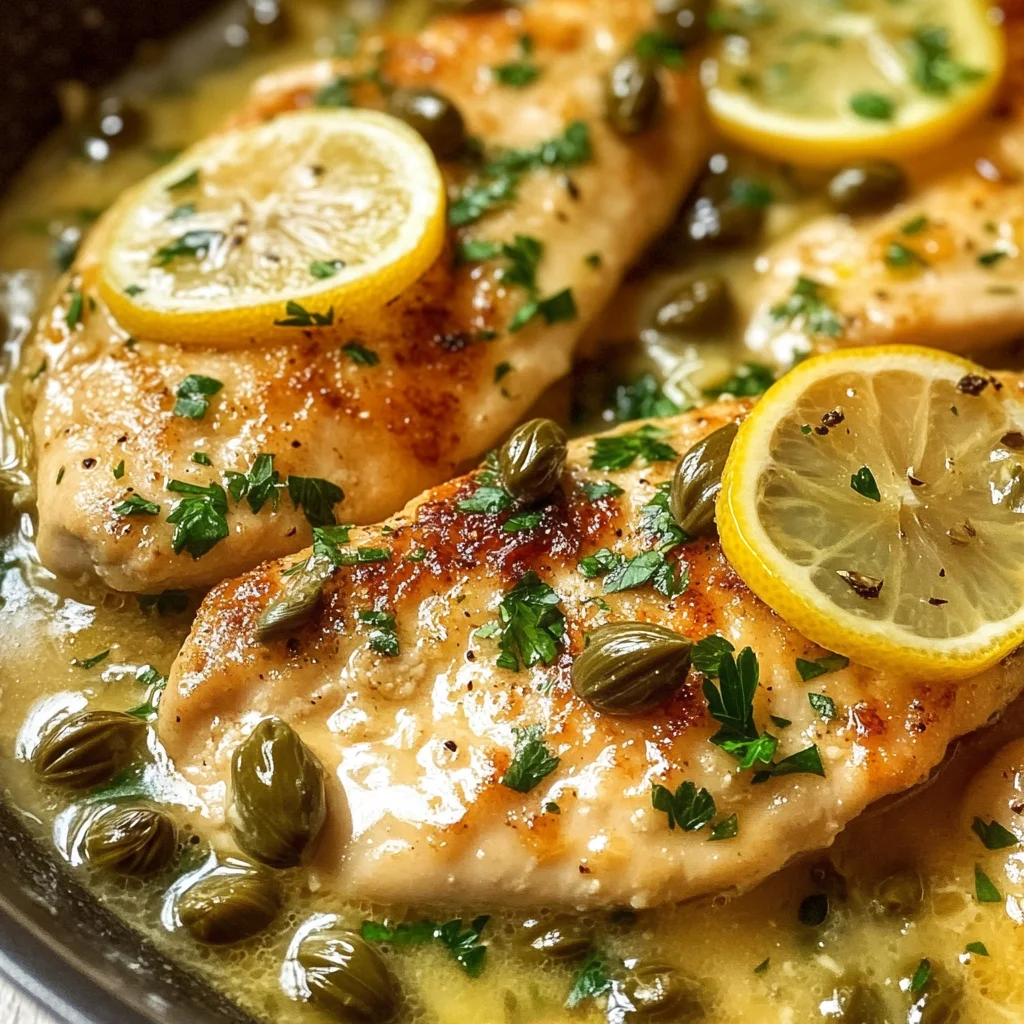
Lemon Chicken Piccata

Discover the bright and zesty flavors of our Lemon Chicken Piccata, a delightful twist on a classic Italian dish. This recipe features tender boneless chicken breasts seared to golden perfection, then enveloped in a luscious sauce made from fresh lemon juice and dry white grape juice. The addition of capers brings a tangy pop that elevates the overall flavor profile, making each bite a celebration of taste. Perfect for family dinners or entertaining guests, this dish is not only quick to prepare but also embodies comfort and sophistication.
- Prep Time: 15 minutes
- Cook Time: 20 minutes
- Total Time: 35 minutes
- Yield: Serves 4
- Category: Dinner
- Method: Frying
- Cuisine: Italian
Ingredients
- 2 large boneless skinless chicken breasts
- 1 teaspoon salt
- ½ teaspoon black pepper
- ½ cup flour
- ¼ cup finely grated Parmesan cheese
- 1 teaspoon garlic powder
- 3 tablespoons extra virgin olive oil
- 1 tablespoon salted butter
- ½ cup dry white grape juice (non-alcoholic)
- 4 cloves garlic (thinly sliced)
- 2 tablespoons capers (drained)
- 1 cup low-sodium chicken broth
- 2 tablespoons fresh lemon juice
- 2 tablespoons cold salted butter (for finishing)
- ¼ cup fresh parsley (roughly chopped)
Instructions
- Place chicken breasts between plastic wrap and pound to an even thickness. Season both sides with salt and pepper.
- Combine flour, Parmesan cheese, and garlic powder in a shallow bowl. Dredge chicken in the mixture until fully coated.
- Heat olive oil and butter in a large skillet over medium-high heat. Sear chicken for about five minutes on each side until golden brown. Remove from skillet and keep warm.
- In the same skillet, sauté sliced garlic and capers until fragrant. Add dry white grape juice, followed by chicken broth and lemon juice; simmer for five minutes until slightly reduced.
- Stir in cold butter to finish the sauce, then return the chicken to the skillet for another few minutes.
- Serve hot, garnished with fresh parsley.
Nutrition
- Serving Size: 1 piece of chicken with sauce (200g)
- Calories: 350
- Sugar: 4g
- Sodium: 630mg
- Fat: 18g
- Saturated Fat: 7g
- Unsaturated Fat: 10g
- Trans Fat: 0g
- Carbohydrates: 22g
- Fiber: 1g
- Protein: 30g
- Cholesterol: 80mg