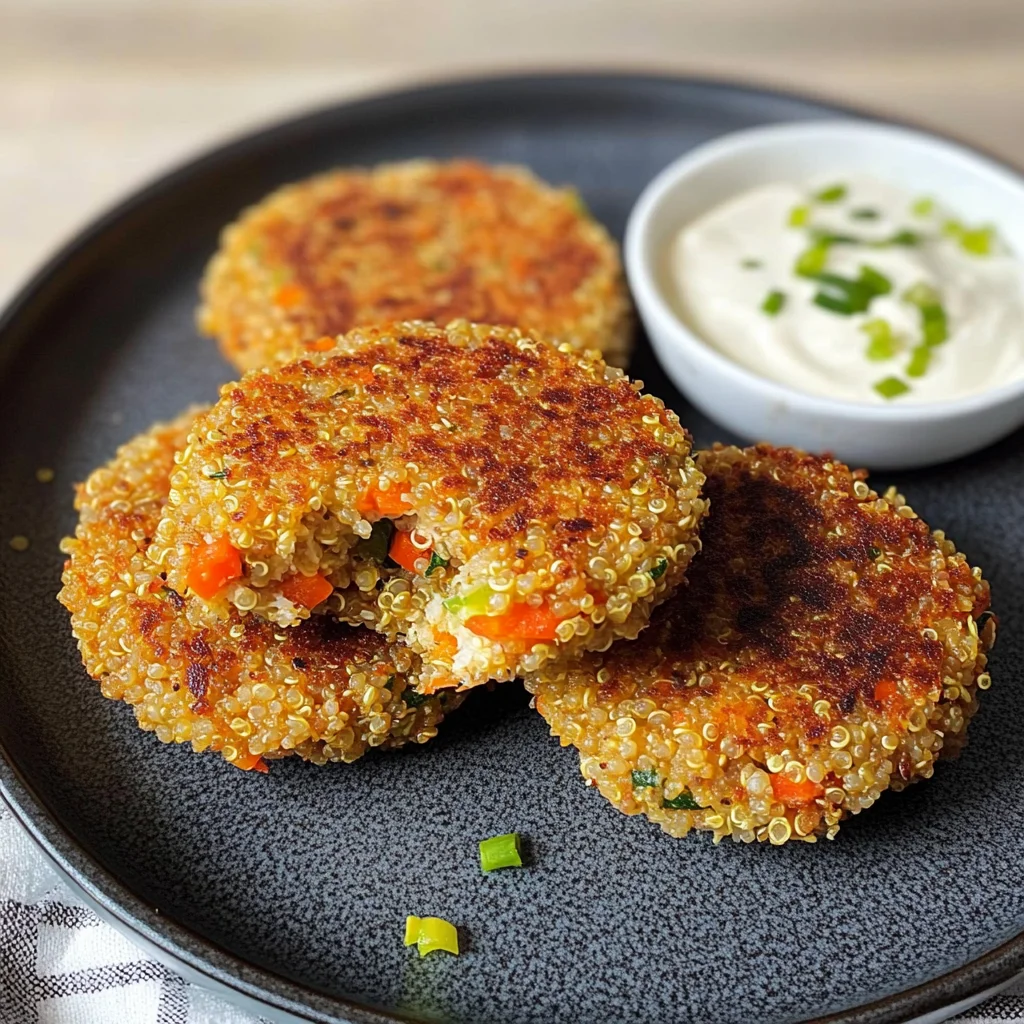
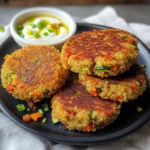
Secretly Healthy Crunchy Quinoa Patties
There’s something profoundly enchanting about the alchemy of cooking, don’t you think? It transforms simple ingredients into heartfelt meals that can evoke memories, spark conversations, and bring people together around the table. Today, I want to share with you a recipe that’s not just about nourishment; it’s a celebration of flavors, textures, and the joy of creating something beautiful from scratch. I’m talking about my Secretly Healthy Crunchy Quinoa Patties—a dish that’s not merely a meal but an experience that invites you to savor every single bite. Imagine crisp, golden exteriors giving way to a tender, flavorful interior packed with wholesome goodness. Each patty is a delightful little package of health and taste, truly a revelation for anyone seeking nutritious options without sacrificing flavor.
As we dive into this culinary adventure together, let me tell you why these patties hold such a special place in my heart. They are wonderfully versatile, making them perfect for weeknight dinners when time is tight or as appetizers for gatherings where you want your guests to be wowed by something unexpected yet utterly delicious. The secret lies not only in their vibrant ingredients—like bright bell peppers and earthy chickpeas—but also in the harmonious blend of spices that create an irresistible depth of flavor. This recipe is truly about striking that balance between tradition and innovation; it’s reminiscent of classic veggie burgers while being uniquely its own. So grab your apron, and let’s embark on this journey to create something truly extraordinary!
Secretly Healthy Crunchy Quinoa Patties: A Flavorful Revelation
These Crunchy Quinoa Veggie Patties are more than just a delicious snack; they are a true testament to how healthy eating can be both satisfying and enjoyable. I promise you’ll find yourself coming back for seconds (or thirds!) because they’re simply irresistible! With every bite, you’re treated to a delightful crunch followed by a burst of flavor from fresh veggies and aromatic spices. Trust me on this one—once you try these patties, you’ll wonder how you ever lived without them!

Ingredients:
As we prepare to make these delightful patties come alive in your kitchen, let’s take a moment to appreciate each ingredient’s role in crafting this culinary masterpiece. Each component adds its unique personality to the dish while working together in harmony.
- 2 cups Cooked Quinoa (Make sure it’s cooled a bit!): Quinoa is our star ingredient here—a nutritional powerhouse packed with protein and fiber that brings both substance and texture to our patties. It’s vital that your quinoa is cooked and cooled before using it; this helps prevent mushiness when forming the patties. I recommend rinsing it before cooking to remove any bitterness from the saponins coating the grains—this step ensures a pure flavor that shines through.
- 1 cup Grated Zucchini: Zucchini lends moisture and subtle sweetness to our patties while keeping them light. However, it’s crucial to squeeze out excess moisture before adding it to the mix; otherwise, you risk ending up with soggy patties that won’t hold their shape during cooking. Choose firm zucchinis with shiny skin—the fresher they are, the better the flavor will be!
- 1 cup Grated Carrot: Adding grated carrot not only introduces vibrant color but also infuses natural sugars that caramelize beautifully when cooked. Carrots provide essential vitamins while contributing to the overall sweetness of the dish; they bring an added crunch that complements the other textures beautifully.
- 1 15-ounce can Canned Chickpeas (Rinse and lightly mash them): Chickpeas act as both binders and protein sources in our patties. Rinsing them removes excess sodium from canning liquid while mashing them lightly helps achieve that perfect consistency—too smooth will lead us astray! Aim for a mix of whole beans and some mashed for optimal texture.
- 1 cup Finely Chopped Bell Pepper (Any color works!): Whether you choose red, yellow, or green bell pepper doesn’t matter much—they all contribute refreshing crunchiness and sweetness! Bell peppers are loaded with vitamins A and C and add a beautiful pop of color to entice your senses even more.
- 1/4 cup Chopped Green Onions: Green onions provide an essential onion-y bite without overwhelming the palate like yellow onions might do. Their mild flavor perfectly balances the earthiness of chickpeas while adding freshness—a must-have in this recipe!
- 1 cup Breadcrumbs (Gluten-free breadcrumbs can be used): Breadcrumbs serve as our binding agent; they help absorb moisture while providing structure so we can form those lovely patties effortlessly! Opt for whole grain or gluten-free varieties if needed; either will work well.
- 1 large Egg (For a vegan version, use a flax egg): The egg acts as another binding agent while adding richness—its protein content helps keep everything together during cooking. If you’re making these vegan-friendly, simply mix one tablespoon of ground flaxseed with two tablespoons of water; let it sit until it thickens before incorporating it into your mixture.
- 2 tablespoons Soy Sauce (Or Tamari): This savory addition enhances umami flavors within our patties—it’s an absolute must! It deepens the taste without overpowering other ingredients. If you’re avoiding gluten or soy entirely, coconut aminos work just as well!
- 1 teaspoon Garlic Powder: Garlic powder provides depth without requiring chopping or mincing—which means less prep time! Its robust aroma fills your kitchen with comfort as it cooks alongside other flavors—making everything come together beautifully.
- 1 teaspoon Onion Powder: Similar in purpose as garlic powder but brings its unique sweetness along with savory notes—it rounds out those flavors perfectly!
- 1 teaspoon Ground Cumin: Cumin introduces warmth through its earthy tones; it’s often found in Mediterranean cuisine—adding depth that elevates each bite into something sublime!
- 1/2 teaspoon Smoked Paprika: This smoky spice gives us warmth along with hints of sweetness while enriching color—it transforms ordinary ingredients into something extraordinary!
- Salt and Freshly Ground Black Pepper (To taste): Seasoning is key! Salt amplifies flavors while freshly ground black pepper adds complexity by introducing slight heat—adjust according to personal preference so every bite bursts forth vibrantly!
- 2 tablespoons Olive Oil (Or your preferred cooking oil): A drizzle of olive oil ensures our patties brown beautifully while providing healthy fats at the same time; feel free to substitute oils based on dietary needs or preferences!
After gathering these essential components, we’re ready to move forward into crafting our delicious creation!
Equipment You’ll Need:
Having the right tools makes all the difference when diving into any culinary adventure! While they may not technically be ingredients, these pieces of equipment are absolutely essential partners in creating something wonderful.
- Mixing Bowl – A large mixing bowl gives us ample space for combining all our ingredients seamlessly without spilling everywhere! Choose one made from glass or stainless steel since they’re easy-to-clean materials that’ll last through many recipes ahead.
- Grater – For grating zucchini and carrots efficiently; opt for box graters or handheld ones depending on what feels more comfortable in your hands—it should allow for easy handling so no fingers get grated along with vegetables!
- Measuring Cups & Spoons – Accurate measurements ensure consistency throughout each batch! Invest in good-quality measuring tools so you can replicate success time after time—precision matters greatly here.
- Wooden Spoon or Spatula – Using sturdy utensils allows us to blend ingredients thoroughly without damaging delicate components like chickpeas—you’ll find many uses beyond just this recipe!
- Non-stick Skillet or Frying Pan – A quality skillet promotes even heating during cooking which prevents sticking—a non-stick surface provides ease when flipping those scrumptious patties halfway through their crisping process too!
As we gather our tools together alongside those fresh ingredients… Let’s dive into preparing these Secretly Healthy Crunchy Quinoa Patties!
Step 1: Combine Your Ingredients
Begin by placing all your prepared ingredients—the cooked quinoa, grated zucchini, grated carrot, rinsed chickpeas (lightly mashed), chopped bell peppers, green onions, breadcrumbs, egg (or flax egg), soy sauce, garlic powder, onion powder cumin smoked paprika salt pepper—in that mixing bowl we talked about earlier. Giving yourself enough room here is crucial because we’re going to need plenty of space for mixing everything well! It’s important not just mechanically combine but rather embrace each element harmoniously so flavors meld nicely together during cooking too—this step sets us up beautifully for success ahead.
Step 2: Mix Until Well Combined
Now comes one of my favorite parts—the actual mixing process! Use either your wooden spoon/spatula or even clean hands if preferred—they’re great at incorporating everything really well because they allow tactile feedback throughout blending action itself too! Aim for thoroughness here; ensure no stray bits remain unmixed especially those spices hiding amidst veggies—they’re integral players afterall… If there’s excessive dryness at any point? Don’t hesitate adding an extra splash water solely focused on hydration aspect alone which helps hold everything nicely together ultimately yielding desired results later down line.
Step 3: Form Into Patties
With everything mixed thoroughly now comes shaping magic part—we want uniformity amongst our creations ensuring similar sizes yield consistent cooking times across board! Grab fistfuls worth mixture at once then gently mold between palms creating round discs approximately three inches wide thickness depending slightly on preference desired crispiness outcomes eventually during frying stage ahead… Remember though don’t rush this step as forming carefully ensures structural integrity holds strong whilst frying later allowing ultimate crispiness achieved meanwhile avoiding breakage issues mid-cooking process which could lead disappointment instead blissfulness expected once ready served up hot plate awaiting devouring soon after…
Step 4: Preheat Your Skillet
Before diving straight into frying? Let’s take moment preheat skillet over medium heat level alongside drizzle olive oil ensuring surface temperature rises adequately prior introducing patties onto pan later down line! Why preheat properly? This critical phase guarantees even browning occurs throughout entire batch whilst enhancing flavor infusion achieved within outer crust surrounding each patty simultaneously yielding intoxicating aroma wafting through air enticing everyone around kitchen eager anticipate first bites soon arriving shortly thereafter…
Stay tuned as we continue crafting these delectable treats together—there’s so much more deliciousness ahead!
Step 5: Forming the Patties with Love and Care
Now, we get to one of the most crucial steps in crafting your Secretly Healthy Crunchy Quinoa Patties: forming them into beautiful little rounds that will transform into golden bites of heaven. Start by taking a generous handful of the mixture—about a quarter cup—and gently press it together in your palms. You want to create a firm patty that holds its shape but isn’t too dense. This is where the magic happens; the blend of cooked quinoa, vibrant veggies, and spices meld together, creating a symphony of flavors that will dance on your palate. If you notice that the mixture feels too crumbly and doesn’t hold together well, don’t fret! A splash more soy sauce or an extra tablespoon of breadcrumbs will help bind everything beautifully.
As you form each patty, think about how you can make them uniform in size. Not only does this help them cook evenly, but it also makes for a lovely presentation when served. Lay each formed patty on a parchment-lined baking sheet or a plate as you go along; this keeps things neat and organized. I promise you, taking the time to shape these patties thoughtfully pays off tremendously later in terms of texture and taste. Once all your patties are formed, let them rest for about 10 minutes. This resting period allows the ingredients to settle and bond even more tightly, making them easier to handle during cooking. Trust me—this little pause is absolutely paramount in ensuring that your patties remain intact while they crisp up beautifully in the pan.
Step 6: The Sizzling Dance – Cooking Your Patties to Perfection
Now we dive into the exhilarating part where we bring our patties to life through cooking! Heat two tablespoons of olive oil (or your preferred cooking oil) in a large non-stick skillet over medium heat. As the oil warms up—just enough for it to shimmer—that’s your cue! Carefully place four patties in the skillet, giving them plenty of space to breathe; overcrowding is a common pitfall that can lead to steaming instead of crisping—a fate we absolutely want to avoid. The sound of those patties hitting the hot oil should be music to your ears! You’re not just frying; you’re creating an utterly intoxicating crust that will add both texture and flavor.
Cook these beauties for about 4-5 minutes on each side until they turn golden brown and crispy. Keep an eye out for visual cues: when they start to develop a rich golden hue around the edges and release easily from the pan when you gently nudge them with a spatula, it’s time to flip! This step is crucial because achieving that perfect crust not only enhances flavor but also locks in moisture inside each patty, ensuring every bite is juicy and satisfying. If you find any patties getting too dark too quickly—don’t panic! Just lower the heat slightly; patience is key here as we want even browning without burning.
Step 7: The Art of Patience – Resting Your Patties
After you’ve lovingly cooked both sides until they’re beautifully golden brown and crispy, it’s time for yet another important step: resting! Place each cooked patty on a plate lined with paper towels; this serves a dual purpose—it soaks up any excess oil and allows steam to escape. You might be tempted to dive right in after cooking—who could blame you? But let me encourage you not to rush this step! Allowing these little treasures to rest for about 5 minutes does wonders. During this time, they’ll firm up further and develop an even deeper flavor as any residual heat continues to work its magic.
This resting phase is often overlooked but let me tell you—it makes all the difference! The exterior becomes perfectly crisp while maintaining that delightful moist interior without being soggy or falling apart when served—what’s not to love? Plus, while waiting patiently, use this time wisely; perhaps whip up a quick salad or prepare some dipping sauce that could elevate these quinoa patties even further!
Step 8: Presenting Your Masterpieces
Finally, it’s time for what I like to call “the big reveal”! Arrange your Secretly Healthy Crunchy Quinoa Patties on a beautiful serving platter—you’ve worked so hard, and they deserve nothing less than center stage! As you lay them out, consider garnishing with fresh herbs like chopped parsley or cilantro for that vibrant pop of color which not only looks stunning but also adds freshness with every bite. And if you’re feeling extra fancy (because why not?), serve them with a side of creamy avocado dip or tangy hummus; these dips complement the rich flavors beautifully while adding another layer of enjoyment.
As you gather friends or family around for this meal—or maybe just treat yourself—take a moment to revel in what you’ve created: colorful patties packed with nutritious ingredients yet deliciously satisfying enough that no one would ever guess their secret healthfulness! Remember, cooking is all about sharing joy through food; I promise you’ll find smiles all around once everyone takes their first bite. Enjoy every moment—you’ve earned it!
Final Touches – Enjoying Your Creation
And there we have it—the journey from raw ingredients to exquisite Secretly Healthy Crunchy Quinoa Patties has come full circle! These delightful morsels are perfect for meal prep as they store wonderfully in airtight containers in the fridge for up to five days (if they last that long!). Reheat them in an air fryer or skillet for an easy snack or meal throughout your busy week.
So go ahead, take pride in your culinary adventure today! Whether you’re enjoying these delicious patties at home or sharing them at gatherings with loved ones, know that each bite carries not just incredible flavor but also love and care infused into every step of its creation. Happy cooking—and don’t forget: good food brings people together like nothing else can!
Storage and Enjoyment Tips for Your Secretly Healthy Crunchy Quinoa Patties
And just like that, your kitchen is filled with the mouthwatering aroma of freshly cooked patties, golden brown and crisp on the outside—can you just feel the excitement bubbling up? These Secretly Healthy Crunchy Quinoa Patties are not only a delightful treat right out of the pan, but they’re also incredibly easy to store and enjoy later. After you’ve indulged in your initial batch, don’t let those leftovers go to waste! Let’s dive into how to keep them fresh and flavorful.
Storing Leftover Secretly Healthy Crunchy Quinoa Patties
To ensure your leftover Secretly Healthy Crunchy Quinoa Patties stay as delicious as they were when first cooked, I recommend placing them in an airtight container. This little trick helps lock in moisture while keeping unwanted air out. You can store them in the refrigerator for about 3-4 days—just enough time for you to savor each bite before they’re gone! Now, here’s a pro tip: placing a slice of bread in the container can help absorb any excess moisture, maintaining that delightful crunch we all love. When reheating, I suggest using an oven or skillet rather than a microwave; this will revitalize their crispy exterior and keep that perfect texture. Trust me on this—nothing compares to that satisfying crunch when you take a bite!
Freezing Secretly Healthy Crunchy Quinoa Patties for Later
If you want to prepare ahead or simply stock up for those busy weeknights, freezing these patties is an absolute game-changer! To freeze them properly, allow your patties to cool completely before laying them flat on a baking sheet lined with parchment paper. Once frozen solid (about 1-2 hours), transfer them into freezer-safe bags or containers—this way, they won’t stick together and can easily be pulled out individually whenever hunger strikes! They’ll keep well in the freezer for up to 3 months, preserving both flavor and texture. The convenience factor here is fantastic—imagine coming home after a long day and having a healthy meal ready to pop in the oven! Just preheat your oven at 375°F (190°C) and bake from frozen for about 20-25 minutes until heated through and crispy again. It’s like having fast food but without any of the guilt!
Secretly Healthy Crunchy Quinoa Patties
Discover the joy of healthy eating with these Secretly Healthy Crunchy Quinoa Patties. Packed with protein and bursting with flavor, this easy-to-make recipe transforms wholesome ingredients into a delicious treat that everyone will love. Perfect for weeknight dinners or as impressive appetizers for gatherings, these patties feature a delightful mix of quinoa, fresh vegetables, and aromatic spices. With their crispy exterior and tender interior, each bite is a celebration of taste and health. Enjoy them on their own, in a wrap, or with your favorite dipping sauce for a versatile meal that nourishes the body and pleases the palate.
- Prep Time: 15 minutes
- Cook Time: 20 minutes
- Total Time: 35 minutes
- Yield: About 10 servings 1x
- Category: Dinner
- Method: Frying
- Cuisine: Vegetarian
Ingredients
- 2 cups cooked quinoa
- 1 cup grated zucchini
- 1 cup grated carrot
- 1 can (15 oz) chickpeas (rinsed and lightly mashed)
- 1 cup finely chopped bell pepper
- 1/4 cup chopped green onions
- 1 cup breadcrumbs (gluten-free if desired)
- 1 large egg (or flax egg for vegan option)
- 2 tablespoons soy sauce (or tamari/coconut aminos)
- Spices: garlic powder, onion powder, ground cumin, smoked paprika
- Olive oil for cooking
Instructions
- In a large mixing bowl, combine cooked quinoa, grated zucchini, grated carrot, mashed chickpeas, chopped bell pepper, green onions, breadcrumbs, egg (or flax egg), soy sauce, garlic powder, onion powder, cumin, smoked paprika, salt, and pepper. Mix until well combined.
- Form the mixture into patties about 3 inches wide.
- Heat olive oil in a non-stick skillet over medium heat. Cook patties for 4-5 minutes on each side until golden brown and crispy.
- Place cooked patties on paper towels to absorb excess oil before serving.
Nutrition
- Serving Size: 1 serving
- Calories: 130
- Sugar: 2g
- Sodium: 210mg
- Fat: 5g
- Saturated Fat: 0.5g
- Unsaturated Fat: 4g
- Trans Fat: 0g
- Carbohydrates: 18g
- Fiber: 4g
- Protein: 5g
- Cholesterol: 30mg