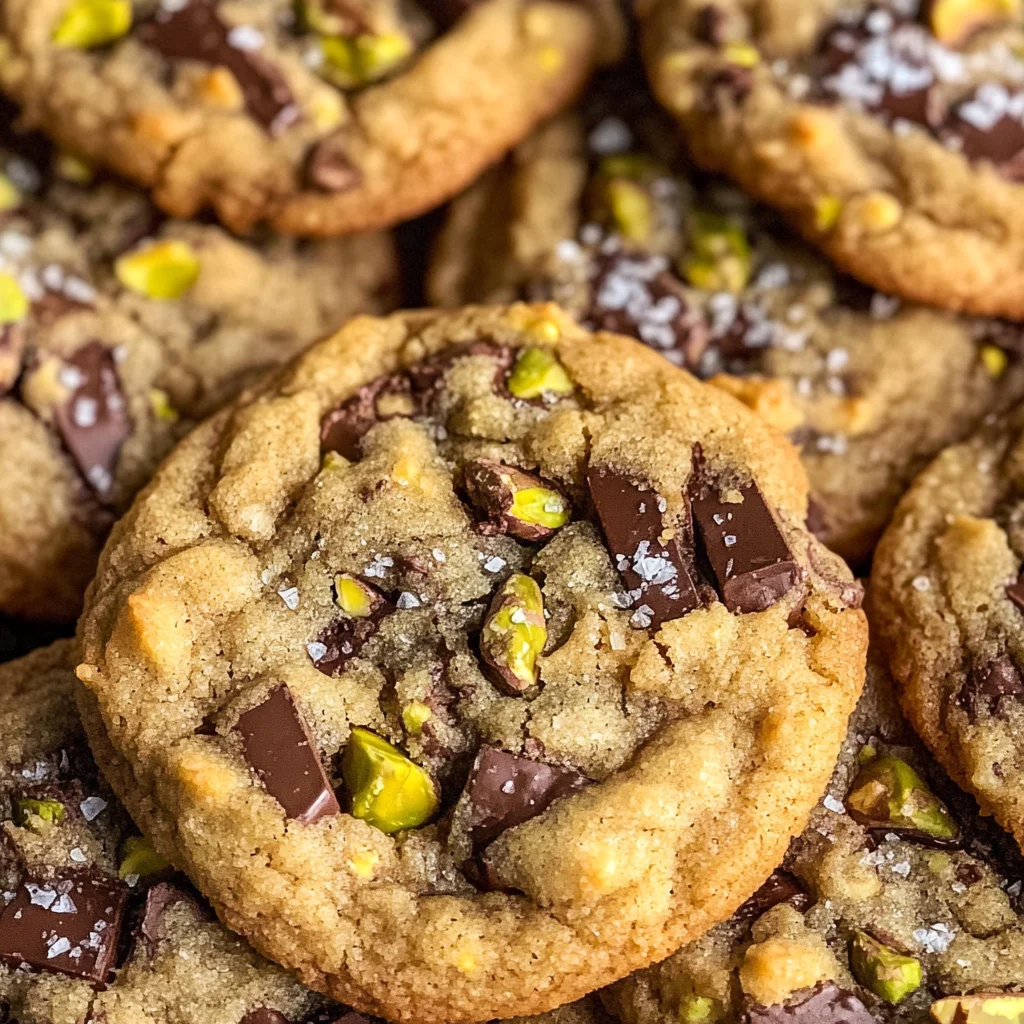
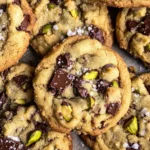
Pistachio Cookies
There’s something utterly intoxicating about the aroma of freshly baked cookies wafting through the air, isn’t there? It conjures up memories of cozy family gatherings, laughter echoing off kitchen walls, and the sweet anticipation that comes with indulging in a treat made with love. Today, I want to share with you one of my favorite recipes: Pistachio Cookies. These are not just any cookies; they are thick, chewy bites of bliss, bursting with rich pistachio flavor and delightful chunks of dark chocolate. Each bite is a symphony of flavors that will make you feel as though you’ve uncovered a hidden treasure in your own kitchen.
What makes these Pistachio Cookies so special is their unique blend of textures and flavors—the nuttiness of the pistachios combined with the bittersweet richness of dark chocolate creates an experience that is both comforting and exciting. They’re perfect for sharing during casual get-togethers or simply enjoying with a cup of tea at home after a long day. I promise you, once you bake these cookies, they will earn a permanent spot in your dessert rotation!
Pistachio Cookies: A Delightful Blend of Nutty and Sweet
These Pistachio Cookies are truly a labor of love that combines simple ingredients into something extraordinary. The process may seem daunting at first, but trust me—each step is straightforward and rewarding. As we embark on this culinary journey together, I’ll guide you through every nuance to ensure your cookies turn out perfectly!
Ingredients:
Before we dive into the baking process, let’s gather our ingredients. Each component plays an essential role in crafting these divine cookies, contributing not only to flavor but also to the texture and overall experience.
- 1/2 cup (70 g) pistachios: These gorgeous green gems are the heart and soul of our cookies. When finely ground, they impart a deep nutty flavor that permeates every bite. Look for unsalted pistachios to control the saltiness in your dough. If you’re feeling adventurous, try roasting them lightly to enhance their natural oils and aromas before grinding—this step can elevate the flavor profile even further!
- 1 3/4 cups (219 g) all-purpose flour, spooned and leveled: Flour is the backbone of any cookie recipe. It provides structure while allowing our cookies to maintain that delightful chewiness we crave. Make sure to spoon the flour into your measuring cup instead of packing it down; this ensures you use just the right amount without overdoing it.
- 1/2 tsp baking powder: This ingredient adds a little lift to our cookies, helping them rise slightly as they bake without making them cakey. It’s crucial for achieving that perfect texture—light but still wonderfully chewy.
- 1/2 tsp baking soda: Working alongside our baking powder, baking soda helps give our cookies that beautiful golden-brown color while also adding a touch to their spread during baking. Together with baking powder, they create a beautifully balanced cookie.
- 1/2 tsp salt: Salt is non-negotiable! It enhances all other flavors present in our cookies; without it, everything feels bland. Using salted butter already adds some saltiness, but this additional pinch ensures every bite bursts with flavor.
- 3/4 cup (168 g) salted butter, softened: Butter is what brings richness and moisture to our cookies—it’s where we draw much of our flavor from! Allowing it to soften at room temperature is crucial for proper creaming; if it’s too cold or melted, your dough won’t reach its full potential.
- 3/4 cup (165 g) light brown sugar: This sugar not only sweetens but also contributes moisture due to its molasses content. It gives our cookies that lovely chewiness while adding depth with its rich caramel notes.
- 1/4 cup (50 g) granulated white sugar: While brown sugar brings moisture and depth, granulated sugar helps achieve that delicate crispness on the edges—a beautiful contrast to the chewiness in the center.
- 2 egg yolks, at room temperature: Egg yolks bring fat and richness while contributing to both texture and stability in our cookie dough. Room temperature eggs incorporate more easily into the mixture; this step matters because it helps us achieve an even consistency throughout.
- 1 tbsp vanilla extract: This magical ingredient elevates the flavor profile immensely! Vanilla adds warmth and complexity; it’s like a hug for your taste buds! Always opt for pure vanilla extract when possible—it makes all the difference in quality.
- 6 oz (170 g) dark chocolate bars, chopped (60% cacao): The bittersweet nature of dark chocolate perfectly complements the nuttiness from pistachios. Chopping chocolate bars rather than using chips creates luscious pockets of melted chocolate throughout each cookie—pure bliss!
- 1/2 cup (70 g) pistachios, roughly chopped: We’ll be adding some roughly chopped pistachios into our dough too! Their crunch adds delightful texture while reinforcing that signature flavor we’re after.
- Flaky sea salt, extra chopped chocolate and extra chopped pistachios for sprinkling on top: This final flourish gives your cookies an irresistible edge—literally! A sprinkle of flaky sea salt enhances sweetness while providing an alluring contrast against the rich chocolate; it’s those little touches that take these treats from good to extraordinary!

Equipment You’ll Need:
Baking can be such a joyous endeavor when you have all the right tools at your fingertips! While these items may not be ingredients themselves, they are essential partners in creating something wonderful from scratch.
- Mixing bowls – Having several mixing bowls allows you to keep organized as we work through each step without feeling overwhelmed by clutter. Use glass or stainless steel bowls as they’re durable and easy to clean.
- Electric hand mixer or stand mixer – These tools will save your arm strength when creaming butter and sugars together! They help incorporate air into your mixture efficiently ensuring lightness in texture—which is absolutely paramount for soft yet chewy cookies.
- Rubber spatula – This nifty tool is perfect for folding in ingredients gently without deflating any air we’ve incorporated during mixing. It’s also great for scraping down bowl sides so nothing goes wasted!
- Cookie scoop (large) – A large cookie scoop ensures uniformity among all your cookies—this means they’ll bake evenly too! Plus, who doesn’t love perfectly shaped rounds?
- Parchment paper – Lining your baking sheets with parchment paper keeps cookies from sticking while making cleanup easier—trust me; this small step saves time later!
Now that we’ve gathered all our essentials and understood how each ingredient contributes to these fabulous Pistachio Cookies let’s roll up those sleeves and get started on this delightful adventure filled with nutty goodness!
Step 1: Preheat Your Oven & Prepare Baking Sheets
First things first—let’s set ourselves up for success by preheating our oven to 350°F (175°C). Preheating is crucial because it ensures consistent cooking times; if you place dough in a cold oven, they’ll spread too much before they start baking properly! While that’s happening, go ahead and line two baking sheets with parchment paper—a must-have for avoiding sticky situations later on—and set them aside for now.
Step 2: Grounding Those Pistachios
Next up? We need those beautiful pistachios transformed into a fine consistency! Toss them into a food processor and pulse until they’re almost resembling nut butter but still slightly grainy—you want enough texture left so they don’t completely disappear when mixed into dough later on. This process releases their natural oils which intensifies their flavor throughout each cookie bite—trust me on this one!
Step 3: Whisking Dry Ingredients
In another bowl (yes—we’re getting organized here!), whisk together your flour, baking powder, baking soda, and salt until well combined before setting aside this dry mixture as well. Whisking ensures everything is evenly distributed—a vital step since nobody wants unevenly risen or salty bites amidst sweet goodness!
Step 4: Creaming Butter & Sugars
Now comes one of my favorite parts—the creaming process! In a large mixing bowl fitted with either an electric hand mixer or stand mixer beat together softened butter along with brown sugar & granulated white sugar until light & fluffy (about 2–3 minutes). This step incorporates air which leads us toward luscious softness within those thick chews later on—it’s absolutely paramount for achieving cookie perfection!
I hope you’re feeling inspired so far because trust me—the best part is just around the corner as we blend all these glorious components together! Let’s keep going…
Step 5: Creaming to Sweet Perfection
Now, we’re diving into one of the most crucial steps in our cookie-making journey: creaming the butter and sugars. This step is where the magic truly begins. In a large mixing bowl, combine your softened salted butter, light brown sugar, and granulated white sugar. Using an electric hand mixer on high speed, blend these ingredients together for about 2 to 3 minutes until the mixture transforms into a fluffy, pale gold cloud of sweetness. The reason this step is so important cannot be overstated! Creaming incorporates air into the butter, which helps to create that lovely lift and structure in your cookies. You’ll know you’re on the right track when your mixture looks light and airy, with a texture that’s almost like whipped cream.
As you beat the ingredients together, take a moment to savor the intoxicating aroma wafting through your kitchen. This is where your cookies start to become something special! If you see any clumps of brown sugar or butter still hanging around, don’t hesitate to scrape down the sides of the bowl with a spatula; we want everything blended seamlessly together. Trust me on this: taking those few extra seconds to ensure a thorough mix will pay off with each delicious bite!
Step 6: Adding Richness and Flavor
Once your creamed mixture is ready and looking fabulous, it’s time to bring in our egg yolks and vanilla extract—two components that will add depth and richness to our pistachio cookies. Carefully drop in two egg yolks at room temperature (this is non-negotiable as they’ll blend better) along with one tablespoon of vanilla extract. Mix on medium speed for about 1 to 2 minutes until everything is combined and beautifully fluffy again. You’ll notice that the color deepens slightly as it transforms into a luscious golden hue.
Why do we use egg yolks instead of whole eggs? Great question! The yolks are rich in fats, which contribute to the chewy texture we’re aiming for; they also enhance flavor without adding too much moisture like whole eggs would. This step is all about building that incredible flavor base that will make every bite of your pistachio cookies unforgettable. Keep an eye out for any lumps; if you see them, just give it another quick mix until smooth!
Step 7: The Flour Power
Now comes the moment we’ve been leading up to—the incorporation of our dry ingredients! In another medium bowl, you’ve already whisked together all-purpose flour, baking powder, baking soda, and salt; now it’s time to bring them into our wet mixture. Gently add this flour mixture into the buttery goodness you’ve created while mixing on low speed just until combined—this should take no more than about 30 seconds. Be careful here! Over-mixing can lead to tough cookies because gluten develops when flour is agitated too much.
This step might seem simple but remember: it’s during this moment that we are binding everything together into a cohesive dough without overworking it. You want just enough mixing so that no dry flour remains visible—think of it like creating a soft blanket around all those delightful flavors we’ve built up so far! Once everything comes together and you see no streaks of flour left behind, it’s time to move forward with our indulgent add-ins!
Step 8: Stirring in Nutty Goodness
With our dough formed nicely, let’s fold in those glorious chopped dark chocolate bars and roughly chopped pistachios—these are what will elevate these cookies from good to spectacular! Using a rubber spatula (my favorite tool for this), gently mix these chunky treasures into the dough until they are evenly distributed throughout. Imagine each scoop being filled with creamy chocolate bits mingling among nutty pistachios—it’s utterly intoxicating!
When you’re folding these goodies in, take care not to overwork the dough again; we want those chunks intact for texture rather than ground down into oblivion. It might be tempting to dive right into tasting at this point (and I won’t blame you if you do!). But hold tight just a little longer—the best is yet to come! Once everything is mixed well but still chunky—think treasure hunt with each bite—it’s time for us to form our cookie shapes.
Baking Your Perfect Pistachio Cookies
Step 9: Scooping Out Cookie Dreams
Now comes perhaps one of my favorite moments—the act of scooping out your cookie dough! Using a large cookie scoop (about 2 tablespoons capacity), carefully portion out balls of dough onto your prepared baking sheets lined with parchment paper. Aim for arranging them about two inches apart; this spacing allows room for spreading while baking, creating those perfectly plump cookies we crave!
As they bake at 350 degrees Fahrenheit for anywhere between 10-12 minutes (here’s where personal preference really shines), keep an eye on them! If you prefer super chewy cookies that melt in your mouth (who wouldn’t?), pull them out closer to that 10-minute mark when they look puffy but still slightly underbaked in centers—they’ll set up perfectly as they cool. On the flip side, if crispy edges are more your style, let them go until around 12 minutes when they’re golden brown all over.
What’s crucial here is knowing your oven; every oven behaves differently based on its quirks and idiosyncrasies. So don’t hesitate to rotate your baking sheets halfway through if you’ve got hot spots or uneven heating—that small adjustment could mean all the difference between perfectly baked bliss and burnt edges!
Step 10: The Finishing Touches
Once those heavenly pistachio cookies have baked up beautifully (and I’m sure your house smells simply divine!), let them cool on the baking sheet for five minutes before transferring them onto a wire rack for complete cooling—this allows their structure to set while still being warm enough for that melty chocolate experience.
But wait! Just before they cool completely, grab some extra chopped chocolate chunks and pistachios along with flaky sea salt—you’ll want to sprinkle these atop each cookie while they’re still warm so they stick magnificently! This final flourish not only enhances visual appeal but also adds layers of flavor and texture—imagine biting through soft cookie dough only to discover delightful crunches from nuts paired with bursts of rich chocolate mixed with those sweet salty flakes!
And there you have it—the best pistachio cookies you’ve ever tasted! I promise you; each bite will be an extraordinary experience filled with nostalgia and warmth. Share these with friends or keep them all for yourself (I won’t judge!) because once you’ve had one of these beauties… you’ll understand why I’m so passionate about sharing this recipe with you today! Happy baking!
Storage and Enjoyment Tips for Your Pistachio Cookies
Now that you’ve created these delightful, chewy pistachio cookies, it’s time to revel in the joy of enjoying them! But wait—what happens if you have leftovers? Fear not, my friend! With the right storage techniques, you can savor every last crumb of these little treasures for days to come.
Storing Leftover Pistachio Cookies
To keep your pistachio cookies as fresh and delicious as the day they were baked, place them in an airtight container. This is absolutely crucial; it prevents moisture from ruining their delightful texture. If you want to go the extra mile, consider layering them between sheets of parchment paper to ensure they don’t stick together. Ideally, store your cookies at room temperature where they’ll stay wonderfully chewy for up to a week. But trust me on this—if you really want to maintain that soft texture, toss a slice of bread into the container; it works wonders by keeping the cookies moist! You’ll find that even after a few days, they retain that rich pistachio flavor and buttery goodness that makes them so special. When you’re ready to indulge again, simply pop them in the microwave for about 10-15 seconds for that freshly baked warmth!
Freezing Pistachio Cookies for Later
Feeling like you might not finish off all 18 cookies in one go? No problem at all! Freezing these pistachio cookies is a fabulous option that allows you to enjoy them whenever a craving strikes. To freeze properly, simply scoop the cookie dough onto a baking sheet lined with parchment paper and freeze until solid—this usually takes about an hour. Once frozen, transfer them to an airtight freezer bag or container and store them for up to three months. I promise you; this method preserves their flavor and texture beautifully! When you’re ready to bake from frozen, just preheat your oven and add an extra minute or two to the baking time. The convenience of having homemade cookies at your fingertips is simply unmatched! Imagine pulling out a warm cookie from the oven on a cozy evening—it feels like magic!
Pistachio Cookies
Indulge in the delightful world of homemade Pistachio Cookies—a perfect blend of nutty goodness and rich dark chocolate. These thick, chewy cookies are not only a treat for the taste buds but also a heartwarming reminder of cozy moments spent in the kitchen. With each bite, you’ll experience the deep, earthy flavor of finely ground pistachios paired beautifully with decadent chocolate chunks. Ideal for sharing at gatherings or enjoying solo with a cup of tea, these cookies are sure to become a beloved staple in your baking repertoire. Let’s embark on this sweet adventure together!
- Prep Time: 20 minutes
- Cook Time: 12 minutes
- Total Time: 32 minutes
- Yield: Approximately 18 servings 1x
- Category: Dessert
- Method: Baking
- Cuisine: American
Ingredients
- 1/2 cup (70 g) pistachios, finely ground
- 1 3/4 cups (219 g) all-purpose flour
- 1/2 tsp baking powder
- 1/2 tsp baking soda
- 1/2 tsp salt
- 3/4 cup (168 g) salted butter, softened
- 3/4 cup (165 g) light brown sugar
- 1/4 cup (50 g) granulated white sugar
- 2 egg yolks, at room temperature
- 1 tbsp vanilla extract
- 6 oz (170 g) dark chocolate, chopped (60% cacao)
- 1/2 cup (70 g) pistachios, roughly chopped
- Flaky sea salt, extra chopped chocolate and extra chopped pistachios for sprinkling
Instructions
- Preheat your oven to 350°F (175°C) and line two baking sheets with parchment paper.
- In a food processor, finely grind the unsalted pistachios until nearly smooth but slightly grainy.
- In a mixing bowl, whisk together flour, baking powder, baking soda, and salt. Set aside.
- In another bowl, cream softened butter with light brown sugar and granulated sugar until fluffy.
- Add room temperature egg yolks and vanilla extract; mix until combined.
- Gradually incorporate the dry mixture into the wet mixture until just combined.
- Fold in chopped dark chocolate and roughly chopped pistachios until evenly distributed.
- Using a large cookie scoop, place dough balls on prepared baking sheets about two inches apart.
- Bake for 10–12 minutes or until edges are golden brown. Let cool on the sheet for five minutes before transferring to wire racks.
- Sprinkle warm cookies with flaky sea salt before serving.
Nutrition
- Serving Size: 1 cookie (30g)
- Calories: 150
- Sugar: 7g
- Sodium: 80mg
- Fat: 8g
- Saturated Fat: 5g
- Unsaturated Fat: 3g
- Trans Fat: 0g
- Carbohydrates: 17g
- Fiber: 1g
- Protein: 2g
- Cholesterol: 25mg