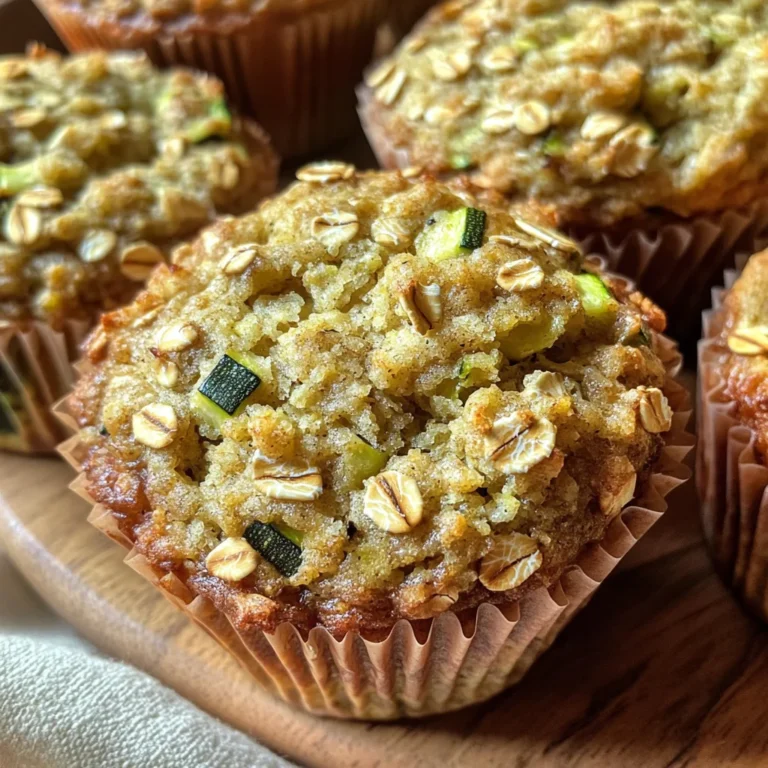
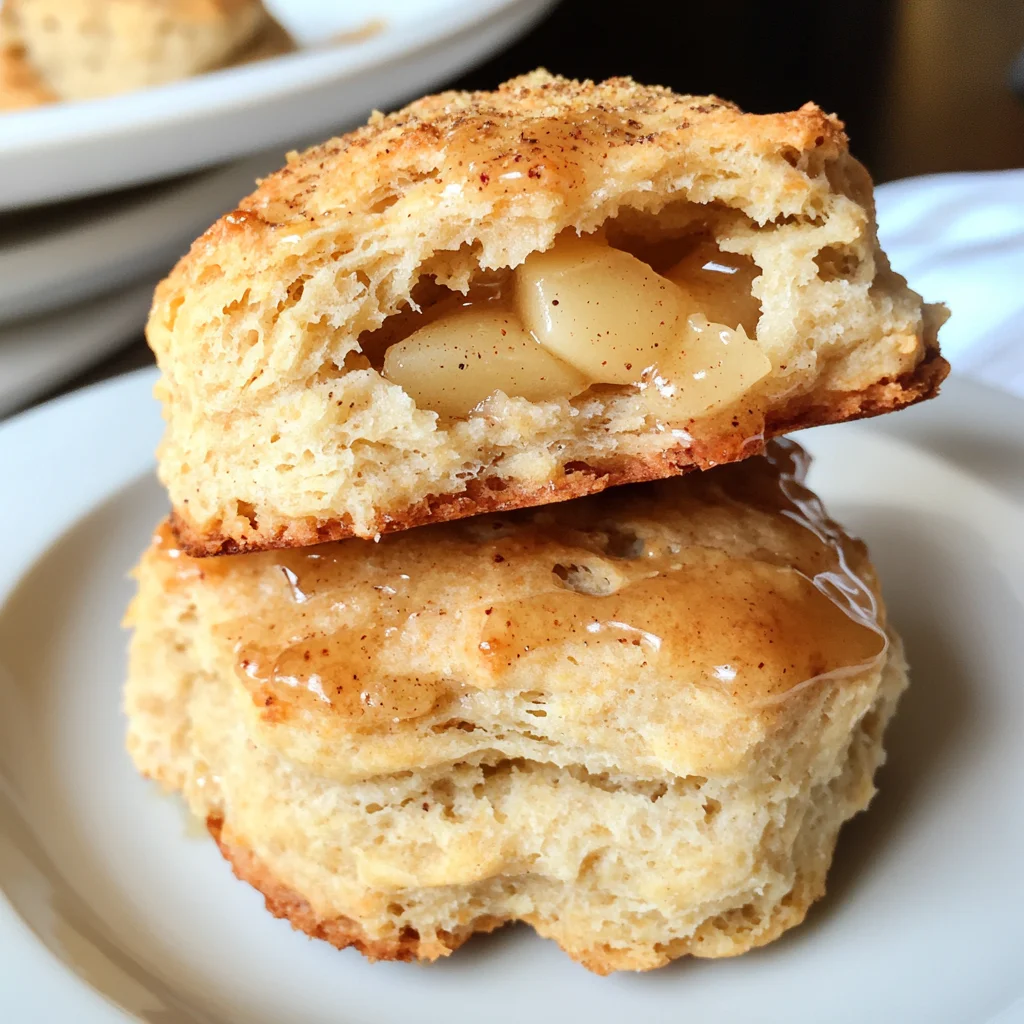
Apple Biscuits with Honey Butter Glaze
There’s something undeniably magical about the aroma of freshly baked Apple Biscuits wafting through your home. It’s like a warm embrace, a gentle reminder of cozy afternoons spent in the kitchen with loved ones, where laughter mingles with the scent of cinnamon and sugar. These Apple Biscuits with Honey Butter Glaze are not just a recipe; they’re an experience that transforms simple ingredients into something truly extraordinary. Each bite is a tender morsel that boasts the sweetness of apples and the warmth of spices, all wrapped in a fluffy biscuit that practically melts in your mouth. When you brush them with that luscious honey butter glaze, it’s like drizzling liquid gold over pure comfort – utterly intoxicating!
Now, I can’t help but share how this recipe resonates with so many of us. It embodies the spirit of American baking while offering a delightful twist with its unique combination of flavors and textures. Imagine serving these biscuits at brunch or as the centerpiece of your next family gathering; they’re perfect for any occasion where you want to connect over good food. The beauty lies not only in their taste but also in the memories they create – whether it’s sharing them over coffee on a lazy Sunday morning or enjoying them as a sweet treat after dinner. Trust me when I say, these biscuits hold the power to bridge generations, weaving together stories and flavors that will linger long after the last crumb has been savored.
Apple Biscuits with Honey Butter Glaze: A Sweet Symphony of Flavors
I’m just so excited to share this recipe for Apple Biscuits with Honey Butter Glaze with you! You’ll find that these biscuits are incredibly easy to make yet yield such rewarding results. The combination of tender apple pieces and fragrant spices creates a comforting flavor profile that feels both familiar and refreshing. And let’s not forget about that honey butter glaze – it takes these biscuits from delightful to downright divine! So roll up your sleeves, pour yourself a cup of tea (or coffee), and let’s dive into this culinary adventure together!
Ingredients:
As we embark on this culinary journey, it’s important to understand each ingredient’s role in creating those delectable Apple Biscuits we’re dreaming about. The right ingredients are crucial; they’re not just components but rather characters in our delicious story.
- 4 1/2 cups all-purpose flour (plus more for dusting the surface): This is our foundation, providing structure and stability to our biscuits. When choosing flour, look for high-quality all-purpose flour; it should be finely milled for best results in texture. If you want an extra layer of flavor or nutrition, consider using half whole wheat flour for part of the amount—just keep in mind it may change the final texture slightly.
- 1 tablespoon baking powder (plus 1 teaspoon): This leavening agent is absolutely paramount to achieving those flaky layers we adore in biscuits! Baking powder works by releasing carbon dioxide when mixed with wet ingredients, helping our dough rise beautifully as it bakes. Make sure it’s fresh; old baking powder won’t give you that lift which is so crucial for lightness.
- 1 teaspoon baking soda: This ingredient complements our baking powder by providing additional lift and helping balance acidity in our dough from other ingredients like buttermilk and grated apples. Like baking powder, freshness matters here—so check your pantry!
- 2 teaspoons sugar: A touch of sugar enhances flavor without making these biscuits overly sweet while contributing to browning during baking. It helps create that gorgeous golden crust we all love! Feel free to use coconut sugar or organic cane sugar if you prefer something less refined.
- 1 teaspoon salt: Salt is essential—it enhances all those lovely flavors and balances sweetness beautifully. Don’t skimp on this; it’s what makes every bite profoundly satisfying.
- 1 teaspoon ground cinnamon: Ahh, cinnamon—the warm hug we didn’t know we needed! Its aromatic quality adds depth to our biscuits and perfectly complements the natural sweetness of apples. Always opt for freshly ground cinnamon if possible; it makes a world of difference.
- 1/2 teaspoon nutmeg: Nutmeg brings a hint of earthiness and warmth that elevates our spice blend. Just a pinch goes a long way—too much can overpower everything else!
- 1/2 teaspoon ground ginger: Ginger offers a subtle zing that brightens up our biscuit dough beautifully while enhancing its complexity without being overwhelming.
- 1/4 teaspoon ground cardamom: This exotic spice is often overlooked but adds an utterly intoxicating flavor profile reminiscent of cozy holiday gatherings—it’s like magic in tiny amounts!
- 1/4 teaspoon ground cloves: Cloves bring warmth and slight bitterness that rounds out our spice mixture perfectly—just be careful not to add too much!
- 1 cup cold butter: Using cold butter is non-negotiable here; it creates steam pockets during baking which leads to those flaky layers we crave! Cut your butter into small cubes before adding it to ensure even distribution throughout the flour mixture.
- 1/2 cup apple (grated): Freshly grated apple not only infuses moisture into our biscuits but also adds natural sweetness and nutrition without artificial additives—trust me; you’ll love this addition!
- 1 cup chilled buttermilk: Buttermilk adds tenderness due to its acidity reacting with baking soda while also enriching flavor profiles—don’t skip this step! You can easily make your own substitute by mixing regular milk with lemon juice or vinegar if you’re short on time.
- 3 tablespoons unsalted butter (chilled): For brushing on top before serving, melted unsalted butter gives each biscuit an inviting glossiness while enhancing richness—a little luxury never hurt anyone!
- 3 tablespoons honey: Drizzling honey over warm biscuits not only brings sweetness but also adds complexity—think floral notes dancing alongside buttery goodness!
- pinch salt: Just a sprinkle enhances overall flavor without drawing attention away from those gorgeous honey notes—we want balance here!
Equipment You’ll Need:
Having the right tools can truly elevate your cooking experience! While they might not be ingredients themselves, they play essential roles in ensuring everything comes together beautifully—from mixing bowls to bakeware, each piece has its purpose.
- Mixing bowls (various sizes) – A good set will help you tackle different stages seamlessly! I recommend sturdy glass or stainless steel bowls as they’re durable and easy to clean.
- Pastry cutter (or fork) – This handy tool is perfect for cutting cold butter into dry ingredients—this process helps create those desirable flaky layers we love so much! If you don’t have one, don’t worry; using two forks or even your fingertips will do just fine.
- Grater – A box grater works wonders for shredding apples quickly without fussing too much—you’ll appreciate how easily it integrates them into the dough later on!
- Rolling pin – While we won’t be rolling out dough per se, having one nearby can assist if you’d like flatter biscuits or if you’re feeling adventurous enough to try variations down the line!
- Baking sheets lined with parchment paper – Because who doesn’t love easy cleanup? Lining your sheets prevents sticking while allowing golden bottoms—a win-win situation!
Preparing the Apple Biscuits with Honey Butter Glaze
Step 1: Combining Dry Ingredients
Let’s start by combining our dry ingredients—it sets the foundation for everything delicious that’s about to happen! In your mixing bowl, whisk together all-purpose flour, baking powder, baking soda, sugar, salt, and spices until well blended. This process ensures even distribution throughout the dough—the last thing we want is one biscuit tasting overwhelmingly spicy while another falls flat! Take your time here; it’s crucial because each component plays its part harmoniously in creating that symphony of flavors we crave in every bite.
Step 2: Cutting in Cold Butter
Next up is cutting in our cold butter—a step that’s both fun and critical for achieving flakiness! Using your pastry cutter (or forks), work swiftly through those small cubes until you achieve pea-sized pieces scattered throughout—the goal here is unevenness as different sizes will create varying textures when baked. This step may seem tedious but trust me on this; it’s vital as we’re creating pockets within our dough which will release steam during baking resulting in tender layers rather than dense lumps—a true masterpiece awaits us!
Step 3: Incorporating Grated Apples
Once you’ve achieved that beautiful butter-flour mixture resembling coarse crumbs—let’s fold in those grated apples now! Gently stir until evenly distributed throughout without overmixing—it’s tempting because you want everything combined nicely but remember too much handling can lead to tough results which no one wants when biting into soft fluffy goodness! As you mix gently think about how flavors meld together—the earthy sweetness from apples combined with spices will dance joyfully throughout every biscuit.
Step 4: Adding Buttermilk
Now comes my favorite part—the addition of chilled buttermilk! Pour it gradually into the bowl while folding gently again until just combined—no need for perfection here since lumpy batter means we’re on track toward achieving delightful texture later on! If lumps remain don’t fret too much—they’re welcomed friends at this stage seeking their chance at becoming buttery bliss shortly ahead as heat transforms them into glorious bites filled with warmth & nostalgia within each morsel enjoyed together around tables filled laughter shared moments cherished forevermore…
Stay tuned as we continue crafting these heavenly treats together—I promise you’ll love every moment spent making them just as much as savoring every delectable bite afterward!
Step 5: Bringing It All Together – The Dough Magic
Now, let’s dive into the heart of our Apple Biscuits with Honey Butter Glaze by combining our dry and wet ingredients. First, grab a large mixing bowl and gently whisk together your 4 ½ cups of all-purpose flour, the baking powder, baking soda, sugar, salt, and those delightful spices—cinnamon, nutmeg, ginger, cardamom, and cloves. This step is crucial because it ensures that every bite of your biscuits will have that perfectly balanced flavor profile. You want the spices to be evenly distributed throughout the flour mixture for an enchanting symphony of flavors in each biscuit. Once mixed, you’ll create a little well in the center of your dry ingredients; this is where the magic happens!
Now comes the fun part—add in your cold butter! Using a pastry cutter or two forks, cut that chilled butter into the flour mixture until it resembles coarse crumbs with pea-sized pieces. Trust me on this one: using cold butter is absolutely paramount for achieving those tender layers we adore in biscuits. The cold butter creates steam pockets as it bakes, which is what makes our biscuits fluffy and flaky. You should see tiny bits of butter nestled within your dry mix—this is a visual cue that you’re on the right track. Next up, fold in the grated apple gently, ensuring it’s evenly distributed without overworking the dough (overworking leads to tough biscuits—yikes!). Finally, pour in the chilled buttermilk slowly while stirring with a spatula or wooden spoon until just combined. This moment is truly magical—the transformation from dry ingredients to a shaggy dough signals we’re getting closer to biscuit heaven.
Step 6: The Resting Phase – Patience is a Virtue
Once your dough has come together beautifully but remains slightly sticky (and oh-so-inviting!), it’s time to cover it with plastic wrap and let it rest for about 15-20 minutes in the fridge. I know waiting can be tough—trust me; I often find myself peeking into my fridge like a kid waiting for cookies to bake—but this step is non-negotiable! Chilling allows the gluten to relax while also keeping our butter cold. This results in tender biscuits that rise magnificently when they hit that hot oven. During this time, you can take a moment to breathe deeply and enjoy that warm aroma of spices wafting through your kitchen; it’s an utterly intoxicating experience!
If you feel like getting creative while waiting, consider prepping your baking sheet by lining it with parchment paper or giving it a light dusting of flour so that your biscuits won’t stick post-bake. Enjoy this time—it’s not just about making biscuits; it’s about savoring the process and building anticipation for what’s to come!
Step 7: Shaping Your Biscuits – The Art of Forming
With patience rewarded and your dough chilled, it’s time for perhaps one of my favorite parts: shaping those divine biscuits! On a floured surface (don’t skimp here; we want enough flour so nothing sticks!), turn out your rested dough gently. With floured hands or a rolling pin (if you prefer), pat or roll out the dough until it’s about ¾ inch thick—this thickness allows for ideal rising while still achieving that tender crumb inside.
Using a round biscuit cutter or even the rim of a glass (no need for fancy tools here), cut out circles from the dough without twisting—the key here is to press down firmly straight through to keep those beautiful layers intact. As you cut each biscuit, place them onto your prepared baking sheet about an inch apart; this allows them room to grow and become puffy during baking. Remember not to waste any dough! Gather up any scraps gently without overworking them again to cut out more biscuits because every bit counts when you’re creating something as special as these Apple Biscuits with Honey Butter Glaze!
Step 8: Baking Your Perfect Apple Biscuits
Now comes the moment we’ve all been waiting for: sliding those lovely rounds into the oven! Preheat your oven to 425°F (220°C) while you finish shaping your biscuits so that it’s at just the right temperature when you’re ready to bake—a hot oven is essential for creating that perfect golden crust on top while keeping all those tender layers inside moist and fluffy. Bake these beauties for about 15-20 minutes or until they are puffed up high and have taken on a lovely golden hue—a beautiful contrast against their soft interior.
As they bake away—oh my goodness—you’ll be greeted by an aroma that’s simply irresistible! It’s like being wrapped in a warm hug from home as cinnamon fills every nook and cranny of your kitchen. A good way to check if they’re done? Gently tap on one; if it sounds hollow, they’re ready! Alternatively, you can insert a toothpick into one biscuit—if it comes out clean (or just slightly crumbly), you’ve hit biscuit perfection!
Final Touches – The Honey Butter Glaze
The last step feels like adding icing on top of an already beautiful cake—it’s what elevates these Apple Biscuits with Honey Butter Glaze from delightful breakfast treats into extraordinary bites of bliss! While your biscuits are cooling slightly on a wire rack—a perfect opportunity for them to set just right—let’s prepare that glorious glaze.
In a small bowl, combine three tablespoons of chilled unsalted butter with three tablespoons of honey and add just a pinch of salt. Give this mixture a gentle stir until it’s well combined—you want it silky smooth like liquid gold drizzling down over each biscuit later on. Why bother with this glaze? Because brushing these warm biscuits with honey butter not only adds an extra layer of flavor but also gives them an incredibly glossy sheen that makes each bite feel indulgent yet comforting.
Once you’ve brushed each warm biscuit generously with this heavenly glaze, let them sit for just another minute or two before serving—or if you’re anything like me, dig right in because patience only lasts so long when such deliciousness awaits! Each bite will be an experience rich in warmth and nostalgia; I promise you won’t regret it.
And there you have it: tender Apple Biscuits with Honey Butter Glaze ready to enjoy! Whether served fresh out of the oven for breakfast or as an indulgent afternoon snack paired with tea or coffee, these delightful morsels will fill your home—and hearts—with warmth and joy. Happy baking!
Storage and Enjoyment Tips for Your Apple Biscuits with Honey Butter Glaze
Now that your kitchen is filled with the intoxicating aroma of freshly baked Apple Biscuits with Honey Butter Glaze, it’s time to bask in the warm glow of your culinary triumph! These tender, fluffy biscuits are not just a delight to eat right out of the oven; they also have a wonderful staying power that allows you to enjoy them over the next few days—or even longer if you choose to freeze some for later! The sweet, buttery glaze adds a finishing touch that can transform each bite into a moment of pure bliss. So, let’s talk about how to store these gems so you can savor their deliciousness as long as possible.
Storing Leftover Apple Biscuits with Honey Butter Glaze
To keep those delightful Apple Biscuits fresh and tasty, store them in an airtight container at room temperature. This method allows them to retain their soft texture without drying out. I recommend using a container lined with parchment paper to absorb any excess moisture and help maintain that tender crumb. They will typically last for about 2-3 days—though I promise they’ll be gone much sooner if you’re anything like my friends and family! If you want to ensure they remain soft and fluffy, place a slice of bread in the container with them; this little trick helps maintain moisture levels beautifully. As for how they taste after storage? Well, trust me when I say they still retain their charm—each biscuit remains wonderfully aromatic and flavorful, especially when warmed up slightly in the oven or microwave before serving.
Freezing Apple Biscuits with Honey Butter Glaze for Later
If you’ve got leftovers or simply want to prepare ahead, freezing these biscuits is an excellent option! To do this properly, allow the biscuits to cool completely on a wire rack before transferring them to a freezer-safe bag or container—make sure to remove as much air as possible before sealing. You can keep them frozen for up to three months without compromising quality. When you’re ready to enjoy them again, simply pop them straight from the freezer into a preheated oven at 350°F (175°C) for about 15-20 minutes until heated through. This convenient option not only saves time but also ensures that you always have a delightful treat on hand for unexpected guests or cozy afternoons at home. Just imagine pulling out a warm biscuit on a chilly day; it’s like having a comforting hug from your kitchen!
CATEGORY_NAME
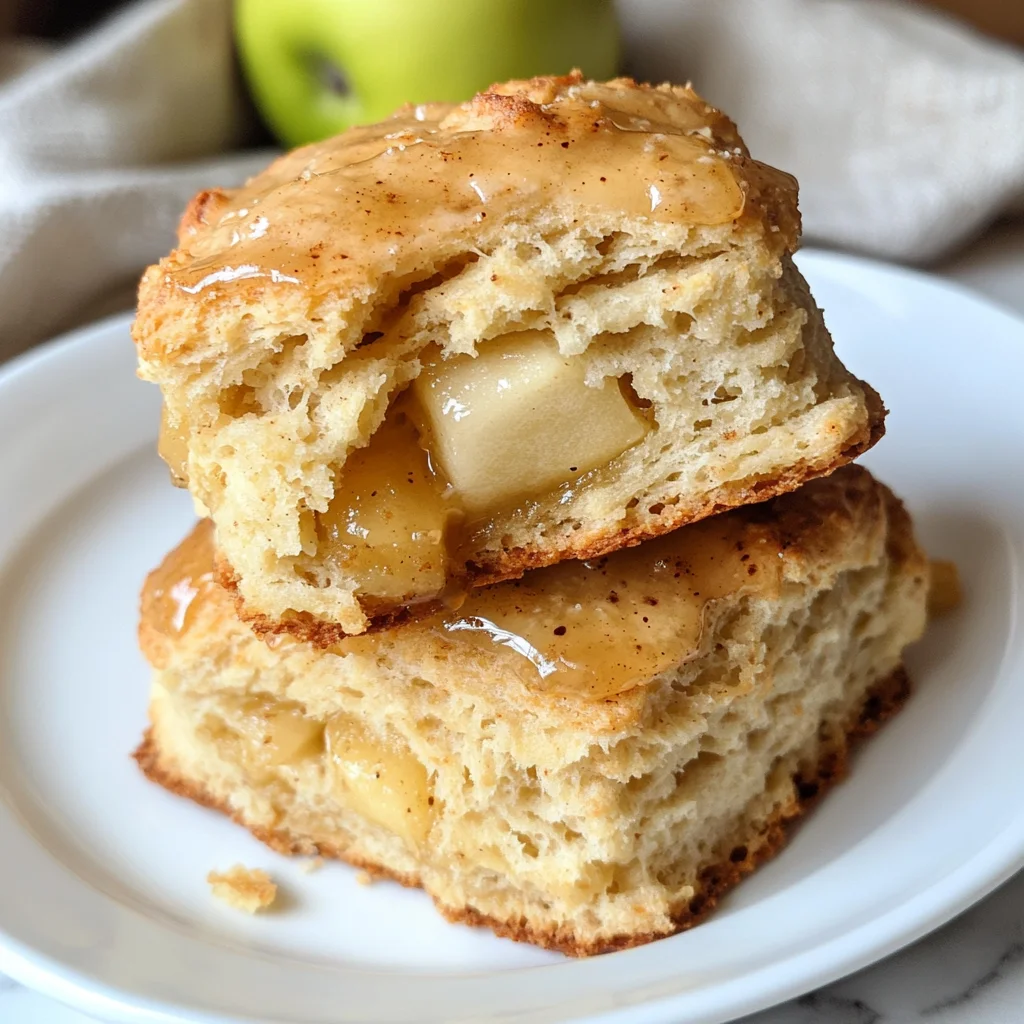
Apple Biscuits with Honey Butter Glaze
Apple Biscuits with Honey Butter Glaze offer a delightful blend of tender, fluffy biscuit texture infused with sweet apple pieces and warm spices. The moment you take a bite, you’re enveloped in the comforting flavors of cinnamon and honey, making these biscuits perfect for any occasion. Whether served at brunch, as an indulgent snack, or a cozy dessert, they create memories that linger long after the last crumb is savored. With simple ingredients and easy preparation, this recipe transforms your kitchen into a haven of warmth and nostalgia that brings family and friends together.
- Prep Time: 20 minutes
- Cook Time: 20 minutes
- Total Time: 40 minutes
- Yield: Approximately 16 servings 1x
- Category: Dessert
- Method: Baking
- Cuisine: American
Ingredients
- 4 ½ cups all-purpose flour
- 1 tablespoon baking powder
- 1 teaspoon baking soda
- 2 teaspoons sugar
- 1 teaspoon salt
- 1 teaspoon ground cinnamon
- ½ teaspoon nutmeg
- ½ teaspoon ground ginger
- ¼ teaspoon ground cardamom
- ¼ teaspoon ground cloves
- 1 cup cold butter (cubed)
- ½ cup grated apple
- 1 cup chilled buttermilk
- Honey Butter Glaze: 3 tablespoons unsalted butter (melted) and 3 tablespoons honey
Instructions
- Preheat the oven to 425°F (220°C). Line a baking sheet with parchment paper.
- In a large mixing bowl, whisk together flour, baking powder, baking soda, sugar, salt, and spices until well combined.
- Cut in the cold butter until the mixture resembles coarse crumbs.
- Fold in the grated apple gently.
- Add the chilled buttermilk gradually while stirring until just combined.
- Turn dough onto a floured surface and pat it to about ¾ inch thick. Cut out biscuits using a round cutter.
- Place on the prepared baking sheet and bake for 15-20 minutes until golden brown.
- While cooling slightly, prepare the glaze by mixing melted butter with honey; brush over warm biscuits.
Nutrition
- Serving Size: 1 biscuit (50g)
- Calories: 190
- Sugar: 6g
- Sodium: 200mg
- Fat: 9g
- Saturated Fat: 5g
- Unsaturated Fat: 3g
- Trans Fat: 0g
- Carbohydrates: 26g
- Fiber: 1g
- Protein: 3g
- Cholesterol: 25mg