Mongolian Beef
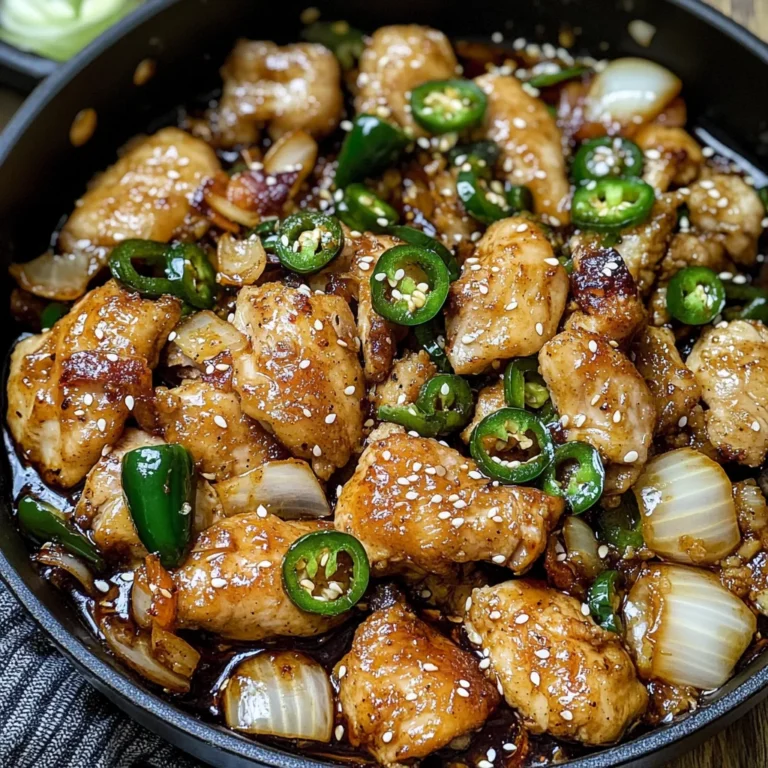
There’s something incredibly special about a dish that brings warmth and comfort to the soul, and Mongolian Beef is certainly one of those treasures. The moment you take your first bite, you’re greeted with a delightful symphony of flavors that dance across your palate—sweet and savory, with a hint of that intoxicating charred essence reminiscent of a backyard BBQ. It’s more than just a meal; it’s an experience that transports you to bustling streets filled with tantalizing aromas, where every bite feels like a celebration of life itself. I promise you, once you prepare this dish in your own kitchen, it becomes more than just another recipe; it’s a connection to tradition and innovation, all wrapped up in beautifully tender beef.
What makes Mongolian Beef so beloved? Perhaps it’s the perfect balance of sweet and salty that keeps you coming back for more or the way each ingredient complements the others—like old friends reunited after years apart. This dish has roots in Chinese cuisine but has evolved over time into something uniquely cherished by many around the world. Whether you’re whipping it up for a cozy weeknight dinner or serving it at a gathering with friends, this recipe is sure to impress. And let’s not forget about how quickly it comes together—just 30 minutes from start to finish! Trust me on this: after one taste, you’ll understand why it’s often featured on takeout menus everywhere.
Mongolian Beef: A Sweet Symphony of Flavor
This Mongolian Beef recipe is an absolute delight for anyone looking to bring authentic tastes into their home kitchen without spending hours slaving away. The juicy flank steak gets marinated in a magical mix of ingredients that tenderize and amplify its flavor while ensuring that every bite is utterly satisfying. You’ll love how simple yet extraordinary this dish is—it’s perfect for impressing guests or just treating yourself after a long day.
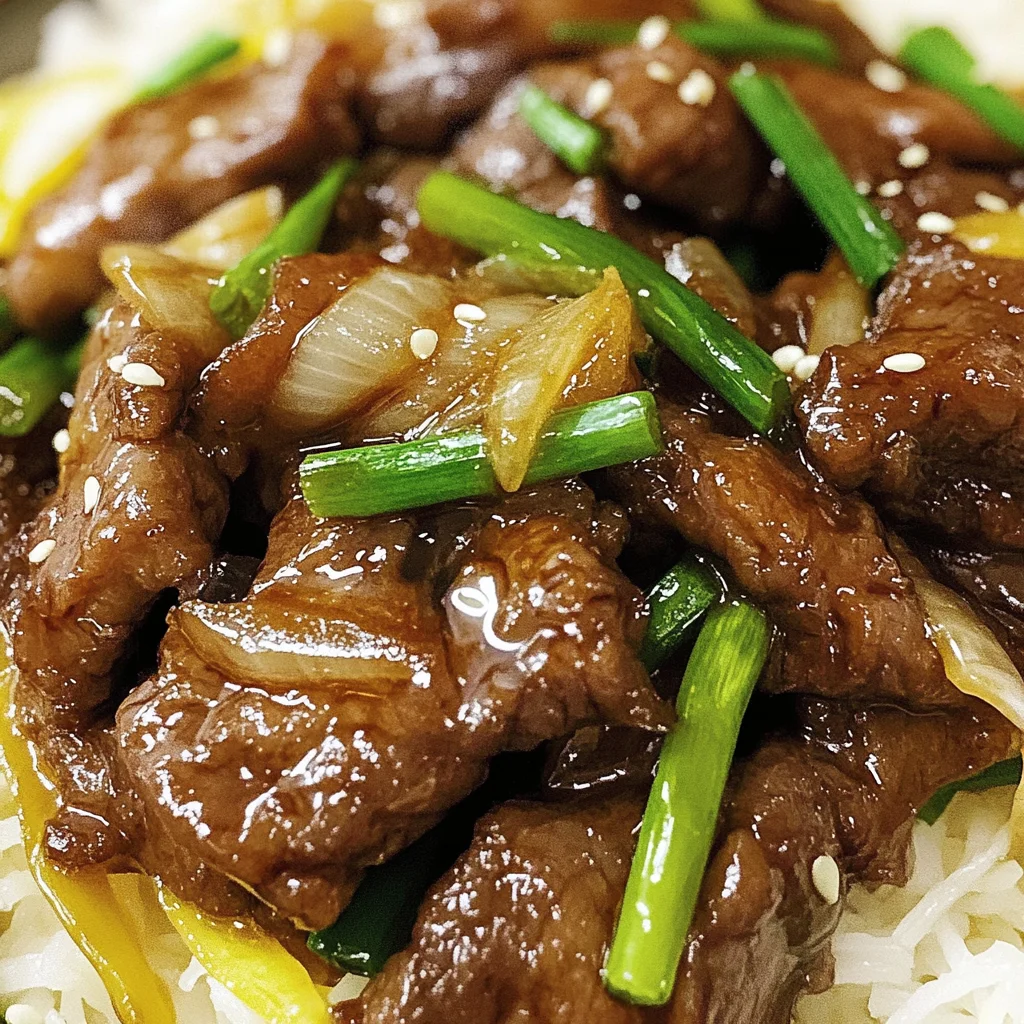
Ingredients:
As we embark on this culinary journey together, let’s explore the wonderful ingredients that will make our Mongolian Beef not just tasty but truly exceptional. Each component plays its role in creating the dish’s signature flavor profile.
- 1 pound beef flank steak (thinly sliced between ⅛ to ¼ inch thick). Flank steak is an incredible choice here due to its rich flavor and relatively low fat content. When thinly sliced against the grain, it becomes incredibly tender and absorbs marinades beautifully. Aim for slices that are consistent in thickness so they cook evenly; this step is non-negotiable if you’re after that melt-in-your-mouth texture. If flank steak isn’t available, you can also use sirloin or skirt steak as alternatives.
- 2 tablespoons water. Water may seem simple, but it serves as an essential component in our marinade, helping to dissolve other ingredients like sugar and vinegar to infuse maximum flavor into the meat. Don’t underestimate its power—it ensures everything blends beautifully!
- 2 teaspoons Shaoxing rice apple vinegar. This vinegar adds a unique tanginess that elevates our dish beyond ordinary flavors. Shaoxing vinegar brings depth and complexity; if you can’t find it, a good substitute would be apple cider vinegar mixed with a splash of regular soy sauce for balance.
- ½ teaspoon Kosher salt (a little less if using fine salt). Salt is crucial for enhancing all those lovely flavors we’ve introduced into our dish. It helps draw out moisture from the meat while also seasoning it thoroughly—this step transforms your beef from bland to bold.
- ¼ teaspoon baking soda. Now here’s where some magic happens! Baking soda acts as a tenderizer by altering the protein structure in beef, making it softer when cooked. Just remember not to use too much; otherwise, you might end up with an off-putting metallic taste.
- 2 tablespoons cornstarch. This ingredient plays two vital roles: first, it helps create that lovely crust when frying the beef, giving us those delicious charred bits we crave; second, it thickens our sauce later on for an ultra-satisfying texture.
- 1 tablespoon oil (any neutral oil). You’ll want an oil with a high smoke point for sautéing—something like canola or vegetable oil works perfectly here. This non-flavored oil lets our other ingredients shine through without overpowering them.
- 1 teaspoon cracked black pepper (more or less to taste). Cracked black pepper adds just the right kick without overwhelming the palate—it complements both sweet and savory notes beautifully! Feel free to adjust based on your spice tolerance; it’s all about finding what makes your heart sing!
- 3 tablespoons granulated sugar. This sweetener balances out the savory elements of our dish perfectly! It caramelizes during cooking, creating those irresistible crispy bits while providing that comforting sweetness we adore in Mongolian Beef.
- 2 tablespoons regular soy sauce. Soy sauce adds umami depth to our marinade while also contributing color during cooking—it’s absolutely paramount for achieving that beautiful glaze we’re aiming for!
- 1 tablespoon garlic (minced; about 2 cloves). Garlic introduces warmth and aromatic richness into our dish; its flavor intensifies when sautéed alongside onions and green onions—creating layers of taste you’ll be dreaming about long after your meal ends!
- ½ large yellow onion (sliced). Onions provide sweetness as they caramelize during cooking while also adding texture—you want them soft yet still holding their shape slightly so they contrast beautifully against the tender beef.
- 1 bunch green onion (cut into 2-inch pieces; separate white and green parts). Green onions add freshness and brightness at the end—they’re perfect for garnishing! Separating them allows us to cook the white parts down first before adding those vibrant green tops right at the end for color and crunch.
- 1 ounce rice vermicelli (medium thickness; optional). If you’re feeling adventurous or want something extra special alongside your beef, rice vermicelli noodles are fantastic! They soak up all those wonderful sauces like little sponges while adding heartiness to each bite.
- Oil (as needed for cooking). Finally, don’t forget additional oil as necessary throughout cooking—it ensures everything doesn’t stick and helps achieve perfect browning!
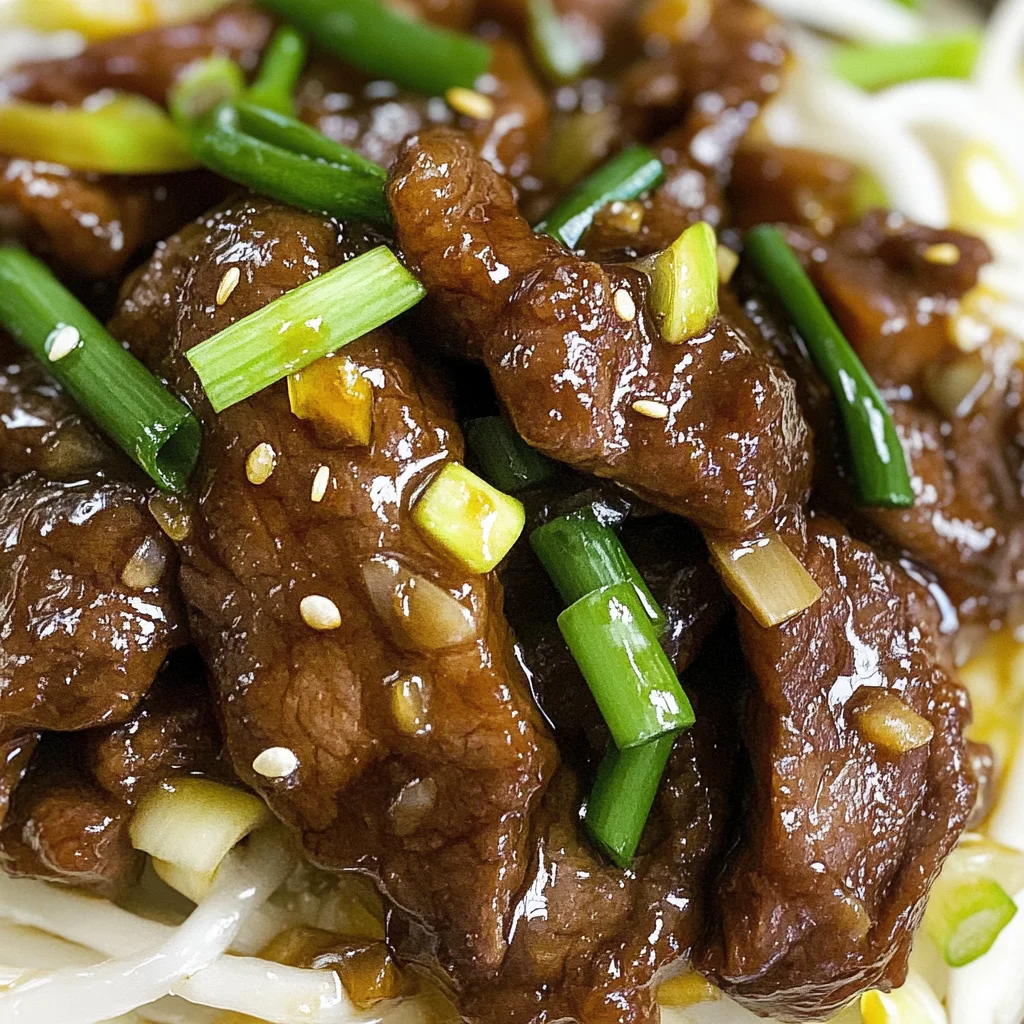
Equipment You’ll Need:
Before diving into preparation mode, let’s talk about having the right tools at hand—these trusty companions will make your cooking experience smoother and more enjoyable! While they may not be ingredients, they are essential partners in creating something wonderful.
- **Chef’s knife – A sharp chef’s knife is vital for slicing your flank steak thinly against the grain—a technique crucial for tenderness! Investing in quality knives saves time spent struggling through tougher cuts while also enhancing precision when chopping vegetables later on.
- **Cutting board – A sturdy cutting board provides stability during food prep while protecting countertops from damage as well as keeping things clean! Opt for one made from bamboo or plastic which are easier on knives compared with glass options which can dull blades over time.
- **Large skillet or wok – You’ll need either option depending on what cookware you have available at home—the key here being ample space allowing ample room for stir-frying without overcrowding ingredients thereby ensuring even cooking times throughout!
- **Spatula or wooden spoon – A durable spatula or wooden spoon doubles as stirring equipment plus aids flipping pieces over seamlessly during sautéing processes ensuring browning occurs uniformly across various surfaces without tearing delicate proteins apart!
Now that we’ve gathered our ingredients and equipment let’s get started preparing this mouthwatering Mongolian Beef recipe!
Step 1: Marinating Your Flank Steak
The first step on this flavorful journey begins by marinating our flank steak—a process I always look forward to because it’s where so much flavor begins to build! Start by placing your thinly sliced flank steak into a bowl or resealable plastic bag—the beauty of using bags is how well they allow marinades to coat every inch effortlessly! In this bowl/bag combo add water along with Shaoxing rice apple vinegar followed by sprinkling Kosher salt evenly throughout before introducing baking soda next which enhances tenderness dramatically over time as proteins break down slowly under acidic conditions present from vinegar additions earlier mentioned previously! Give everything a gentle toss using hands until evenly coated before letting sit aside anywhere from 15 minutes up until one hour max—this waiting period ensures those rich flavors seep deep into each slice giving us truly extraordinary results once cooked properly later down line!
Step 2: Preparing Your Sauce
While our beef marinates merrily away soaking up all those delicious flavors we can shift focus onto preparing our glorious sauce next! In another mixing bowl combine granulated sugar alongside soy sauce then introduce minced garlic here too—this combination produces an utterly intoxicating aroma filling kitchen air almost immediately upon mixing together! Make sure whisking occurs thoroughly enough until sugar dissolves entirely within liquid otherwise clumping may occur leading undesired textures later when added directly onto sizzling hot meats during final stages cooking process—we wouldn’t want that now would we? Set aside once complete but feel free checking periodically throughout remaining steps ahead just ensure nothing settles at bottom resting too long unattended!
Step 3: Coating The Beef
Now comes one of my favorite moments—the coating process where we transform marinated meat into something resembling culinary magic right before eyes! After allowing sufficient time lapse pass since initial marinade phase gently remove steak pieces one handful at time shaking off any excess moisture beforehand making sure surface area stays dry before sprinkling cornstarch generously over top layer acting like armor protecting against direct heat exposure during frying stages yet simultaneously enhancing golden crispy textures eventually encountered post-cooking completion period thus yielding optimal results overall later down line trust me here folks don’t skip out this essential step please!! Toss each piece lightly coating evenly across all sides ensuring no dry patches remain visible then set aside ready awaiting hot pan action shortly thereafter!
Step 4: Searing The Steak
With everything prepped nicely now let’s dive headfirst into searing those beautiful strips of flank steak until browned perfection emerges magically right before eyes—it honestly feels like watching dreams come true doesn’t it? Heat large skillet/wok over medium-high flame adding generous drizzle neutral oil allowing surface heat up sufficiently reaching ideal temperatures known ideally around 375°F range optimal searing conditions exist whereby proteins begin caramelizing effectively producing mouthwatering crusty bits highly sought-after within dishes such as these creating unforgettable experiences every single time enjoyed around tables across countless gatherings shared laughter amongst family & friends alike surrounded warmth kitchens filled joy expressed through culinary creations prepared lovingly by hand perhaps even yours today? Once heated carefully drop coated strips one-by-one avoiding overcrowding keeping spacing ample between pieces allowing proper airflow thus preventing steaming rather than desired frying effects taking place instead encourages uniform browning achieved across entire batch served piping hot straight plate immediately following removal skillet pan finish cooking process onwards onto next adventures ahead awaiting exciting flavors soon reveal themselves shortly thereafter…
I can’t wait for you to experience how easy—and delightful—making Mongolian Beef can be right at home in just thirty minutes flat! With each step unfolding effortlessly alongside rich aromas wafting through air enticing senses igniting excitement anticipation building steadily until finally plated beautifully garnished fresh chopped greens atop ready devoured hungrily soon afterward leaving everyone satisfied hearts content bellies full afterward afterward sharing stories laughter resonating throughout homes filled love warmth memories created enjoyed together forever cherished fondly recall days gone past revisited again often within kitchens everywhere… Enjoy every moment dear friend!
Step 5: Marinating the Beef for Ultimate Flavor
Now that we have our flank steak beautifully sliced, it’s time to marinate it. This step is absolutely paramount because it infuses the meat with a depth of flavor that’s nothing short of extraordinary. In a medium bowl, combine your thinly sliced beef with 2 tablespoons of water, 2 teaspoons of Shaoxing rice apple vinegar, ½ teaspoon of Kosher salt, and ¼ teaspoon of baking soda. Now, I know what you might be thinking: baking soda? Yes! This little trick helps to tenderize the beef by breaking down its proteins, ensuring each bite is as melt-in-your-mouth as possible.
Toss everything together gently with your hands or a spatula until the beef is well coated. The marinade should cling to each slice, creating a sort of flavor bath that will transform your dish into something magical. Let this mixture sit for about 10-15 minutes at room temperature—don’t rush this step! Allowing the beef to marinate not only enhances its flavor but also helps it to absorb that sweet-savory goodness we’re after in our Mongolian beef. While you wait, take a moment to appreciate how fabulous your kitchen smells already; trust me, it’ll only get better from here.
Step 6: Coating the Beef for Crispiness
Once your beef has marinated to perfection, it’s time for the next crucial step: coating it with cornstarch. This method creates that delightful crispy exterior that’s so signature in Mongolian beef dishes. In a separate bowl, place 2 tablespoons of cornstarch and gently add your marinated beef slices, tossing them until they are evenly coated. This doesn’t have to be a perfect process—just ensure every piece gets some love from that cornstarch coating.
Why is this step important? Well, during cooking, the cornstarch forms a protective layer around the meat, which not only helps achieve that coveted crisp texture but also locks in moisture. As you heat up your oil later on, watch for those little bubbles forming around the edges when you drop in a piece of coated beef; that’s when you know you’re ready to cook! I promise you; this crispy texture will elevate your dish from delicious to utterly intoxicating.
Step 7: Searing the Beef for Charred Perfection
Now comes one of my favorite parts—the sizzling sear! Heat a large skillet or wok over medium-high heat and add about 1 tablespoon of neutral oil (like canola or vegetable oil), swirling it around until it glistens like liquid gold. Once the oil is hot—this is crucial—add your coated beef in batches if necessary; overcrowding can lead to steaming instead of searing. You want each piece to have contact with that hot surface so they caramelize beautifully.
Sear each side for about 2-3 minutes or until they develop a lovely golden-brown crust. Don’t be afraid to let them sit undisturbed for those precious first moments; this allows those beautiful char marks to form—a hallmark of great stir-fry technique! Keep an eye on them and listen carefully; you should hear that satisfying sizzle as they cook. The aroma wafting through your kitchen will likely start drawing family members in like moths to a flame, and trust me—they won’t be disappointed when they taste this!
Step 8: Stir-Frying Vegetables for Vibrant Flavor
Once all your beef is beautifully seared and resting on a plate (don’t worry—we’ll get back to it!), it’s time to bring those vibrant vegetables into play. In the same skillet where you cooked the beef—which should still have that glorious residual oil and fond on the bottom—add your sliced yellow onion and white parts of green onions along with about 1 tablespoon more oil if needed. The residual heat will help release those fantastic flavors while preventing anything from sticking!
Stir-fry these veggies for about 2-3 minutes until they begin to soften and become fragrant; you’ll notice their colors intensifying as they cook! Next up is adding minced garlic—oh my goodness, this is where things get really exciting! Garlic adds an aromatic layer that’s undeniably comforting and profoundly satisfying. Toss in the garlic and give everything another minute or so until it’s fragrant but be careful not to let it burn; burnt garlic can turn bitter quickly! As this aromatic medley unfolds before you, take a moment to inhale deeply—you won’t regret it!
Next Major Phase – Bringing It All Together
Step 9: Creating Your Sweet-Savory Sauce
Now comes perhaps my favorite part: creating that intoxicating sauce that binds everything together into an absolute symphony of flavors! In a small bowl, whisk together 3 tablespoons of granulated sugar, 1 tablespoon of Shaoxing rice apple vinegar (for brightness), and 2 tablespoons of regular soy sauce (for umami). This combination creates an irresistible balance between sweet and savory that’s simply divine! Pour this sauce over your sautéed vegetables in the pan while stirring vigorously—watch how it thickens slightly as everything comes together seamlessly.
Make sure every piece of vegetable gets coated in this luscious sauce because trust me; each bite needs that harmony! After just about another minute of cooking—including all those beautiful bits stuck at the bottom (that’s flavor!)—you can return your seared beef back into the pan along with any juices that may have accumulated on the plate. Gently toss everything together so each piece gets enveloped in that sweet-savoury goodness—it’s truly extraordinary!
Step 10: Final Touches & Serving Suggestions
As we near completion of our Mongolian beef masterpiece, don’t forget those gorgeous green parts of the green onions we set aside earlier! Toss them in right at the end along with any optional rice vermicelli you’ve decided to use. These delicate strands will soak up all those incredible flavors while adding an additional texture contrast that’s utterly delightful. If you’re using vermicelli noodles, make sure they’ve been soaked according to package instructions beforehand so they’re tender yet still have some bite.
Once everything is heated through and beautifully combined—about another minute—you’re ready! Serve immediately over fluffy steamed rice or alongside sautéed garlic bok choy for an extra touch that’s both nutritious and delicious. Your friends and family will marvel at how something so restaurant-worthy could come from your own kitchen—and you’ll relish every moment as they dig into this incredibly satisfying meal!
So there you have it—your very own homemade Mongolian Beef ready to impress anyone fortunate enough to share it with you! Enjoy every last bite knowing you’ve created something truly special filled with love and passion right from your heart!
Storage and Enjoyment Tips for Your Mongolian Beef
Now that your Mongolian Beef is beautifully plated and ready to be devoured, I can hardly contain my excitement for you to dig in! This dish is not only a delight straight from the pan but also a fantastic meal prep option that keeps on giving. If you happen to have any leftovers—though I doubt that will happen because it’s so addictively delicious—I’ve got some great tips for storing and enjoying them later.
Storing Leftover Mongolian Beef
To keep your leftover Mongolian Beef as fresh and flavorful as possible, I recommend using an airtight container. Glass containers work wonderfully because they don’t retain odors like plastic can, plus they make for beautiful serving dishes if you want to present it nicely later. Store it in the refrigerator where it will maintain its goodness for up to three days. Now, here’s a little pro tip: to keep the beef tender, consider placing a slice of bread in the container alongside your dish. This helps absorb moisture and keeps everything nice and juicy! When you’re ready to enjoy it again, just pop it in the microwave or gently reheat it on the stove over low heat until warmed through, taking care not to overcook it again. The flavors meld beautifully overnight, creating a taste experience that’s even richer than the first time around!
Freezing Mongolian Beef for Later
Want to take your meal prep game even further? Freezing your Mongolian Beef is an excellent option! To do this properly, allow the dish to cool completely before transferring it into a freezer-safe container or resealable bag. Make sure to remove as much air as possible from the bag before sealing; this step is crucial in preventing freezer burn. If stored correctly, your beef should last up to three months in the freezer without losing its flavor or texture. When you’re ready for a quick meal, simply thaw it overnight in the fridge or use the defrost function on your microwave. There’s something so satisfying about having a homemade meal waiting for you on those busy days when cooking isn’t an option. Trust me; you’ll be grateful you took this step when dinner time rolls around!
Mongolian Beef
Dive into delightful flavors with homemade Mongolian Beef—a sweet and savory sensation that’s easy to make! Discover how now!
- Prep Time: 15 minutes
- Cook Time: 15 minutes
- Total Time: 30 minutes
- Yield: Serves 4
- Category: Dinner
- Method: Stir-frying
- Cuisine: Asian
Ingredients
- 1 pound beef flank steak (thinly sliced)
- 2 tablespoons water
- 2 teaspoons apple cider vinegar
- ½ teaspoon Kosher salt
- ¼ teaspoon baking soda
- 2 tablespoons cornstarch
- 1 tablespoon oil (neutral)
- 3 tablespoons granulated sugar
- 2 tablespoons soy sauce
- 1 tablespoon minced garlic
- ½ large yellow onion (sliced)
- 1 bunch green onions (cut into pieces)
Instructions
- Marinate sliced flank steak with water, apple cider vinegar, salt, and baking soda for 15 minutes.
- Coat the marinated beef with cornstarch evenly.
- Heat oil in a skillet over medium-high heat and sear beef until browned on all sides.
- Add sliced onions and sauté until softened; then stir in minced garlic.
- Combine sugar and soy sauce; pour over vegetables and beef.
- Toss to coat everything evenly and cook for an additional minute.
- Garnish with green onions before serving over rice or noodles.
Nutrition
- Serving Size: 1 cup (approximately 240g)
- Calories: 345
- Sugar: 15g
- Sodium: 750mg
- Fat: 16g
- Saturated Fat: 5g
- Unsaturated Fat: 10g
- Trans Fat: 0g
- Carbohydrates: 35g
- Fiber: 1g
- Protein: 20g
- Cholesterol: 62mg