Patriotic Cheesecake Bars: An Amazing Ultimate Recipe
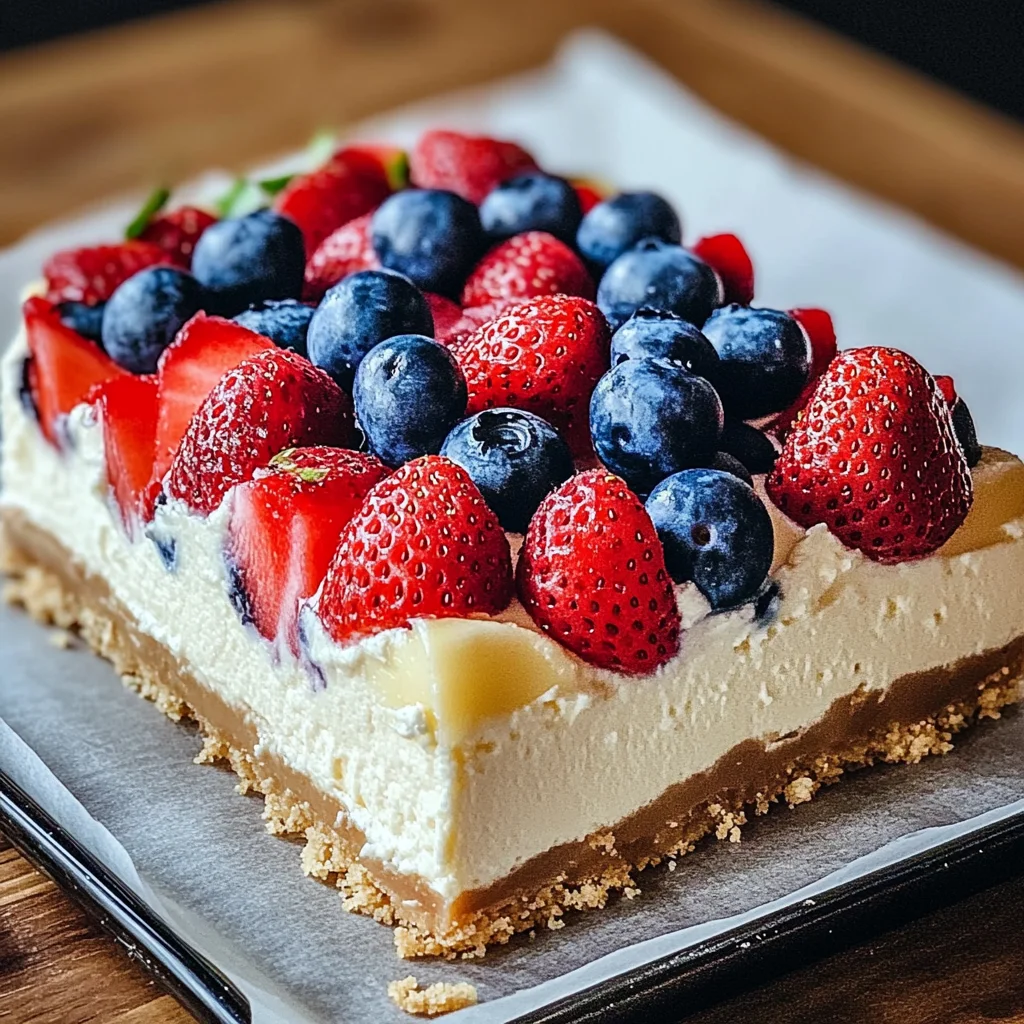
It’s hard to put into words the sheer joy that a dessert can bring, but I promise you, these Patriotic Cheesecake Bars: An Amazing Ultimate Recipe are more than just a sweet indulgence; they’re a celebration of flavor, color, and nostalgia. Picture this: a creamy, luscious cheesecake filling resting on a buttery graham cracker crust, beautifully adorned with vibrant strawberries and blueberries. Each bite is like a joyful burst of summer on your palate, evoking memories of family gatherings, barbecues in the backyard, and those magical moments when laughter fills the air. You can almost hear the fireworks crackling in the distance as you serve these beauties at your next gathering. Trust me when I say that these bars do more than satisfy your sweet tooth—they create connections and spark happiness.
What makes this recipe truly special is its versatility; it’s perfect for any occasion—be it Fourth of July picnics or cozy gatherings with friends. The combination of cream cheese and sour cream creates a silken texture that dances on your tongue. And the way those bright berries pop against the white cheesecake? It’s not just food; it’s a feast for the eyes as well. I’ve always been captivated by how desserts can bridge generations—passing down feelings of love through shared recipes and cherished moments around the table. So let’s embark on this delicious journey together and craft these Patriotic Cheesecake Bars that will surely become a staple in your home.
Ingredients:
As we dive into making these delectable Patriotic Cheesecake Bars, let’s gather our ingredients first. Each one plays an essential role in creating that perfect balance of flavor and texture, making every bite utterly divine.
- 1 ½ cups graham cracker crumbs: This star ingredient forms the base of our cheesecake bars. Think of graham crackers as tiny little flavor bombs that provide both crunch and sweetness—perfectly complementing the creamy filling above them. When purchasing graham crackers, opt for high-quality brands or even make your own if you’re feeling adventurous! The texture should be finely ground for an even crust; if it’s too coarse, your crust might crumble instead of holding together beautifully.
- ½ cup unsalted butter, melted: Butter is like liquid gold in baking! It binds our crust ingredients together while adding richness to the overall flavor profile of our cheesecake bars. Using unsalted butter allows you to control the sweetness in your dessert better. Make sure it’s melted but not too hot; if it’s sizzling, it could cook the crumbs slightly instead of combining them smoothly.
- ¼ cup granulated sugar: A touch of sugar sweetens our crust just enough to enhance its flavor without overpowering. Granulated sugar also helps achieve that beautiful golden color when baked. If you’re looking for alternatives, light brown sugar could add a hint of caramel undertones that would be delightful!
- 16 oz cream cheese, softened: Cream cheese is undoubtedly the heart of our cheesecake filling—it offers that rich, creamy texture we all crave! Make sure it’s softened to room temperature before starting; this is crucial for achieving a smooth consistency without lumps. Using full-fat cream cheese ensures we have a decadent treat rather than something overly light.
- 1 cup granulated sugar: This sugar isn’t just about sweetness—it balances out the tanginess from our cream cheese and sour cream beautifully. Gradually adding it while mixing will help dissolve any granules completely so you get that creamy mouthfeel we’re aiming for.
- 1 teaspoon vanilla extract: Vanilla extract acts as an aromatic whisper through our cheesecake filling—it enhances flavors without stealing the spotlight. Opt for pure vanilla extract when possible; imitation varieties can lack depth and complexity.
- 3 large eggs: Eggs bring structure to our cheesecake bars while providing moisture and richness. Adding them one at a time ensures each egg fully incorporates before introducing another—this step is non-negotiable if we want to avoid any curdled textures later on!
- ½ cup sour cream: Sour cream adds profound creaminess along with a slight tang that elevates flavors—it’s absolutely paramount in achieving that perfect balance between sweet and savory in our dessert! If you prefer an alternative, full-fat plain yogurt works wonders too!
- 1 cup strawberries, sliced: Fresh strawberries not only add vibrant color but also provide natural sweetness as they sit atop our cheesecake bars—a refreshing contrast to the creamy filling below.
- 1 cup blueberries: Blueberries bring their burst of juiciness alongside their deep color, echoing summer days spent outdoors. They’re rich in antioxidants too—what’s not to love?
- Whipped cream (optional): While entirely optional, whipped cream adds an indulgent touch when dolloped generously atop each slice right before serving—providing extra sweetness and airy texture!
Now that we’ve gathered everything we need for this culinary adventure, let’s take some time to appreciate how each ingredient interacts harmoniously with others to create something truly extraordinary!
Equipment You’ll Need:
Before diving headfirst into baking bliss, let’s ensure we have all our tools ready at hand! Having the right equipment can make all the difference between a fun experience in the kitchen and one filled with frustration.
- 9×13-inch baking pan: This size is perfect for allowing your cheesecake bars to bake evenly while providing ample space for generous portions! If you don’t have one on hand, feel free to use two smaller pans instead—you just might need to adjust baking times slightly based on thickness.
- Parchment paper: Lining your pan with parchment paper is an absolute game-changer when it comes time to remove those gorgeous bars post-baking! It prevents sticking while allowing you easy access by simply lifting them out using overhanging edges after cooling.
- Mixing bowls: A set of medium-sized bowls will help keep things organized as we mix our crust separately from our filling—trust me; organization leads to smoother baking!
- Electric mixer (handheld or stand): While whisking by hand can be therapeutic at times (and great exercise!), using an electric mixer saves time and ensures everything combines seamlessly without lumps developing—a must-have for this recipe!
- Rubber spatula or wooden spoon: Both tools are fantastic for folding ingredients gently together without deflating air pockets created during mixing—a key factor in achieving fluffy results!
Let’s make sure we gather these tools before moving forward because having everything prepped will allow us to focus solely on crafting those incredible Patriotic Cheesecake Bars without distraction!
Preparing the Patriotic Cheesecake Bars: An Amazing Ultimate Recipe
Step 1: Preheat Your Oven & Prepare Your Pan
Preheating your oven is absolutely paramount because it sets up optimal baking conditions right from the start! Set it to 325°F (163°C) so it’s ready when you’re done preparing your mixture—a hot oven ensures even cooking throughout every layer. While that’s happening, grab your trusty 9×13-inch pan and line it with parchment paper—this makes cleanup effortless later on! Just cut pieces large enough so they hang over two sides; this will act like handles once baked.
Step 2: Creating The Graham Cracker Crust
Now onto one of my favorite parts—the crust! In a medium-sized bowl (you know which one!), combine your graham cracker crumbs with melted butter and sugar until they resemble wet sand—a delightful tactile experience! This blend creates not just flavor but also structure—you want enough butter so every crumb binds together nicely without being overly greasy or dry either! Press this mixture evenly into the bottom of your prepared baking pan using either clean hands or an offset spatula—don’t skip this part because it’ll provide stability against all that creamy goodness above! Bake it for about 10 minutes until lightly golden around edges; you’ll catch whiffs drifting through your kitchen signaling success already!
Step 3: Preparing The Creamy Cheesecake Filling
With that lovely crust cooling down slightly now comes my favorite part—the heavenly filling! In another large mixing bowl (yes—we’re going back here!), beat softened cream cheese until perfectly smooth—this process known as creaming allows air pockets into what will become velvety bliss later on! Gradually integrate granulated sugar followed by vanilla extract until combined flawlessly—you should absolutely taste test at this point because who doesn’t love raw batter? Next up are those eggs; add them one at a time while blending thoroughly after each addition—it’ll feel like magic watching everything transform into lusciousness before your eyes!
Step 4: Folding In Sour Cream & Pouring Over Crust
Once you’ve incorporated all three eggs seamlessly into your mixture comes introducing our secret weapon—the sour cream! Gently fold it in using either a rubber spatula or wooden spoon until everything melds together beautifully—it adds such depth without overwhelming any flavors present already! Now carefully pour this delightful concoction over cooled graham cracker crust spreading evenly across surface area—you’ll see how delicately luscious everything appears already as it’s ready for its turn under heat where transformation awaits us ahead!
I hope you’re feeling excited because we’re well on our way toward creating something spectacular here—the anticipation builds as we prepare these glorious Patriotic Cheesecake Bars destined for celebration soon enough! Just remember patience through chilling times after baking will yield unparalleled results worth waiting for…
Step 5: Mixing the Creamy Filling
Now that you have that delightful crust cooling down, let’s dive into the heart of this Patriotic Cheesecake Bars: An Amazing Ultimate Recipe—the cheesecake filling itself. It’s time to make magic with our main ingredient: cream cheese! Start by placing your softened cream cheese in a large mixing bowl. I cannot stress enough how important it is for the cream cheese to be at room temperature; this allows it to blend seamlessly, creating a velvety texture that is simply irresistible. Using an electric mixer, beat the cream cheese until it’s wonderfully smooth and creamy—think of it as creating a luscious canvas for your flavors.
Next, gradually add in your granulated sugar along with that heavenly splash of vanilla extract. The sugar not only sweetens but also plays a key role in achieving that perfect creamy consistency. As you mix everything together, take a moment to appreciate the intoxicating aroma wafting through your kitchen—it’s like a warm embrace! Now, here comes the fun part: adding the eggs. Introduce them one at a time, mixing well after each addition. This process is crucial because it ensures that each egg is fully incorporated, leading to a rich and uniform filling. Finally, fold in the sour cream gently; this adds a delightful tanginess that beautifully balances out the sweetness of the sugar and enhances the overall flavor profile of your cheesecake bars.
Step 6: Pouring It All Together
With your delicious filling prepared, it’s time for what I consider one of the most rewarding steps—pouring that luscious cheesecake mixture over your perfectly baked crust! Gently pour the filling onto the cooled crust, using a spatula to spread it evenly across every corner of the pan. This is where patience pays off; be sure to take your time here so that every bite will be as delightful as the last! The contrast between the buttery graham cracker base and this dreamy filling is an experience you’ll want to relish.
As you pour and spread, keep an eye on those edges—make sure they’re well-covered with that creamy goodness. This step ensures even baking and prevents any unsightly cracks from forming later on. You’ll want to see a smooth surface before moving on; if you notice any air bubbles surfacing as you spread, give it a gentle tap on your countertop—it works wonders! Trust me on this; those little bubbles can be sneaky if not dealt with properly.
Step 7: The Baking Process
Now comes one of my favorite moments—the baking phase! Preheat your oven (if you haven’t already) to 325°F (163°C). Carefully place your filled pan in the preheated oven and set your timer for 30-35 minutes. But don’t wander off just yet—this step requires just a bit of vigilance! You’ll want to watch for visual cues as it bakes away: look for just slight jiggle in the center when you gently shake the pan; it should look set around the edges but still have that soft wobble in its heart. That jiggle means we’ve achieved something truly extraordinary!
Why do we aim for this specific doneness? If we bake too long, we risk drying out our creamy masterpiece or creating unsightly cracks—a fate no cheesecake deserves! So trust your instincts; when it’s done right, you’ll notice a golden hue around the edges and an almost glossy finish on top. Once baked to perfection, remove your patriotic creation from the oven and let it cool at room temperature before moving on to chilling—it’s essential for allowing those flavors to meld beautifully!
Step 8: Patience Is Key—Chilling Perfection
Now comes one of my absolute favorite parts of making these Patriotic Cheesecake Bars—the chilling process! After letting your baked cheesecake cool at room temperature for about an hour (and yes, I know waiting can feel like an eternity), cover it with plastic wrap or foil and then place it in the refrigerator for at least two hours—ideally overnight if you’re planning ahead because this magical step transforms a lovely dessert into something utterly divine.
Chilling is non-negotiable when it comes to cheesecakes! During this time, all those wonderful flavors continue to develop and deepen while allowing the filling to firm up just enough so you can cut neat squares without any fuss. Plus, think about how satisfying it will be when you serve them cold from the fridge on a hot day—it feels like summer in each bite! So resist any temptation to skip this step; I promise you’ll thank yourself later when everyone keeps coming back for more!
Final Touches: Dressing Up Your Cheesecake Bars
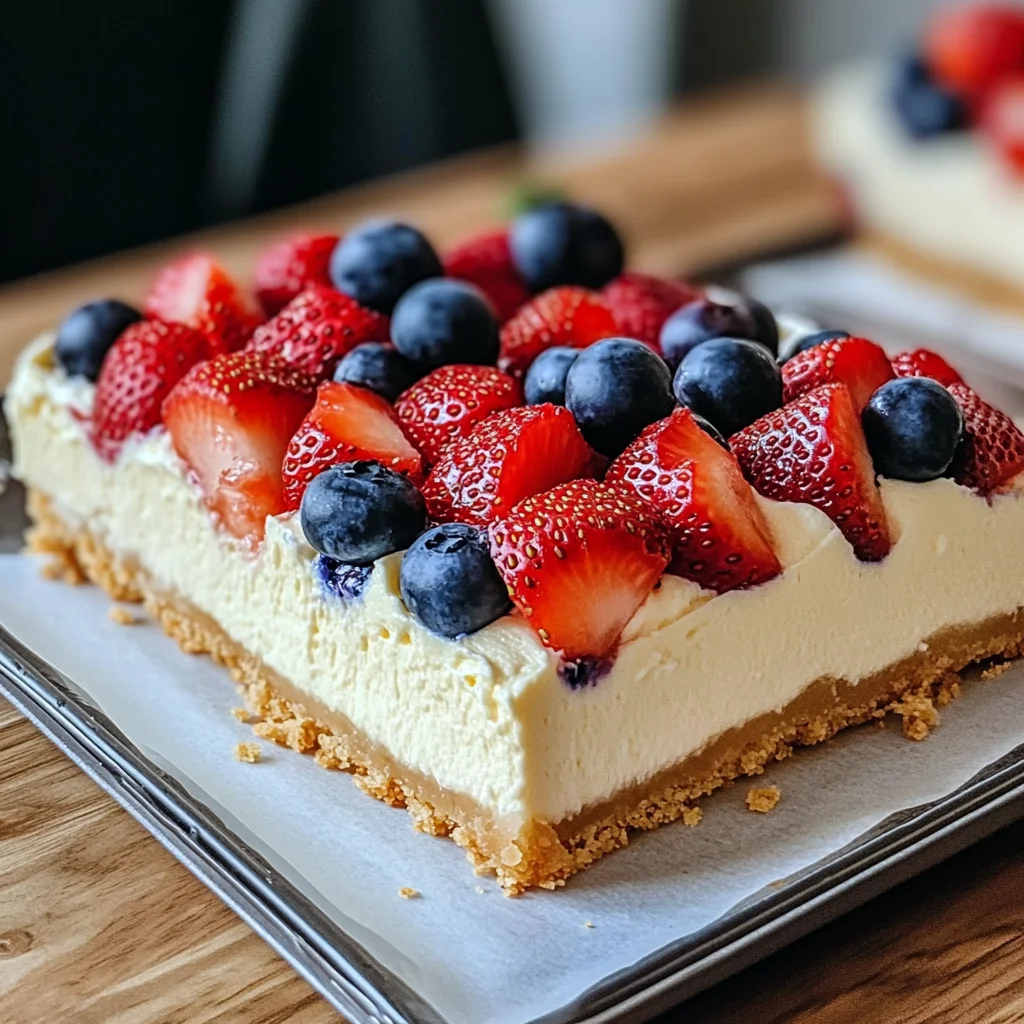
Now that your cheesecake has chilled beautifully and is ready for decorating, let’s talk toppings because this is where we get creative—and patriotic! Just before serving, carefully arrange those vibrant sliced strawberries and blueberries on top of your cheesecake bars. You can create stripes or clusters; let your artistic side shine through! Not only does this add visual appeal with their radiant colors contrasting against creamy white but also adds bursts of fresh flavor with every bite.
If you’re feeling indulgent (and who isn’t?), consider adding dollops of whipped cream atop each bar right before serving—the fluffy clouds dance atop those rich layers in such an inviting way! And there you have it—your Patriotic Cheesecake Bars are ready to impress family and friends alike. Trust me when I say they will marvel at how beautiful they look as much as they love how extraordinary they taste!
Storage and Enjoyment Tips for Your Patriotic Cheesecake Bars: An Amazing Ultimate Recipe
Now that you’ve crafted these stunning Patriotic Cheesecake Bars, it’s time to relish in the joy of sharing them with friends and family! The vibrant colors, creamy texture, and delightful sweetness are sure to elicit smiles all around. But what happens when you have leftovers? Fear not! I’ve got some fantastic tips on how to preserve these beauties so you can enjoy them long after the celebration ends.
Storing Leftover Patriotic Cheesecake Bars: An Amazing Ultimate Recipe
To keep your leftover Patriotic Cheesecake Bars fresh and delicious, I recommend using an airtight container that is both sturdy and reliable. Place a sheet of parchment paper between layers if you’re stacking them; this will help prevent any sticking, ensuring each bar retains its lovely shape. Store them in the refrigerator where they will hold their quality for about 5-7 days—though I promise you, they may not last that long! Trust me on this: the flavors deepen beautifully with time. If you’re concerned about maintaining that luscious creaminess, consider putting a slice of bread in the container; it helps keep moisture levels just right. When ready to indulge, simply take them out and enjoy chilled or at room temperature—the flavors will still be utterly intoxicating!
Freezing Cheesecake Bars for Later
If you find yourself with extra bars (or simply want to prepare ahead), freezing is a splendid option! Cut your cheesecake into individual portions before wrapping each piece tightly in plastic wrap and placing them in a freezer-safe bag or container. This method ensures no air gets in, which can alter the texture. These delightful treats can be stored frozen for up to three months—what a joy to have on hand for unexpected guests or just a sweet craving! When you’re ready to enjoy one (or two!), simply remove from the freezer and let thaw in the fridge for a few hours or overnight. The convenience of having these delicious bars ready-to-go is absolutely paramount for any home baker!
In essence, whether enjoyed fresh or saved for later indulgence, these Patriotic Cheesecake Bars are destined to evoke happiness at every bite!
Patriotic Cheesecake Bars: An Amazing Ultimate Recipe
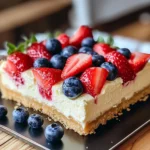
Indulge in the joy of summer with these Patriotic Cheesecake Bars: An Amazing Ultimate Recipe. These delightful dessert bars feature a creamy, velvety cheesecake filling nestled atop a buttery graham cracker crust, beautifully topped with vibrant strawberries and blueberries. Perfect for any celebration, these bars not only satisfy your sweet tooth but also spark happiness and connection among family and friends. Crafted with love, they evoke nostalgia of sunny days filled with laughter and joy. Easy to make and even easier to enjoy, these colorful cheesecake squares are sure to be a hit at your next gathering or picnic!
- Prep Time: 20 minutes
- Cook Time: 35 minutes
- Total Time: 55 minutes
- Yield: Serves approximately 12 bars 1x
- Category: Dessert
- Method: Baking
- Cuisine: American
Ingredients
- 1 ½ cups graham cracker crumbs
- ½ cup unsalted butter, melted
- ¼ cup granulated sugar (for crust)
- 16 oz cream cheese, softened
- 1 cup granulated sugar (for filling)
- 1 teaspoon vanilla extract
- 3 large eggs
- ½ cup sour cream
- 1 cup strawberries, sliced
- 1 cup blueberries
Instructions
- Preheat oven to 325°F (163°C) and line a 9×13-inch baking pan with parchment paper.
- In a bowl, mix graham cracker crumbs, melted butter, and sugar until combined. Press mixture into the bottom of the prepared pan and bake for 10 minutes until golden.
- In a large mixing bowl, beat softened cream cheese until smooth. Gradually add granulated sugar and vanilla extract. Mix in eggs one at a time, then fold in sour cream until well incorporated.
- Pour the cheesecake filling over the cooled crust evenly. Bake for 30-35 minutes until edges are set but center is slightly jiggly.
- Allow to cool at room temperature before chilling in the refrigerator for at least two hours.
- Before serving, decorate with sliced strawberries and blueberries.
Nutrition
- Serving Size: 1 bar (approx. 80g)
- Calories: 290
- Sugar: 21g
- Sodium: 150mg
- Fat: 19g
- Saturated Fat: 11g
- Unsaturated Fat: 7g
- Trans Fat: 0g
- Carbohydrates: 24g
- Fiber: <1g
- Protein: 4g
- Cholesterol: 70mg