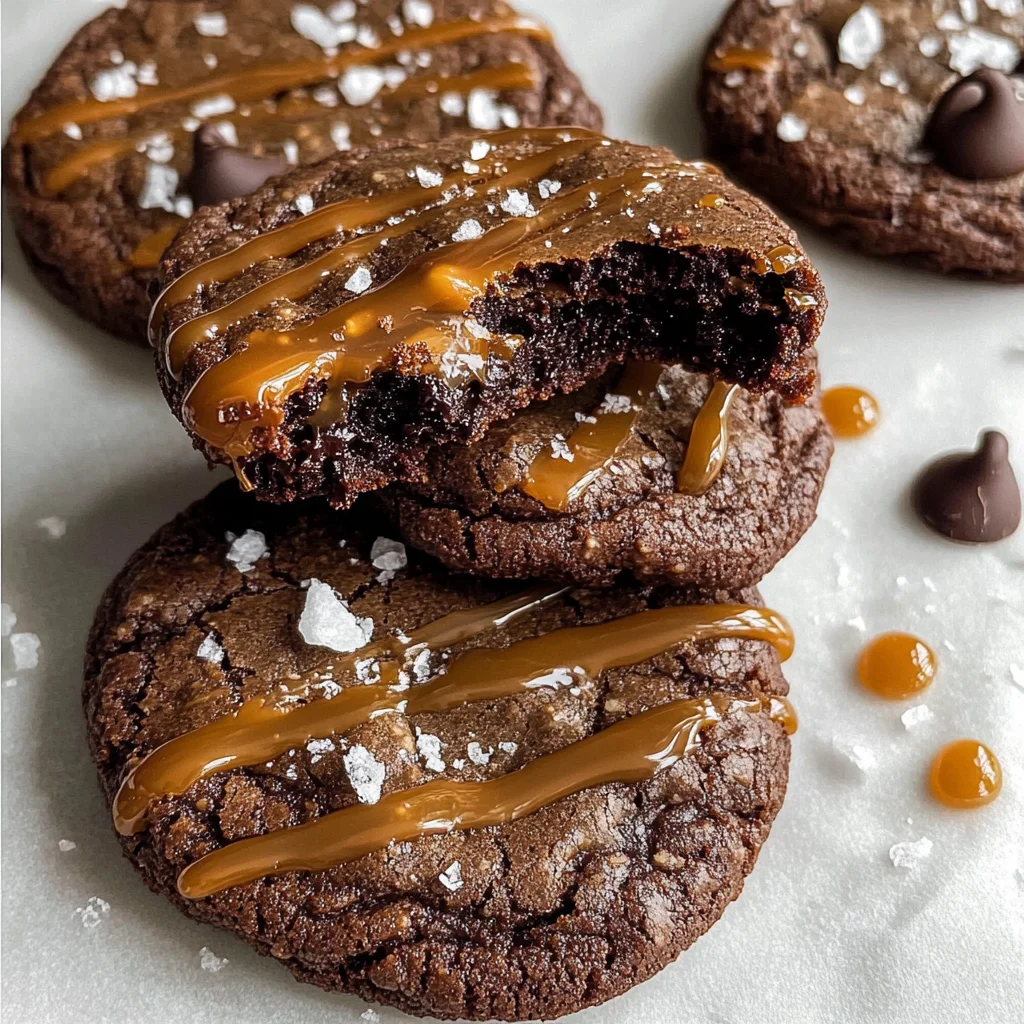
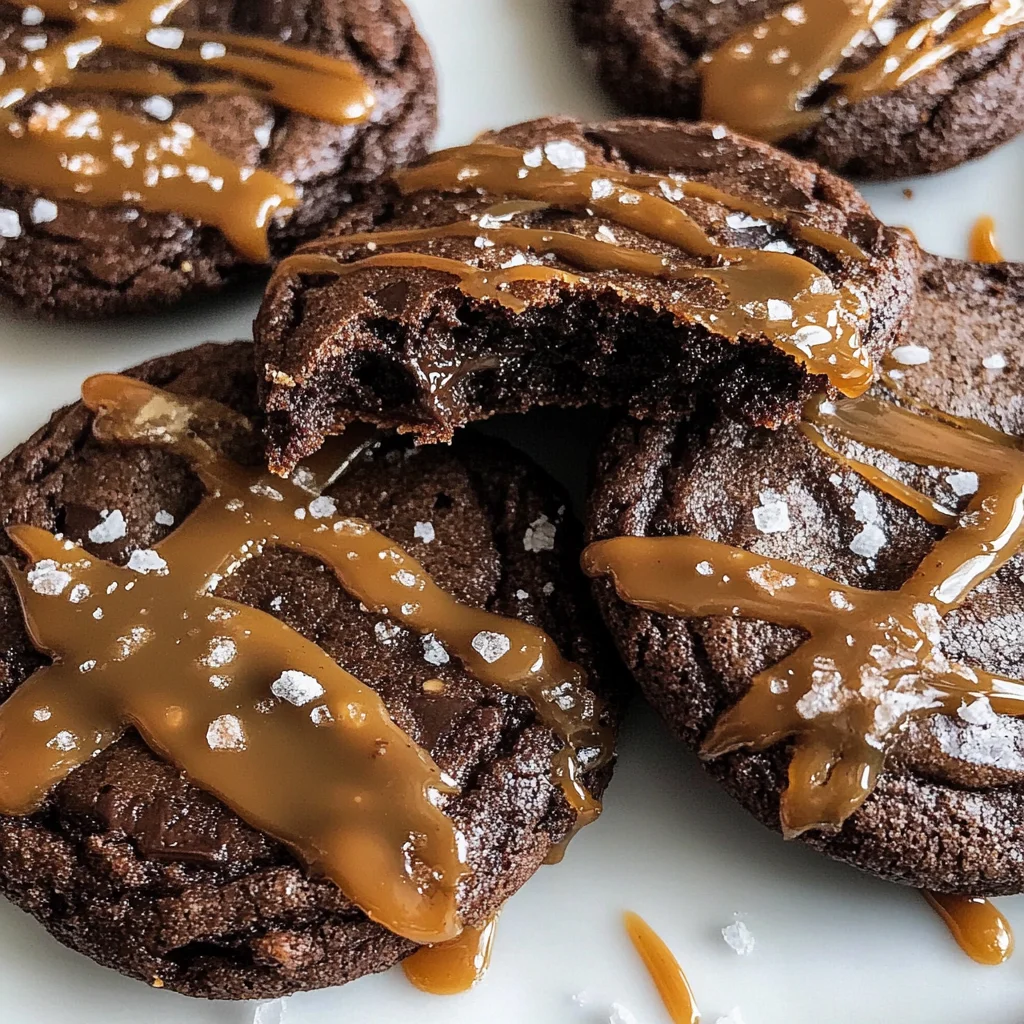
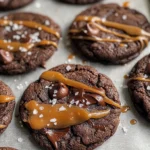
Double Chocolate Salted Caramel Cookies
There’s something profoundly magical about the aroma of freshly baked cookies wafting through the house, isn’t there? The anticipation that builds as you wait for those warm morsels to emerge from the oven is an experience worth cherishing. Today, I want to share a recipe that captures that essence and elevates it to a whole new level: Double Chocolate Salted Caramel Cookies. Imagine biting into a cookie with light, crispy edges that give way to a soft, fudgy center bursting with rich chocolate flavor and a hint of sweet caramel. And let’s not forget the sprinkle of sea salt on top—it’s like a little kiss of perfection that brings everything together!
I’ve always been captivated by the contrast between sweet and salty, and these cookies embody that wonderful balance beautifully. They’re perfect for any occasion, whether you’re hosting friends for coffee or just need a comforting treat at the end of a long day. As I guide you through this recipe, I promise you’ll find that baking these cookies isn’t just about satisfying your sweet tooth; it’s about creating memories in your kitchen, feeling the warmth of the oven, and indulging in an utterly intoxicating experience.
The Irresistible Allure of Sweet and Salty
What makes these Double Chocolate Salted Caramel Cookies so special? It’s all in the layers of flavor. The combination of chocolate and caramel is timeless, reminiscent of childhood treats yet sophisticated enough to satisfy adult palates. Each bite offers an explosion of textures and tastes—the crispy exterior gives way to fudgy bliss while the salt enhances every sugary note. These cookies are not just a dessert; they are a celebration! Perfect for gatherings or simply shared amongst family, they evoke joy in every mouthful. So roll up your sleeves and let’s dive into this delightful journey!
Double Chocolate Salted Caramel Cookies: A Symphony of Flavors
Baking these Double Chocolate Salted Caramel Cookies is like crafting a masterpiece—each ingredient plays its role in creating something truly extraordinary!
Ingredients:
As we embark on this culinary adventure, let’s take a moment to appreciate each ingredient that comes together to create these heavenly cookies.
- 2 1/4 cups All-Purpose Flour. This foundational ingredient provides structure to our cookies, allowing them to hold their shape while still being soft inside. When selecting flour, look for brands labeled as “all-purpose” which ensures versatility across various baking projects. Sifting it before mixing can help aerate it and eliminate any lumps, leading to even more delightful results.
- 1/2 cup Unsweetened Cocoa Powder. This is where our double chocolate magic begins! The unsweetened cocoa powder adds depth and richness without additional sweetness—it’s essential for achieving that intense chocolate flavor we crave. Opt for high-quality Dutch-processed cocoa powder if you want an extra smooth taste; it offers a mellower cocoa profile compared to regular.
- 1 tsp Baking Soda. As our leavening agent, baking soda will ensure our cookies rise beautifully without becoming overly puffy or cake-like. It reacts with acidic components (like brown sugar) during baking to produce carbon dioxide bubbles, making our cookies tender yet chewy.
- 1 tsp Salt. Don’t underestimate the importance of salt! It not only enhances flavors but also balances sweetness—it’s what brings those chocolatey notes to life! Always use fine sea salt for its ability to dissolve easily into the dough; it’ll ensure an even distribution within each cookie.
- 1 cup Unsalted Butter (room temperature). Softened butter is absolutely paramount for achieving that creamy texture we’re after in our cookie dough. Room temperature butter mixes more thoroughly with sugars than cold butter would—a crucial step in developing air pockets for that perfect chewiness! If you can find European-style butter with higher fat content, I highly recommend it for even richer flavor.
- 1 cup Granulated Sugar. This sugar contributes sweetness but also plays a pivotal role in creating crunchy edges due to caramelization during baking. The granulated sugar helps achieve that delightful contrast between crispy exteriors and soft interiors we all adore in cookies.
- 1 cup Light Brown Sugar (lightly packed). Brown sugar adds moisture thanks to its molasses content, ensuring our cookies stay chewy on the inside while maintaining a slight crispness on the outside. Lightly packing it means we’re maximizing flavor without overloading on sweetness—trust me on this!
- 2 Large Eggs (room temperature). Eggs are another key player here as they provide structure and richness; they help bind everything together too! Using room-temperature eggs allows them to emulsify better into your mixture—this step is crucial because it ensures even mixing throughout the dough.
- 1 tbsp Vanilla Extract. Ahh, vanilla—the fragrant essence that makes everything better! Not only does vanilla add warmth and complexity; it enhances other flavors in your cookie dough making each bite feel like pure bliss.
- 1 1/2 cups Semi-Sweet or Milk Chocolate Chips. The choice is yours here: semi-sweet chips offer balanced sweetness while milk chocolate lends creaminess and softens some intensity from cocoa powder—a perfect companion for this decadent cookie!
- 1 cup Caramel Flavored Chips. Bursting with gooey goodness when baked, caramel chips add delightful surprise bites within your cookies—they melt beautifully too! If you can’t find them at your local store, feel free to substitute with finely chopped soft caramels instead.
- Sea Salt Flakes (for sprinkling over top of cookies). These finishing touches are non-negotiable! A light sprinkling just before baking creates an irresistible contrast against all that sweetness—it’s what makes each bite so memorable!
- Caramel Sauce or Dulce de Leche (optional, for drizzling over the top of cookies). Whether you choose classic caramel sauce or dulce de leche—which has a deeper flavor profile—this optional drizzle transforms ordinary cookies into something utterly decadent!
Equipment You’ll Need:
Having the right tools makes all the difference when you bake these delightful cookies! While they might not be ingredients themselves, think of them as essential partners in crafting something truly wonderful.
- Mixing Bowls – A good set of mixing bowls allows you flexibility while preparing different components without messiness taking over your kitchen counter! Look for sturdy glass or metal options which can handle both hot and cold ingredients seamlessly.
- Hand Mixer or Stand Mixer – Investing in either type will make creaming butter and sugars effortless—not only saving time but ensuring optimal fluffiness too! If you’re using a stand mixer fitted with a paddle attachment (my favorite!), remember not to overmix once adding dry ingredients; just combine until no streaks remain.
- Parchment Paper or Silicone Baking Mats – These non-stick surfaces prevent any unwanted sticking during baking sessions while promoting even browning on cookie bottoms—an absolute must-have when working with sticky doughs like ours!
Now that we’re fully equipped with knowledge about our ingredients and tools let’s dive into preparing these scrumptious Double Chocolate Salted Caramel Cookies!
Step 1: Prepping Your Space
First things first—let’s get organized! Adjust your oven rack so it’s positioned at about the second level mark (just above center) before preheating your oven to 375ºF (190ºC). This temperature strikes an ideal balance between achieving perfectly baked edges while keeping centers deliciously gooey—a necessity when creating such decadent delights as these Double Chocolate Salted Caramel Cookies! While waiting for your oven’s warm embrace, take time lining two cookie sheets with parchment paper or silicone mats; this small step guarantees easy cleanup later on plus prevents sticky situations during transfer from pan-to-cooling rack!
Step 2: Mixing Dry Ingredients
In a medium bowl—a simple yet crucial space—we’ll whisk together our all-purpose flour, unsweetened cocoa powder, baking soda, and salt until well combined; set aside afterward as we’ll incorporate them shortly into wet ingredients mixture later on! This process helps evenly distribute leavening agents throughout dry mix which ensures uniform texture across all cookies rather than clumps forming here-and-there leading uneven results upon baking—which none of us desire!
Step 3: Creaming Butter & Sugars
Now comes one of my favorite parts—the creaming process! Using either hand mixer or stand mixer fitted with paddle attachment will simplify things immensely here; start by beating room temperature unsalted butter along granulated & light brown sugars together at medium-high speed until light & fluffy—about three minutes should do nicely if everything goes according plan! Why cream? Well…this technique introduces air into mixture creating tiny pockets which leads ultimately towards beautifully textured finished products later on—that coveted chewy-crisp combination we adore!
Step 4: Adding Eggs & Vanilla
Once you’ve achieved luscious creaminess within bowl’s depths add two large eggs one at-a-time along with tablespoon vanilla extract whilst continuing mixing until fully blended throughout dough base—you may need stop occasionally scrape down sides using spatula gently if necessary—that way ensuring no hidden patches remain unincorporated anywhere inside mixture itself before proceeding further onwards towards dry addition stage right ahead!
With each step revealing itself more vividly than last…we’re already making progress towards reaching ultimate goal today: tasting those fabulous Double Chocolate Salted Caramel Cookies soon enough!! Hold tight dear friend because next steps await us just around corner…
Step 5: Mixing It All Together – The Art of Blending Flavors
Now we’re ready to bring everything together, and let me tell you, this is where the magic truly begins! With your mixer set to medium-high speed, gently beat together the room-temperature unsalted butter, granulated sugar, and lightly packed light brown sugar in a large mixing bowl. As the mixture transforms from an amalgamation of ingredients into a light and fluffy concoction, you’ll witness that beautiful creamy texture that promises rich flavor and melt-in-your-mouth goodness. This step is absolutely crucial because it incorporates air into the batter, creating those delightful cookie edges that will turn crisp while keeping the center impossibly soft and fudgy. Trust me on this—when you take that first bite, you’ll understand why achieving this fluffy base is non-negotiable!
Once you’ve beaten the sugars and butter until they are lightened in color and texture—almost like a cloud—you can add in your two large eggs (which should also be at room temperature for optimal blending) along with that fragrant tablespoon of vanilla extract. Mix until everything is well combined; don’t rush this step! Take a moment to savor the aroma wafting through your kitchen—it’s utterly intoxicating! If you notice any stubborn bits of butter clinging to the sides of your bowl, don’t hesitate to scrape them down with a spatula. This ensures that every morsel of cookie dough is infused with that luscious buttery flavor we crave.
Step 6: The Perfect Dough Consistency – Gradually Integrating Dry Ingredients
As we move forward, it’s time for the dry ingredients to join the party! With your mixer now set to low speed—this is crucial to prevent flour clouds from exploding everywhere—you’ll gradually incorporate your previously whisked dry ingredients into the buttery mixture. I recommend adding a little at a time, allowing each bit to blend seamlessly before adding more. This gentle approach helps create a uniform dough without overmixing. Overmixing can lead to tough cookies instead of the tender bites we’re aiming for. You want to watch as your batter transforms into a rich chocolatey canvas, almost velvety in its texture.
Once you see no visible flour streaks left in the dough, it’s time for the pièce de résistance: folding in those chocolate chips and caramel-flavored chips! Using a spatula for this part gives you better control over how gently you mix these heavenly morsels into your dough. I promise you—the sight alone will make your heart race! The semi-sweet or milk chocolate chips will add bursts of gooey sweetness while those caramel-flavored chips enhance the overall richness of each cookie. Take care not to over-mix here; just fold until evenly distributed so that every bite reveals pockets of chocolatey indulgence.
Step 7: Shaping Your Cookies – The Anticipation Builds
Now comes one of my favorite parts—shaping the cookies! With a spoon or cookie scoop (I love using my 1 ½ tablespoon-sized scoop for perfectly portioned cookies), begin dropping rounds of dough onto your lined baking sheets, leaving about two inches between each dollop. However tempting it might be, resist the urge to crowd them! Cookies need their space to spread out properly while baking, resulting in those lovely crispy edges and soft centers that we all adore. As I place each mound on my baking sheet, I can hardly contain my excitement knowing how delectable they will soon become!
Before they hit the oven, let’s sprinkle those glorious sea salt flakes on top—a non-negotiable step if you want that perfect sweet-and-salty contrast that elevates these cookies from ordinary to extraordinary! Just a pinch will do; as they bake, those salt flakes will slightly dissolve into the warm cookie surface, enhancing every chocolatey bite with their savory touch. If you’ve ever had salted caramel treats before, you’ll know exactly what I’m talking about—the balance is simply divine!
Step 8: Baking Your Double Chocolate Salted Caramel Cookies – The Transformative Experience
Preheat your oven to 375ºF (190ºC) if you haven’t already—this temperature is key for achieving that harmonious balance of textures: crispiness on the outside with a fudgy center. Once you’re ready, pop those trays into your oven on the second rack (just above center) and set your timer for 8-10 minutes. Now comes an essential part of baking: patience! Resist opening that oven door too soon because every minute counts in developing those beautifully baked cookies.
You’ll know they’re done when you see their edges beginning to firm up while still having a soft shine in their centers—that’s what we’re going for! The visual cue here is paramount; if they look too dome-like or aren’t showing signs of spreading at all after about 10 minutes, they may need an extra minute or two—but keep a close eye on them as ovens can vary significantly in heat distribution. Remember—a little underbaking goes a long way toward ensuring that gooey middle we all crave!
Final Touches – Elevating Your Cookies
Step 9: Drizzling Caramel Bliss – A Sweet Finishing Touch
Ahh…the final flourish! After removing your beautiful cookies from the oven (and allowing them some well-deserved cooling time on their baking sheets for about five minutes), it’s time for one last decadent addition—drizzling caramel sauce or dulce de leche over each cookie if you’re feeling extra indulgent! To do this effectively without making too much mess (because let’s face it—we want these cookies looking as delightful as they taste!), simply transfer some warm caramel sauce into a small piping bag or even use a spoon if you don’t have one handy.
As you drizzle that liquid gold over each cookie, imagine how all those layers of flavors are coming together—from rich dark chocolate and sweet caramel flavors dancing merrily with hints of sea salt on top. This final touch isn’t just for show; it adds another dimension of flavor and moisture that makes these Double Chocolate Salted Caramel Cookies truly unforgettable.
Once finished drizzling—and trust me when I say this part brings sheer joy—you can transfer them onto wire racks where they’ll cool completely before devouring them all yourself (or perhaps sharing…if you’re feeling generous!). Store any leftovers in an airtight container along with a slice of bread; yes, seriously! That slice keeps them wonderfully soft for days ahead.
And there you have it—your very own batch of Double Chocolate Salted Caramel Cookies transformed from simple ingredients into an extraordinary treat filled with love and warmth! Each bite will envelop you in happiness and satisfaction as memories are created around this delightful dessert. So gather friends or family around because sharing these cookies will undoubtedly spark joy—and who knows? They might just become your new favorite go-to recipe!
Storage and Enjoyment Tips for Your Double Chocolate Salted Caramel Cookies
Now that you’ve created these utterly intoxicating Double Chocolate Salted Caramel Cookies, it’s time to revel in their deliciousness! But let’s be honest, as tempting as it is to devour them all in one sitting (and trust me, I’ve been there), you’ll want to savor your creations over time. To keep those crispy edges and fudgy centers perfectly delightful, proper storage is key. Imagine coming home after a long day and being greeted by the sweet aroma of freshly baked cookies—well, with a little care, that can be your reality every day!
Storing Leftover Double Chocolate Salted Caramel Cookies
To maintain the freshness of your glorious cookies, store them in an airtight container at room temperature. This is crucial because you want to lock in that chewy center while keeping the edges just right. They will stay scrumptious for up to a week, but I promise you they’ll be gone long before then! Here’s a pro tip: toss a slice of bread into the container with your cookies; this little trick helps maintain moisture and keeps your cookies soft and inviting. And let me tell you, even after a few days, these cookies retain their rich chocolatey flavor with hints of caramel that are still profoundly satisfying. If you find yourself craving one later on, simply warm it slightly in the microwave for about 10 seconds—it brings back that fresh-out-of-the-oven experience that will wrap you in warmth.
Freezing for Later
If you find yourself with an abundance of these delectable treats or if you want to prepare ahead for a special occasion (or just because), freezing is an excellent option! Simply place your baked cookies in a single layer on a baking sheet until they are firm, then transfer them to a freezer-safe bag or container. They’ll keep beautifully frozen for up to three months—imagine having a stash ready whenever the cookie cravings strike! The convenience factor is absolutely paramount; when you’re ready to enjoy them, just pop them in the oven at 350°F for about 5-7 minutes straight from the freezer. It’s like magic—those precious morsels will taste incredibly fresh and decadent as if they were just baked moments ago!
Double Chocolate Salted Caramel Cookies
Indulge in the delightful experience of baking Double Chocolate Salted Caramel Cookies, where rich chocolate meets gooey caramel in a perfect balance of flavors. With light, crispy edges and a soft, fudgy center, these cookies are not only a treat for your taste buds but also a source of cherished memories. The added sprinkle of sea salt enhances the sweetness, making each bite an irresistible combination of sweet and salty. Whether you’re looking to impress guests or simply enjoy a cozy evening at home, these cookies are sure to be a hit!
- Prep Time: 20 minutes
- Cook Time: 10 minutes
- Total Time: 30 minutes
- Yield: Makes approximately 24 cookies 1x
- Category: Dessert
- Method: Baking
- Cuisine: American
Ingredients
- 2 1/4 cups All-Purpose Flour
- 1/2 cup Unsweetened Cocoa Powder
- 1 tsp Baking Soda
- 1 tsp Salt
- 1 cup Unsalted Butter (room temperature)
- 1 cup Granulated Sugar
- 1 cup Light Brown Sugar (lightly packed)
- 2 Large Eggs (room temperature)
- 1 tbsp Vanilla Extract
- 1 1/2 cups Semi-Sweet or Milk Chocolate Chips
- 1 cup Caramel Flavored Chips
- Sea Salt Flakes (for sprinkling)
Instructions
- Preheat oven to 375°F (190°C) and line two baking sheets with parchment paper.
- In a bowl, whisk together flour, cocoa powder, baking soda, and salt.
- In a large mixing bowl, cream together butter, granulated sugar, and brown sugar until light and fluffy.
- Add eggs one at a time along with vanilla extract; mix until well blended.
- Gradually add dry ingredients to the wet mixture until combined.
- Fold in chocolate chips and caramel-flavored chips gently.
- Drop rounded tablespoons of dough onto prepared baking sheets, spacing them apart.
- Sprinkle sea salt flakes on top before baking for 8-10 minutes until edges are set but centers are soft.
- Let cool slightly before transferring to wire racks.
Nutrition
- Serving Size: 1 serving
- Calories: 150
- Sugar: 10g
- Sodium: 100mg
- Fat: 7g
- Saturated Fat: 4g
- Unsaturated Fat: 2g
- Trans Fat: 0g
- Carbohydrates: 21g
- Fiber: 1g
- Protein: 2g
- Cholesterol: 20mg