Chilled 4th of July Pasta Salad
There’s something truly magical about gathering with friends and family on the 4th of July, isn’t there? The air is filled with laughter, the smell of sizzling barbecues wafts through the warm summer breeze, and everywhere you look, vibrant colors celebrate freedom. One dish that has become a staple in my celebrations is a Chilled 4th of July Pasta Salad. This recipe is more than just a side; it’s a canvas splashed with the hues of our nation’s flag—red, white, and blue—that brings people together around the table. Each bite is like a burst of joy, a symphony of flavors that dances on your palate while evoking fond memories of summer picnics and sun-soaked afternoons.
As I prepare this salad each year, I find myself reminiscing about those delightful moments spent with loved ones—sharing stories, laughter, and perhaps a few friendly competitive games in the backyard. The Chilled 4th of July Pasta Salad not only satisfies the taste buds but also serves as an invitation to create new memories. It embodies the essence of summer with its fresh ingredients and cheerful presentation. Trust me when I say that it will be the highlight of your potluck or picnic, drawing compliments from everyone fortunate enough to partake in its deliciousness!
Chilled 4th of July Pasta Salad: A Patriotic Feast for Your Taste Buds
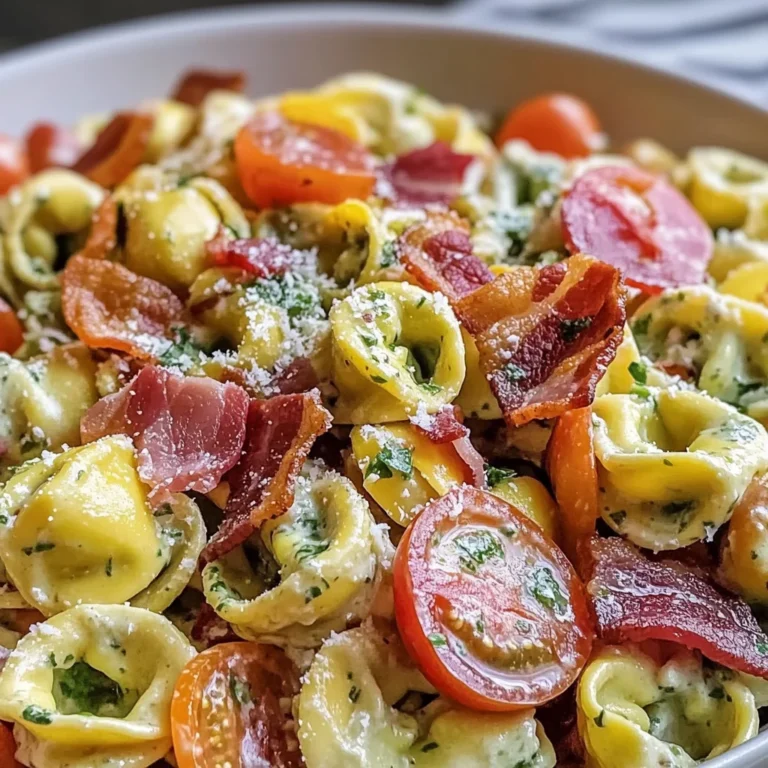
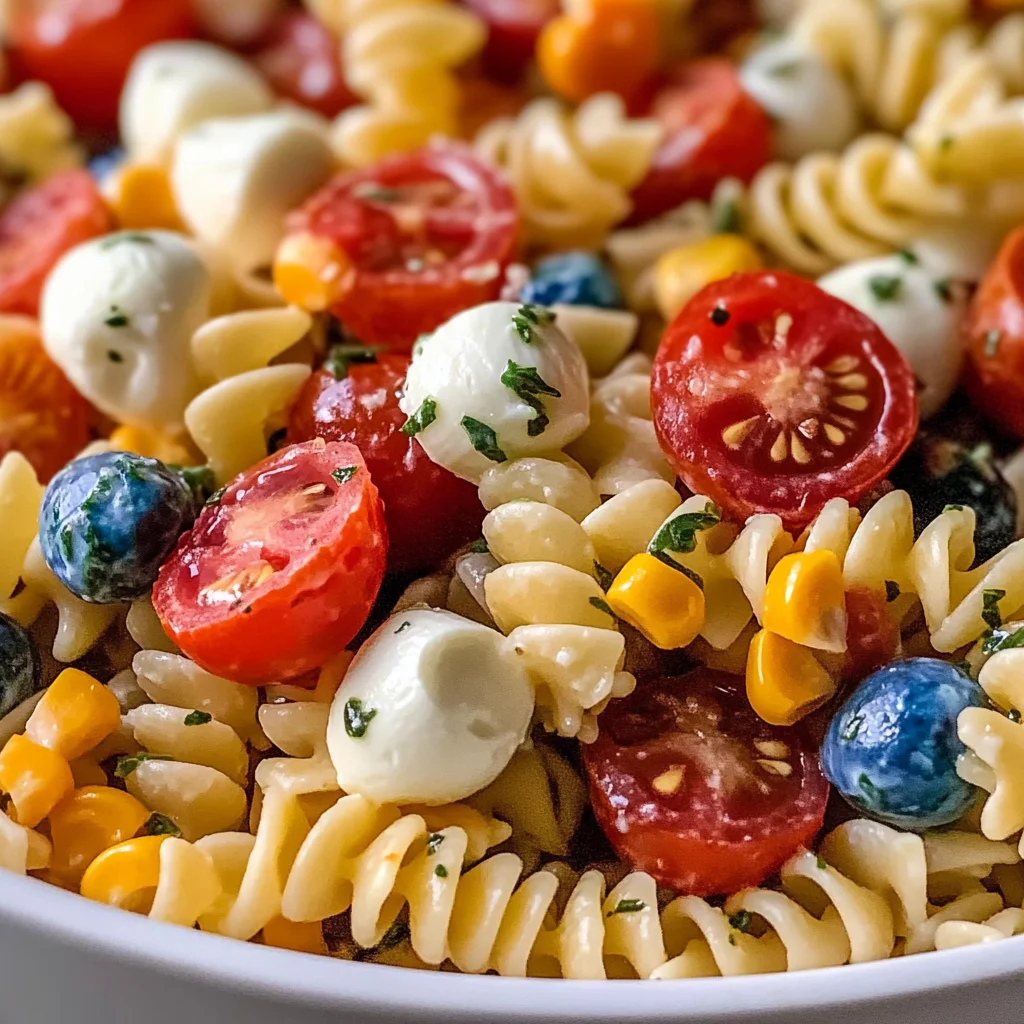
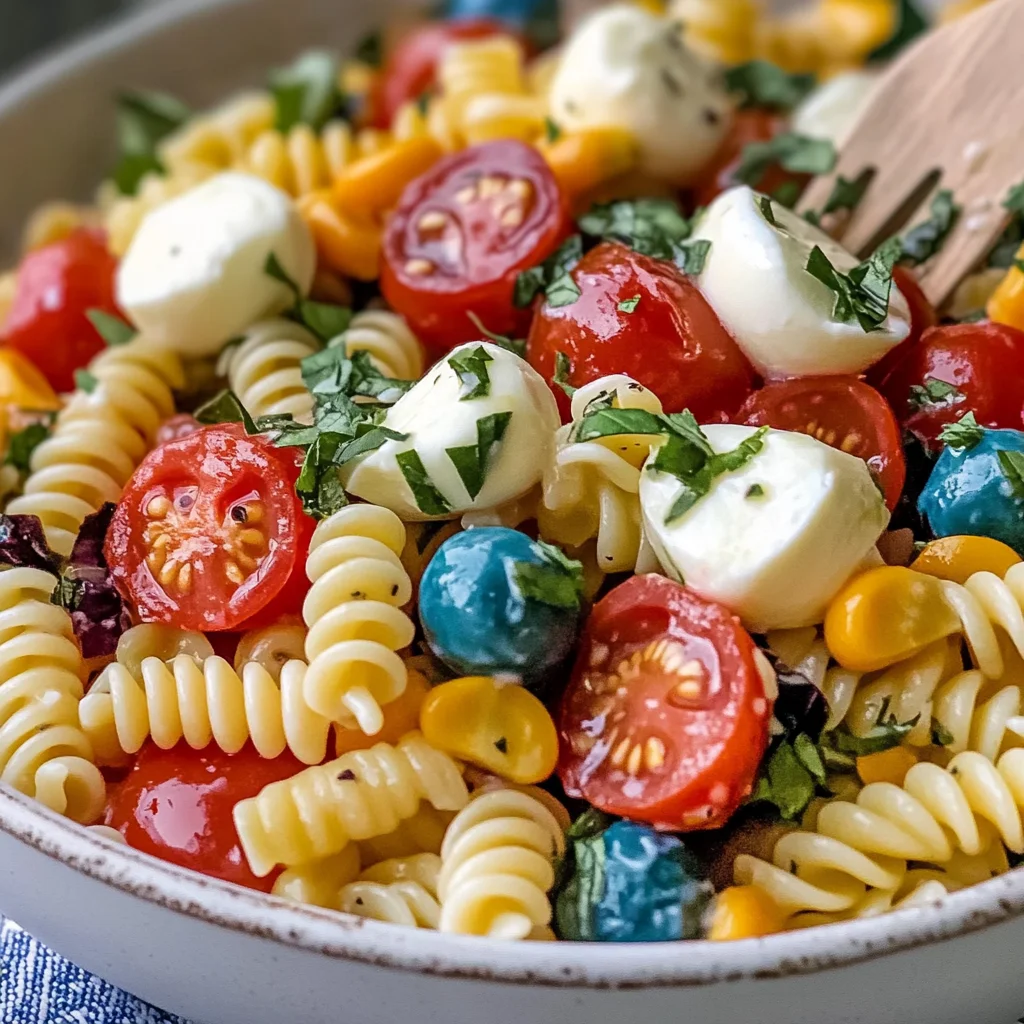
Let’s dive into this delightful recipe! It’s simple yet absolutely extraordinary, perfect for both seasoned chefs and beginner cooks alike. You’ll love how effortlessly it comes together while still packing a punch in flavor and visual appeal. With pasta that twirls like ribbons of celebration and bursts of color from cherry tomatoes and mozzarella balls mingling joyously with olives and turkey pepperoni, this dish is bound to be a crowd-pleaser. So gather your ingredients, roll up your sleeves, and let’s embark on this culinary journey together!
Ingredients:
To create this dazzling Chilled 4th of July Pasta Salad, we need some vibrant ingredients that are as flavorful as they are eye-catching. Each component plays a vital role in making this dish not only visually stunning but also deliciously satisfying.
- 1 pound package of rotini pasta, cooked and rinsed. This delightful corkscrew-shaped pasta holds onto sauces beautifully due to its spirals, allowing every bite to be infused with flavor. When selecting your pasta, opt for whole grain or gluten-free varieties if you’re looking for healthier options or accommodating dietary preferences. Cooking the pasta al dente—firm to the bite—is essential here because it will continue to absorb flavors once tossed with dressing.
- 3-4 drops of red and blue liquid food coloring mixed into 2 tablespoons water (separate). This is where the magic happens! These vibrant colors transform your ordinary pasta into an eye-catching display reminiscent of fireworks lighting up the night sky. Just be cautious; start with fewer drops—you can always add more if needed! The gentle mixing ensures an even distribution without over-saturating any single piece.
- 1 tablespoon olive or vegetable oil. This adds a touch of richness while preventing the pasta from clumping together post-cooking. Olive oil is not just about adding flavor; it creates a silky texture that enhances each ingredient’s freshness in our salad. If using vegetable oil instead for dietary preferences or availability, that’s perfectly fine too—just ensure it’s neutral so it doesn’t overpower other flavors.
- 1 pint cherry tomatoes, halved (approximately 10 ounces). These juicy gems bring brightness to our salad both visually and taste-wise! Their natural sweetness contrasts beautifully against savory ingredients like olives and pepperoni. Always choose firm tomatoes that have vibrant colors; they should feel slightly heavy for their size—a sign they’re packed with flavor.
- 1 cup mozzarella cheese, either cubed or use mozzarella pearls for convenience. Creamy mozzarella adds an indulgent texture that balances out the other ingredients’ crunchiness perfectly. When purchasing mozzarella, go for fresh if possible—it will elevate this salad from good to utterly unforgettable! If you prefer dairy-free options, consider plant-based mozzarella alternatives available today.
- 3/4 cup turkey pepperoni, quartered. Adding turkey pepperoni gives our salad an extra kick without relying on traditional pork products—it’s leaner yet packed with flavor! If you’re vegetarian or looking for alternatives, consider using sliced bell peppers or even marinated artichokes for that same zesty punch without meat.
- 1/2 cup chopped black olives. These briny nuggets bring depth to our dish—their salty richness provides balance against sweet elements like cherry tomatoes while enhancing overall flavor complexity. When choosing olives, look for pitted varieties; their convenience allows us to enjoy them without fussing over pits while eating!
- 1 (16-ounce) bottle of Italian dressing. The dressing ties all these beautiful ingredients together into one cohesive dish bursting with flavor! Opt for a light Italian dressing to keep things refreshing; homemade versions offer even more control over flavors if you’re feeling adventurous!
Now that we’ve gathered everything we need, let’s get ready to whip up something truly special together!
Equipment You’ll Need:
Having the right tools at your fingertips makes all the difference when creating this Chilled 4th of July Pasta Salad—it ensures everything goes smoothly as you prepare this colorful masterpiece! While these aren’t ingredients per se, they’re essential partners in bringing your culinary vision to life.
- Large pot – A sturdy pot is non-negotiable when cooking pasta! It allows plenty of room for boiling water while ensuring optimal cooking conditions so each piece can tumble freely without sticking together during cooking—a crucial step to achieving perfectly al dente pasta!
- Colander – After cooking our rotini pasta until it’s just right (al dente!), we’ll need a colander to drain off excess water effectively before rinsing under cold water—this helps halt further cooking immediately! Look for one with small holes so none slips through unnoticed.
- Mixing bowl – A large mixing bowl is where all the magic happens as we combine our colorful ingredients! Choose one big enough so everything can blend harmoniously together without spilling out—trust me; no one wants a mess on their countertop during such joyful preparations!
- Wooden spoon or spatula – This trusty tool will be invaluable when tossing our salad delicately yet thoroughly—ensuring every morsel gets evenly coated in dressing while protecting those delicate mozzarella balls from breaking apart.
With all our equipment ready and waiting like eager friends at a summer barbecue party, let’s move forward into preparing this delightful pasta salad!
Step 1: Cooking The Pasta
First things first—we need to cook up our rotini pasta! Fill your large pot with water (about four quarts) and bring it to a rolling boil over high heat. Adding salt at this stage is crucial; think about how sea water tastes—that’s how salty you want your boiling water! This step enhances flavor tremendously by infusing itself into each noodle as they cook—a secret many overlook but absolutely should not skip! Once boiling vigorously, toss in your pound of rotini pasta carefully (avoid splashes!). Give it a gentle stir initially so nothing clumps together unexpectedly during cooking time—set your timer according to package instructions but aim for al dente consistency (usually around eight minutes). It’s okay if bits feel slightly firm since they’ll continue soaking up flavors later when combined with dressing!
Step 2: Rinsing With Cold Water
After draining off that bubbly goodness using your colander (allowing all excess starchy water escape), quickly rinse under cold running tap water until cooled down completely—that’s right! We want those noodles chilled before adding anything else because nobody enjoys mushy salads where everything melds into one unappealing mass rather than maintaining distinct textures throughout each bite! Give them some gentle shakes within colander post-rinse too—ensuring every bit gets adequately cooled off before proceeding onward toward assembling perfection.
Step 3: Adding Vibrant Colors
Now comes one eventful moment—I promise you’ll love seeing how vibrant colors bloom within our bowl! Grab those drops of red and blue food coloring mixed separately in two tablespoons water we prepared earlier—dunk each batch gently back into our now-cooled rotini noodles then toss delicately until evenly coated throughout every twisty shape present within this glorious creation unfolding before us! Keep an eye out here—the goal isn’t overwhelming color saturation but rather creating striking visuals reminiscent patriotic spirit emanating from every angle once served up at celebrations ahead!
Step 4: Drizzling Olive Oil
After achieving those stunning hues dancing throughout those rotini shapes shimmering under kitchen lights beautifully reflecting back at us…it’s time we introduce another layer onto canvas: drizzling olive oil atop everything lovingly stirred together before diving headfirst into next steps ahead towards finishing touches coming soon thereafter! Remember—the purpose behind adding olive oil isn’t merely about taste alone; its presence prevents future clumping issues arising later down road especially once dressed fully alongside other components like olives & cheese appearing shortly afterward too—a precaution worth taking if seeking smooth results overall once plated finally standing tall amongst fellow dishes shared around table setting later on joyous occasions ahead awaiting eagerly among guests gathered nearby ready devour what’s been crafted within kitchens today!
Stay tuned as we continue crafting this wonderful Chilled 4th of July Pasta Salad—it promises delightful surprises await around every corner along our journey together today!
Chilled 4th of July Pasta Salad: A Festive Delight
As we dive deeper into the creation of this Chilled 4th of July Pasta Salad, I want to share just how special it is to me. This recipe is not merely a dish; it’s an embodiment of summertime celebrations, laughter with friends, and the joy that comes from sharing food made with love. Each vibrant layer of color and flavor tells a story, and I promise you, every bite will take you on a journey! So, let’s roll up our sleeves and get ready for some culinary magic.
Step 5: Transforming Your Pasta with Color
The first step in making your pasta salad truly festive is to add a burst of color to the rotini pasta. Begin by cooking your pound of rotini pasta according to the package instructions—this usually takes about 8-10 minutes until al dente. Remember, the trick here is not to overcook it; you want that delightful bite when you sink your teeth into it! Once cooked, drain the pasta and rinse it under cold water. This not only halts the cooking process but also cools it down for that refreshing chilled salad feel.
Now comes the fun part: infusing color! In two separate small bowls, combine three to four drops each of red and blue liquid food coloring with two tablespoons of water. You’ll create striking hues that reflect the spirit of Independence Day! Add half of your drained pasta to one bowl and toss gently until evenly coated; do the same with the other half in the second bowl with blue food coloring. It’s crucial to be gentle here—over mixing could lead to a muddied mess instead of vibrant swirls! Once you have your beautifully colored pasta, set them aside; patience is key as we allow them to dry slightly before combining all ingredients.
Step 6: The Heart of Flavor – Dressing Your Ingredients
Next up is where we really bring everything together using those delicious ingredients that make this salad sing! In a large mixing bowl, combine your cooled and colored pasta with one pint of halved cherry tomatoes. Their juicy sweetness balances perfectly against the richness of mozzarella cheese, which brings that creamy texture we all love. Speaking of cheese, whether you choose cubed mozzarella or pearls, make sure they are fresh and high-quality—this is absolutely paramount for achieving a truly extraordinary result!
Now add in three-quarters cup of quartered turkey pepperoni—this adds a wonderful savory element without overpowering the dish—and half a cup of chopped black olives for that salty punch. As you toss these ingredients together gently, take a moment to appreciate how visually appealing this medley already looks; it’s like summer on a plate! Trust me on this step: be sure everything is well distributed before moving forward. This ensures each forkful will have that symphony of flavors we’re aiming for.
Step 7: The Magic Touch – Adding Dressing
Ahh, now we come to one of my favorite parts—the dressing! Using a generous amount (about 16 ounces) of Italian dressing not only coats our ingredients lovingly but also ties them all together into a cohesive dish bursting with flavor. Pour in the dressing slowly while tossing gently; this method allows for even distribution without bruising any delicate components like tomatoes or mozzarella.
Here’s where patience becomes essential again: after mixing all these glorious ingredients together, cover your bowl with plastic wrap or transfer everything into an airtight container. This isn’t just about keeping things fresh; allowing our salad to rest for at least an hour in the refrigerator lets all those flavors meld together beautifully. Why chill? Well, during this time, the dressing seeps into each ingredient, creating an utterly intoxicating experience when you finally dig in! Keep an eye on how things blend together visually—if everything looks harmoniously mixed and colorful after chilling time has elapsed, you’re right on track!
Step 8: Serving Up Your Patriotic Creation
Finally, it’s time for everyone’s favorite part—serving up this masterpiece at your gathering! When pulling out your Chilled 4th of July Pasta Salad, take a moment to appreciate its beauty—the vivid reds and blues contrasting against creamy whites make for such an inviting presentation. Before serving, give everything another gentle toss; this helps redistribute any dressing that may have settled at the bottom during chilling.
As you scoop out portions onto plates or into festive bowls for sharing among family and friends, watch their faces light up with excitement—it’s such a joyful moment! To elevate this dish even further, consider garnishing with fresh herbs like basil or parsley just before serving; they add not only a pop of color but also brightness that complements those rich flavors impeccably.
Enjoy every moment as laughter fills the air around your table filled with loved ones indulging in your delightful creation—I promise you they will appreciate every flavor-packed bite as much as I do!
Final Thoughts on Your Chilled 4th of July Pasta Salad
In closing, creating this Chilled 4th of July Pasta Salad isn’t just about following steps—it’s about embracing creativity in cooking and sharing moments together over food made from scratch. Whether it’s an outdoor barbecue or an indoor gathering away from pesky bugs due to weather changes—you’ve crafted something that resonates joyfully during those summertime celebrations.
I hope this recipe finds its place in your heart (and on your table) just as it has in mine over so many years filled with memories and laughter around good food. Happy cooking—and happy celebrating!
Storage and Enjoyment Tips for Your Chilled 4th of July Pasta Salad
Now that you’ve crafted this vibrant and utterly delightful Chilled 4th of July Pasta Salad, you’re probably just itching to dive in and share it with your friends and family. Can you imagine the look on their faces as they take that first bite? The colors alone tell a story, and the flavors are nothing short of a celebration! But before you get swept away in the excitement of savoring this dish, let’s talk about how to preserve those beautiful leftovers (if there are any!).
Storing Leftover Chilled 4th of July Pasta Salad
To keep your Chilled 4th of July Pasta Salad fresh and bursting with flavor, I recommend using an airtight container. Glass containers are my personal favorite because they don’t absorb any odors and help maintain the salad’s bright colors. You can easily store it in the fridge for up to three days. To ensure that every bite remains just as delicious as the first, consider placing a slice of bread inside the container; it absorbs any excess moisture and keeps your pasta perfectly al dente! Trust me on this one—it’s a little trick that makes a big difference. When you pull it out after a day or two, you might even find that the flavors have melded together beautifully, creating a taste that’s even more profound than when it was first made. If you’re serving it again, there’s no need to reheat—this salad is meant to be enjoyed cold!
Freezing Components for Later
If you want to prepare ahead or simply have some extra salad on hand for those spontaneous get-togethers, freezing is a fantastic option! To freeze your Chilled 4th of July Pasta Salad effectively, I suggest separating components like the mozzarella cheese and vegetables from the pasta before packing them away. This way, each ingredient retains its texture and flavor. Store everything in freezer-safe bags or containers—just be sure to eliminate as much air as possible before sealing them up tight. You can keep these components frozen for up to three months! When you’re ready to enjoy them again, simply thaw in the refrigerator overnight before serving; it’s as easy as that! The convenience factor here is utterly intoxicating—imagine pulling out a ready-to-go summer dish on a busy weeknight or during an impromptu picnic!
Chilled 4th of July Pasta Salad
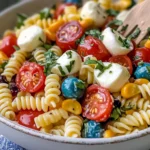
Chilled 4th of July Pasta Salad is the ultimate summer dish that brings vibrant colors and refreshing flavors to your gatherings. This delightful salad features rotini pasta colored with red and blue food coloring, making it a festive centerpiece for your Independence Day celebrations. Tossed with juicy cherry tomatoes, creamy mozzarella, savory turkey pepperoni, and briny olives, each bite bursts with flavor reminiscent of sun-soaked picnics. Perfect as a side or a standalone dish, this easy-to-make recipe creates lasting memories around the table. With its visually stunning presentation and delicious taste, it’s sure to be a hit at any summer gathering!
- Prep Time: 15 minutes
- Cook Time: 10 minutes
- Total Time: 25 minutes
- Yield: Serves about 8 people 1x
- Category: Salad
- Method: Cooling
- Cuisine: American
Ingredients
- 1 pound rotini pasta
- 3–4 drops red and blue food coloring
- 1 tablespoon olive oil
- 1 pint cherry tomatoes, halved
- 1 cup mozzarella cheese, cubed or pearls
- 3/4 cup turkey pepperoni, quartered
- 1/2 cup chopped black olives
- 1 (16-ounce) bottle Italian dressing
Instructions
- Cook the rotini pasta according to package instructions until al dente (about 8 minutes). Drain and rinse under cold water.
- In two separate bowls, mix red and blue food coloring with water. Divide the pasta into two portions and coat each half with the respective colors. Set aside to dry slightly.
- In a large mixing bowl, combine the cooled colored pasta, cherry tomatoes, mozzarella cheese, turkey pepperoni, and black olives.
- Drizzle with Italian dressing and toss gently to combine all ingredients evenly.
- Cover and refrigerate for at least one hour to allow flavors to meld before serving.
Nutrition
- Serving Size: 1 cup (150g)
- Calories: 220
- Sugar: 2g
- Sodium: 550mg
- Fat: 10g
- Saturated Fat: 3g
- Unsaturated Fat: 7g
- Trans Fat: 0g
- Carbohydrates: 25g
- Fiber: 2g
- Protein: 9g
- Cholesterol: 15mg