Classic Southern Coleslaw
There’s something truly magical about a bowl of Classic Southern Coleslaw, isn’t there? It’s not just a side dish; it’s a comforting embrace of flavors and textures that transports you right to the heart of a summer picnic or a backyard barbecue. The vivid crunch of fresh cabbage, paired with the subtle sweetness of carrots, mingles beautifully with a creamy dressing that dances on your palate. Every bite is like a little celebration, a reminder of gatherings with family and friends where laughter fills the air and memories are made over shared meals. This Classic Southern Coleslaw recipe is one I hold dear, not just because it’s delicious but because it embodies the warmth and love found in home-cooked food.
I’ve always been captivated by how this dish can transform any meal into something special. Whether it’s served alongside grilled vegetables, delightful sandwiches, or even just on its own as a light lunch, this coleslaw brings everything together. The beauty lies in its simplicity; the sweet-tangy dressing complements the freshness of the cabbage and carrots perfectly. Plus, it’s incredibly quick to whip up—trust me when I say you’ll want to keep this recipe close at hand for both spontaneous dinners and planned feasts alike!
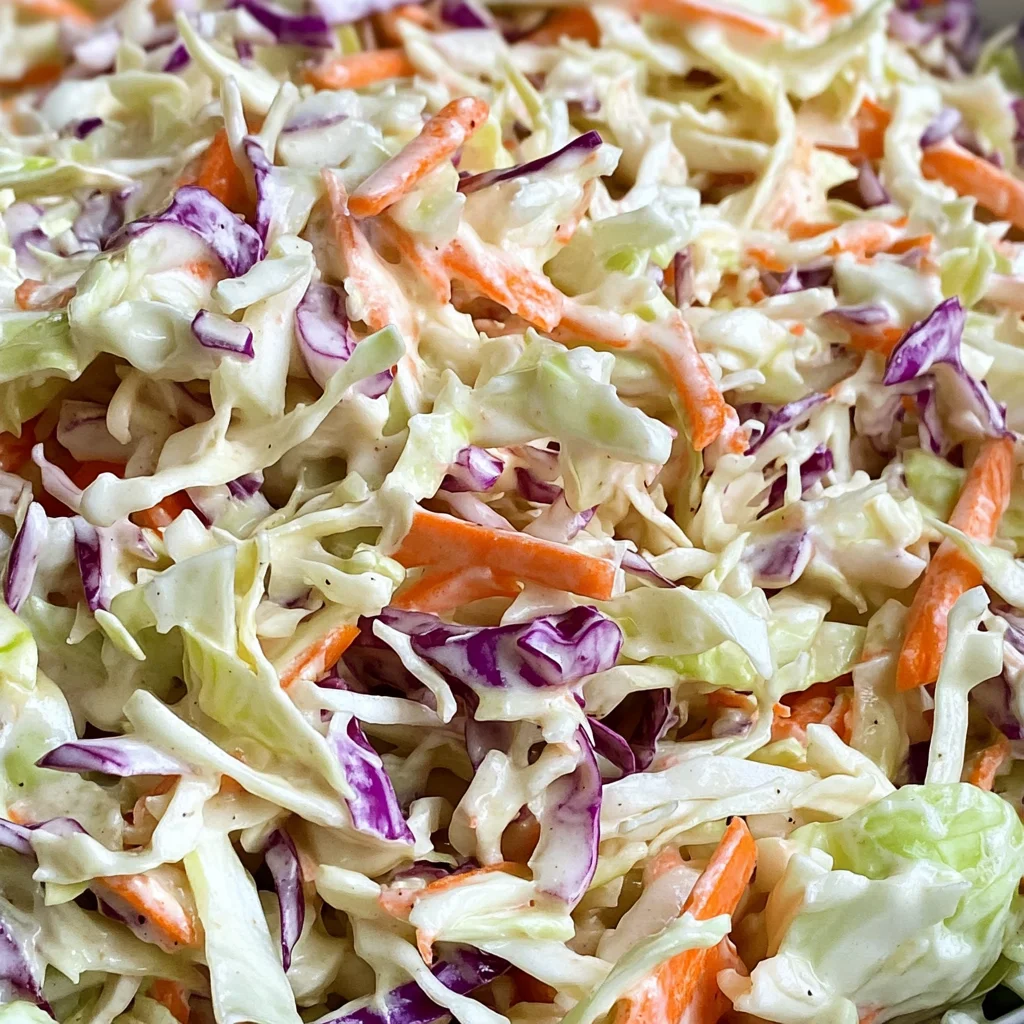
Classic Southern Coleslaw: A Flavorful Side Dish That Steals the Show
Let’s dive into bringing this delightful dish to life! You’re going to love how quick and easy it is to make this coleslaw. I promise you; once you serve it up at your next gathering, it’s bound to be the star of the show!
Ingredients:
As we embark on this culinary journey together, let’s talk about what makes each ingredient essential for achieving that perfect balance in our Classic Southern Coleslaw.
- 1 bag (16 ounces) coleslaw mix (or 8 cups shredded cabbage). This is your foundation—the crunchy backbone of your coleslaw. When selecting pre-packaged coleslaw mix, look for vibrant colors without any wilted edges; freshness is key! If you prefer to shred your own cabbage, aim for green cabbage or even add some red cabbage for an extra pop of color and flavor. The interplay between these cabbages will create a beautiful visual appeal while providing different textures that keep every bite exciting.
- 1 cup shredded or grated carrots. Carrots add not only sweetness but also vibrant color that brightens up your coleslaw immensely. When shopping for carrots, choose those that feel firm with smooth skin—this ensures they are fresh and full of flavor. Shredding them yourself allows you to control their texture; if you prefer larger pieces for more crunch, go ahead! The natural sweetness from the carrots plays beautifully against the tangy dressing we’ll create.
- ½ cup mayonnaise. This creamy element acts as the glue that holds everything together while imparting richness and depth of flavor. For best results, opt for quality mayonnaise; homemade varieties can elevate your coleslaw to new heights! If you’re looking for lighter options, consider using Greek yogurt instead—it maintains creaminess while adding a protein boost.
- 2 tablespoons buttermilk. Why buttermilk? It adds a tangy flavor profile that elevates our dressing beyond basic mayonnaise. Give your buttermilk a good shake before measuring; freshness matters! If you don’t have any on hand, no worries—a splash of milk mixed with a teaspoon of vinegar or lemon juice will suffice as an excellent substitute.
- ⅓ cup granulated sugar. This ingredient may seem simple but trust me when I say it’s absolutely paramount in balancing out those tart flavors from our vinegar and lemon juice later. Sugar enhances the overall taste experience by creating contrast—sweet meets tangy in such harmony! If you’re aiming for less sugar or a healthier alternative, honey can work wonders too without losing that sweetness.
- 1 tablespoon distilled white vinegar. The acidity from vinegar cuts through all that creaminess beautifully—it wakes up your taste buds! A small amount goes a long way here; be sure to use distilled white vinegar for its clean flavor profile that won’t overpower other ingredients.
- 1 tablespoon lemon juice. Freshly squeezed if possible! Lemon juice adds brightness and further enhances our dish’s zestiness without being overwhelming. It’s incredible how just one tablespoon can elevate flavors so dramatically—don’t skip this step!
- ¾ teaspoon kosher salt (plus more to taste before serving). Salt is essential in bringing out natural flavors within all ingredients involved—not enough can lead to blandness while too much can overpower everything else. Kosher salt dissolves readily and distributes evenly throughout your coleslaw mix; adjust before serving based on personal preference!
- ¼ teaspoon black pepper (plus more to taste before serving). Just like salt, pepper adds depth—the warmth from black pepper works as an enhancer rather than standing out on its own accord! Start with this amount and feel free to adjust according to your own palate preferences.
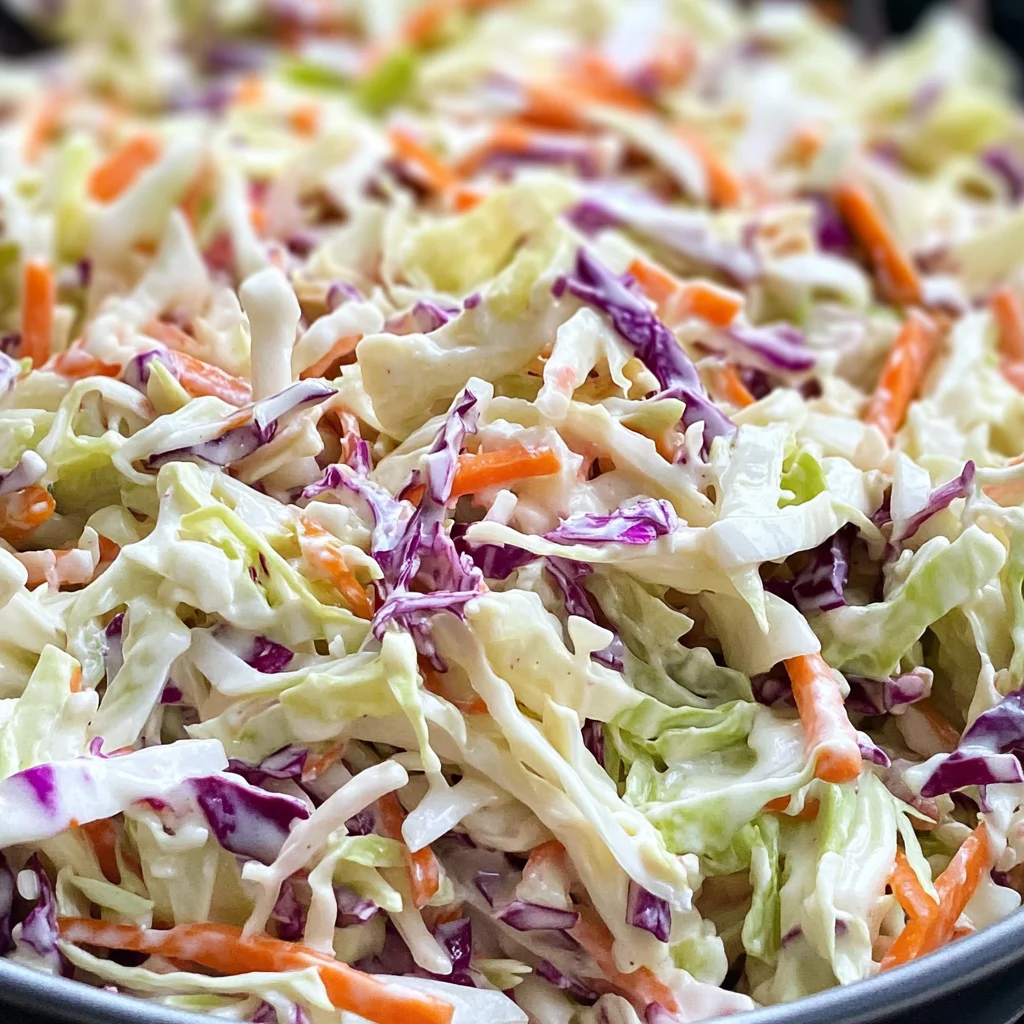
Equipment You’ll Need:
Now that we have our ingredients lined up like eager participants ready for their moment in the spotlight, let’s gather our trusty kitchen tools! Having the right equipment not only makes cooking smoother but also transforms how enjoyable the process becomes.
- Mixing bowls – A good set of mixing bowls is essential; you’ll need one large bowl for combining ingredients and possibly smaller ones for preparing dressings or other components beforehand. Choose glass or stainless steel bowls—they’re durable and won’t retain odors over time!
- Whisk – This tool is key when blending our dressing together smoothly—no lumps allowed! A sturdy whisk helps incorporate all elements seamlessly while introducing air into our mixture which contributes to creaminess—a whisk truly makes magic happen here!
- Measuring cups & spoons – Precision matters in cooking just as much as baking! Using accurate measurements ensures consistent results every time you whip up this coleslaw recipe.
- Cutting board & knife – While we’re using pre-shredded cabbage here, having these tools handy allows flexibility should inspiration strike—or if you’d like finer control over vegetable sizes!
Preparing the Classic Southern Coleslaw
Step 1: Create Your Dressing
Let’s begin by crafting our signature dressing—a sweet-tangy masterpiece that truly defines Classic Southern Coleslaw! In a small bowl (one you don’t mind getting messy), combine your granulated sugar with buttermilk first; whisk them together until fully dissolved—this step helps avoid graininess later on when combined with mayonnaise. Next comes distilled white vinegar followed closely by lemon juice—each addition heightens flavor complexity while balancing out creaminess from mayo itself perfectly! Finally sprinkle in kosher salt along with black pepper before adding mayonnaise last—whisk vigorously until everything melds together into one cohesive blend reminiscent of liquid gold waiting eagerly atop crisp veggies.
Step 2: Prepare Your Veggies
While our dressing rests harmoniously aside waiting patiently for its moment to shine, let’s turn attention towards prepping those beautiful vegetables! In a large mixing bowl momentarily set aside specifically designate space where we’ll combine coleslaw mix along with grated carrots later on—this allows ample room necessary for tossing without spills occurring across countertops everywhere (trust me!). Take time cutting down any larger pieces present within pre-packaged coleslaw mix too since uneven sizes could result in awkward bites during serving later down line—no one wants huge chunks overshadowing delicate shreds around family dinner table!
Step 3: Combine Everything Together
Now comes perhaps my favorite part—the joyously therapeutic act of combining all elements into one glorious medley! Drizzle generous amounts freshly whisked dressing over shredded cabbage-carrot mixture resting back inside large bowl made earlier today then proceed gently tossing everything together until each piece gets lovingly coated evenly throughout—incredibly satisfying sight indeed resembling art rather than mere food preparation going on right now! Make sure not rush through this step either since thorough tossing ensures every bite offers balanced flavors rather than random bursts unexpectedly appearing here-and-there amongst otherwise delicate components present within dish itself always aiming toward perfectionist tendencies many strive after daily!
Step 4: Refrigerate For Maximum Flavor Development
Once fully combined expect slight urge wanting dig straight into delicious creation already prepared—but hold tight—it’s crucial step awaiting arrival soon thereafter takes precedence above immediate gratification at this moment! Cover tightly ensuring no air escapes then refrigerate mixture ideally anywhere between two-three hours allowing flavors marry beautifully overtime giving rise deeper complexities ultimately leading us toward final product everyone remembers fondly years down road ahead ahead likely reminiscing fondly about gatherings spent enjoying company friends-family-lovers alike surrounding plentiful bowls overflowing alongside hearty laughter filling spaces once filled silence prior evenings gone past forevermore…
And there you have it—a journey through creating an unforgettable Classic Southern Coleslaw made special by every ingredient shared intimately within community formed around cooking traditions passed down generations ago until now proudly showcased today upon tables near far reaches ought inspire anyone willing take chance plunge forward discovering new talents along way discovering hidden gems buried deep beneath surface waiting there patiently years waiting someone brave enough venture forth uncovering undiscovered treasures awaiting reveal…
Crafting Your Classic Southern Coleslaw: The Art of Patience and Flavor
Step 5: Let the Flavors Marry – Chilling Time is Key
Now that you have your beautifully tossed coleslaw, it’s time for one of the most crucial steps in this recipe – the chilling. Trust me on this; allowing your coleslaw to sit in the refrigerator for at least 2-3 hours, or even better, overnight, transforms it from good to absolutely extraordinary. This resting period is where the magic happens! As the coleslaw chills, the flavors meld together, creating a harmonious symphony of sweet and tangy notes that will dance on your palate.
Why is this step so important? Well, think of it like brewing a fine tea or letting a stew simmer slowly. The ingredients need time to interact and develop their full potential. The salt in the dressing draws moisture from the cabbage, enhancing its crunchiness while softening it just enough to make every bite deeply satisfying. So don’t rush this step; your patience will pay off when you take that first forkful.
As you place your coleslaw in the fridge, cover it well with plastic wrap or a lid; this prevents any unwanted odors from other foods mingling with your masterpiece. When you’re ready to serve, simply give it a gentle stir to redistribute any dressing that may have settled at the bottom of the bowl. You might notice some liquid at the bottom—that’s perfectly normal! It’s just those delicious flavors combining beautifully.
Step 6: Taste Testing – Adjusting for Perfection
Once your coleslaw has chilled sufficiently, it’s time for one of my favorite moments—taste testing! This is where you can truly personalize your dish and ensure every bite is nothing short of perfection. Grab a clean fork and take a small taste; you want to assess how all those lovely flavors are coming together. Does it need a pinch more salt? Perhaps an extra sprinkle of black pepper? Or maybe even a dash more vinegar for that zingy brightness?
Adjusting seasoning is an art form in itself. Remember that our palates can differ widely; what feels perfect to one person might feel lacking to another. So, don’t hesitate to trust your own taste buds! If you feel like it needs just a touch more sweetness or acidity to balance out the flavors, go ahead and add it slowly while tasting as you go—this way, you’re creating something uniquely yours. And if you’re serving guests, I promise they will appreciate this thoughtful attention to detail!
Step 7: The Perfect Serving Temperature
When you’re ready to serve your coleslaw—and believe me, that moment will come sooner than later—take it out of the fridge and allow it to sit at room temperature for about 10-15 minutes before diving in. This slight warming allows all those chilled flavors to refresh themselves; after all, cold food can sometimes mask deeper tastes! By letting it rest briefly outside of its icy refuge, you’ll find each ingredient shines through much more vibrantly.
As you prepare to present your classic Southern coleslaw at dinner or a get-together, consider using an inviting serving bowl that complements your table setting—a splash of color always elevates any dish! This simple act not only enhances visual appeal but also adds an extra layer of warmth as guests gather around with eager appetites.
Step 8: Garnishing with Love – Final Touches Matter
Now comes one of my favorite parts—the finishing touches! Just before serving your coleslaw, consider adding a sprinkle of fresh herbs like parsley or even some green onions for added color and flavor complexity. These little details make such a difference—they not only look stunning but offer an aromatic freshness that elevates every bite into something truly memorable.
As you set down your beautifully crafted bowl of coleslaw on the table, take a moment to appreciate what you’ve created. This isn’t just food; it’s nourishment crafted with love and intention—a dish that brings people together over shared meals and laughter. Trust me when I say there’s nothing quite like seeing friends or family enjoy something you’ve poured your heart into making.
Bring It All Together: Enjoying Your Classic Southern Coleslaw
At long last, it’s time to savor what you’ve made—the Classic Southern Coleslaw is ready! Whether you’re serving it alongside grilled veggies during summer cookouts or as part of cozy winter gatherings with warm casseroles and hearty dishes, this delightful side dish fits seamlessly into any meal’s narrative. Each crunch speaks volumes about care and attention as though saying “Welcome!”
Remember that classic Southern hospitality thrives on sharing good food with loved ones. So fill their plates generously—this creamy coleslaw will not only complement their meals but also spark conversations filled with joy and nostalgia as everyone shares their own stories tied to family recipes passed down through generations.
Enjoy every moment spent around the table with vibrant conversation flowing as freely as laughter—and don’t forget about seconds (or thirds!) because when something tastes this divine, who could possibly resist?
Storage and Enjoyment Tips for Your Classic Southern Coleslaw
Now that you’ve created this delightful Classic Southern Coleslaw, it’s time to revel in the joy of sharing it with your loved ones! The sweet, tangy dressing mingles beautifully with the crisp cabbage and vibrant carrots, creating a dish that’s irresistibly appetizing. Whether you’re serving it alongside grilled meats, at a family picnic, or as part of a potluck spread, its freshness can elevate any meal. But what do you do with those leftovers? Let’s dive into how to keep this delicious creation at its best!
Storing Leftover Classic Southern Coleslaw
To ensure your coleslaw stays fresh and keeps its crunchy texture, it’s essential to store it properly. I recommend using an airtight container; glass containers are fabulous for this purpose because they don’t retain odors and allow you to see that beautiful mix of colors inside. If you happen to have a large batch left over (which is often the case because it’s so good), it will last in the refrigerator for about 3-4 days. An excellent tip for maintaining freshness is to place a slice of bread in the container—this little trick helps absorb excess moisture and keeps your coleslaw from getting soggy! When you pull it out for your next meal, you might notice that the flavors have melded together even more profoundly, creating a symphony of taste that’s truly extraordinary. Just remember to give it a good stir before serving and season with additional salt and pepper if needed; trust me, it makes all the difference!
Freezing Classic Southern Coleslaw for Later
If you find yourself with more coleslaw than you can eat within those few days (a rare but possible scenario!), freezing might seem like an option worth considering. However, due to its creamy dressing and delicate textures, traditional coleslaw doesn’t typically freeze well. Instead, consider freezing just the shredded cabbage and carrots separately—this way, when you’re ready to whip up another batch, simply thaw them out and mix them with fresh dressing! Properly sealed in freezer bags or containers, these veggies can keep for up to three months without losing their quality. This approach not only saves time on prep but also ensures that you’ll always have the base for an amazing side dish ready at your fingertips. How convenient is that? Imagine having homemade coleslaw ready to go whenever you need a quick addition to dinner or a lunchbox surprise!
Classic Southern Coleslaw
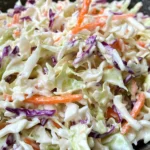
Classic Southern Coleslaw is a delightful and refreshing side dish that captures the essence of summer gatherings and backyard barbecues. This vibrant dish combines crunchy cabbage and sweet carrots with a creamy, tangy dressing that dances on your palate. Perfect for picnics, potlucks, or simply as a light lunch, this coleslaw is not only quick to prepare but also embodies the warmth of shared meals and cherished memories. Whether served alongside grilled chicken or enjoyed on its own, this coleslaw is bound to be a crowd favorite!
- Prep Time: 15 minutes
- Cook Time: None
- Total Time: 0 hours
- Yield: About 6 servings 1x
- Category: Salad
- Method: Mixing
- Cuisine: American
Ingredients
- 1 bag (16 ounces) coleslaw mix or 8 cups shredded cabbage
- 1 cup shredded carrots
- ½ cup mayonnaise (or Greek yogurt)
- 2 tablespoons buttermilk (or milk mixed with vinegar)
- ⅓ cup granulated sugar
- 1 tablespoon distilled white vinegar
- 1 tablespoon lemon juice
- ¾ teaspoon kosher salt
- ¼ teaspoon black pepper
Instructions
- In a small bowl, whisk together sugar and buttermilk until dissolved. Add vinegar, lemon juice, salt, pepper, and mayonnaise; whisk until smooth.
- In a large mixing bowl, combine coleslaw mix and shredded carrots.
- Drizzle dressing over the cabbage mixture and toss gently until well coated.
- Cover and refrigerate for at least 2-3 hours to allow flavors to meld.
- Stir before serving; adjust seasoning if necessary.
Nutrition
- Serving Size: 1 serving
- Calories: 190
- Sugar: 10g
- Sodium: 320mg
- Fat: 14g
- Saturated Fat: 2g
- Unsaturated Fat: 10g
- Trans Fat: 0g
- Carbohydrates: 17g
- Fiber: 2g
- Protein: 2g
- Cholesterol: 5mg