Chocolate Raspberry Cups
There’s something utterly magical about the marriage of chocolate and raspberries, isn’t there? The way the rich, dark chocolate envelops the tart sweetness of fresh raspberries creates a symphony of flavors that dances on your palate. Chocolate Raspberry Cups are not just a dessert; they are an experience that brings warmth and joy to every gathering, every quiet moment with a cup of tea, or simply a delightful indulgence after a long day. This recipe embodies comfort and love, transporting you back to those cherished moments in life when sweetness was simple, yet profoundly satisfying. Trust me on this—when you take your first bite, you’ll understand why these little cups give such pure happiness.
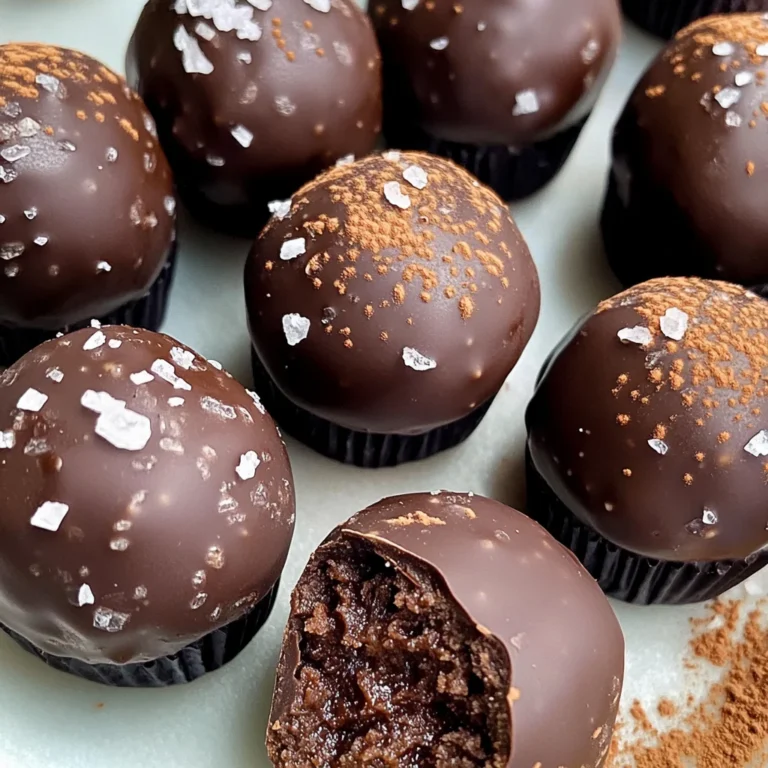
Imagine biting into a velvety shell of dark chocolate that gives way to a luscious raspberry filling, the tangy fruitiness mingling with rich chocolate creating an utterly intoxicating sensation. Each cup is like a tiny treasure waiting to be discovered, bringing together the best of both worlds: the deep richness of chocolate and the bright burst of raspberry flavor. These Chocolate Raspberry Cups are not only easy to make but also offer an elegant touch, making them perfect for any occasion—from cozy family gatherings to festive celebrations where you want to impress your guests with something truly extraordinary.
Equipment You’ll Need:
Before we dive deeper into crafting these delightful cups, let’s ensure we have all the right tools at hand! Having the proper equipment can make all the difference between a fun cooking experience and one filled with frustration.
- Small saucepan – This will be your trusty companion for heating up those glorious raspberry ingredients! A saucepan allows for better heat distribution which is vital when gently warming fruit and sweeteners without burning them.
- Mini cupcake liners or candy molds – Think of these as the cozy homes for our Chocolate Raspberry Cups! They’ll shape our little masterpieces perfectly while making it easier to pop them out once set. If you don’t have these on hand, don’t fret—using parchment paper cut into circles works wonders too!
- Heatproof bowl – This will be essential when melting our rich dark chocolate; it should fit snugly over the saucepan without touching boiling water below—this method is known as double boiling! It ensures gentle melting without seizing up our precious chocolate.
- Masher or fork – For those juicy raspberries needing some love before they become filling! Either tool will help break down their structure beautifully resulting in a luscious puree that’s perfect for our cups.
Now that we’re all set up in our culinary workspace let’s get started on preparing these delectable Chocolate Raspberry Cups!
Keep following along through these steps till completion—the rewards are utterly rewarding beyond anything imaginable once enjoyed fresh from their chilly abode straight into eager tastebuds ready experiencing ambrosial delight at first bite!
Stay tuned as we wrap up preparations soon—I can assure you these Chocolate Raspberry Cups shall become staples within homes everywhere once tasted at least once!
Crafting Your Chocolate Raspberry Cups: The Delightful Steps
Step 5: Melt the Chocolate to Perfection
Now that we have our luscious raspberry filling simmering gently on the stove, it’s time to turn our attention to the star of the show: the chocolate. Melting chocolate is both an art and a science; it requires your undivided attention and a bit of finesse. I recommend using either a double boiler or the microwave for this step. If you choose the double boiler method, place a heatproof bowl over a pot of simmering water, ensuring that the bottom of the bowl doesn’t touch the water. This gentle heat will coax the chocolate into melting without scorching it, which is absolutely crucial because burnt chocolate can lose its smoothness and flavor.
If you’re going for convenience with the microwave, simply place your chocolate chips in a microwave-safe bowl and heat them in short bursts of 20-30 seconds. Remember to stir after each interval—this ensures even melting and helps prevent those pesky burnt bits from forming. You’ll know your chocolate is ready when it’s glossy and smooth, with no lumps remaining. If you’re feeling adventurous, adding a teaspoon of vegetable oil or melted coconut oil at this stage can make your chocolate even smoother and easier to work with. Trust me on this; it transforms your final product into something utterly luxurious!
Step 6: Building Your Chocolate Raspberry Cups
This part is where the magic truly begins! Grab those mini cupcake liners or candy molds—this is where we’ll layer our flavors to create those delightful Chocolate Raspberry Cups. Start by using a small spoon or spatula to spread about a teaspoon of your perfectly melted chocolate up the sides of each liner or mold. This creates a shell that will cradle our raspberry filling later on. Don’t rush this step; take your time to ensure that every inch is covered—we want every bite to be an explosion of flavor.
Once you’ve crafted those beautiful chocolate shells, it’s time for the star ingredient—the raspberry filling! Using another spoon, scoop about two teaspoons of that vibrant, fragrant raspberry mixture right into the center of each cup. It’s okay if some spills over; that only means more deliciousness in every bite! After you’ve added your filling, it’s essential to top each cup with another layer of melted chocolate to seal in all that juicy goodness. Make sure to give them a good tap on the counter afterward; this will help eliminate any air bubbles and ensure everything settles beautifully.
Step 7: The Waiting Game – Chill Time!
Ah, patience—an essential ingredient in cooking! Once you’ve assembled all your cups with their delectable layers, it’s time for them to chill out in either the refrigerator or freezer. This step might feel like an eternity as you wait for them to set—about 15-30 minutes in the freezer should do but letting them sit longer in the fridge can yield equally delightful results (up to an hour). Chilling is crucial because it solidifies both the outer chocolate shell and locks in that fruity raspberry filling, creating a perfect harmony of textures.
While they chill, take a moment to reflect on what you’ve created so far. The anticipation builds as you imagine biting into one of these cups—the outer shell cracking slightly under pressure before revealing that gooey raspberry center—it’s pure bliss! Plus, chilling helps meld those flavors together even more profoundly; it’s like giving them time to get better acquainted before they meet your taste buds.
Step 8: Unmolding Your Masterpieces
Now comes one of my favorite moments—the unveiling of your Chocolate Raspberry Cups! Carefully remove them from their liners or molds by gently peeling back the sides or twisting if necessary. If you’ve used miniature cupcake liners, they should come off quite easily if they were properly chilled; you’ll see that lovely sheen from the melted chocolate shining through! However, if they seem stubborn at first glance, don’t panic—just give them a little more time in refrigeration before trying again.
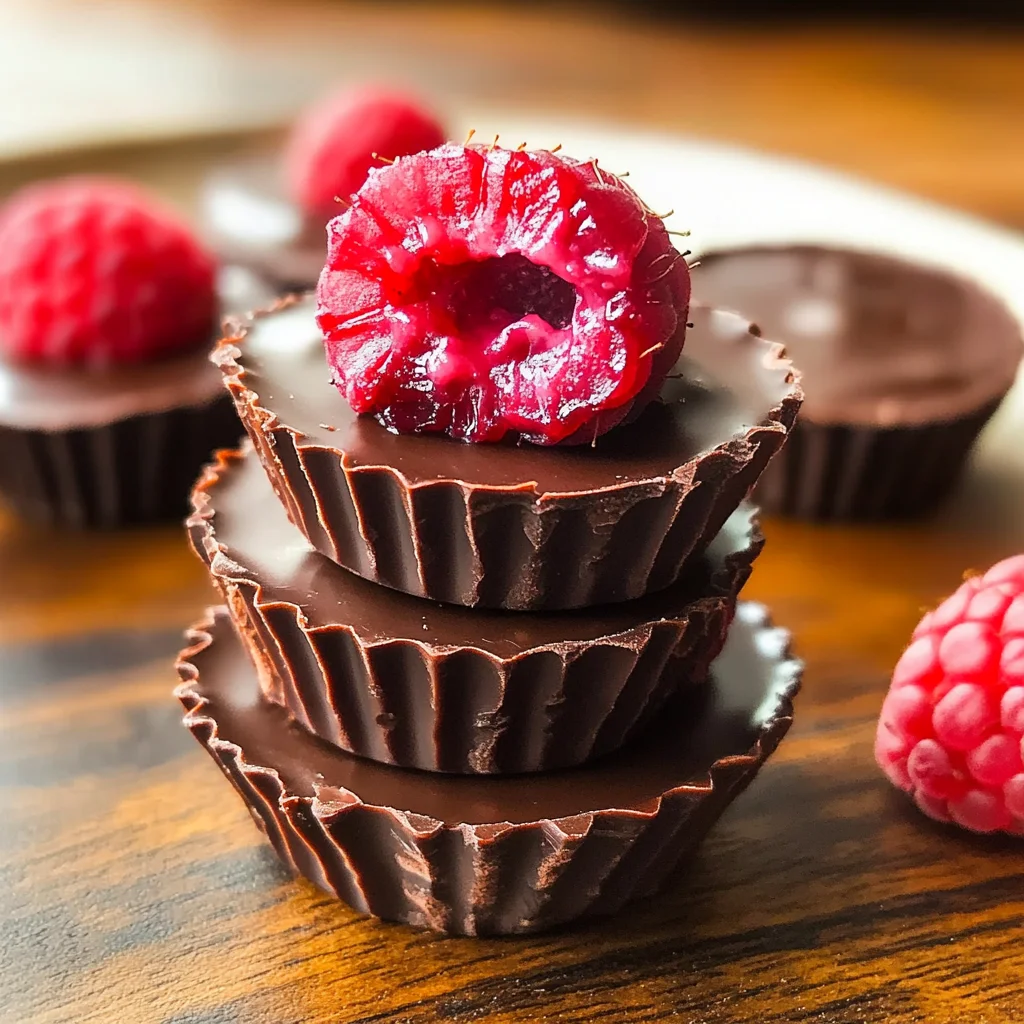
As you hold one of these little gems in your hand, take a moment to admire their craftsmanship; perhaps even snap a picture before diving in! The contrast between rich dark chocolate and bright red raspberry filling is not just visually stunning, but also sets up an experience for your palate that you won’t soon forget. Each bite offers an indulgent burst followed by hints of tartness from those juicy raspberries—it’s truly extraordinary!
Final Touches on Your Chocolate Raspberry Cups
Step 9: Presentation and Enjoyment
Now that you’ve successfully crafted these gorgeous Chocolate Raspberry Cups adventurously layered with rich dark chocolate and sweet-tart raspberry goodness, it’s time for presentation! Consider placing them on a beautiful serving platter lined with fresh mint leaves or even some extra raspberries scattered around for color contrast—after all, we eat with our eyes first! You could even dust them lightly with powdered sugar for an elegant touch—or how about drizzling some leftover melted chocolate on top?
Remember, these cups are not just desserts; they’re little tokens of joy meant to bring people together. Whether you’re enjoying them during family gatherings or sharing them at brunch with friends (I promise you they’ll be a hit!), each bite embodies warmth and love that only comes from crafting something homemade. So gather around with your loved ones and savor each moment—you deserve every exquisite morsel!
Tips for Success:
Before I let you go off into your own kitchen adventures armed with this recipe for Chocolate Raspberry Cups, here are just a few final pointers: Always taste as you go! Adjust sweetness levels according to personal preference because every palate is different. Also, don’t hesitate to experiment with flavors—think about adding hints of vanilla extract or almond extract into your raspberry filling for an added depth.
Lastly—and perhaps most importantly—enjoy yourself during this process! Cooking should always be fun and fulfilling; embrace each step as part of a beautiful journey towards creating something deliciously memorable. Happy cooking!
Storage and Enjoyment Tips for Your Chocolate Raspberry Cups
Now that your Chocolate Raspberry Cups are beautifully crafted and ready to be enjoyed, let’s talk about how to savor these delightful bites over the next few days! These little treasures make for a perfect sweet treat during afternoon slumps or as a special dessert after dinner. But what happens if you find yourself with leftovers? Don’t worry, I’ve got you covered!
Storing Leftover Chocolate Raspberry Cups
To keep your Chocolate Raspberry Cups fresh and delicious, store them in an airtight container. This is absolutely paramount because exposure to air can lead to the chocolate losing its luscious sheen and texture. I suggest placing a piece of parchment paper between layers if you’re stacking them, which helps avoid any sticky mishaps. They’ll stay perfectly fine in the refrigerator for up to a week, but trust me when I say they are best enjoyed within the first few days when all those flavors are at their peak! If you’re worried about maintaining their quality, consider placing a slice of bread in the container—this little trick helps maintain moisture without compromising the chocolatey goodness. When you take one out after storage, expect a slight firming of the chocolate but still an utterly intoxicating burst of flavor from that raspberry filling!
Freezing Chocolate Raspberry Cups for Later
If you’re looking to enjoy your Chocolate Raspberry Cups even longer, freezing is an excellent option! Just place them in a single layer on a baking sheet until they’re solid, then transfer them into a freezer-safe zip-top bag or container. This ensures they won’t stick together and makes it easy to grab just one (or two!) whenever the craving strikes. They’ll keep wonderfully frozen for up to three months. When you’re ready to indulge again, pull them from the freezer and let them sit at room temperature for about 10-15 minutes; this way, you’ll experience that delightful contrast of textures—the chocolate will soften just enough while the raspberry filling remains refreshingly cool. The convenience of having these sweet bites at your fingertips is simply fantastic!
Chocolate Raspberry Cups
Chocolate Raspberry Cups are a delightful fusion of rich dark chocolate and tart raspberry filling that create an exquisite dessert experience. Each bite offers a velvety chocolate shell encasing a luscious, fruity center. Perfect for any occasion, these treats are not only easy to prepare but also make an elegant impression at gatherings or as a sweet indulgence after dinner. With just a handful of simple ingredients, you can whip up these irresistible cups that promise to bring joy to your taste buds.
- Prep Time: 15 minutes
- Cook Time: 10 minutes
- Total Time: 25 minutes
- Yield: Approximately 8 servings 1x
- Category: Dessert
- Method: No-bake
- Cuisine: American
Ingredients
- 6 oz raspberries (fresh or frozen)
- 1 tbsp chia seeds
- 2 tsp sweetener of choice (maple syrup or agave nectar recommended)
- 6 oz dark chocolate chips (or chocolate bars)
- Optional: 1 tsp vegetable or melted coconut oil
Instructions
- In a small saucepan, mash the raspberries and mix in chia seeds and sweetener over low heat until heated through and bubbling gently.
- Melt the dark chocolate using a double boiler or microwave until smooth; add oil if desired for extra creaminess.
- Line mini cupcake liners or candy molds with melted chocolate, ensuring sides are coated evenly.
- Spoon raspberry filling into each mold, then cover with additional melted chocolate.
- Refrigerate or freeze until set, about 15-30 minutes.
- Carefully unmold and enjoy!
Nutrition
- Serving Size: 1 cup (30g)
- Calories: 160
- Sugar: 9g
- Sodium: 2mg
- Fat: 10g
- Saturated Fat: 6g
- Unsaturated Fat: 4g
- Trans Fat: 0g
- Carbohydrates: 17g
- Fiber: 3g
- Protein: 2g
- Cholesterol: 0mg