Baked Blackened Cod
When I think about cooking, it transcends just the act of preparing food; it’s an experience that envelops you in warmth and nostalgia. Each dish tells a story, whispers secrets from generations past, and beckons you to savor every bite. Today, I’m beyond excited to share with you my cherished recipe for Baked Blackened Cod. Imagine golden fillets of cod, kissed by the heat of a sizzling skillet, cloaked in a smoky and slightly spicy blackened crust that crackles with every mouthful. The moment you take your first bite, you’ll be enveloped in a symphony of flavors that dance on your palate—richness from the butter, a hint of heat from the spices, all harmonizing beautifully with the delicate fish. This isn’t just dinner; it’s an invitation to indulge in something profoundly satisfying.
This recipe embodies everything I adore about weeknight meals: it’s quick, straightforward, and utterly delightful. With just a handful of ingredients and ready in under 20 minutes, Baked Blackened Cod is perfect for those busy evenings when you crave something wholesome yet exciting. It’s one of those dishes that can elevate any ordinary day into something extraordinary. So grab your apron, and let’s make some magic happen!
Baked Blackened Cod: A Flavorful Escape
I can’t wait for you to try this recipe! The beauty of this dish lies not just in its simplicity but also in how the bold flavors come together to create something truly special. Whether it’s a cozy family dinner or a casual gathering with friends, this Baked Blackened Cod will impress everyone at your table. Let’s embark on this culinary journey together!
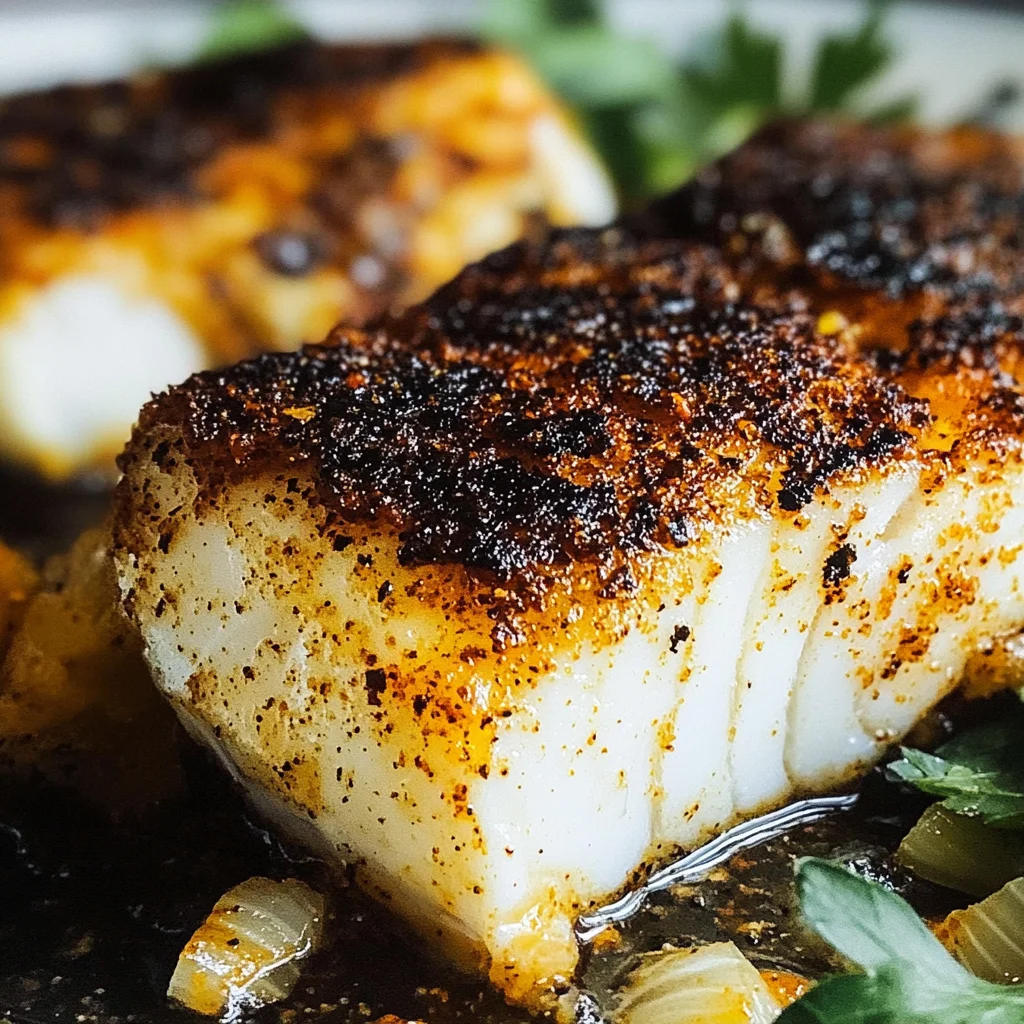
Ingredients:
As we dive into making this delicious dish, it’s important to start with quality ingredients—each one plays a vital role in creating that unforgettable flavor profile.
- 4 cod fish fillets (5-6 oz each). When selecting cod fillets, freshness is key! Look for fish that has a bright appearance and smells like the ocean—not fishy at all. The firm texture is what makes cod special; it holds up beautifully during cooking while remaining tender and flaky inside. If you’re unable to find fresh cod, frozen fillets work well too—just make sure they are fully thawed before cooking for the best results.
- 2 tablespoons olive oil (plus more for rubbing on fish). Olive oil is liquid gold in the kitchen! Not only does it add richness and depth to our dish, but it also helps create that beautiful crust we’re looking for when we blacken the cod. When purchasing olive oil, opt for extra virgin for its superior flavor profile; its robust taste will enhance our seasonings beautifully.
- 1 tablespoon butter. Butter brings an unparalleled richness to our dish; it’s what takes our blackening technique from good to absolutely phenomenal! By adding butter later in the cooking process, we can achieve that perfect balance where it adds flavor without burning—a crucial step when working over high heat.
- Blackening seasoning (homemade or store-bought). This blend is pivotal—the combination of spices creates that iconic blackened crust we’re after. If you choose homemade seasoning (which I wholeheartedly recommend), you’ll have control over the spice levels and freshness!
- 1 tablespoon paprika (smoked or sweet). Paprika gives our dish color and contributes a subtle sweetness and smokiness depending on which variety you choose. Smoked paprika adds an extra layer of complexity—think summer barbecues captured in spice form!
- ½ tablespoon onion powder. This ingredient adds depth and enhances our overall flavor without overwhelming the delicate taste of the cod itself. Onion powder provides that mellow onion flavor which is essential while allowing other spices to shine as well.
- ½ tablespoon garlic powder. Garlic powder has a way of elevating almost any dish—it brings warmth and richness without being too harsh or raw like fresh garlic can sometimes be.
- 1 teaspoon kosher salt. Salt is our friend here! It enhances all the flavors while ensuring each bite is perfectly seasoned—the key is balancing enough salt to draw out those flavors without overwhelming them.
- ½ teaspoon black pepper. Freshly cracked black pepper adds just enough heat to awaken your palate without stealing the show—trust me on this one!
- ¼ teaspoon cayenne pepper. For those who love a kick, cayenne pepper offers that tantalizing heat that lingers at the back of your throat—a little goes a long way here!
- ¼ teaspoon dried oregano & ½ teaspoon dried thyme: These herbs bring earthiness and complexity to our seasoning mix; they tie everything together beautifully while giving nods to classic Southern flavors.
Equipment You’ll Need:
Before we jump into cooking, let’s gather our trusty kitchen companions—they’ll help us navigate this culinary adventure smoothly!
- Large heavy-bottomed or cast iron skillet: This tool is non-negotiable when it comes to achieving that perfect sear on our cod fillets! A cast iron skillet retains heat exceptionally well, allowing us to create that coveted blackened crust without losing temperature during cooking.
- Small mixing bowl: For blending our spices together before applying them to the fish—this step ensures even distribution so every bite bursts with flavor!
- Paper towels: These are essential for patting down our cod fillets before seasoning; drying them will help achieve better browning as moisture can hinder that beautiful crust we’re after.
Now that we have everything set up let’s delve into preparing this gorgeous Baked Blackened Cod!
Step 1: Crafting Your Spice Symphony
In a small bowl, begin by mixing all your blackening spices until they are combined evenly—it’s like assembling an orchestra where each instrument plays its part flawlessly! Make sure there are no clumps because we want every spoonful of spice to sing on our fish fillets! If you’re using store-bought seasoning instead, feel free to adjust based on personal preference—but I promise you’ll find joy in creating your own blend!
Step 2: Preparing Your Canvas
Next up is preparing our beautiful cod fillets: gently pat each one dry with paper towels—this step may seem small but trust me—it’s absolutely paramount for achieving that gorgeous crust! After drying them off thoroughly, rub each side with about 1 teaspoon of olive oil—this not only helps the spices adhere but also contributes additional richness during cooking.
Step 3: Coating with Flavor
Once your fish is prepped and glistening with oil, generously coat both sides of each fillet with the prepared blackening seasoning mix—don’t be shy here! You want them fully enveloped so every bite offers an explosion of flavor! Give them a gentle shake after coating to remove any excess spice; too much can lead to bitterness rather than enhancing their natural taste.
Step 4: Searing Perfection
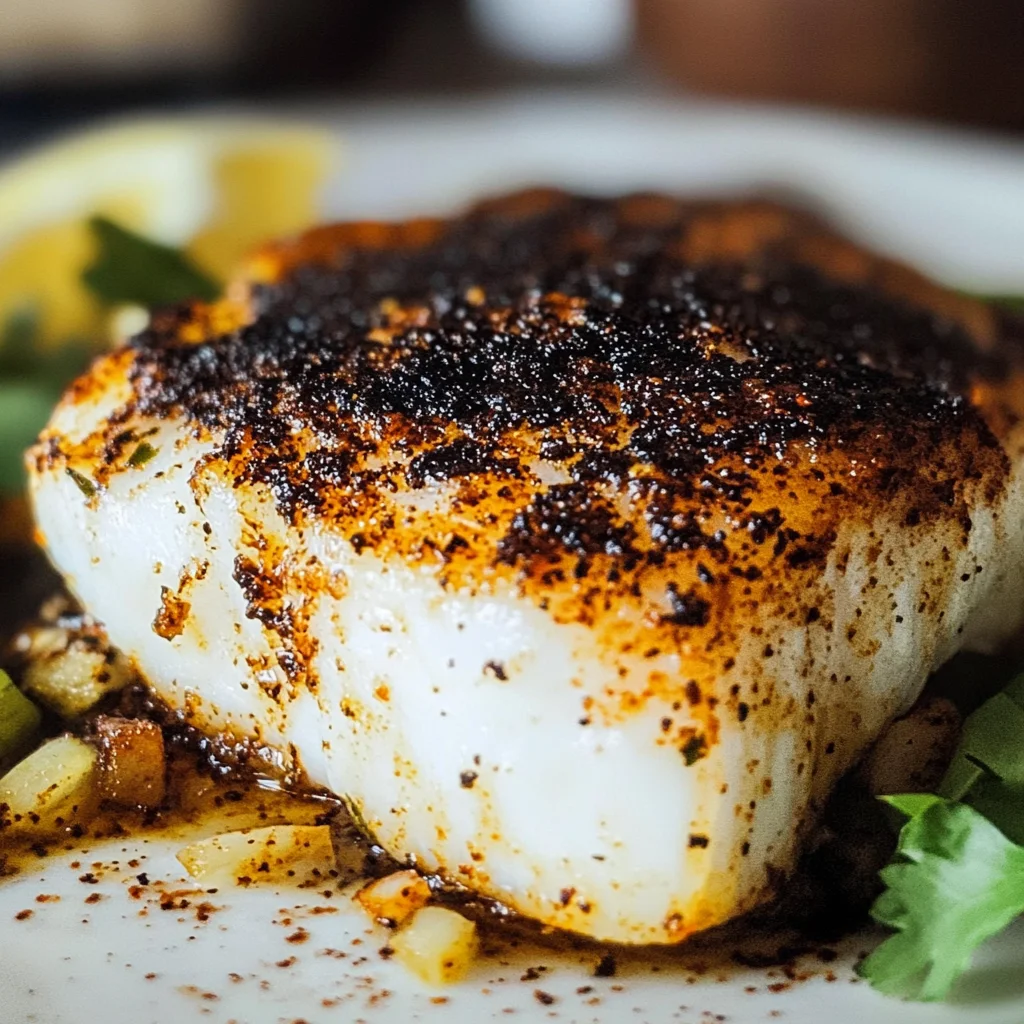
Heat up your skillet over medium-high heat until it’s hot enough that water droplets dance across its surface—that’s when you know it’s time! Drizzle some olive oil into the pan followed by carefully placing your coated fillets down gently—it should sizzle excitedly as they’re introduced to their new environment! Cook them undisturbed for about 3–5 minutes until they develop an intoxicating deep color—the smell wafting through your kitchen will be nothing short of heavenly!
Keep these steps close at hand as you embark on making Baked Blackened Cod—the end result will undoubtedly make every effort worthwhile! Are you feeling excited? I know I am!
Baked Blackened Cod: A Culinary Delight
Ah, my friends, we’ve already embarked on a delightful journey with our Baked Blackened Cod, but let’s not rush this. The anticipation of a meal is half the pleasure, don’t you think? Now that we have our cod fillets perfectly seasoned and ready to go, it’s time to dive deeper into the cooking process. Trust me on this; the steps we’re about to take will transform simple ingredients into something truly extraordinary.
Step 5: Searing to Perfection
Now that we’ve got our cod fillets well-seasoned and prepped, it’s time for the magic to happen in the skillet. Heat your trusty cast-iron skillet over medium-high heat, and pour in a couple of tablespoons of olive oil. As the oil begins to shimmer, it’s a clear sign that it’s heating up beautifully—a crucial moment because proper searing is what gives our fish that delectable blackened crust! You’ll want to listen for that satisfying sizzle as you lay your cod in the pan; it’s music to your ears, isn’t it?
Once the fish hits the skillet, avoid overcrowding; if your pan isn’t big enough, cook in batches. This step is non-negotiable because if you crowd the pan, you risk steaming rather than searing—an outcome we absolutely want to avoid! Let those fillets cook undisturbed for about 3-5 minutes. During this time, keep a close eye on them; you’re looking for that rich black color on the spice rub. When they look like they’ve transformed into little nuggets of flavor-packed bliss, it’s time to add butter. Just a tablespoon will do—the addition of butter at this stage helps enhance richness and adds an extra layer of flavor without burning since we’re adding it later.
Step 6: The Turn – Flipping with Care
After those glorious first few moments in the pan, it’s time for what I like to call “the flip.” Gently nudge your spatula underneath one of the fillets and carefully turn it over—this is where your patience pays off! You should see a beautifully charred crust forming on top; it will have taken on an invitingly dark hue with hints of red from the paprika and spices. As you do this, remember that cooking times can vary slightly based on how thick your fillets are; they typically need just another 1-2 minutes on this side.
What makes flipping so special? Well, it’s not just about cooking both sides evenly; it’s also about letting flavors mingle and deepen during their short time in that hot skillet. If done correctly, your cod should now be flaky and cooked through—perfectly tender yet firm enough not to fall apart when served. To check doneness without cutting into it (which is a no-no), gently press down on the top; if it flakes easily with a fork, you’re golden!
Step 7: The Finale – Serving Up Joy
Once your fish is cooked through—and trust me when I say you’ll know by that intoxicating aroma wafting through your kitchen—it’s time to plate up! Remove those beautiful cod fillets from the skillet with care; they deserve all the love and attention after such a vigorous cooking process! Place them gently onto a warm plate, allowing any residual juices to stay nestled around them for added moisture.
I always recommend serving this dish alongside fluffy white rice or perhaps couscous—something that can soak up all those lovely flavors—and don’t forget a vibrant green salad on the side for balance! There’s something incredibly fulfilling about pairing this buttery fish with fresh greens tossed in a light vinaigrette; it adds dimension both visually and taste-wise. And trust me on this—every bite will be an explosion of flavors dancing across your palate!
Step 8: Enjoying Every Bite – The Perfect Moment
Now comes one of my favorite parts—savoring each bite of your creation! As you sit down at your table (or wherever you enjoy meals), take a moment to appreciate what you’ve accomplished. Feel free to sprinkle some fresh herbs over your cod if they’re available—a bit of parsley or cilantro can elevate its presentation even more! And as you dig in, pay attention to how each component sings together—the flaky texture of the fish meets that slightly spicy blackened crust while being enveloped by delicious buttery goodness.
It’s not just food; it’s an experience—a true testament to how simple ingredients can come together harmoniously when given love and care during preparation. So gather around with loved ones or enjoy some quiet time alone with this dish—you’ve earned every satisfying bite!
Conclusion:
As we wrap up this wonderful journey through my cherished recipe for Baked Blackened Cod, I hope you’re feeling as excited as I am about bringing this dish into your home! There’s something truly magical about how simple ingredients can come together to create such an extraordinary symphony of flavors. The combination of buttery cod paired with that slightly spicy blackened crust creates a texture contrast that is profoundly satisfying. You will taste the love and care baked right into every single bite!
This recipe isn’t just about filling your belly; it’s about creating joy in the kitchen. It’s perfect for weeknight dinners when time is short but satisfaction is non-negotiable. Picture yourself pulling those golden fillets from the oven—their tantalizing aroma wafting through your kitchen like a warm embrace—and imagine sharing this meal with loved ones gathered around your table. Whether it’s an intimate family dinner or a casual get-together with friends, I promise you this dish will shine on any occasion.
And speaking of pairings—imagine savoring one of these delectable cod fillets alongside fluffy jasmine rice that soaks up all those divine juices or perhaps nestled next to a crisp green salad tossed with zesty lemon vinaigrette that cuts through the richness beautifully. For an afternoon pick-me-up, consider serving it with light quinoa salad bursting with vibrant veggies; oh, what a burst of freshness! And don’t forget—a dollop of homemade tartar sauce or even a squeeze of lemon can elevate this dish into pure bliss.
Feeling adventurous? This recipe is wonderfully adaptable! Add some zest by swapping out spices or infusing other flavors like lemon pepper or even herbs de Provence if that’s more to your liking—every variation brings its own unique twist while still honoring that beautiful cod! I invite you to not only try my version but also make it yours; add personal touches that reflect your tastes and share them with me—I’d love to hear how you put your spin on this delightful dish!
Baked Blackened Cod
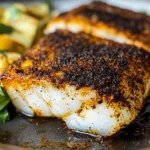
Indulge in the rich flavors of Baked Blackened Cod, a quick and delightful dish perfect for weeknight dinners. This recipe features tender cod fillets coated in a spicy blackening seasoning that creates a mouthwatering crust, all while being ready in just 20 minutes! With a combination of aromatic spices and a touch of butter, each bite is an explosion of flavor that promises to elevate your dinner experience. Serve it alongside fluffy rice or a vibrant salad for a wholesome meal that will impress family and friends alike. Dive into this culinary adventure and discover how easy it is to create something extraordinary!
- Prep Time: 10 minutes
- Cook Time: 10 minutes
- Total Time: 20 minutes
- Yield: Serves 4
- Category: Dinner
- Method: Frying
- Cuisine: Seafood
Ingredients
- 4 cod fillets (5–6 oz each)
- 2 tablespoons olive oil
- 1 tablespoon butter
- Blackening seasoning mix (homemade or store-bought)
- 1 tablespoon paprika (smoked or sweet)
- ½ tablespoon onion powder
- ½ tablespoon garlic powder
- 1 teaspoon kosher salt
- ½ teaspoon black pepper
- ¼ teaspoon cayenne pepper
- ¼ teaspoon dried oregano
- ½ teaspoon dried thyme
Instructions
- In a small bowl, combine the blackening seasoning with paprika, onion powder, garlic powder, salt, black pepper, cayenne pepper, oregano, and thyme.
- Pat the cod fillets dry with paper towels and rub each side with olive oil.
- Generously coat both sides of the fillets with the blackening seasoning mix.
- Heat a cast-iron skillet over medium-high heat and add olive oil. Once hot, place the fillets gently in the skillet.
- Cook undisturbed for about 3–5 minutes until they develop a deep color; then add butter to the pan.
- Flip the fillets carefully and cook for an additional 1–2 minutes until cooked through.
- Serve immediately with your choice of sides.
Nutrition
- Serving Size: 1 cod fillet (157g)
- Calories: 290
- Sugar: 0g
- Sodium: 740mg
- Fat: 16g
- Saturated Fat: 4g
- Unsaturated Fat: 12g
- Trans Fat: 0g
- Carbohydrates: 4g
- Fiber: 0g
- Protein: 32g
- Cholesterol: 80mg