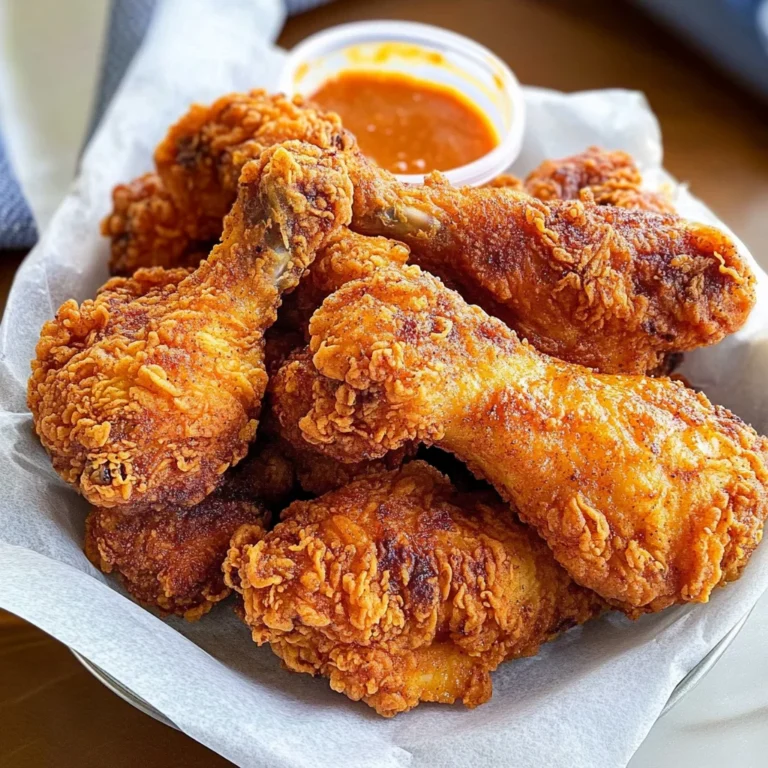
Best Chicken Shawarma Recipe with Homemade Marinade
There’s something utterly enchanting about the way cooking can weave together memories, flavors, and cultures. It’s like a warm hug on a plate, and when it comes to my Best Chicken Shawarma Recipe with Homemade Marinade, I promise you’ll find it to be an experience that transcends the ordinary. The moment those marinated chicken thighs hit the grill, they release an intoxicating aroma that dances through the air, pulling everyone into the kitchen like moths to a flame. Each bite is a celebration of bold spices — coriander, cumin, cardamom — that sing in harmony, creating a symphony of flavors that will make your taste buds rejoice. This dish is more than just a meal; it’s a gateway to the vibrant streets of Mediterranean markets and family gatherings where laughter fills the air.
I’ve always been captivated by the intricate dance of spices found in Middle Eastern cuisine. It tells stories of tradition and innovation, bridging generations through shared meals. What makes this recipe truly special is not just its deliciousness but also its versatility; it’s perfect for everything from casual weeknight dinners to festive gatherings. Picture serving these succulent chicken thighs wrapped in warm pita bread with fresh veggies and tangy sauces, or simply enjoyed on their own as a main feature. Trust me when I say that once you master this recipe, it will become your go-to for impressing family and friends alike.
Best Chicken Shawarma Recipe with Homemade Marinade: A Flavorful Journey Awaits
Let’s embark on this culinary adventure together! Making your own shawarma at home is not only rewarding but also incredibly fun. With each step, you’ll learn how to create richly flavored chicken that’s tender and juicy, all thanks to our homemade marinade that packs a punch yet remains approachable. So roll up your sleeves, grab your favorite apron, and let’s dive into this delightful experience!
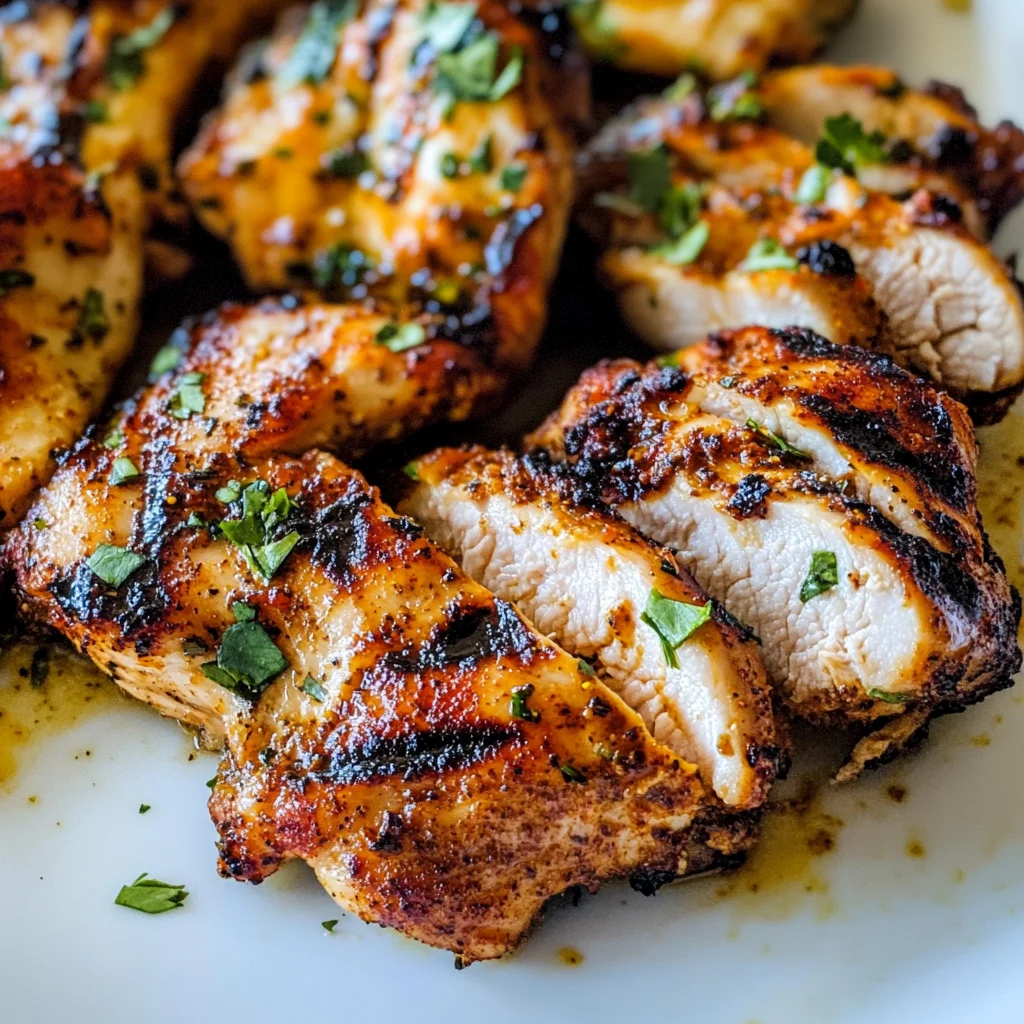
Ingredients:
As we gather our ingredients for this Best Chicken Shawarma Recipe with Homemade Marinade, I want you to feel excited about each component. Every ingredient plays its own unique role in crafting those unforgettable flavors.
- 3 lb chicken thighs (about 8 chicken thighs, boneless & skinless): Using boneless and skinless chicken thighs is absolutely paramount here because they provide rich flavor and moisture that chicken breasts simply can’t match. The fat content in thighs keeps them juicy even when grilled at high temperatures. When selecting chicken, look for thighs that are plump and have a nice pink color; this indicates freshness. If you’re looking for alternatives due to personal preference or availability, boneless skinless chicken breasts can work too but will require careful attention to avoid dry meat.
- 3/4 cup plain yogurt: This ingredient is liquid gold in our marinade! Not only does yogurt help tenderize the chicken through its lactic acid content — which breaks down protein fibers — but it also adds a tangy depth that complements the spices beautifully. Always opt for full-fat plain yogurt for the best results; it creates a luscious coating that clings beautifully to the meat. If you’re vegan or dairy-free, feel free to substitute with coconut yogurt or almond yogurt for similar results.
- 1 tablespoon white vinegar: Vinegar plays a crucial role in enhancing flavors while also helping break down tough proteins in the chicken. It adds brightness and balances out the richness of the yogurt and olive oil beautifully. If you don’t have white vinegar on hand, apple cider vinegar can serve as an excellent alternative while adding its own subtle sweetness.
- 5 cloves garlic (minced): Garlic brings an utterly intoxicating aroma that infuses the marinade with flavor! The key here is to mince your garlic finely; this ensures even distribution throughout the dish so every bite bursts with garlicky goodness. Fresh garlic is always best; if you’re in a pinch, you could use garlic powder as an alternative but remember it won’t have quite the same impact.
- 1 tablespoon coriander powder: This spice offers a warm citrusy note that complements our other spices perfectly! Coriander has been used for centuries in Middle Eastern cooking; it brings both depth and brightness to our marinade. When purchasing coriander powder (or any dried spice), always opt for whole spices if possible and grind them fresh at home — this enhances their fragrant oils significantly!
- 1 tablespoon cumin powder: Cumin adds an earthy richness that’s essential in creating authentic shawarma flavors. It pairs wonderfully with coriander and provides warmth without heat — perfect for those who may not enjoy spicy dishes! Again, grinding whole seeds will yield superior flavor if you’re feeling adventurous.
- 2 teaspoons cardamom powder: Cardamom might seem like an unusual addition but trust me; it truly elevates this dish! Its sweet-spicy notes add complexity that rounds out our spice blend beautifully—it’s what makes people ask “What’s that special flavor?” when they take their first bite! Use freshly ground cardamom if you can find it; it’s far more aromatic than pre-ground versions.
- 1 tablespoon chili powder: This ingredient brings warmth without overwhelming heat; it’s essential for achieving that classic shawarma kick! Look for mild chili powder blends unless you’re up for some extra spice adventures!
- 1 tablespoon onion powder: Onion powder provides subtle sweetness and umami depth while ensuring even flavor distribution throughout our marinade—no raw onion bits here! It’s especially useful if you’re short on fresh onions or want an easier prep time.
- 1 tablespoon smoked paprika: Ahh, smoked paprika — how I adore thee! This ingredient adds not only color but also a lovely smoky undertone reminiscent of food cooked over open flames—which perfectly complements our grilling method later on!
- 2 tablespoons lemon juice: Freshly squeezed lemon juice brightens every ingredient we’ve added so far while providing acidity necessary to balance out richer components like olive oil and yogurt. Make sure you squeeze fresh lemons; bottled lemon juice lacks vibrancy!
- 1/4 cup olive oil: Olive oil acts as our binding agent here—it helps meld all these incredible flavors together while adding richness necessary for grilling success! Use high-quality extra virgin olive oil; it’ll yield better flavor than generic brands.
- 2 teaspoons sea salt: Salt is non-negotiable when cooking meat—it enhances natural flavors while helping retain moisture during cooking! Choosing sea salt over table salt gives you more control over seasoning due to its larger grain size—just remember to adjust accordingly based on your preference!
- 2 teaspoons black pepper: Freshly cracked black pepper adds subtle heat plus complexity—it’s what takes dishes from good-to-great by enhancing other flavors present without overpowering them!
Now that we’ve gathered all these beautiful ingredients together let’s move forward into choosing our trusty equipment needed for success!
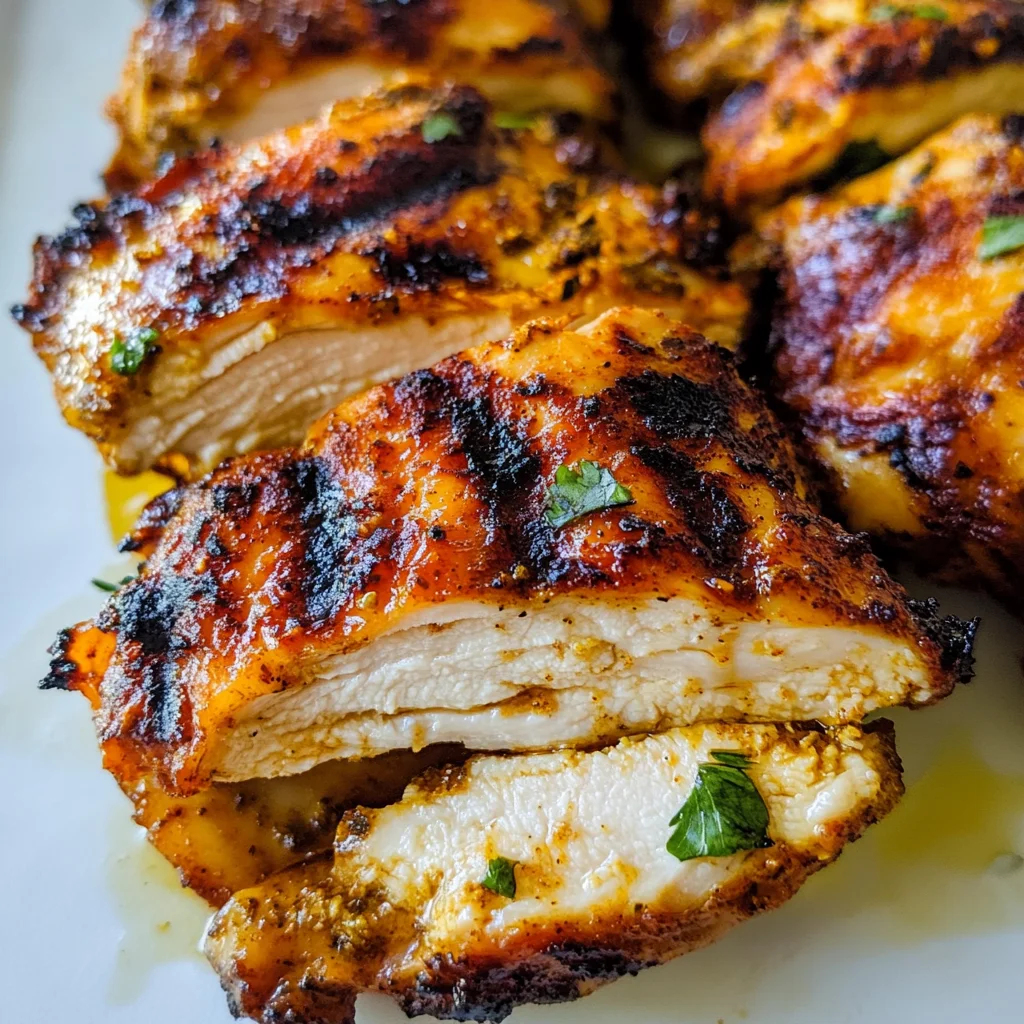
Equipment You’ll Need:
Having the right tools makes every cooking experience smoother—and trust me when I say they’re essential partners in creating something wonderful! While not technically ingredients, these items will help elevate your cooking game significantly.
- Grill or Grill Pan: Your grill will be where all magic happens! Whether using outdoor charcoal or gas grills—or even stovetop grill pans—the key is achieving high heat so those beautiful char marks form while locking juices inside each piece of meat! If using electric options like indoor grills instead ensure proper preheating beforehand!
- Mixing Bowl or Zip Bag: A large mixing bowl works well for combining marinades easily—but don’t underestimate zipper bags either! They’re fantastic because they allow easy mixing plus save space within your fridge during marination times—just remember not overfill them!
- Meat Tenderizer (optional): Tenderizing isn’t mandatory but helps ensure uniform thickness across all pieces so they cook evenly—and who doesn’t love tender meat? If opting out make sure cutting them into small pieces before marinating instead!
- Sharp Knife & Cutting Board: A sharp knife paired with sturdy cutting board ensures clean cuts during preparation plus safe handling practices throughout process—investing slightly more into quality knives pays off big time long-term!
Now we’re ready to bring everything together through some simple yet effective steps leading us toward deliciousness ahead…
Step 1: Tenderizing Your Chicken Thighs
Begin by placing those lovely chicken thighs onto your cutting board—a little tenderizing goes a long way in ensuring we achieve maximum flavor absorption later on! Cover them gently with plastic wrap (this keeps things tidy) before using either a meat mallet or rolling pin—don’t worry too much about perfection here; we’re simply aiming for even thickness across each piece which promotes better cooking results overall later down line!
Step 2: Marinating Magic
In either large mixing bowl or zip bag—whichever suits you best—combine those gorgeous chicken thighs alongside yogurt plus minced garlic along with all dry spices including coriander powder,cumin powder etc… Take time stirring thoroughly until everything melds together harmoniously—that’s where true magic happens folks! Once mixed well seal tightly (if using bags), then place inside refrigerator letting rest ideally overnight (but at least 3 hours minimum)—this allows flavors deepen enriching every bite immensely!
Step 3: Grilling Glory
Once marination period finishes pull out those flavorful gems awaiting us—it’s time fire up grill reaching medium/high heat levels before placing marinated chicken directly onto grates (making sure not overcrowd!). Cook each side around 8–10 minutes until nicely charred outside yet cooked through inside—internal temperature should hit around 165°F ensuring juicy perfection awaits upon slicing open post-grilling adventure!
Step 4: Slicing Time!
Once grilled remove from heat allowing resting briefly before diving headfirst into slicing process—you’ll want thin strips maximizing presentation potential whilst retaining tenderness within each piece ultimately resulting deliciousness overall experience too!! Serve however pleases heart most-warm pita wraps filled crunchy veggies topped creamy tahini sauce perhaps? Whatever choices made just remember cherish moments shared around table enjoying exceptional feast created lovingly through efforts put forth today!!
With these steps guiding us forward let’s continue exploring further delights ahead…
Step 5: Marinating the Chicken – The Heart of Flavor
Now that you’ve tenderized those beautiful chicken thighs, it’s time for the magic to happen: marinating. This step is absolutely crucial; it’s where the chicken absorbs all those wonderful spices and yogurt, transforming into an utterly intoxicating dish that will leave your taste buds dancing! In a large bowl or a sturdy zip-top bag, you’ll add your chicken thighs alongside the yogurt, minced garlic, coriander powder, cumin powder, cardamom powder, chili powder, vinegar, onion powder, smoked paprika, lemon juice, olive oil, sea salt, and black pepper. Don’t be shy—get in there with your hands and massage everything together. You want every piece of chicken coated in this fragrant mixture.
Let me tell you why marinating for a good 3-5 hours (or even better—overnight) is essential: it not only infuses the meat with flavor but also helps to tenderize it further thanks to the acidity in the yogurt and lemon juice. As the chicken rests in this flavorful bath, the spices begin to penetrate deeply into the fibers of the meat. If you’re wondering how to maximize this effect—trust me on this—patience is key! The longer you allow your chicken to soak up these flavors, the more profound and satisfying each bite will be. So pop that bowl or bag into your refrigerator and let time do its thing; I promise you it will be worth it.
Step 6: Preparing Your Grill – Setting Up for Success
While your chicken is basking in its marinade bliss, it’s time to turn your attention to your grill. Whether you’re using a gas grill or charcoal (which brings its own delightful smokiness), preheating is absolutely paramount! You’ll want to set your grill to medium-high heat; aim for about 400°F (204°C). This temperature allows for that perfect sear on the outside while ensuring that juicy goodness remains locked inside. If you’re using charcoal, let those coals get nice and ashy before placing your grate over them.
As you prepare your grill area, take a moment to brush your grates with a little olive oil or non-stick cooking spray; this non-negotiable step prevents any stickage and ensures those beautiful grill marks are etched into each piece of chicken—a hallmark of grilling success! While waiting for the grill to reach optimal temperature, keep an eye on it because once it’s hot enough, we’re ready to bring out that marinated chicken. Trust me when I say that hearing the sizzle as you place those thighs on the grill will fill your kitchen (or backyard) with an aroma so inviting that even passersby might just stop and wonder what magic is happening inside.
Step 7: Grilling Chicken Thighs – The Moment of Transformation
Now comes one of my favorite parts—the grilling! Carefully place each marinated chicken thigh onto the preheated grill grates. You should hear an immediate sizzle; that sound is music to any cook’s ears! Grill each side for about 8-10 minutes; however, don’t just set a timer and walk away—this is where attentiveness pays off big time. Use tongs to gently flip each piece when they develop a deliciously golden-brown crust with beautiful char marks. If you’re unsure about doneness at any point during grilling, simply insert an instant-read thermometer into the thickest part of a thigh; you’re aiming for an internal temperature of 165°F (74°C).
Why do we need this careful attention? Cooking times can vary depending on factors like thickness and heat intensity. Overcooking can lead to dry meat—something we absolutely want to avoid! So keep an eye on those thighs; their juiciness depends on how well you manage that heat. Once fully cooked through and beautifully charred on both sides, remove them from the grill and allow them to rest for about five minutes before slicing. This resting period is transformative because it allows juices within the meat to redistribute evenly rather than spilling out onto your cutting board—resulting in every bite being as succulent as possible.
Step 8: Slicing & Serving – The Grand Finale
After letting those grilled beauties rest, it’s finally time for slicing! Using a sharp knife (I always prefer my trusty chef’s knife), cut each thigh against the grain into strips about half an inch thick. This technique is important because slicing against the grain shortens muscle fibers which makes every bite tender rather than chewy—a truly extraordinary experience! As you slice through that perfectly cooked chicken, pay attention to how juicy they look; you’ll see glistening juices pooling along each cut which speaks volumes about how well you’ve prepared them.
Now comes one final touch—the serving! These grilled slices are incredibly versatile; you can serve them tucked into warm pita bread with crisp lettuce and fresh tomatoes drizzled with creamy tahini sauce or stacked atop a vibrant salad bursting with colors and textures. You could even lay these slices over rice infused with saffron or spices if you’re looking for comfort in a bowl! Whatever route you choose here—don’t forget to garnish with fresh herbs like parsley or mint—they add not only vibrant color but also a refreshing lift that complements those rich flavors beautifully.
Conclusion:
As we wrap up our savory journey through crafting the Best Chicken Shawarma Recipe with Homemade Marinade, I can’t help but feel excited for you! Each step has been infused with love and passion for cooking—this isn’t just any ordinary recipe; it’s a celebration of vibrant spices dancing together in harmony! The tender chicken paired with that luscious marinade creates an explosion of flavors that will transport you straight to a bustling Middle Eastern market. It’s these special combinations that elevate simple ingredients into something truly extraordinary.
Why should you make this recipe? Beyond its mouthwatering taste lies a wealth of joy in preparing it! It’s versatile enough for any occasion—from casual weeknight dinners where you need something quick yet satisfying, to festive gatherings where you impress friends and family alike. Just imagine pulling those juicy skewers off the grill or out of the oven; the enticing aroma wafting through your home, mingling with laughter and conversation—it’s moments like these that create lasting memories.
When it comes time to serve your beautiful shawarma, think outside the box! Imagine savoring each bite wrapped in warm pita bread alongside a crisp tabbouleh salad bursting with freshness. Or picture yourself enjoying some fragrant couscous on the side while drizzling tangy tahini sauce over everything—a culinary experience that promises satisfaction on so many levels! For an afternoon pick-me-up, try pairing leftovers with creamy hummus or crunchy veggie sticks for a delightful snack.
Feeling adventurous? This recipe is wonderfully adaptable; try swapping out spices based on what you have on hand or experimenting with marinating other proteins like turkey or tofu for plant-based options. You could even turn these flavors into a vibrant rice bowl topped with pickled vegetables—or simply embrace creativity by crafting delectable wraps filled with shawarma-inspired fillings. I encourage you to make this recipe yours. Share your experiences and variations because cooking is all about connection—between ingredients, moments shared around the table, and cherished memories made together!
Best Chicken Shawarma Recipe with Homemade Marinade
Embark on a culinary adventure with this vibrant Best Chicken Shawarma Recipe featuring a homemade marinade that transforms ordinary chicken thighs into an extraordinary dish. Bursting with flavors from aromatic spices like cumin, coriander, and cardamom, this recipe not only captivates the senses but also brings friends and family together around the table. The marinated chicken thighs are grilled to juicy perfection, making them perfect for wrapping in warm pita bread or serving over rice and fresh vegetables. Simple yet satisfying, this delightful dish is perfect for any occasion, whether it’s a weeknight dinner or a festive gathering.
- Prep Time: 25 minutes
- Cook Time: 20 minutes
- Total Time: 45 minutes
- Yield: About 6 servings 1x
- Category: Main
- Method: Grilling
- Cuisine: Middle Eastern
Ingredients
- 3 lb boneless, skinless chicken thighs
- 3/4 cup plain yogurt (or coconut/almond yogurt)
- 1 tablespoon white vinegar (or apple cider vinegar)
- 5 cloves garlic (minced)
- 1 tablespoon coriander powder
- 1 tablespoon cumin powder
- 2 teaspoons cardamom powder
- 1 tablespoon chili powder
- 1 tablespoon onion powder
- 1 tablespoon smoked paprika
- 2 tablespoons lemon juice
- 1/4 cup olive oil
- 2 teaspoons sea salt
- 2 teaspoons black pepper
Instructions
- Tenderize the chicken thighs by gently pounding them to an even thickness.
- In a large bowl or zip-top bag, combine chicken thighs with yogurt, minced garlic, all spices, vinegar, lemon juice, olive oil, sea salt, and black pepper. Mix well until thoroughly coated.
- Marinate in the refrigerator for at least 3 hours or overnight for deeper flavor.
- Preheat your grill to medium-high heat (about 400°F).
- Grill the marinated chicken thighs for approximately 8–10 minutes per side until they reach an internal temperature of 165°F.
- Allow the grilled chicken to rest for five minutes before slicing into strips.
- Serve wrapped in pita bread with fresh veggies or over rice.
Nutrition
- Serving Size: Approximately 5 oz (140g) of grilled chicken
- Calories: 300
- Sugar: 2g
- Sodium: 600mg
- Fat: 15g
- Saturated Fat: 3g
- Unsaturated Fat: 12g
- Trans Fat: 0g
- Carbohydrates: 6g
- Fiber: <1g
- Protein: 36g
- Cholesterol: 120mg