4th of July Fireworks Cookies
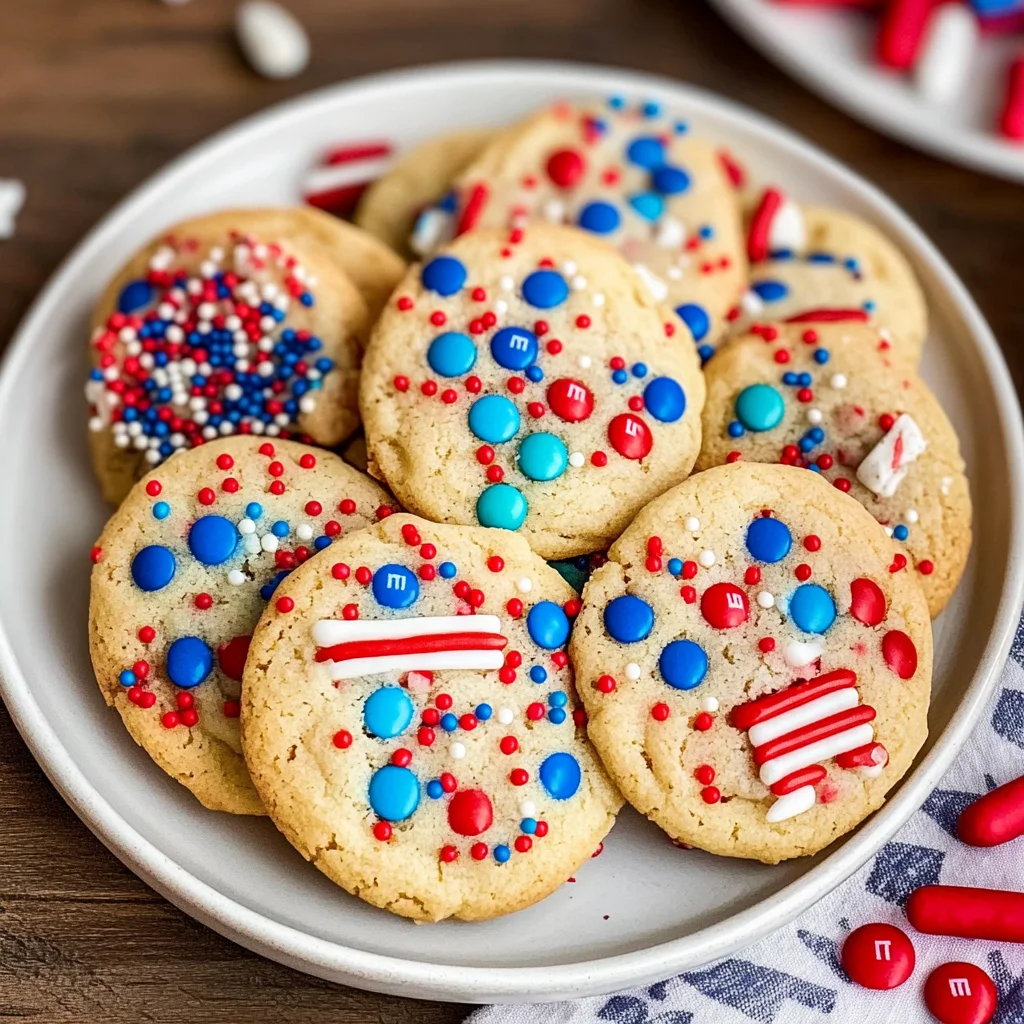
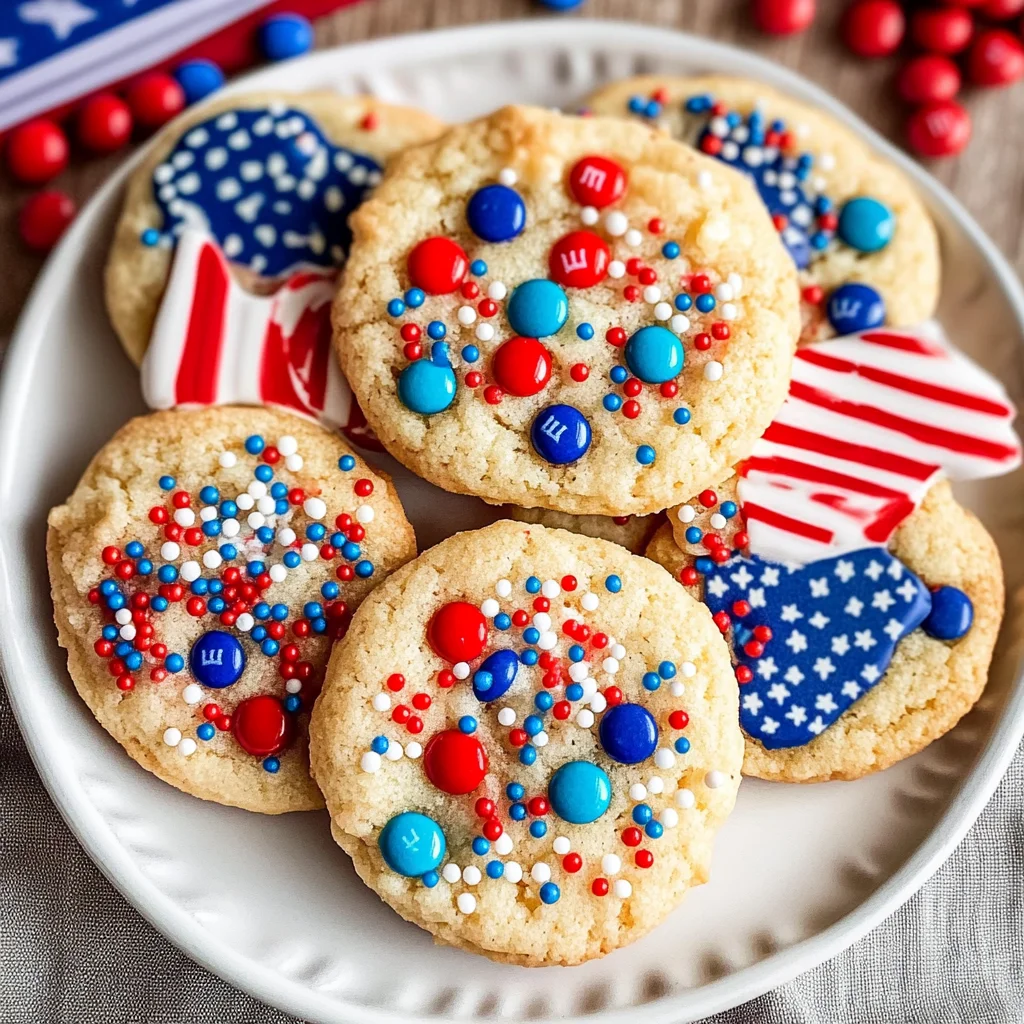
It’s that magical time of year again when the sky lights up with brilliant colors, and our hearts swell with pride and joy. The Fourth of July is not just a day on the calendar; it’s an invitation to gather with loved ones, share stories, and create memories that will last a lifetime. And what better way to celebrate this joyous occasion than with a plate full of 4th of July Fireworks Cookies? Picture this: soft, puffy cookies bursting with sweet chocolatey goodness, adorned in vibrant red, white, and blue hues. These delightful treats are more than just desserts; they embody the spirit of summer celebrations, where laughter fills the air and every bite brings a smile.
As we embark on this culinary adventure together, let me assure you that these Fireworks Cookies are incredibly easy to whip up! They require minimal effort yet yield maximum delight. I’ve always been captivated by how simple ingredients can come together to create something so festive and joyful. Each bite is a cloud-like explosion of flavors—a symphony of sweetness that dances on your palate. Trust me when I say that once these cookies make their grand appearance at your gathering, they’ll vanish faster than you can say “fireworks!” So roll up your sleeves, and let’s get started on making some unforgettable memories.
4th of July Fireworks Cookies: Celebrate with Colorful Delight
These 4th of July Fireworks Cookies are everything you need for a perfect celebration—fun, colorful, and utterly delicious! With every bite filled with soft cookie goodness and playful sprinkles, they’re bound to be the star of your holiday spread. So grab your mixing bowl and let’s bring some festive cheer into your kitchen!
Ingredients:
As we dive into our ingredient list for these dazzling cookies, remember that each component plays a vital role in creating that perfect texture and flavor balance. Let’s explore what makes each ingredient special!
- 1 – 15.25 ounce vanilla cake mix. This is the magic wand behind our cookie dough! The cake mix serves as the foundation for our cookies—bringing sweetness and moisture while also providing structure without the fuss of measuring individual flour or sugar components. You’ll want to choose a quality brand here because it sets the stage for all those scrumptious flavors we are about to unpack.
- 8 tablespoons unsalted butter, softened. Ahh, butter—the golden nectar of baking! Softening it is crucial as it allows us to cream it beautifully with our other ingredients, leading to cookies that are light yet rich at the same time. If you find yourself without unsalted butter at home, feel free to use salted butter; just reduce any additional salt in your recipe slightly.
- 1 large egg. Eggs are nature’s little binding agents—they provide structure while adding richness to our dough. Room temperature eggs incorporate more smoothly into the mixture compared to cold ones straight from the fridge. If you’re vegan or simply looking for an alternative, you can replace one egg with 1/4 cup unsweetened applesauce or a flax egg (1 tablespoon ground flaxseed mixed with 2.5 tablespoons water).
- 1 teaspoon vanilla extract. This liquid gold adds depth and warmth to our cookies that is absolutely non-negotiable! It enhances all the other flavors beautifully, making them sing together in harmonious unity. Choose pure vanilla extract over imitation for an extra-special touch; you’ll taste the difference!
- 4 ounces cream cheese, softened. Cream cheese lends a delightful tanginess while keeping our cookies wonderfully moist—think of it as adding a secret layer of richness! Ensure it’s at room temperature so it blends seamlessly into your dough; otherwise you’ll end up with pesky lumps that detract from that dreamy texture we’re going for.
- 2 cups Oreo cookie chunks (14 chocolate cream-filled). These iconic cookies add crispy texture alongside bursts of chocolatey flavor throughout each bite—it’s like having crunchy surprises hiding in soft pillows! Chop them into generous chunks so they don’t completely dissolve during baking; we want those delightful bits intact!
- 3/4 cup red, white & blue M&M’s, divided. These colorful candies aren’t just gorgeous—they’re pure fun! Their vibrant hues evoke feelings of celebration while providing bursts of chocolatey joy within each cookie. We’ll reserve half for topping later because who doesn’t love a few extra M&M’s peeking out?
- 1/2 cup red, white & blue sprinkles, divided. Sprinkles are like confetti for desserts—they bring joy and festivity wherever they appear! We’ll use them both inside our dough and on top for an eye-catching finish that’ll wow everyone at your gathering.
Equipment You’ll Need:
Before we jump into baking bliss, let’s gather our trusty tools! The right equipment not only makes cooking smoother but also elevates your experience into something truly enjoyable.
- Mixing bowl: A sturdy mixing bowl is essential for combining all those lovely ingredients without fear of spills or messes—opt for glass or stainless steel varieties which won’t retain odors or stains over time.
- Hand mixer (or stand mixer): While you can absolutely mix by hand if you’re feeling adventurous (and perhaps have strong arms!), using an electric mixer saves time and ensures everything gets combined evenly—this step is crucial for achieving that fluffy texture we adore!
- Cookie scoop: A medium-sized cookie scoop ensures uniformity in size which not only makes for prettier cookies but also guarantees they bake evenly—no more surprises where half are burnt while others remain doughy!
- Baking sheet: A good quality baking sheet helps distribute heat evenly during baking—you wouldn’t want unevenly baked cookies now would you? Line it with parchment paper to prevent sticking and ensure easy clean-up.
Preparing the 4th of July Fireworks Cookies
Step 1: Create Your Cookie Dough Base
Let’s kick off this delicious endeavor by mixing together our dry cake mix with softened butter and cream cheese until we achieve a smooth dough consistency—that’s where all the magic begins! First things first: take your mixing bowl and combine the vanilla cake mix with those velvety dollops of softened butter and cream cheese. This process is known as creaming—it’s vital because it introduces air into the mixture which will give us those lovely puffy cookies later on. I promise you’ll know you’ve reached perfection when everything looks glossy and well-blended without any lumps lurking about.
Next up is adding our large egg along with that fragrant splash of vanilla extract—yes please! This duo not only enriches flavor but also contributes moisture needed for tenderness in each bite. Beat everything together until it’s fully incorporated; you should see no streaks left behind from either egg or cream cheese at this stage—it’s crucial since inconsistency could lead to varying textures once baked.
Step 2: Mix In The Goodies
Now comes one of my favorite parts—the joyfully chaotic addition of Oreo chunks along with half those stunning red, white & blue M&M’s plus some sprinkles! Gently fold these treasures into the dough using a spatula; trust me on this—you don’t want to overmix here as doing so will deflate all that wonderful fluffiness we’ve worked so hard on creating thus far! Just aim to distribute them evenly throughout until every spoonful feels like biting into pure happiness!
After mixing in all those good things comes perhaps my least favorite part: letting our dough chill in the refrigerator for about sixty minutes (I know—it feels like forever!). But don’t rush this step; chilling allows flavors meld together beautifully while ensuring optimal texture once baked—think thick chewy clouds rather than flat pancakes!
Step 3: Preheat & Portion
While we wait patiently (deep breaths!), it’s time to preheat our oven to 350 degrees Fahrenheit—a critical step as this ensures even cooking throughout every cookie batch when finally placed inside its warm embrace! Once you hear that familiar beep signaling readiness from your oven timer after preheating has completed its delicate dance…we’ll move onto portioning out those delightful mounds using a two-tablespoon cookie scoop!
This tool becomes incredibly handy here since it guarantees uniformity across batches—no one likes getting stuck with either dinky bite-sized pieces or massive ones requiring extra chewing efforts (unless that’s what you’re going for!). Each ball should be roughly golf-ball sized before placing them onto lined baking sheets spaced adequately apart since they’ll spread slightly during baking.
Step 4: Top & Bake
As if these cookies weren’t already enticing enough—we’re going to add additional M&M’s right onto their tops along with maybe sprinkle some festive color over each mound too if desired! This finishing touch isn’t just about aesthetics though—it adds an extra crunch factor upon devouring which complements softness found within perfectly once baked through!
Now it’s finally time for these beauties go forth into their hot oven haven—bake them until edges start turning golden brown but remain slightly soft in center (about ten minutes). As tempting as it may be…don’t open up that door too soon because they need uninterrupted heat exposure initially; otherwise cool air might seep inside diminishing puffiness achieved earlier on!
Once they’re done baking away merrily indoors…remove them gently from oven letting rest briefly upon pan itself before transferring onto parchment-lined counter surfaces below—it’s crucial allowing cooling periods since residual heat allows further setting towards desired consistency while preventing unfortunate crumbly disasters later down line once touched prematurely!
And there you have it—the beginning steps toward creating unforgettable memories via delicious bites wrapped around love shared amongst friends or family members alike during special occasions such as Fourth-of-July celebrations ahead…stay tuned because we’ll continue exploring how best store these gems whilst ensuring optimum freshness maintained over next few days ahead!
Grab yourself another cup coffee/tea/water whatever tickles fancy—and let’s continue embracing summertime vibes together next round shall we?!
Crafting the Perfect 4th of July Fireworks Cookies
Now that we have our dough all mixed and ready, let’s dive deeper into the next steps to ensure your 4th of July Fireworks Cookies turn out utterly extraordinary. Trust me, every detail matters when it comes to baking magic, and I can’t wait to share these secrets with you!
Step 5: Forming the Dough Balls
Once your cookie dough is chilled, it’s time to portion it out. Using a 2-tablespoon cookie scoop is not just helpful; it’s absolutely paramount for achieving uniformity in size and shape. This means each cookie will bake evenly, allowing for that delightful soft center and slightly crisp edge that everyone loves. As you scoop the dough, you should see a lovely soft consistency that holds together beautifully. If the dough feels too sticky or wet, don’t worry! Just a gentle roll in your hands will help shape it into neat balls without much hassle.
After you’ve formed about 24 dough balls, it’s time to add those fabulous M&Ms and sprinkles on top. Press a few of the remaining M&Ms into each ball—this step isn’t just for decoration; it’s also about ensuring that every bite is bursting with flavor and color. The vibrant red, white, and blue will make these cookies pop visually, creating that festive spirit we all love during the Fourth of July celebrations. Plus, who doesn’t love an extra crunch of candy in their cookies? You can also sprinkle some extra sprinkles on top for added flair; after all, fireworks are all about spectacle!
Step 6: Baking Your Cookies to Perfection
Preheating your oven to 350 degrees Fahrenheit is crucial at this point because it ensures that your cookies will bake evenly and thoroughly. An oven that’s not hot enough might lead to flat or gooey cookies—definitely not what we’re aiming for! While your oven warms up, line a baking sheet with parchment paper or a silicone mat. This not only prevents sticking but also promotes even baking by allowing heat circulation around each cookie.
Once your oven reaches the desired temperature, arrange those adorable dough balls on your prepared baking sheet with enough space between them—about two inches apart is ideal. Why? Because as they bake, they’ll spread out beautifully into those perfect puffy shapes we’re going for! Bake them for exactly 10 minutes; they should look set but still slightly soft in the center when you take them out. This is completely normal! The residual heat from the pan will continue cooking them just enough while they cool down.
Step 7: Cooling – The Art of Patience
Now comes one of the most significant steps—cooling! When your cookies emerge from the oven looking like little golden clouds of joy, resist the urge to dive right in. Instead, let them rest on the baking sheet for about two minutes before transferring them to parchment paper on your counter. This step allows them to firm up just a tad while still retaining that fluffy texture inside—trust me; it makes a world of difference!
As they cool completely on parchment (this usually takes about 15-20 minutes), you’ll notice their texture transform from soft and fragile to perfectly chewy yet firm enough to hold their shape when you bite into one. Don’t rush this process; cooling is essential for letting those flavors meld together beautifully and achieving that ideal cookie consistency!
Step 8: Storing Your Delicious Creations
Once your 4th of July Fireworks Cookies have cooled entirely, it’s time to store them properly so they stay fresh and delightful for days—or at least until they’re all devoured! Place these gems in an airtight container; this helps lock in moisture and keep them chewy longer. I always recommend layering parchment paper between cookies if you’re stacking them—this prevents any accidental sticking together.
These cookies can last up to a week at room temperature or even longer if kept in the fridge—but I promise you they’ll be gone well before then! For an extra treat later on, consider freezing some unbaked dough balls for those unexpected cravings or surprise guests. Just scoop them onto a tray lined with parchment paper and freeze until solid before transferring them into a freezer bag. When you’re ready to bake fresh cookies again, simply pop them straight into a preheated oven without thawing—what could be easier?
Final Touches: Celebrating Your Success!
With everything said and done, I hope you feel as excited as I do about sharing these 4th of July Fireworks Cookies with family and friends this holiday season! As you bite into these colorful delights filled with creamy Oreos and chocolatey M&Ms, remember that each cookie embodies the joy of celebration—the laughter shared over good food and cherished moments spent together.
Don’t hesitate to encourage others to join in on this fun process! Baking can be such a bonding experience; why not invite loved ones over? You can bake together while reminiscing about past Fourth of July celebrations or even create new memories as you enjoy these cookies fresh from the oven. So gather everyone around—it’s time to celebrate life’s sweet moments with these festive treats!
Storage and Enjoyment Tips for Your 4th of July Fireworks Cookies
Now that your 4th of July Fireworks Cookies are baked to perfection, it’s time to dive into the delightful world of enjoying these colorful treats! Picture a sunny afternoon, surrounded by friends and family, with laughter echoing in the background as you share stories. These cookies not only bring joy but also capture the essence of celebration with their vibrant colors and flavors. But what happens when there are leftovers? Fear not! I’ve got you covered with tips to keep your cookies fresh and delicious.
Storing Leftover 4th of July Fireworks Cookies
To keep your 4th of July Fireworks Cookies as delightful as the day they were baked, it’s essential to store them properly. Place them in an airtight container; this is crucial because it locks in moisture and prevents them from becoming stale. You can keep them at room temperature for about a week, and trust me, they’ll taste just as soft and chewy as when they first came out of the oven. If you’re looking to maintain that delightful texture, consider adding a slice of bread to the container—this little trick helps keep everything moist and utterly scrumptious! After storage, the flavors meld beautifully, making each bite a little piece of heaven. For an extra touch of warmth before serving, you can pop them in the microwave for about 10 seconds; this will give them that freshly-baked feeling again, making them even more irresistible!
Freezing Your 4th of July Fireworks Cookies for Later
If you want to save some for later (or just can’t resist the urge to bake more), freezing these cookies is a fantastic option! To freeze them properly, make sure they are completely cooled down first. Arrange them in a single layer on a baking tray and place them in the freezer until they’re firm—this prevents them from sticking together. Once frozen solid, transfer these beauties into a freezer-safe bag or container. They can last up to three months in the freezer without losing their charm! When you’re ready to indulge again, simply take out however many you desire and either let them thaw at room temperature or warm them gently in the oven for that fresh-baked aroma that fills your kitchen with joy. Freezing offers incredible convenience; imagine having delicious cookies ready at a moment’s notice for unexpected guests or those late-night cravings!
4th of July Fireworks Cookies

Celebrate summer with vibrant 4th of July Fireworks Cookies! Soft & colorful treats perfect for any gathering—try this festive recipe today!
- Prep Time: 15 minutes
- Cook Time: 10 minutes
- Total Time: 25 minutes
- Yield: Approximately 24 cookies 1x
- Category: Dessert
- Method: Baking
- Cuisine: American
Ingredients
- 1 package (15.25 oz) vanilla cake mix
- 8 tablespoons unsalted butter, softened
- 1 large egg
- 1 teaspoon vanilla extract
- 4 ounces cream cheese, softened
- 2 cups Oreo cookie chunks
- 3/4 cup red, white & blue M&Ms, divided
- 1/2 cup red, white & blue sprinkles, divided
Instructions
- In a mixing bowl, combine the vanilla cake mix, softened butter, and cream cheese until smooth.
- Add in the egg and vanilla extract; mix until fully incorporated.
- Gently fold in the Oreo chunks, half of the M&Ms, and half of the sprinkles into the dough.
- Chill the dough for at least one hour in the refrigerator.
- Preheat your oven to 350°F (175°C). Line a baking sheet with parchment paper.
- Using a cookie scoop or tablespoon, portion out the dough onto the baking sheet with enough space between each ball.
- Press additional M&Ms and sprinkles on top before baking for about 10 minutes or until edges are golden brown but centers remain soft.
- Allow cookies to cool on the baking sheet for two minutes before transferring them to a wire rack.
Nutrition
- Serving Size: 1 cookie (30g)
- Calories: 132
- Sugar: 10g
- Sodium: 85mg
- Fat: 6g
- Saturated Fat: 3g
- Unsaturated Fat: 2g
- Trans Fat: 0g
- Carbohydrates: 18g
- Fiber: <1g
- Protein: 1g
- Cholesterol: 15mg