Apple Pie Egg Rolls
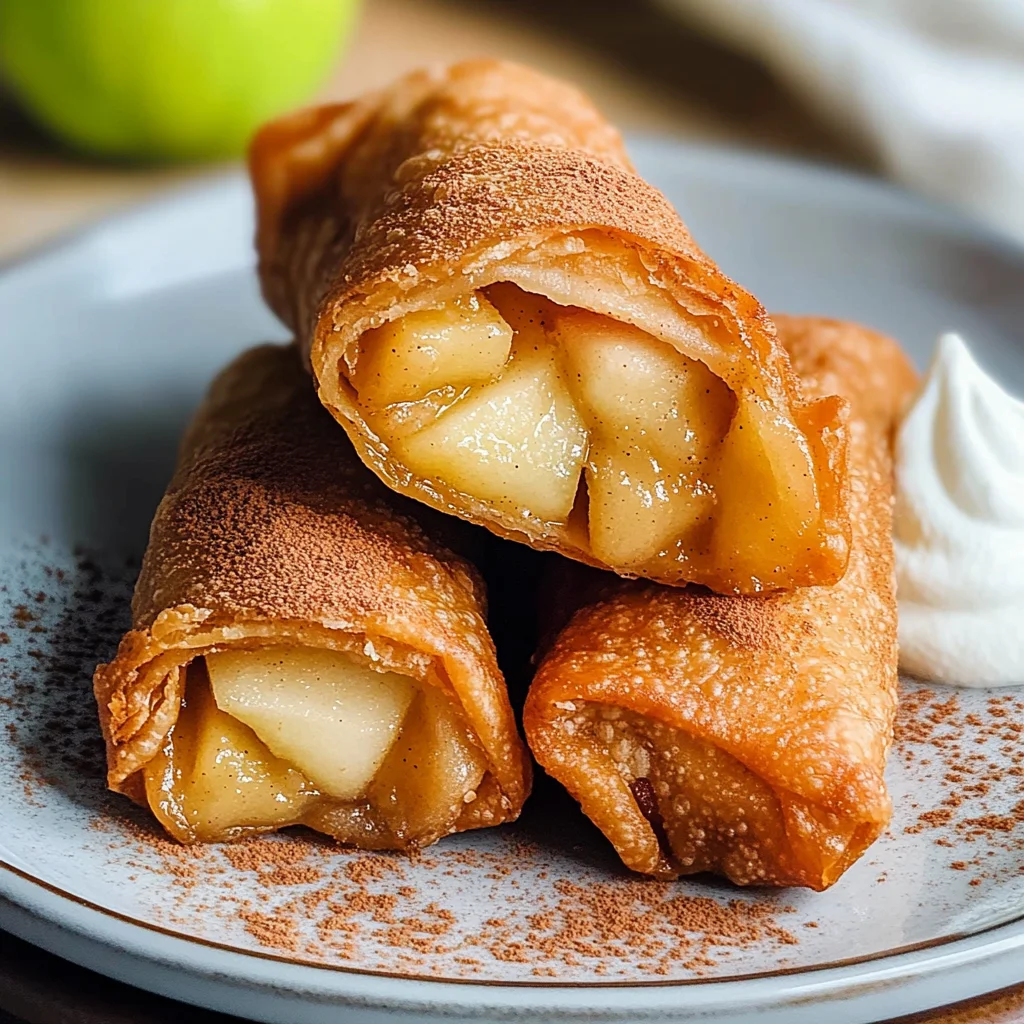
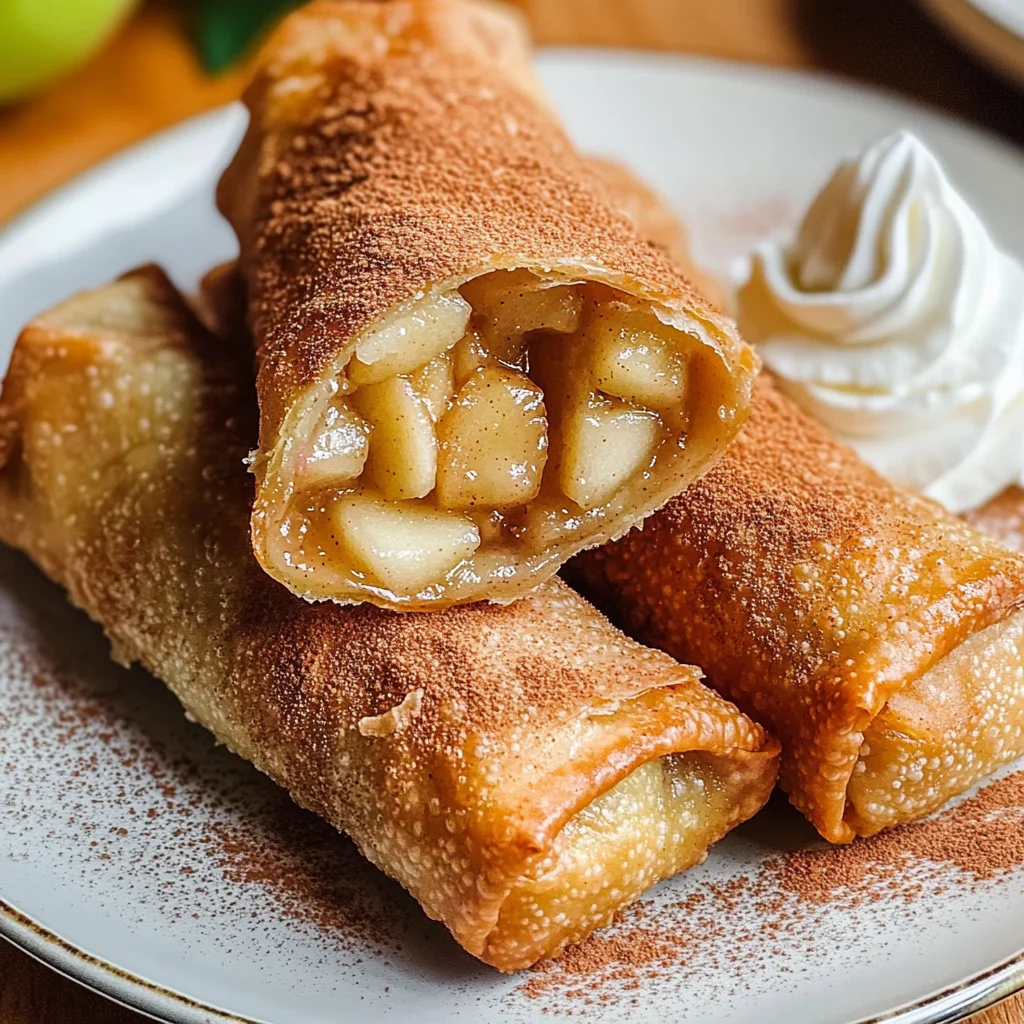
There’s something utterly magical about the scent of apples and cinnamon wafting through the kitchen, isn’t there? It transports me back to my childhood, where I’d eagerly await the arrival of fall, not just for the change in the leaves but for the promise of warm, gooey apple pie cooling on the counter. This Apple Pie Egg Rolls recipe is more than just a delightful twist on a classic dessert; it’s an experience that brings comfort and joy to any gathering. Imagine biting into a crispy egg roll with its golden-brown exterior, revealing a sweet, spiced apple filling that dances on your palate. Each bite is like a warm hug—simple yet profound, familiar yet refreshingly new.
I’ve always been captivated by the way food can bridge generations and traditions. These Apple Pie Egg Rolls make me think about the stories shared over dinner tables, laughter echoing through cozy kitchens as loved ones gather around for dessert. They’re perfect for celebrations or simply as a sweet treat after a long day. Plus, they’re incredibly versatile—you can serve them with a drizzle of caramel sauce or a dollop of whipped cream, making them even more special! Trust me when I say that this recipe will quickly become one of your go-to favorites.
Apple Pie Egg Rolls: A Crispy Twist on Tradition
Welcome to your next obsession—Apple Pie Egg Rolls! This recipe is not just about creating delicious bites; it’s about crafting memories that will linger long after the last morsel has been enjoyed. So roll up your sleeves and let’s dive into this delightful culinary adventure together!
Ingredients:
As we embark on this culinary journey, let’s take a moment to appreciate each ingredient that makes our Apple Pie Egg Rolls so extraordinary. Every component plays a vital role in creating that symphony of flavors we’re aiming for.
- 3 medium Granny Smith apples, peeled and diced into 1-inch pieces. The star of our show! Granny Smith apples are renowned for their tartness, which beautifully balances the sweetness from sugar and enhances the overall flavor profile. When selecting these apples, look for firm ones without blemishes; they should feel heavy for their size. If you prefer something sweeter, feel free to mix in some Honeycrisp or Fuji apples for a harmonious blend of flavors.
- 1 Tablespoon lemon juice. This brightens up our filling and prevents those lovely apple pieces from browning too quickly. The acidity from lemon juice cuts through the sweetness and enhances all our flavors—this step is absolutely paramount! Freshly squeezed lemon juice is ideal here; it brings vibrant flavor compared to bottled varieties.
- 3/4 teaspoon cinnamon. Ahh, cinnamon—the quintessential spice that wraps you in warmth! It adds depth and nostalgia to our filling while complementing the apples perfectly. Always opt for fresh ground cinnamon if possible; it packs more flavor than older spices sitting in your pantry gathering dust.
- 1/4 cup sugar. Sugar is crucial here—not only does it sweeten our filling but it also helps create that irresistible caramelization when we fry our egg rolls. You can use granulated sugar or swap it out for brown sugar if you want an extra hint of molasses flavor—it’ll make your filling taste even richer!
- 2 teaspoons cornstarch. This ingredient acts as our thickening agent, ensuring that our apple mixture doesn’t turn into a watery mess inside those delicate wrappers. Cornstarch works wonders especially when combined with water; it creates a smooth texture that will hold everything together beautifully.
- 1 teaspoon vanilla extract. Vanilla adds warmth and complexity—it’s like adding a secret ingredient that elevates everything to another level! Make sure you choose pure vanilla extract over imitation; the difference in flavor will be noticeable and truly exceptional.
- 8 egg roll wrappers. These little sheets are what will cradle our delicious filling before being transformed into golden perfection! When selecting wrappers at your local store, ensure they are fresh and pliable; dried-out wrappers may crack during assembly.
- Vegetable oil, for frying. A good quality vegetable oil is non-negotiable here since we need something with a high smoke point to achieve that crispy texture without burning them to oblivion. Canola or peanut oil works wonderfully!
- Whipped cream or caramel sauce, for serving (optional). While technically optional, I highly recommend having one (or both!) on hand because who doesn’t love dipping into something creamy or sweet? It takes these egg rolls from great to utterly intoxicating.
Equipment You’ll Need:
Before we dive into cooking up these delightful treats, let’s chat about some essential tools you’ll need along the way—think of them as trusty companions guiding us through this process!
- Medium saucepan – This is where all the magic begins! A medium-sized saucepan allows us enough space to cook down our apples evenly while preventing any spills or splashes during cooking.
- Slotted spoon – Absolutely crucial when scooping out those luscious apple pie fillings! A slotted spoon ensures you leave behind any excess liquid while transferring your mixture onto those egg roll wrappers—nobody wants soggy egg rolls!
- Deep-fry thermometer – This tool helps us achieve precision when frying by accurately measuring oil temperature—a must-have for ensuring our egg rolls come out perfectly crisp without burning.
- Large heavy-bottomed stock pot – Using a heavy pot helps maintain consistent heat while frying so our oil won’t cool down too quickly when adding in those egg rolls.
- Baking sheet lined with paper towels – This handy item serves as our resting place post-frying—it allows excess oil to drain away while keeping those crispy delights warm until you’re ready to serve!
Now that we’ve gathered everything we need let’s get started on preparing these scrumptious Apple Pie Egg Rolls!
Step 1: The Sweet Symphony Begins
In a medium saucepan set over medium-high heat, combine those diced Granny Smith apples with lemon juice, cinnamon, and sugar—the aroma already wafting through your kitchen will send everyone running towards you! The reason behind combining these ingredients first is simple: we want to infuse those apple pieces with flavor before they hit the heat’s embrace. Allow this mixture to cook down gently while occasionally stirring—it should start bubbling away after just a few minutes! This initial stage is crucial because it softens the apples slightly while allowing all those wonderful flavors to meld together beautifully.
Step 2: Thicken It Up
While still over medium-high heat, grab yourself a small bowl and whisk together cornstarch with 1/3 cup water until it’s completely smooth—this slurry is going to work wonders once added to your cooked apple mixture! Once bubbling begins again in your saucepan (a visual cue telling you it’s time), pour that cornstarch mixture onto those fragrant apples and mix thoroughly—it should begin thickening almost immediately as you stir continuously! This step binds everything together wonderfully—without it? You risk having runny fillings that leak everywhere once fried—a total kitchen catastrophe!
Step 3: Let It Cool
Now comes one of my favorite parts: removing this glorious concoction off heat and letting it cool completely before proceeding further! Transfer everything into another bowl (trust me—this makes things easier later) then walk away for about 10–15 minutes while inhaling deeply—you deserve it! Cooling allows flavors time to settle down while also ensuring we don’t end up with melted wrappers later on—patience pays off here!
Step 4: Wrapping Up
With everything cooled down sufficiently now comes the fun part—wrapping up those flavorful bites into perfect little parcels! Lay out each egg roll wrapper on your dry work surface—you’ll notice there’s one side that’s wider than another; place approximately 1/4 cup of apple filling at lower third (the wider edge) then fold upwards tightly like tucking someone in bed (isn’t cooking just like nurturing?). Fold edges inward before rolling tightly from bottom towards top—don’t forget to wet edges lightly using water-dipped fingers—that seals them shut securely ensuring no precious filling escapes during frying!
Stay tuned because we’ll be diving deeper into frying techniques next…
Step 5: Wrapping the Apple Goodness
Now that your delightful apple mixture has cooled completely, it’s time to transform these flavors into beautiful egg rolls. Picture this moment: you’re about to wrap up a little pocket of joy that will soon be golden and crispy. First, let’s lay out those egg roll wrappers on a clean, dry work surface. It’s essential to keep everything organized here because a messy workspace can lead to a messy outcome—trust me on this! Each wrapper should sit with one corner pointing towards you, much like a diamond shape. This positioning is crucial because it guides how we’ll roll and seal our treats.
Using a slotted spoon—because we don’t want excess liquid in our rolls—portion about 1/4 cup of that luscious apple filling onto the lower third of each wrapper. Don’t skimp on this step; feel free to pile it generously! This is where the magic begins—the filling should be bursting at its seams, ready to meld with the crispy exterior. Now, gently but firmly start rolling from the bottom, folding in the edges as you go along. I find that this step is not just about sealing in flavor; it’s about creating anticipation for that first bite. When you reach the top corner, wet your finger in the small dish of water and run it along the edge of the wrapper to help seal it shut. This simple act of moisture is non-negotiable; it ensures that all your deliciousness stays wrapped tightly during frying.
Step 6: The Art of Frying
Now comes the part that fills your kitchen with an utterly intoxicating aroma—the frying! Grab a large, heavy-bottomed stock pot and pour in at least 4 inches of vegetable oil. Why so much oil? It’s essential for achieving that deep-fried perfection while preventing any sogginess. After all, nobody wants a sad, greasy egg roll. Attach your deep-fry thermometer to the pot—it’s like having an assurance buddy for this step. Heat the oil over medium-high heat until it reaches 360°F (182°C). Patience is key here; don’t rush this heating process because oil that’s too cold will lead to soggy egg rolls while hot oil will ensure a crisp exterior.
Once your oil hits that magical temperature, carefully add three or four egg rolls at a time—crowding them can lead to uneven cooking and can drop the oil temperature too drastically. As they fry, turn them occasionally with tongs for even browning; you want them to bask in that bubbling embrace until they turn a glorious golden brown, which usually takes about 3-4 minutes. Watch closely—they’ll go from perfectly golden to burnt faster than you can say apple pie! Using a slotted spoon or tongs, remove them from the oil and transfer them onto a baking sheet lined with paper towels to absorb excess oil—a crucial step for keeping them crisp as they cool.
Step 7: The Joy of Serving
Can you smell that? The sweet scent wafting through your kitchen is nothing short of heavenly! Once all your apple pie egg rolls are fried and resting comfortably on their paper towel bed, it’s time for what I like to call “the grand reveal.” There’s something so profoundly satisfying about serving these beauties hot out of the fryer; they practically beg for dipping sauces! You can serve them warm alongside whipped cream or rich caramel sauce—imagine how those flavors come together!
But wait! Before you dive in headfirst (and I know how tempting it is), allow them to cool slightly for just a minute or two; biting into one too soon could result in molten apple filling oozing out everywhere—not exactly what we want on our first taste! Instead, savor those moments as you plate them up—a sprinkle of powdered sugar on top adds an elegant touch while enhancing their visual appeal as well.
Step 8: Savoring Every Bite
Now comes my favorite part: taking that first bite! As you sink your teeth into these crispy delights, relish in how every crunch reveals layers of sweet spiced apples enveloped by flaky wrappers. It’s truly extraordinary how such simple ingredients come together to create a symphony of flavors! For best results when serving these treats at gatherings or family events, consider making them right before guests arrive so they’re enjoyed fresh and warm—they simply don’t hold up well when left sitting out for long periods.
For those who love a little extra flair, consider drizzling some melted chocolate over the top or sprinkling chopped nuts when serving—you’ll elevate these already delightful bites into something unforgettable! And let me tell you, once you’ve introduced these Apple Pie Egg Rolls into your dessert repertoire, there might just be no going back!
Conclusion:
As we wrap up our delightful journey through making Apple Pie Egg Rolls, I hope you’re feeling as excited as I do about this recipe! There’s something profoundly satisfying about creating these crispy, golden treats filled with tender apples and warm spices—it’s truly extraordinary what simple ingredients can transform into such a comforting dish. The way the cinnamon dances with the tartness of Granny Smith apples creates a symphony of flavors that warms your heart and fills your home with sweetness.
Why is this recipe a must-try? Beyond just taste, it’s about the joy of crafting something special in your kitchen—the anticipation as you watch those egg rolls sizzle away gives way to pure delight when you finally take that first bite. These little wonders are perfect for family gatherings or cozy nights in; picture pulling them out of the fryer and serving them up golden brown and hot—they’re sure to impress everyone at the table.
Imagine savoring one with a dip into rich caramel sauce or fluffy whipped cream; each crispy bite contrasts beautifully with its creamy companions, making every moment feel decadent and special. For an afternoon pick-me-up or dessert after dinner, these egg rolls shine bright like culinary stars! And let’s not forget how they make perfect finger food for entertaining guests—they’ll disappear faster than you can say “apple pie”!
Feeling adventurous? This recipe is wonderfully adaptable! You could swap out Granny Smith apples for sweet Honeycrisps or even toss in some dried cranberries for an added twist—each variation brings its own unique flair while still delivering that cherished comfort we crave. So gather your ingredients and get rolling—I can’t wait for you to try these Apple Pie Egg Rolls! Share your experiences with me; I’d love to hear how they turned out for you!
Apple Pie Egg Rolls

Indulge in a delightful twist on a classic dessert with these Apple Pie Egg Rolls! These crispy, golden treats are filled with tender Granny Smith apples, warm cinnamon, and just the right amount of sweetness, creating an irresistible combination. Each bite reveals a gooey apple filling wrapped in a flaky exterior that’s perfect for any occasion—whether it’s a cozy family gathering or an afternoon snack. Plus, they can be served with rich caramel sauce or fluffy whipped cream for an extra touch of decadence. Easy to make and even easier to enjoy, these Apple Pie Egg Rolls are sure to become your new favorite dessert.
- Prep Time: 20 minutes
- Cook Time: 15 minutes
- Total Time: 35 minutes
- Yield: Makes about 8 servings 1x
- Category: Dessert
- Method: Frying
- Cuisine: American
Ingredients
- 3 medium Granny Smith apples, peeled and diced into 1-inch pieces
- 1 Tablespoon lemon juice
- 3/4 teaspoon cinnamon
- 1/4 cup sugar
- 2 teaspoons cornstarch
- 1 teaspoon vanilla extract
- 8 egg roll wrappers
- Vegetable oil, for frying
Instructions
- In a medium saucepan over medium-high heat, combine diced apples, lemon juice, cinnamon, and sugar. Cook until bubbling.
- Mix cornstarch with water until smooth, then stir into the apple mixture until thickened. Remove from heat and let cool.
- Lay out egg roll wrappers and place about 1/4 cup of cooled apple filling on the lower third of each wrapper. Roll tightly and seal edges with water.
- Heat vegetable oil in a heavy-bottomed pot to 360°F (182°C). Fry the egg rolls in batches until golden brown (about 3-4 minutes).
- Transfer cooked egg rolls to a paper towel-lined baking sheet to drain excess oil before serving.
Nutrition
- Serving Size: 1 egg roll (50g)
- Calories: 150
- Sugar: 6g
- Sodium: 40mg
- Fat: 7g
- Saturated Fat: 0g
- Unsaturated Fat: 6g
- Trans Fat: 0g
- Carbohydrates: 20g
- Fiber: 1g
- Protein: 2g
- Cholesterol: 0mg