Gingerbread Latte Cookies
There’s something truly magical about the aroma of spices wafting through the kitchen, especially during the cooler months. It’s a scent that feels like home, wrapping you in a warm embrace with every whiff. This Gingerbread Latte Cookies recipe is not just a delightful treat, but an experience that transports you to cozy coffee shops filled with laughter and the spirited chatter of friends gathering over steaming mugs. Imagine biting into a soft, chewy cookie that encapsulates all the beloved flavors of a gingerbread latte—the earthy warmth of cinnamon, the zing of fresh ginger, and a touch of espresso that dances upon your palate. Each bite is a celebration; a bridge between tradition and innovation, reminding us that some recipes are meant to be cherished and shared.
I’ve always been captivated by how baking brings people together; there’s an unspoken bond created over mixing dough and waiting for cookies to rise in the oven. The process is as important as the outcome—a journey filled with anticipation and joy. These cookies, with their festive flavor twist and creamy white chocolate dip, are perfect for holiday gatherings or simply for enjoying at home while cozied up with your favorite book. Whether you whip them up for family or make them for yourself (because self-love also includes indulging in delicious treats), I promise you, these cookies will create memories that linger long after they’ve disappeared from your plate.
Gingerbread Latte Cookies: A Cozy Festive Delight
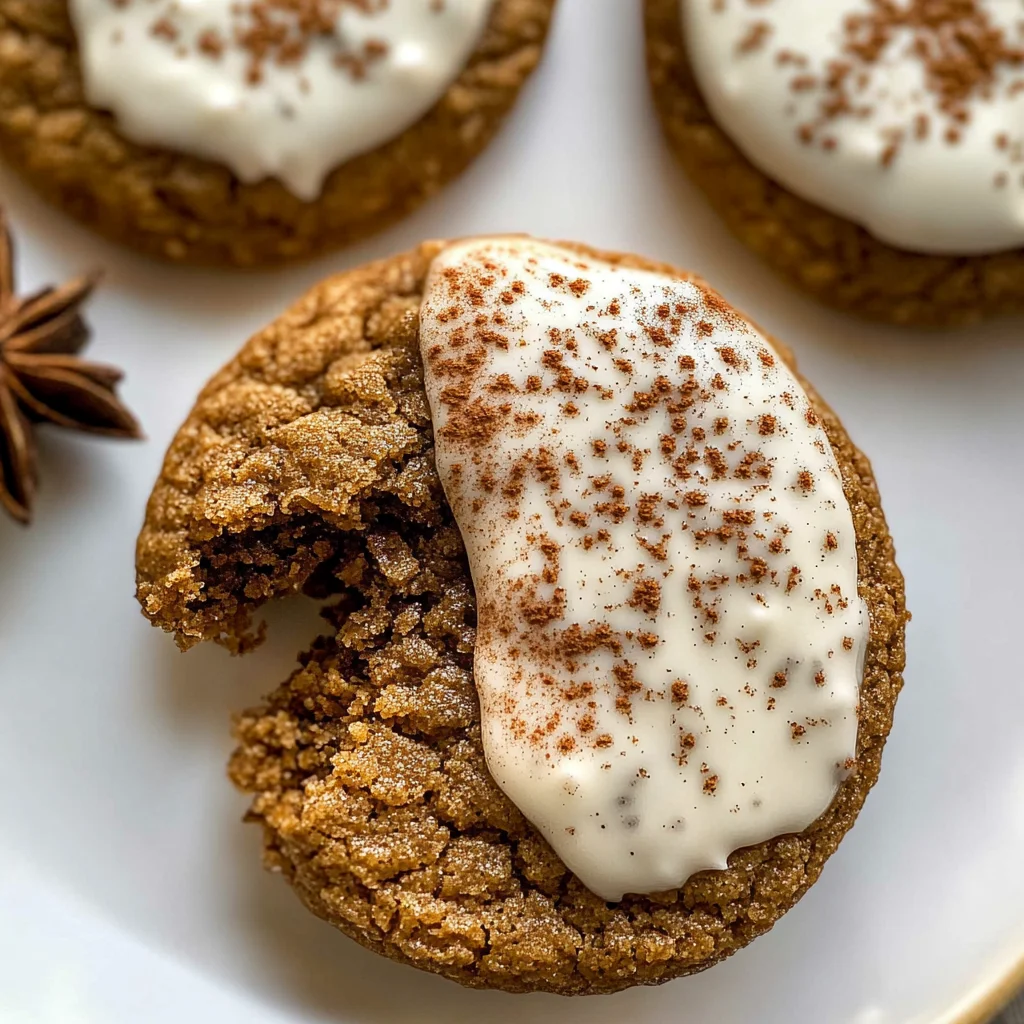
Welcome to one of my all-time favorite recipes—Gingerbread Latte Cookies! They’re soft, chewy, and bursting with festive flavors that evoke memories of holiday cheer. The combination of spices paired with a dunk in velvety white chocolate creates an utterly intoxicating experience that’s bound to become a staple in your baking repertoire.
Ingredients:
As we embark on this culinary adventure together, let’s take a moment to appreciate each ingredient’s role in making these Gingerbread Latte Cookies not just good but truly extraordinary.
- 2 cups (170g) old-fashioned whole rolled oats. These oats are essential for giving our cookies their delightful chewiness while adding rustic charm. When pulsed slightly in the food processor, they create varied textures—some bits add heartiness while others contribute to a tender crumb. Be sure to choose old-fashioned oats rather than quick oats; they provide better structure and flavor in our cookies.
- 1 and 2/3 cups (210g) all-purpose flour (spooned & leveled). Flour is the backbone of any cookie recipe—the foundation that holds everything together. Using all-purpose flour offers the right balance between tenderness and strength in our dough. Spoon it into your measuring cup and level it off with a knife to avoid packing it too tightly; this ensures we don’t end up with dry cookies!
- 2 teaspoons espresso powder. This little wonder elevates our cookies by lending them a rich depth of flavor without overwhelming sweetness. Espresso powder enhances the warm notes from our spices while echoing that beloved coffeehouse experience! If you’re not much of an espresso drinker, fear not! You can find espresso powder easily online or at most grocery stores.
- 1 teaspoon baking soda. This leavening agent plays a crucial role in giving our cookies lift and lightness as they bake. It reacts with the acidity in molasses (another key ingredient) to help achieve those perfectly puffed shapes we’re looking for. Just be sure it’s fresh—old baking soda won’t do much good!
- 1/4 teaspoon salt. A pinch of salt is non-negotiable! It enhances all other flavors present in our cookies while balancing out sweetness beautifully. Salt brings out richness and complexity—in baking, it’s like magic!
- 1 teaspoon ground ginger. Ground ginger adds that signature zing we associate with gingerbread delights! It provides warmth and enhances both flavor depth and aromatic notes throughout our cookies—truly indispensable for this recipe.
- 1 teaspoon ground cinnamon. Cinnamon is another spice that creates nostalgia—it wraps around us like a warm blanket on chilly days! It complements ginger beautifully while filling your kitchen with its sweet-spicy aroma as it bakes.
- 1/4 teaspoon ground nutmeg & 1/8 teaspoon ground cloves. Both spices offer complexity—nutmeg brings warmth while cloves lend an exotic hint that’s utterly enchanting when combined with ginger and cinnamon.
- 3/4 cup (12 Tbsp; 170g) unsalted butter, softened to room temperature. Butter is pivotal here because it forms the base for creaming sugar—a critical step for achieving lightness in our cookie texture! Make sure it’s softened properly; cold butter won’t cream effectively while melted butter could lead to spreading disaster!
- 1 cup (200g) packed light or dark brown sugar & 1/4 cup (50g) granulated sugar. Brown sugar adds moisture due to its molasses content, creating chewier cookies, whereas granulated sugar contributes crisp edges when baked—a perfect balance we’re aiming for!
- 1 large egg, at room temperature. Eggs bind ingredients together while adding richness—and starting at room temperature ensures even mixing within our batter!
- 1/4 cup (60ml/75g) unsulphured or dark molasses (do not use blackstrap; I prefer Grandma’s brand). Molasses imparts robust flavor alongside that classic deep brown color we love in gingerbread treats! Unsulphured molasses is less bitter than its sulphured counterpart—opt for high-quality brands whenever possible.
- 8 ounces (226g) white chocolate, chopped. White chocolate serves as an indulgent coating that melds perfectly with our cookie flavors! When melted properly, it becomes silky smooth—a luscious finish every cookie deserves.
- 1 teaspoon vegetable oil or coconut oil (optional; helps to thin the chocolate). Using oil helps create a smoother melting process for your chocolate if you’re finding it too thick! While optional, it’ll make dipping easier without compromising taste.
- 1/2 teaspoon espresso powder & pinch each of cinnamon and nutmeg, for sprinkling on top post-dipping—this final touch enhances presentation while echoing those fabulous flavors we’ve built into every bite!
Equipment You’ll Need:
Having the right tools makes all the difference when it comes to baking—it’s like having trusted allies by your side ensuring everything goes smoothly! While these items may not be ingredients themselves, they’re essential partners in creating something truly wonderful.
- Food Processor – This handy kitchen gadget is invaluable when preparing oats for this recipe! Pulsing them allows us to achieve varied textures; some finely ground flour-like consistency complemented by coarser oat pieces contribute delightful chewiness throughout our cookies.
- Mixing Bowls – Opt for sturdy bowls—preferably glass or stainless steel—as they withstand vigorous mixing without warping or staining over time! You’ll need at least two: one for combining dry ingredients and another for wet ones before bringing everything together seamlessly.
- Hand Mixer or Stand Mixer fitted with paddle attachment – Either option proves essential during creaming butter and sugars—a step crucial for achieving that light texture we crave in baked goods! A stand mixer can handle larger batches more efficiently than hand-mixing but don’t fret if you only have handheld options—they work wonderfully too!
- Baking Sheets lined with parchment paper or silicone baking mats – Ensuring proper separation between cookies prevents sticking while producing even browning results across batches; both options make cleanup effortless afterward!
Now that we’re fully equipped let’s dive into preparing these scrumptious Gingerbread Latte Cookies!
Step 1: Pulse Those Oats
First things first—we want to transform those old-fashioned rolled oats into something extraordinary! Place them into your food processor and pulse about 10–12 times until you achieve various textures—from coarsely chopped pieces to finer oat flour-like bits nestled within each other beautifully! This variety will lend amazing chewiness to our final product while ensuring no single mouthful feels monotonous—the goal here is contrast harmonizing inside every cookie bite!
Step 2: Whisk Together Dry Ingredients
Once you’ve prepped those lovely oats perfectly well? Great job! Now grab yourself another bowl where we’ll whisk together all dry ingredients: pulsed oats along with flour, espresso powder, baking soda, salt cinnamon blend along side delightful nutmeg & cloves too… Trust me when I say this step brings everything together seamlessly as flavors meld before hitting dough stage later on—it sets us up wonderfully ahead so don’t rush through this part either!
Step 3: Cream Butter & Sugars
Now onto one of my favorite steps—the creaming process! In your largest mixing bowl using either handheld or stand mixer fitted with paddle attachment should do just fine here; add softened unsalted butter before following suit by introducing both types of sugars—brown (moist & rich) plus granulated(adding crispness). Beat them vigorously at medium-high speed until they turn pale golden fluffy mass approximately three minutes long—that’s how we know air has been incorporated thoroughly making future bites lighter overall rather than dense bricks after baking time passes swiftly away…
Step 4: Incorporate Egg & Molasses
With creamy goodness achieved? Excellent work indeed—you’re halfway there already! Next up should involve adding room temp egg alongside glorious dark molasses straight into buttery mixture previously whipped until combined smoothly without any lumps remaining visible whatsoever… This addition brings additional moisture ensuring delightful chew remains intact throughout future bakes ahead stay true even after days spent stored away waiting patiently whilst aromas linger fondly around kitchens everywhere…
Stay tuned as we continue crafting these enchanting Gingerbread Latte Cookies together—I promise you won’t want to miss what’s next in store!
Step 5: Chill Out – The Magic of Dough Resting
Now, here comes a step that may test your patience, but I promise you it’s absolutely paramount for achieving the chewiest, most flavorful Gingerbread Latte Cookies. After you’ve mixed your luscious dough—thick and sticky like a warm hug—you’ll want to cover it with plastic wrap or a clean kitchen towel and pop it into the refrigerator for 30 to 45 minutes. Why chill, you ask? Chilling the dough helps firm it up, which is crucial for controlling the spread of your cookies while they bake. If you skip this step, you might end up with flat little discs that resemble pancakes instead of the soft, pillowy cookies we’re aiming for.
Trust me on this; allowing the flavors to meld during chilling also enhances that rich gingerbread taste you’re craving. You can even chill the dough for up to three days if life gets in the way! Just remember that if you do let it sit for longer than a couple of hours, take it out and let it rest at room temperature for about 30 minutes before scooping. This ensures that it’s not too rock-hard when you’re ready to bake. I often find myself daydreaming about these cookies as they chill—it’s like waiting for the most anticipated gift during the holidays!
Step 6: Prepping Your Baking Haven
While your cookie dough is getting all cozy in the fridge, this is the perfect time to prepare your baking sheets and preheat that oven of yours! Set your oven to a delightful 350°F (177°C), and as it warms up, line two large baking sheets with parchment paper or silicone baking mats. This simple act is more significant than it may seem; these surfaces help prevent your cookies from sticking, ensuring they release easily after baking without any drama.
Once your oven reaches temperature, grab your chilled dough and get ready to scoop! Using about 1.5 tablespoons (35g) per cookie, drop mounds of dough onto your prepared baking sheets, making sure to space them three inches apart. Why such a generous distance? As these beauties bake, they’ll spread out beautifully—if they’re too close together, they could end up merging into one giant cookie! Bake them for 12 to 13 minutes until their edges are lightly browned while their centers still look soft and slightly underbaked; this will give us those chewy centers we adore so much.
Step 7: The Cooling Process – Patience Pays Off
As soon as those heavenly scents start wafting through your kitchen—oh yes, you’ll know it’s time—remove the baking sheets from the oven. Here’s where things get tricky but oh-so-rewarding: allow those cookies to cool on the baking sheet for a full ten minutes before transferring them to a wire rack. This step is crucial because letting them cool on the sheet allows them to firm up just enough so they won’t crumble apart when moved. You see, cookies continue cooking slightly from residual heat even after they’ve been taken out of the oven; it’s like magic!
After ten minutes have passed—yes, I know it’s hard not to sneak a bite—gently transfer each cookie onto a cooling rack using a spatula. Letting them cool completely will ensure they set perfectly before we dive into our next exciting steps of dipping and decorating! Plus, there’s something so satisfying about watching them turn from glossy doughy blobs into beautiful golden treats.
Step 8: Dipping Delights – The White Chocolate Transformation
Now we’re entering an exhilarating part of our journey—the transformative act of dipping these delicious cookies in luscious white chocolate! Start by melting eight ounces (226g) of chopped white chocolate along with one teaspoon of vegetable oil or coconut oil in a double boiler over simmering water or in your microwave. If using a microwave (which I find incredibly convenient), place everything in a medium heat-proof bowl and melt in 20-second increments; stirring after each interval is essential until completely smooth and silky.
Why use oil? It thins out the chocolate just enough so that it glides beautifully over your cookies without clumping—a non-negotiable step for achieving that gorgeous coating! Once melted and smooth like liquid gold, dip each cooled cookie halfway into this creamy elixir. Be sure to lift and let any excess chocolate drip off before placing it back on the lined sheet or cooling rack; we want just enough coating without overwhelming our beloved cookie’s flavor.
As an extra touch of love (because every cookie deserves some pizzazz), mix together a pinch each of cinnamon and nutmeg in a small bowl while you’re dipping away. Lightly sprinkle this spice blend over the white chocolate-coated part of each cookie right after dipping—it adds not only visual appeal but also an intoxicating aroma that will have everyone begging for more! Once all cookies are dipped and decorated with spices galore, place your baking sheet in the refrigerator to set that delicious chocolate goodness for about 30 minutes.
Final Touches: Storing Your Sweet Creations
At last! We’ve reached the finish line with our Gingerbread Latte Cookies—but hold on just one moment longer because how you store these precious gems matters just as much as how we made them! Once set and cooled completely from their chocolaty bath, these cookies stay fresh covered at room temperature for about three days or can be stored in an airtight container in the refrigerator for up to one week.
Just imagine biting into one after dinner—a delightful combination of spices dances on your palate while gentle hints of espresso linger pleasantly at every turn. These cookies encapsulate joyfully festive moments spent surrounded by loved ones during holidays past—and present! So go ahead; share them with friends or keep them all to yourself (I won’t tell!).
I hope this recipe brings warmth and happiness into your home just as it does mine because creating these Gingerbread Latte Cookies isn’t just about satisfying sweet cravings—it’s about crafting memories filled with love and laughter around every delicious bite. Enjoy every moment spent making—and devouring—these delightful treats!
Storage and Enjoyment Tips for Your Gingerbread Latte Cookies
Now that you’ve created a batch of these delightful Gingerbread Latte Cookies, it’s time to dive into the best ways to store and enjoy them! The magic of these cookies doesn’t just lie in their initial fresh-baked glory; it’s also about how they can be savored over days or even longer. The comforting aroma of spices and sweet white chocolate will surely linger in your home, but don’t forget to save some for later enjoyment—and I promise you, they taste just as extraordinary after storage.
Storing Leftover Gingerbread Latte Cookies
To keep your Gingerbread Latte Cookies fresh and fabulous, store them in an airtight container at room temperature. A simple cookie jar works wonders or even a resealable plastic bag will do the trick. These cookies can last for up to three days without losing their delightful chewiness. If you want to maintain that soft texture for a little longer, consider placing a slice of bread in the container with them; this little trick helps retain moisture, keeping your cookies perfectly tender. After a day or two, they might even become more infused with those warm gingerbread spices, creating a flavor that’s profoundly satisfying. When you’re ready for a treat, pop one in the microwave for about 10-15 seconds to warm it up—trust me, that gooey white chocolate will melt back into its delicious state!
Freezing Gingerbread Latte Cookies for Later
If you find yourself with more cookies than you can devour within a few days (though I wouldn’t blame you if you tried!), freezing them is an absolutely fantastic option. To freeze properly, allow your cookies to cool completely before placing them in a single layer on a baking sheet lined with parchment paper. Once frozen solid, transfer them into an airtight container or freezer bag, separating layers with parchment paper to prevent sticking. These beauties can be kept frozen for up to three months! When you’re ready to indulge again, simply pull out as many as you’d like and let them thaw at room temperature or warm them directly from the freezer in the microwave—no need to miss out on that freshly baked experience! This convenience allows you to enjoy the flavors of the season any time of year, making it so easy to bring joy into your day.
Gingerbread Latte Cookies
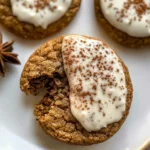
Gingerbread Latte Cookies are the ultimate cozy treat, perfect for holiday gatherings or quiet moments at home. These delightful cookies combine the warm, comforting spices of ginger, cinnamon, nutmeg, and espresso, creating a rich flavor that evokes memories of festive coffee shops. Dipped in creamy white chocolate and sprinkled with a touch of spice, each bite is a celebration of seasonal flavors and nostalgic comfort. Whether you’re baking for friends or indulging in self-care, these cookies are sure to become a cherished addition to your recipe collection.
- Prep Time: 20 minutes
- Cook Time: 12 minutes
- Total Time: 32 minutes
- Yield: About 24 cookies 1x
- Category: Dessert
- Method: Baking
- Cuisine: American
Ingredients
- 2 cups old-fashioned rolled oats
- 1 and 2/3 cups all-purpose flour
- 2 teaspoons espresso powder
- 1 teaspoon baking soda
- 1/4 teaspoon salt
- 1 teaspoon ground ginger
- 1 teaspoon ground cinnamon
- 1/4 teaspoon ground nutmeg
- 1/8 teaspoon ground cloves
- 3/4 cup unsalted butter, softened to room temperature
- 1 cup packed light or dark brown sugar
- 1/4 cup granulated sugar
- 1 large egg, at room temperature
- 1/4 cup unsulphured or dark molasses
- 8 ounces white chocolate, chopped
- 1 teaspoon vegetable oil or coconut oil (optional; helps to thin the chocolate)
- 1/2 teaspoon espresso powder for sprinkling
- Pinch each of cinnamon and nutmeg for sprinkling
Instructions
- Pulse the oats in a food processor until you achieve a mix of coarse pieces and finer oat flour.
- In a separate bowl, whisk together the pulsed oats, flour, espresso powder, baking soda, salt, and spices.
- Cream the softened butter with brown and granulated sugars until fluffy. Add the egg and molasses; mix until well combined.
- Gradually incorporate the dry ingredients into the wet mixture until just combined.
- Chill the dough for 30 to 45 minutes in the refrigerator.
- Preheat your oven to 350°F (177°C) and line baking sheets with parchment paper.
- Scoop mounds of dough onto the prepared sheets, spacing them apart to allow for spreading.
- Bake for 12 to 13 minutes until edges are lightly browned; let cool on sheets for ten minutes before transferring to wire racks.
- Melt white chocolate with optional oil; dip cooled cookies halfway into melted chocolate and sprinkle with additional spices if desired. Let set in the refrigerator.
Nutrition
- Serving Size: 1 cookie (30g)
- Calories: 150
- Sugar: 10g
- Sodium: 60mg
- Fat: 7g
- Saturated Fat: 4g
- Unsaturated Fat: 2g
- Trans Fat: 0g
- Carbohydrates: 19g
- Fiber: 1g
- Protein: 2g
- Cholesterol: 15mg