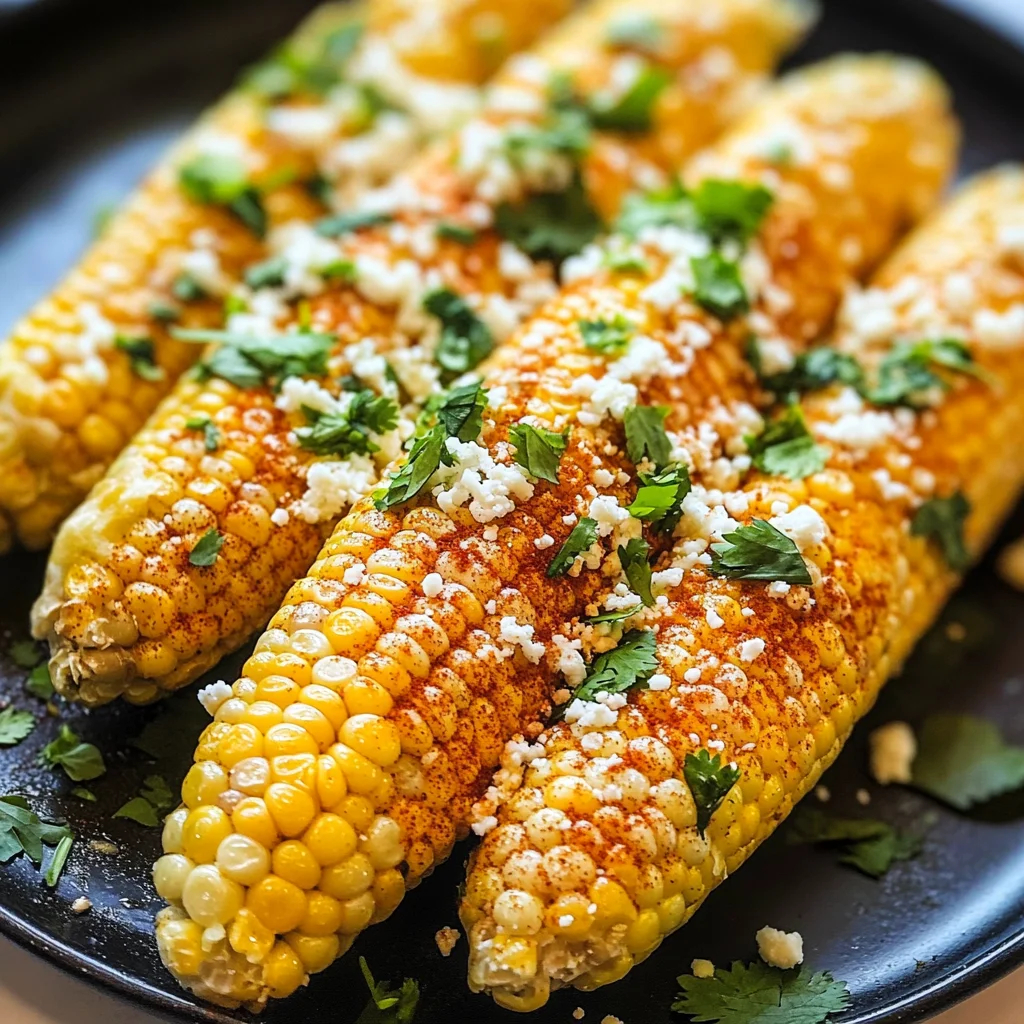
Mexican Corn on the Cob
There’s something magical about the way food brings us together, don’t you think? It’s not just about nourishing our bodies; it’s about creating memories, sharing laughter, and forging connections across generations. This Mexican Corn on the Cob recipe transcends mere sustenance to become an experience that captures the vibrant essence of summer evenings spent with family and friends. The sweet, juicy kernels enveloped in the warmth of melted butter, sprinkled with a symphony of chili powder and tangy lime juice, feel almost like a celebration on a cob. Each bite is an invitation to savor a moment—a snapshot of warmth and joy that lingers long after the last kernel has disappeared.
As I reflect on my own experiences with this dish, I can almost hear the laughter of my loved ones and feel the sun on my skin during those backyard cookouts. This Mexican Corn on the Cob isn’t just food; it’s a gateway to nostalgia, where every bite tells a story. It’s incredibly easy to prepare yet so profoundly satisfying that you’ll be tempted to make it your go-to side dish for any gathering. Whether you’re hosting a summer barbecue or simply enjoying a quiet weeknight dinner, this dish transforms ordinary moments into extraordinary feasts. I promise you—it will quickly become one of your family favorites!
Mexican Corn on the Cob: A Sunshine-Infused Delight
Let’s dive into this delightful recipe that’s as colorful as it is flavorful! This Mexican Corn on the Cob is not only visually appealing but also bursting with taste that captures hearts and palates alike. With minimal prep time and simple ingredients, it’s perfect for those evenings when you want something special without putting in hours in the kitchen.
Ingredients:
Before we embark on this culinary journey together, let me share with you what makes each ingredient in this Mexican Corn on the Cob so special. Every element plays its part beautifully, contributing to that layered flavor profile we’re after.
-
6 ears corn (unhusked). When choosing corn for this recipe, opt for fresh ears with bright green husks and plump kernels that feel firm to the touch. The sweetness of fresh corn really shines through once roasted; it caramelizes slightly and creates an utterly intoxicating aroma that fills your kitchen. If you’re fortunate enough to find locally grown corn during peak season, don’t hesitate—bring home as much as you can! Alternatively, if fresh corn isn’t available, frozen corn could work in a pinch but won’t provide that same depth of flavor or texture.
-
6 tablespoons unsalted butter. Butter is often referred to as liquid gold in the culinary world for good reason; it adds richness and depth to our dish! Here, unsalted butter lets us control the seasoning better while enhancing the natural sweetness of the corn without overwhelming it. Make sure it’s softened before you start rubbing it onto your roasted corn—this ensures an even distribution and helps each ear soak up all that buttery goodness without leaving any behind.
-
2 teaspoons chili powder. Ah, chili powder—the spice that adds just enough heat to make your taste buds dance! When selecting chili powder for this recipe, look for high-quality blends that include ground chilies rather than fillers or excessive salt. The warmth from chili powder complements the sweet corn perfectly while adding a delightful kick that keeps things interesting. You can also adjust this amount based on your personal spice tolerance—feel free to experiment until it feels just right!
-
1/4 cup grated cotija cheese. Cotija cheese is one of those ingredients that brings everything together seamlessly—it’s crumbly yet creamy with a sharp flavor profile that’s reminiscent of feta but distinctly its own. It adds salinity and depth without overshadowing other flavors in our dish. If you can’t find cotija at your local market, crumbled feta or even queso fresco would be lovely alternatives—just remember they might bring slightly different textures or flavors.
-
1/4 cup freshly chopped cilantro leaves. Fresh cilantro adds a burst of brightness to our Mexican Corn on the Cob—it’s like springtime captured in herb form! Its vibrant green color pops against the golden kernels while providing an aromatic lift that enhances every bite. Always chop cilantro just before serving; doing so preserves its freshness and fragrance beautifully.
-
Juice of 2 limes. Lime juice is absolutely paramount in this recipe; it adds acidity that cuts through richness while balancing out all those savory elements we’ve layered onto our delicious corn. When choosing limes, look for ones that feel heavy for their size—they’re often juicier! Squeezing fresh lime juice right before serving ensures maximum brightness and flavor.
Equipment You’ll Need:
Having the right tools makes all the difference in crafting something truly wonderful! While they may not be ingredients themselves, these essential partners will ensure that your cooking experience is smooth and enjoyable.
-
Oven – Your trusty oven will be key here! Preheating it allows us to create an environment where our corn can roast evenly and thoroughly—this process caramelizes sugars naturally found in corn while making them irresistibly tender.
-
Roasting pan or baking sheet – Although we’ll be placing our unhusked corn directly on oven racks for roasting (which helps achieve optimal airflow), having a pan beneath can catch any drips if needed—keeping your oven clean makes future cooking sessions much more pleasant!
-
Basting brush – A basting brush will help apply melted butter evenly across each ear of corn post-roasting; trust me when I say no one wants dry bites! Proper application means every kernel gets coated in buttery goodness.
Preparing the Mexican Corn on the Cob
Step 1: Preheat Your Oven
First things first—we need to get our oven preheated to 350 degrees F (175 degrees C). This step is crucial because it sets up an even cooking environment where our corn can roast beautifully without burning or becoming overly dry. While waiting for your oven to reach temperature, take a moment to enjoy how bright and cheerful those ears of corn look—they’re going to transform into something truly special!
Step 2: Roast Your Corn
Once your oven reaches temperature, place your unhusked ears of corn directly onto the oven rack. Roasting them in their husks locks in moisture while allowing them to steam slightly—a technique giving us tender kernels bursting with flavor after about 40-45 minutes! As they roast away, you may notice aromas wafting through your kitchen like an enticing invitation—you’ll know they’re ready when they smell sweetly fragrant!
Step 3: Peel Back Those Husks
After patiently waiting for those beautiful ears of corn to finish roasting (and trust me—it’ll be worth every minute!), carefully remove them from the oven using tongs or an oven mitt; they’ll be hot! As you peel back each husk gently exposing those tender kernels beneath, take care not to burn yourself; let out any steam trapped within too—safety first! At this point, you’re already halfway there—the golden cobs are begging for their buttery embrace.
Step 4: Buttery Goodness Awaits
Now comes my favorite part: rubbing each ear generously with one tablespoon of melted butter while it’s still warm! This step ensures all those glorious flavors meld perfectly together as we prepare for finishing touches later on—the warmth helps infuse every kernel within reach with rich butteriness that’s simply divine. Don’t rush this step; allow yourself some time here because trust me—it pays off big time when tasting later!
Bringing It All Together
As we come toward the end of crafting our Mexican Corn on the Cob, I hope you’re feeling as excited as I am right now! Each step has layered flavor upon flavor—creating something profoundly satisfying that will surely become a staple at your table.
Step 9: Serve with Love
Finally, it’s time for presentation! Serve these gorgeous ears immediately while they’re still warm—you want everyone to experience them at their peak deliciousness. Arrange them on a large platter or individual plates, garnishing with extra lime wedges for those who love an extra zing!
Encourage everyone at your table to dig in—they won’t be able to resist! The first bite will send them straight into flavor paradise as they crunch through tender kernels bursting with buttery goodness and vibrant spices. This dish is perfect for summer barbecues or cozy family dinners alike—an absolute crowd-pleaser!
I promise you that once you’ve tasted this version of Mexican Corn on the Cob, you’ll find yourself dreaming up excuses just to make it again and again. So gather around with friends or family and enjoy this culinary adventure together—and always remember: cooking is not just about feeding bodies but nourishing souls too! Happy cooking!
Storage and Enjoyment Tips for Your Mexican Corn on the Cob
Now that your kitchen is filled with the intoxicating aroma of roasted corn, it’s time to dive into the sheer delight of enjoying your Mexican Corn on the Cob. Picture yourself gathering around the table with family or friends, each bite bursting with flavor and warmth. But before you dig in, let’s chat about how to store any leftovers—because trust me, you’ll want to savor every last morsel!
Storing Leftover Mexican Corn on the Cob
To keep your leftover Mexican Corn on the Cob as delightful as when it first emerged from the oven, I recommend wrapping each ear in foil or placing them in an airtight container. This helps maintain their moisture and prevents them from drying out. Store them in the fridge, where they will stay fresh for about three to four days. If you’re worried about losing that glorious juiciness, here’s a little pro tip: placing a slice of bread in the container can do wonders for keeping things moist! When you reheat them, you’ll still get that wonderful tenderness and flavor, making it feel like a special treat all over again. For serving suggestions, simply pop them back in the oven at 350°F for about 10-15 minutes to warm through or give them a quick grill if you’re feeling adventurous.
Freezing Mexican Corn on the Cob for Later
If you’re looking to extend your enjoyment even further, freezing your Mexican Corn on the Cob is a fantastic option! Start by husking and removing any silk from the corn (the husks can be left on if you prefer), then wrap each ear tightly in plastic wrap or aluminum foil. This helps protect them from freezer burn and preserves that divine flavor. They can be kept frozen for up to three months! When you’re ready to indulge, just pull out what you need and either let them thaw overnight in the fridge or toss them directly onto the grill or into boiling water—trust me, nothing beats that fresh-off-the-cob taste even after freezing! The convenience of being able to whip up this dish anytime is absolutely magical; just imagine hosting an impromptu gathering and pulling out these flavorful beauties straight from your freezer!
Dinner
Mexican Corn on the Cob

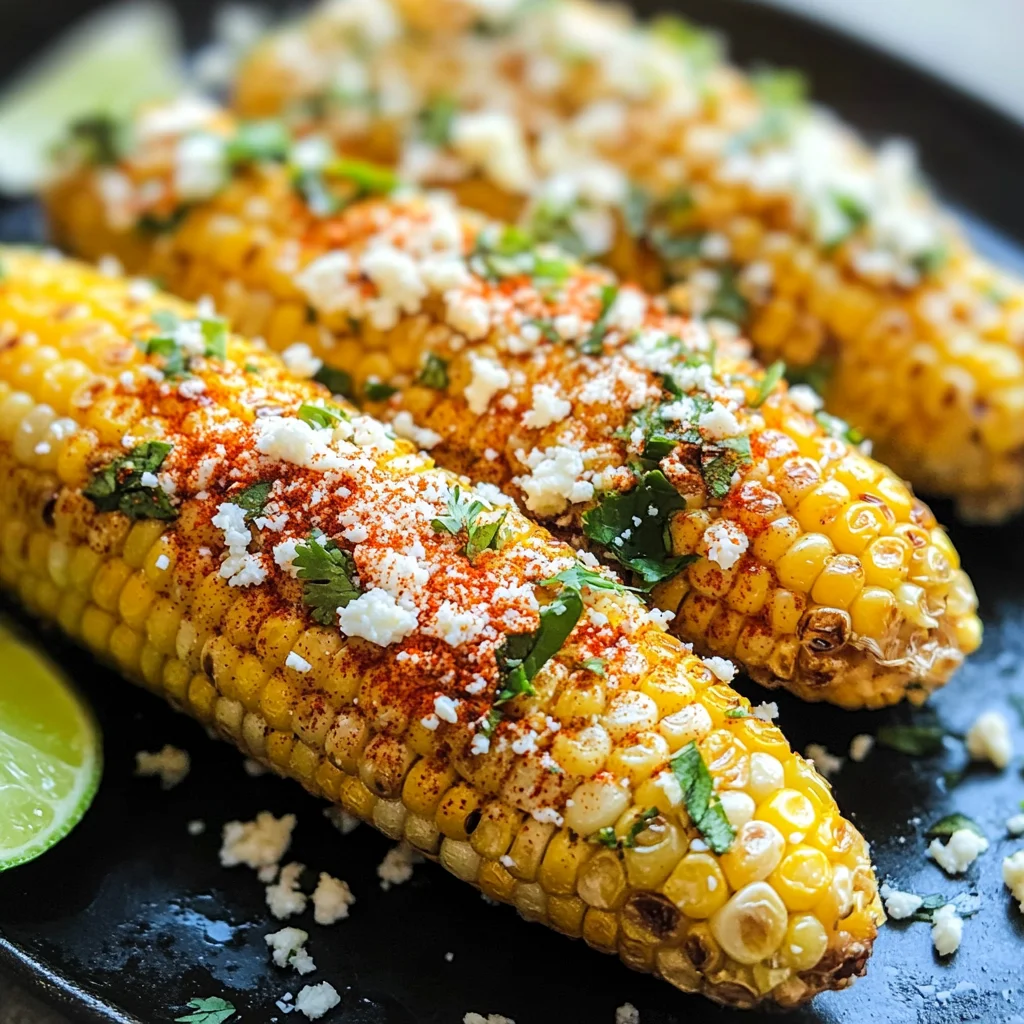
Experience mouthwatering Mexican Corn on the Cob topped with butter, chili powder, cheese & lime juice—perfect for any occasion! Try it today!
- Prep Time: 10 minutes
- Cook Time: 45 minutes
- Total Time: 55 minutes
- Yield: Serves 6
- Category: Side Dish
- Method: Baking
- Cuisine: Mexican
Ingredients
- 6 ears corn (unhusked)
- 6 tablespoons unsalted butter (softened)
- 2 teaspoons chili powder
- 1/4 cup grated cotija cheese (or feta/queso fresco)
- 1/4 cup freshly chopped cilantro leaves
- Juice of 2 limes
Instructions
- Preheat your oven to 350°F (175°C).
- Place unhusked ears of corn directly on the oven rack and roast for 40-45 minutes until tender.
- Carefully remove the corn from the oven and peel back the husks.
- Generously rub each ear of corn with melted butter while still warm.
- Sprinkle chili powder over each ear, followed by cotija cheese and chopped cilantro.
- Squeeze fresh lime juice over the corn before serving.
Nutrition
- Serving Size: 1 ear of corn (about 150g)
- Calories: 210
- Sugar: 3g
- Sodium: 130mg
- Fat: 10g
- Saturated Fat: 6g
- Unsaturated Fat: 4g
- Trans Fat: 0g
- Carbohydrates: 27g
- Fiber: 3g
- Protein: 5g
- Cholesterol: 15mg