Quick & Easy Kung Pao Chicken
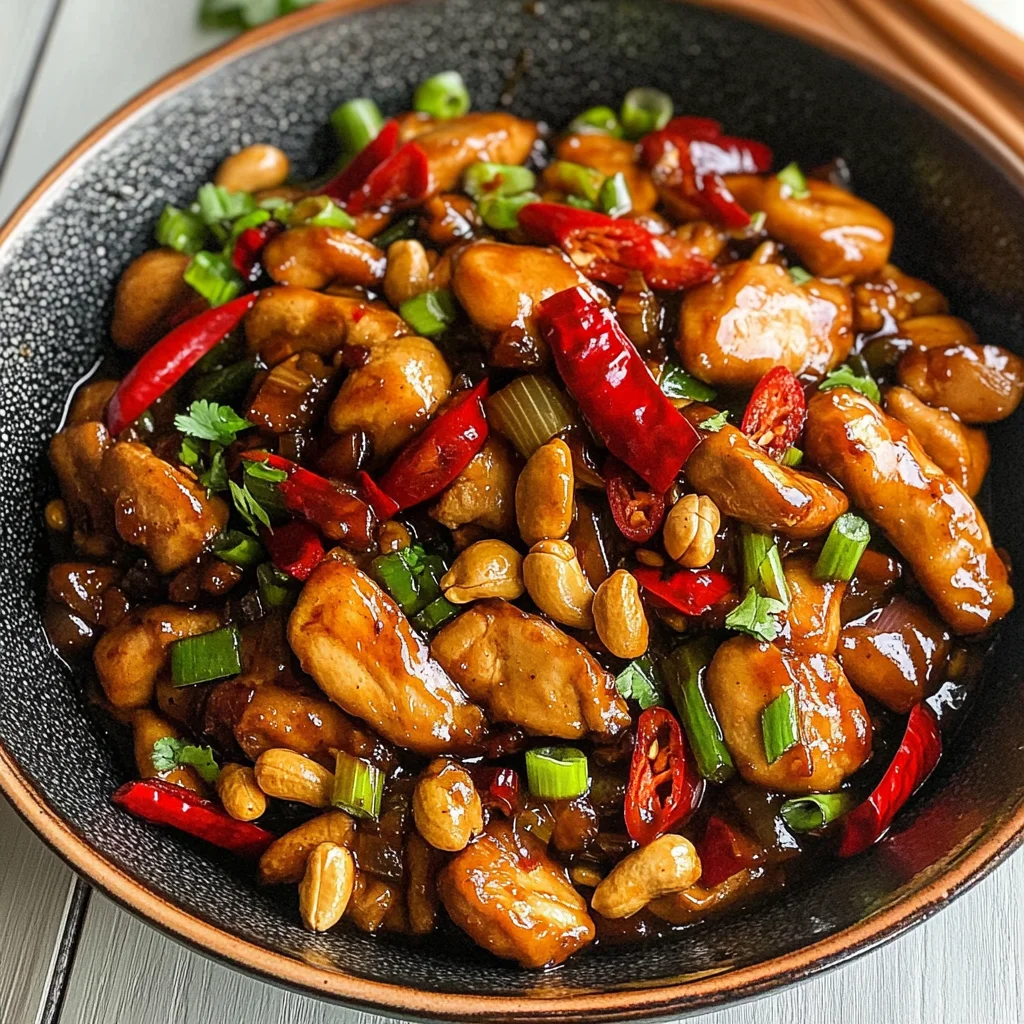
There’s something profoundly magical about cooking a dish that dances on the line between sweet and savory, isn’t there? Quick & Easy Kung Pao Chicken is not just a meal; it’s an experience that pulls you in with its tantalizing aromas and vibrant colors. Imagine the tender chicken thighs sizzling in a hot pan, their edges turning golden brown while being enveloped by a luscious sauce that glistens like liquid gold. The crunch of roasted peanuts adds an unexpected texture, while the gentle heat from dried red chilies entices your senses and warms your heart. This dish is a celebration of flavors, a beautiful amalgamation of Chinese culinary tradition and modern-day convenience, all wrapped up in just 30 minutes of your time! I promise you, once you try this recipe, it’ll become one of your go-to favorites for those busy weeknights or any time you crave an extraordinary yet comforting meal.
What I love most about my Quick & Easy Kung Pao Chicken is its versatility. Whether you’re feeding a family of four or having friends over for an impromptu dinner party, this recipe can easily be scaled up or down without losing its essence. Plus, it’s packed with nourishing ingredients that make you feel good inside and out. The way the ingredients interact—the tender chicken soaking up the sweet-spicy sauce, the crisp bell peppers adding freshness, and the scallions providing that sharp bite—creates a symphony of flavors that will leave everyone at your table reaching for seconds. And let’s not forget about the peanuts: they lend that delightful crunch which makes each bite just so satisfying! So roll up your sleeves and get ready to embark on this culinary journey; I can already tell it’s going to be something special.
Quick & Easy Kung Pao Chicken: A Flavorful Delight in Just 30 Minutes!
If you’ve ever found yourself craving takeout but wanted to whip something up at home instead, you’re in luck! This Quick & Easy Kung Pao Chicken is here to save the day with minimal fuss and maximum flavor. With simple ingredients readily available in most kitchens, you’ll be able to recreate this beloved dish right from the comfort of your home. It’s fast enough to fit into your busy schedule while still being delicious enough to impress anyone who takes a seat at your dinner table.
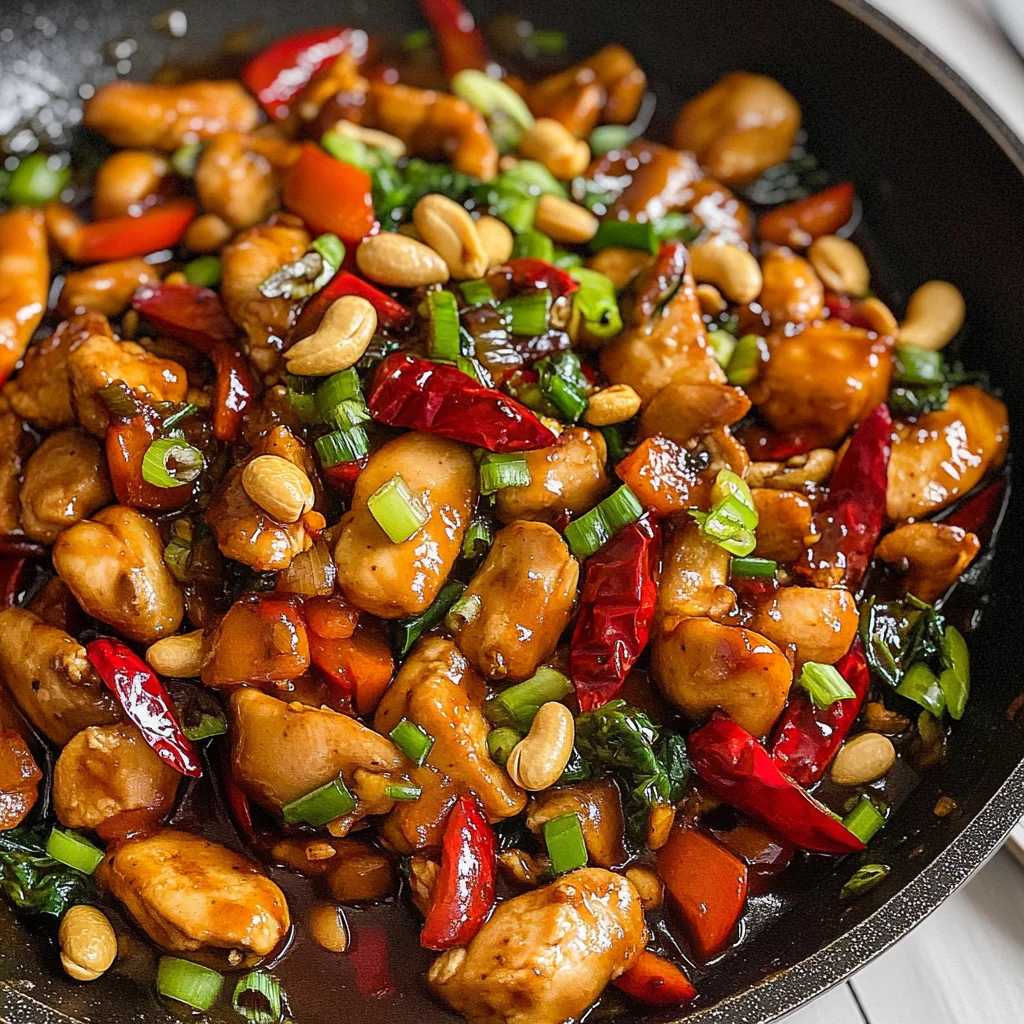
Ingredients:
As we dive into this culinary adventure, let’s take a moment to appreciate each ingredient that plays a vital role in crafting our delightful dish. Each one brings its own character to this flavorful ensemble.
- 1 lb skinless boneless chicken thighs. Choosing skinless boneless chicken thighs is non-negotiable for this recipe since they remain incredibly juicy and tender even when cooked quickly over high heat. The marbling in thighs ensures they don’t dry out as easily as breasts do; trust me on this one! When shopping, look for thighs that are plump and have a fresh color without any discoloration. These will absorb the marinade beautifully and offer a rich flavor profile once stir-fried.
- 1/2 cup red bell pepper (large diced). The bright red bell pepper isn’t just eye-catching; it brings sweetness and color to our dish. When cooked quickly, it retains some crunch while adding vibrancy to our plate—an essential visual component! Always select firm peppers with smooth skin; avoid any with soft spots or wrinkles as they might be past their prime.
- 5 green onions (chopped into 1/2-inch-long pieces). Green onions are like nature’s confetti—they add freshness and brightness to every bite! Their mild oniony flavor complements the dish perfectly without overwhelming it like regular onions might do. Be sure to include both the white and green parts; they contribute different textures and flavors that elevate our kung pao experience!
- ¼ cup roasted peanuts (unsalted). These little nuggets are key players in creating texture contrast within our dish. The unsalted variety allows us to control salt levels better while letting their natural nuttiness shine through—absolutely paramount for enhancing flavor without overshadowing other ingredients! If you’re feeling adventurous, try using cashews instead for a slight twist!
- 10 whole dried Sichuan red chilies. When added whole during cooking, these chilies impart an aromatic heat rather than overpowering spiciness. Their unique flavor profile brings warmth that’s integral to authentic kung pao chicken but don’t worry—you can adjust according to your spice tolerance! Look for vibrant red chilies; avoid any dull or brittle ones which indicate they may not provide much flavor.
- 2 tablespoons vegetable oil (or any neutral oil). A good quality vegetable oil serves as our cooking medium—it’s essential for achieving that perfect sear on our chicken while allowing other flavors to meld beautifully together without interference from strong olive oils or flavored oils.
- 3 tablespoons cold water (for marinating). Cold water helps dissolve cornstarch and ensures an even coating on our chicken during marination—a crucial step for achieving tenderness!
- 1 tablespoon cornstarch. This powerhouse ingredient works wonders by giving our chicken a velvety texture as it cooks—a technique known as velveting—and helps thicken our sauce later on too! Make sure it’s well mixed into the marinade for even results.
- 1 teaspoon regular soy sauce (or light soy sauce). Soy sauce is what brings umami depth into our dish—it’s truly the heart of Asian cooking! Regular or light varieties add saltiness without being too overpowering; choose whichever suits your pantry best!
- 1/2 teaspoon baking soda. You might wonder why we use baking soda here—it’s another secret weapon in ensuring juicy results by tenderizing our chicken during marination! It creates an alkaline environment which alters protein structure for improved juiciness.
- 2 tablespoons white granulated sugar. This ingredient balances out salty notes from soy sauce while enhancing overall flavor complexity—don’t skip it! Sugar caramelizes during cooking giving us those beautiful golden-brown bits we crave.
- 2 tablespoons cold water (for sauce). Just like before, cold water helps incorporate all elements smoothly into our sauce mixture!
- 1 tablespoon regular soy sauce (or light soy sauce) (for sauce). We’re layering flavors again here—this second addition enhances depth further alongside other components!
- 1 tablespoon oyster sauce (or vegetarian stir-fry sauce). This adds richness along with sweetness—if you opt for vegetarian stir-fry sauce instead, ensure it’s well-balanced so it doesn’t veer too far off course!
- 1 tablespoon rice vinegar. Rice vinegar offers brightness and acidity which balances sweetness beautifully—an important aspect when creating complex flavors worth savoring!
- 1/2 tablespoon dark soy sauce. Dark soy gives us color while contributing slightly sweeter notes compared to regular versions—it’s fantastic at rounding out everything harmoniously.
- 1 teaspoon cornstarch (for thickening). Just another bit of cornstarch magic here—to create glossy coatings that’ll cling lovingly onto every morsel!
- 1/2 teaspoon ground sichuan peppercorn (optional). If you want an authentic kick reminiscent of traditional kung pao dishes go ahead—this ingredient adds fragrant warmth alongside subtle tingling sensation—a must-have experience if you enjoy unique flavors!
- 3 garlic cloves (minced). Garlic is essential—not only does it bring incredible aroma but also layers of savory depth throughout each bite! Freshly minced will always yield superior flavor compared against pre-minced options found in jars.
- 1 teaspoon ginger (thinly sliced) is another aromatic powerhouse—its zingy brightness works wonders alongside garlic bringing forth warmth balancing all those sweet/savory notes perfectly together!
Equipment You’ll Need:
Before we dive headfirst into cooking, let’s chat about having the right tools at hand because trust me—they make all the difference in executing this Quick & Easy Kung Pao Chicken flawlessly! Having these essential partners by your side ensures smooth sailing through every step of preparation while maximizing enjoyment along the way.
- Large mixing bowl – A sturdy bowl lets us combine ingredients freely without worrying about spills or splashes during mixing stages—a must-have for marinating chicken effectively ensuring complete coverage!
- Small bowl or cup – This little gem serves as headquarters whenever we’re combining sauces—the perfect size keeps quantities manageable while ensuring nothing goes unnoticed amidst bustling kitchen activity!
- Sharp knife – Having a sharp knife not only speeds things up but also guarantees precision when dicing chicken thighs neatly into cubes—safety first folks; dull knives can lead us astray if we’re not careful!
- Cutting board – Opt for a sturdy cutting board that’ll withstand chopping pressures over time—the ideal support system during prep stages ensuring surfaces stay clean too!
- Large frying pan or wok – A versatile vessel where all magic happens—ideal size allows ample space needed when stir-frying at high temperatures ensuring proper browning happens evenly throughout—all key factors contributing towards mouth-watering results ahead!
Now that we’ve set ourselves up for success let’s roll up those sleeves because it’s time to prepare this irresistible Quick & Easy Kung Pao Chicken together!
Step 1: Marinating the Chicken
The first step toward achieving succulent goodness lies within marinating our chicken thighs—a process vital both texturally and flavor-wise! Start by dicing your skinless boneless chicken thighs into approximately 1.5-inch cubes—they should be uniform so they cook evenly later on without leaving us with any undercooked pieces hiding amongst more thoroughly done ones! Once diced perfectly transfer them into that large mixing bowl we mentioned earlier before adding all marinade ingredients listed above: cornstarch working alongside soy sauces along with baking soda plus cold water create magic together providing moisture retention plus unparalleled tenderness throughout cooking stages ahead!
Don’t rush this step—allowing those glorious chunks of meat soak up every ounce of flavor enhances overall taste immensely after stir-frying later on; aim ideally between 15–20 minutes though even brief exposure yields positive outcomes too if pressed for time! While waiting marvel at how aromas fill surrounding air beckoning appetites forward…it truly sets quite delightful scene anticipating scrumptious feast awaiting shortly thereafter!
Step 2: Preparing Your Sauce Mixture
While waiting patiently on our marinated chicken thighs let’s channel excitement towards preparing accompanying luscious kung pao sauce next—it beautifully binds everything together elevating dish beyond ordinary expectations entirely! Grab small bowl/cup then start whisking away combining remaining elements listed under “sauce” category until granulated sugar dissolves completely resulting silky-smooth glossy mixture ready shortly thereafter—we want this harmony achieved prior making contact between heat sources hence avoiding clumps emerging unexpectedly during final assembly stage before serving steaming plates filled bounty forthwith upon eager guests’ arrival moments away now…
This luscious blend works wonderfully against backdrop created earlier allowing every morsel coated generously right before serving hot from stovetop directly onto plates awaiting eager diners’ hungry eyes lighting up at sight alone…I mean who could resist such temptation?!
Step 3: Searing The Chicken
Next comes searing those marinated pieces transforming them into golden delights ready soon after aromatic frenzy ensues within kitchen atmosphere itself—I know excitement builds tremendously now don’t worry though trust me every minute spent here pays dividends later on regarding texture achieved once plated properly finished product emerges victoriously from sizzling pan thereafter successfully navigating initial heat endeavor flawlessly executed soon enough after heating vegetable oil over medium-high temperature until shimmering lightly inviting adventure awaits unfolding momentarily ahead already beckoning towards sizzling sound enticing all senses fully engaged collectively yearning perfection moment captured forever more…
Once oil reaches appropriate temperature carefully place marinated chunks inside pan avoiding overcrowding situation developing risking uneven cook times occurring ultimately yielding undesirable outcomes best avoided altogether hence aiming towards browning happening uniformly throughout instead yielding crisp exterior whilst keeping juicy insides intact thereafter monitoring closely until golden brown appears approximately five-six minutes elapsed yet don’t hesitate flipping halfway through ensuring even browning taking place uninterrupted throughout entire duration pending readiness achieved confirmed visually promising signs revealing success imminent approaching rapidly indeed…
Step 4: Stir-Frying Vegetables & Peanuts
Now comes joyous part where stirring unravels artistry behind true kung pao magic unfolding effortlessly across flames igniting passion invigorating every fiber present within kitchen realm alike…after removing cooked chicken leaving behind residual oil summon forth fragrant companions dried red chilis alongside chopped green onions plus roasted peanuts tossing them gently around pan embracing fiery embrace sent forth amidst sizzling atmosphere bursting alive suddenly awakening taste buds previously dormant awaiting treat promised soon arriving shortly thereafter tantalizing scents swirling inviting guests closer eager anticipation palpable filling room around shared space reminding everyone meals shared create lasting memories forged strong bonds cherished deeply forever more…
Step 5: A Sizzle of Heat and Flavor
Once your chicken is marinated beautifully, it’s time to bring out those flavors on the stove. Start by heating a generous tablespoon of vegetable oil in a large pan over medium-high heat. Trust me when I say this is where the magic begins! As the oil shimmers like liquid gold, carefully add your diced chicken thighs to the pan. You’ll want to hear that delightful sizzle as they hit the hot surface—this sound is music to any cook’s ears, signaling that we’re about to develop a beautiful golden crust. Cook the chicken for about 5-6 minutes, turning occasionally with a spatula or tongs until it’s cooked through and perfectly golden brown on all sides. This step is crucial because achieving that golden color not only enhances the flavor but also provides a wonderful texture contrast against the tender meat.
Keep an eye on your chicken; you want it cooked through but not dried out. A good visual cue is to look for a rich golden hue and clear juices running from the chicken instead of pink. If you notice any stubborn bits sticking to the pan, don’t fret! Just use your spatula to gently scrape them up—the fond (those tasty browned bits) will add depth to our dish later on. Once your chicken is perfectly cooked, remove it from the pan and set it aside on a plate, leaving behind any residual oil. This oil holds onto all those flavorful drippings that will enhance our next steps!
Step 6: Stir-Frying for Perfection
Now comes one of my favorite parts: stir-frying! In the same pan with the residual oil (and trust me—you want this flavor), toss in your dried Sichuan red chilies, chopped green onions, and roasted peanuts. As these ingredients hit the heat, they will release their essential oils and fragrances, creating an utterly intoxicating aroma that fills your kitchen—seriously, you might just find yourself closing your eyes and inhaling deeply as you savor this moment! Give them a gentle stir for about 15 seconds; this quick fry helps awaken their flavors without burning them.
Next, add in those vibrant chunks of red bell pepper—such a stunning pop of color! Stir-fry everything together for another 30 seconds until the peppers are tender-crisp. This technique is called stir-frying, which allows us to cook ingredients quickly while keeping them crisp and vibrant. The goal here is balance; we want our vegetables bright and lively but still retaining their crunch—a testament to fresh ingredients’ power in this dish. The combination of textures—from crunchy peanuts to tender peppers—will create an incredible mouthfeel that elevates each bite.
Step 7: Bringing It All Together
With everything sautéed to perfection, it’s time to reunite our star player—the chicken—with its flavorful companions in the pan. Return your beautifully cooked chicken back into the skillet and give everything a gentle toss to ensure that every piece of chicken gets coated with those fragrant vegetables and spices. This step isn’t just about mixing; it’s about creating harmony among all these incredible flavors!
Now for the pièce de résistance—it’s time for our sauce! Pour it into the pan over the chicken and vegetables. This sauce is where all our previous efforts pay off; it brings together sweet, savory, tangy notes that will envelop every morsel of chicken like a warm hug. Stir-fry everything together for about 30 seconds until every ingredient glistens with sauce—this quick toss ensures that none of that luscious goodness goes unappreciated! Watch how everything melds beautifully; you’ll see how quickly it thickens due to cornstarch, coating every piece evenly in this delectable glaze.
Step 8: The Final Flourish
At last, we arrive at what I like to call “the final flourish.” Once everything is evenly coated with that fantastic sauce, allow it all to simmer for just a minute longer on low heat—it’s worth every second! This brief simmer allows flavors to deepen even further while ensuring everything is heated through without overcooking those delicate veggies or rubberizing our lovely chicken.
As you prepare to serve this masterpiece, take a moment—step back and admire what you’ve created! Your kitchen should be filled with an aroma that’s inviting enough to draw anyone near, making their taste buds dance with anticipation. To serve, scoop generous portions onto steaming bowls of rice or noodles if you like; these will soak up all those extra juices beautifully. It’s such a profound satisfaction knowing you’ve made something truly extraordinary right at home!
Final Touches
Just before serving up this Quick & Easy Kung Pao Chicken, sprinkle some additional chopped green onions on top for freshness and color—it’s absolutely paramount! These bright bursts will not only enhance visual appeal but also add an aromatic quality that rounds out every bite perfectly.
And there you have it—a simple yet profoundly satisfying meal ready in under half an hour! Each bite offers layers upon layers of flavor: sweet notes from sugar mingling with salty soy sauce while peanuts add crunch against tender chicken pieces—it’s pure bliss! Don’t forget to relish every moment as you enjoy this dish with family or friends because sharing food made with love always makes it taste better. Trust me; they’ll be asking for seconds before they even finish their first plate!
Enjoy your culinary journey into flavors so bold yet comforting; I know you’ll absolutely love making this dish as much as I do!
Storage and Enjoyment Tips for Your Quick & Easy Kung Pao Chicken
Now that your kitchen is filled with the enticing aroma of your freshly made Quick & Easy Kung Pao Chicken, it’s time to dive into the delightful experience of savoring this dish. Whether you’re enjoying it hot off the stovetop or planning to save some for later, the good news is that this meal not only satisfies in the moment but can also be enjoyed beyond its first serving. Trust me when I say, having leftovers can be just as rewarding! Let’s talk about how to keep that deliciousness intact, shall we?
Storing Leftover Quick & Easy Kung Pao Chicken
To ensure your leftover Quick & Easy Kung Pao Chicken remains as scrumptious as it was fresh from the pan, I recommend transferring it to an airtight container. This simple step is crucial because it locks in moisture and flavor while keeping unwanted odors at bay in your fridge. You can store it in the refrigerator for up to three days, which is absolutely perfect for meal prep or a quick lunch option during busy weekdays. To maintain its quality, consider placing a slice of bread in with the chicken; this little trick helps absorb excess moisture, keeping everything fresher longer. After storage, you’ll find that the flavors meld beautifully, creating an even more profound taste sensation when you dig in again! When you’re ready to enjoy those leftovers, simply reheat them gently on the stove or in a microwave, adding a splash of water if necessary to keep things moist.
Freezing Quick & Easy Kung Pao Chicken for Later
If you want to extend the life of your Quick & Easy Kung Pao Chicken even further, freezing is a fantastic option! To do so properly, allow your dish to cool completely before transferring it into freezer-safe bags or containers; removing as much air as possible will help prevent freezer burn. When stored correctly, you can expect it to maintain its quality for up to three months. This makes weeknight cooking so much easier—just pull out a portion on a busy evening and let it thaw overnight in the fridge! The convenience factor here is extraordinary; imagine coming home after a long day and knowing that an amazing homemade meal awaits you with minimal effort. It truly takes away the stress of dinner prep without sacrificing flavor or quality!
Quick & Easy Kung Pao Chicken
Quick & Easy Kung Pao Chicken is a delightful blend of sweet and savory flavors that can be prepared in just 30 minutes. This dish brings the vibrant culinary traditions of Chinese cuisine right to your kitchen, with tender chicken thighs coated in a rich sauce and complemented by crunchy peanuts and colorful vegetables. It’s the perfect solution for busy weeknights when you crave a satisfying meal without the hassle of takeout. The combination of juicy chicken, crisp bell peppers, and aromatic green onions creates an irresistible flavor profile that everyone will love. So roll up your sleeves and get ready for a culinary adventure that promises to impress!
- Prep Time: 20 minutes
- Cook Time: 10 minutes
- Total Time: 30 minutes
- Yield: Serves approximately 4 people 1x
- Category: Dinner
- Method: Stir-Frying
- Cuisine: Chinese
Ingredients
- 1 lb skinless boneless chicken thighs
- 1/2 cup red bell pepper (large diced)
- 5 green onions (chopped)
- 1/4 cup roasted unsalted peanuts
- 10 whole dried Sichuan red chilies
- 2 tablespoons vegetable oil
- 3 tablespoons cold water (for marinating)
- 1 tablespoon cornstarch
- 1 teaspoon soy sauce
- 1 tablespoon oyster sauce (or vegetarian stir-fry sauce)
- 1 tablespoon rice vinegar
- 2 tablespoons white granulated sugar
- 1/2 teaspoon baking soda
- 1/2 teaspoon dark soy sauce
- 1 teaspoon ginger (thinly sliced)
- 3 garlic cloves (minced)
- 1/2 teaspoon ground sichuan peppercorn (optional)
Instructions
- Marinate the chicken: Dice chicken thighs into uniform cubes and combine with cornstarch, baking soda, soy sauce, and cold water in a large mixing bowl. Let marinate for 15–20 minutes.
- Prepare the sauce: In a small bowl, whisk together the oyster sauce, rice vinegar, sugar, soy sauce, and cold water until smooth.
- Cook the chicken: Heat vegetable oil in a large pan over medium-high heat. Add marinated chicken, cooking until golden brown on all sides (about 5-6 minutes). Remove from pan and set aside.
- Stir-fry vegetables: In the same pan, toss in dried red chilies, chopped green onions, and peanuts; cook for about 15 seconds. Add diced bell peppers and stir-fry for another 30 seconds.
- Combine everything: Return the cooked chicken to the pan along with the prepared sauce. Stir-fry for an additional 30 seconds until everything is well coated.
- Serve hot over rice or noodles, garnished with extra green onions if desired.
Nutrition
- Serving Size: 1 serving
- Calories: 360
- Sugar: 8g
- Sodium: 680mg
- Fat: 16g
- Saturated Fat: 2g
- Unsaturated Fat: 12g
- Trans Fat: 0g
- Carbohydrates: 25g
- Fiber: 2g
- Protein: 30g
- Cholesterol: 90mg