Red, White and Blue Pinwheel Icebox Cookies
There’s something so enchanting about the way a simple recipe can transform a gathering into a cherished memory. When I think of summer celebrations, the vibrant colors and delicious aromas that fill the air remind me of laughter, love, and the joy of sharing good food with those we hold dear. This sentiment is beautifully captured in my Red, White and Blue Pinwheel Icebox Cookies. These delightful treats are not just cookies; they represent a sweet finale to your 4th of July feast, embodying the spirit of togetherness and celebration. As you slice through these cookies, revealing their stunning layers reminiscent of our flag, you’ll find that each bite is soft, chewy, and bursting with buttery goodness. The red and blue hues aren’t just for show—they’re an invitation to indulge in a nostalgic treat that bridges tradition with a whimsical twist.
Imagine the anticipation building as you prepare these cookies—how your kitchen fills with the warm, inviting scent of vanilla and butter while you craft this patriotic dessert. Each step in creating these pinwheels is not only about following a recipe; it’s about embracing the process, enjoying every moment spent stirring, rolling, and assembling your dough. Trust me when I say that there’s no rush here—each layer deserves its time to shine, just like the memories you’re about to create around your festive table. So gather your ingredients and let’s embark on this delightful culinary journey together!
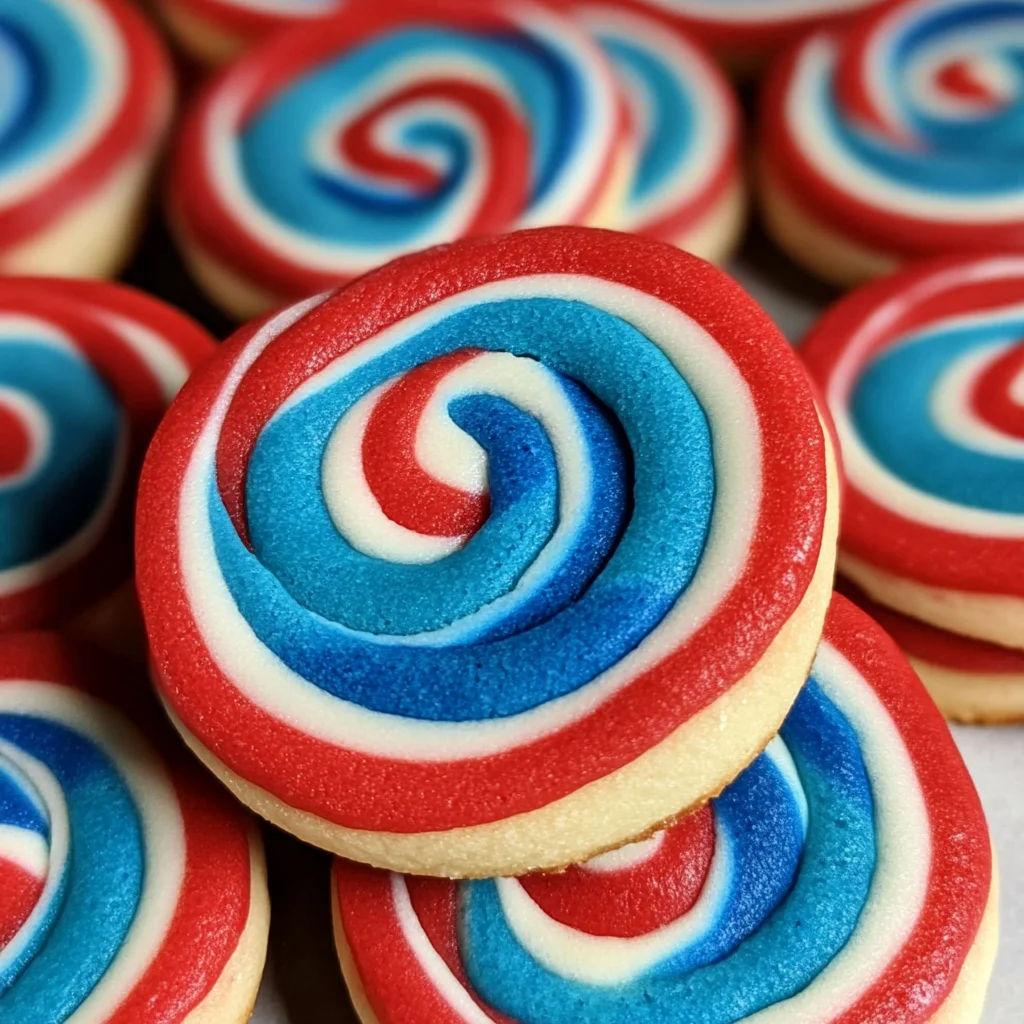
Red, White and Blue Pinwheel Icebox Cookies: A Festive Delight for Summer Celebrations
These Red, White and Blue Pinwheel Icebox Cookies are not only visually stunning but also incredibly easy to make ahead of time! With their chewy texture and vibrant colors, they are perfect for any summer gathering or picnic.
Ingredients:
As we dive into this cookie-making adventure, each ingredient plays an essential role in crafting those beautiful pinwheels that will make everyone smile. Let’s take a closer look at what you’ll need.
- 3 cups all-purpose flour. Flour is the backbone of our cookies; it provides structure and stability while contributing to that wonderful chewy texture we all adore. When choosing flour, opt for a high-quality all-purpose variety that has been finely milled; this ensures your cookies have a smooth consistency. For those gluten-sensitive folks out there, you can swap in a gluten-free blend designed for baking—it works surprisingly well without sacrificing taste or texture.
- 1/2 teaspoon baking powder. This little powerhouse is what gives our cookies that delightful lift! By creating tiny air bubbles as they bake, baking powder helps achieve that soft yet chewy consistency we crave. Make sure it’s fresh because old baking powder can lose its potency—simply check its fizz when mixed with water if you’re unsure.
- 1/2 teaspoon salt. It may seem minor compared to other ingredients but don’t underestimate salt’s ability to enhance flavors! A bit of salt balances the sweetness of sugar and elevates everything else in the cookie dough. Use fine sea salt for even distribution; it dissolves better than coarse salts during mixing.
- 1 cup (2 sticks) unsalted butter, softened to room temperature. This is absolutely paramount for creaming properly—creating that light, airy texture we’re aiming for in our Red, White and Blue Pinwheel Icebox Cookies. If your butter is too cold, it won’t cream effectively; if it’s melted, your cookies will spread too much. The quality of butter matters here—the richer European-style butter will yield even more luxurious results.
- 1 1/3 cups sugar. Sugar isn’t just for sweetness; it also contributes to the chewy texture while helping our cookies brown beautifully in the oven. Granulated sugar works perfectly here because it dissolves effortlessly into the butter when creamed together—creating that fluffy base we want.
- 2 large eggs. Eggs provide moisture as well as act as binding agents in our dough—holding everything together like magic! Ensure your eggs are at room temperature before incorporating them into your batter; this allows them to emulsify better with other ingredients leading to a smoother dough.
- 2 teaspoons vanilla extract. Ahh… vanilla! This liquid gold adds warmth and depth to our cookies’ flavor profile—it’s truly intoxicating! Always choose pure vanilla extract over imitation ones if possible; trust me on this one—the difference in flavor is profound!
- Red food coloring & Blue food coloring. These vibrant colors bring life and festivity to our cookies! When selecting food coloring gel or liquid dyes, make sure they’re high-quality brands; this ensures you achieve brilliant shades without altering the dough’s consistency too much.
Equipment You’ll Need:
Having the right tools on hand makes navigating through this recipe not only easier but also more enjoyable! While these items may not be edible ingredients themselves, they are essential partners on our quest to create something truly wonderful.
- Stand mixer with paddle attachment – This trusty gadget takes much of the labor out of mixing by efficiently blending ingredients until they’re perfectly combined without overworking them—a crucial factor in keeping our cookies tender rather than tough!
- Plastic wrap – You’ll need this handy item not only for wrapping up portions of dough but also for keeping things fresh while chilling them between steps—a non-negotiable part of achieving those perfect layers!
- Wax paper – Essential for rolling out your colored dough without sticking or tearing—it allows you to maneuver easily without mess while ensuring clean lines as you stack those beautiful layers together!
- Parchment paper – Lining your baking sheets with parchment paper means easy removal post-baking while preventing any unwanted sticking or burning!
As we set up our workspace with these tools gathered around us like loyal friends ready for action… let’s jump right into preparing those gorgeous Red, White and Blue Pinwheel Icebox Cookies!
Step 1: Sift Together Dry Ingredients
In a medium bowl, start by sifting together the all-purpose flour along with both baking powder and salt—a step that’s often overlooked but absolutely crucial! Sifting aerates these dry ingredients which fosters an even distribution throughout the cookie dough later on; it helps prevent clumps from forming while ensuring everything combines smoothly when mixed with wet elements later down the line. After sifting, take a moment to admire how light and fluffy they appear—it’s like watching fluffy clouds drift across a bright blue sky!
Step 2: Cream Butter and Sugar
Next up is one of my favorite stages: creaming together that glorious softened butter with sugar! In your stand mixer fitted with a paddle attachment (or using a large bowl if you’re feeling adventurous!), beat the butter until it’s smooth—about two minutes should do—and then gradually add in sugar until you’ve reached lightness akin to whipped cream! This process creates tiny air bubbles within our mixture which helps leaven the cookies as they bake; don’t rush this step—aiming thoroughly for three minutes here creates an utterly intoxicating base that’s almost irresistible even before adding any other components!
Step 3: Incorporate Eggs One at a Time
Now comes time for an egg-citing addition (see what I did there?!)—introducing eggs one at a time into that creamy mixture! This technique known as emulsification binds fats from butter along with liquids from eggs flawlessly creating richness throughout each bite while helping impart structure too—you’ll want each egg fully blended before adding another so keep an eye out during this part! And don’t forget—we’re also adding two teaspoons of pure vanilla extract at this point—the aroma wafting through your kitchen will be nothing short of heavenly!
Step 4: Combine Dry Ingredients
Once those lovely eggs have found their way into our buttery concoction along with aromatic vanilla goodness infused throughout… it’s time now to turn off that mixer briefly before adding in those sifted dry ingredients we worked hard on earlier (don’t forget about them!). Gently combine until just barely mixed—but be wary here—not overmixing is key since excess gluten development could lead us astray towards tough instead of tender textures! Just enough blending should yield lovely cohesive cookie dough ready for sectioning into three equal pieces shortly after removing from bowl…
Stay tuned as we dive deeper into shaping those colorful layers next!
Step 5: Coloring the Dough – A Vibrant Transformation
Now, let’s dive into the fun part—adding color to our dough! This is where the magic truly begins. Take one of the pieces of dough you just separated and return it to the stand mixer bowl. With the mixer set on low, gently add in your red food coloring. I recommend starting with a few drops, then mixing and assessing. Remember, you can always add more, but it’s tricky to dial back if you go overboard! You’re aiming for a bright, cheerful hue that captures the spirit of celebration. Once you’ve reached your desired shade, remove the dough from the bowl and shape it into a neat 4- by 4-inch square again. Wrap this vibrant piece in plastic wrap and place it in the fridge to chill. This chilling step allows the butter in your dough to firm up slightly, which is absolutely crucial for achieving those lovely clean edges when we roll everything together later.
After you’ve wrapped up your red dough, don’t forget to clean out any remnants of that lively color from your mixing bowl—trust me, you don’t want any unintentional tie-dye effects in your cookies! Now, repeat this same process with the remaining piece of dough, using blue food coloring this time. Again, start with a few drops and mix until your blue is bright enough to rival the sky on a perfect summer day. Shape it into another 4- by 4-inch square, wrap it up tightly, and pop it into the fridge alongside its colorful counterpart. This ensures that all three layers of dough are equally chilled before we proceed with rolling them out; consistency is key here!
Step 6: Chilling – The Patience That Pays Off
Now that our beautifully colored doughs are chilling out together in the fridge for about 30 minutes, let’s take a moment to appreciate why this step is non-negotiable! Chilling not only firms up the butter in your cookie dough but also allows the flavors to meld together beautifully—a little patience goes a long way here! It’s during this time that you’ll notice how each color becomes just a bit more vibrant as they set up nicely. Plus, working with cold dough makes it significantly easier to roll out later without sticking or losing shape.
As you’re waiting (and perhaps daydreaming about how delightful these cookies will be), consider prepping your workspace. Clear off a large area on your counter or dining table where you’ll be rolling out these colorful layers. It’s essential to have enough room so you can handle each piece of dough comfortably without feeling cramped or rushed. Trust me; you want this moment to be enjoyable—a little space allows for creativity without chaos!
Step 7: Rolling Out – Crafting Your Cookie Canvas
Once that half-hour has passed—can you feel your excitement building?—it’s time to bring out our chilled treasures from the fridge! Begin by removing each color of dough and cutting each square in half; you’ll now have four rectangles total: one white, one red, and two blue squares (one will be used later). Wrap two of these rectangles back in plastic wrap and return them to their cool haven while we focus on rolling out our first colors.
Place one piece of red dough between two sheets of wax paper—this makes for an easy release as we roll it out! Using a rolling pin (or even just your hands if that’s what you’ve got), gently roll until you achieve a rectangle about 1/8-inch thick; visualize something that looks like a cozy blanket ready to be layered on top! Don’t rush this step—take your time so that each edge remains even and smooth; imperfections can lead to uneven baking later on.
Repeat this rolling process with both the white and blue pieces of dough as well. You want each layer uniform in thickness so they bake evenly together—a beautiful harmony of colors in every bite awaits! If at any point any layer feels too sticky or hard to manage, don’t hesitate to pop it back into the fridge for a few moments before continuing.
Step 8: Layering – Building Your Cookie Masterpiece
Here comes one of my favorite parts—the layering! It’s like creating an edible flag right before our eyes! Start by peeling off the top layer of wax paper from your rolled-out red dough—it should come away easily if rolled correctly—then gently peel away one side of the wax paper from your white layer before using the other side as leverage to carefully place it atop the red layer. This method keeps things neat while ensuring that both colors bond together seamlessly.
Next, repeat this process for the blue layer by peeling off one side of its wax paper and placing it directly on top of the white layer—what an exhilarating sight! Now comes an important technique: using a rolling pin (lightly!) or simply your hands, give those layers a very light roll together just enough so they stick without squashing them down too much. We want those beautiful layers visible when we slice into our cookies later; visual appeal is part of what makes these Red, White and Blue Pinwheel Icebox Cookies so special!
Once you’ve successfully layered those vibrant colors together—and I’m sure they look stunning—it’s time to begin rolling everything into a log starting at one end. Here’s where patience truly counts again; roll tightly but gently so as not to squish out all those lovely patterns we’ve created. As you work through this step, keep checking for air pockets or loose edges; seal any areas that may threaten breaking apart later when slicing.
Step 9: Final Chilling – Setting Up for Success
With our colorful log rolled tightly like an artist’s canvas ready for display, it’s crucial we give it some final relaxation time in the fridge—this is such an essential part! Wrap your logs securely again with wax paper followed by plastic wrap (this helps maintain their shape while cooling). The goal here is simple yet profound: let these beauties chill for at least one hour but ideally four hours if you’re planning ahead!
Why all this fuss about chilling? This additional resting period ensures that when you slice into those logs later on, every cookie maintains its gorgeous shape instead of spreading out flat during baking—no one wants sad-looking cookies that lost their swirl charm! Plus, giving them time allows all those flavors we’ve built up throughout our process to deepen even further—a truly extraordinary outcome awaits us!
While you’re waiting (and yes—I know it’s tough!), think about preheating your oven once you reach that hour mark; get it cranked up to 350ºF so it’s nice and hot when we’re ready for baking magic soon!
Step 10: Baking Your Perfect Red, White and Blue Pinwheel Icebox Cookies
Finally, my friends—we’re nearing cookie bliss! Preheat your oven while carefully unwrapping those chilled logs from their cozy wraps; slicing should reveal those hypnotic swirls we worked so diligently on earlier. Using a sharp knife (for cleaner cuts!), slice each log into rounds about 1/4-inch thick; don’t worry if they aren’t exactly perfect—they’re still going to taste heavenly!
Arrange these colorful rounds about two inches apart on lined baking sheets; allow space because these cookies love expanding while baking! Keep an eye on them as they bake away—set your timer between nine and eleven minutes depending on how soft or crisp you prefer them. You’re looking for pale golden edges but remember not to overbake—watch closely because they may need just another minute at times depending on oven quirks!
As soon as they’re done baking—and oh boy will your kitchen smell utterly intoxicating—you’ll transfer these beauties onto wire racks allowing them ample space to cool completely before devouring them fresh from their warm state.
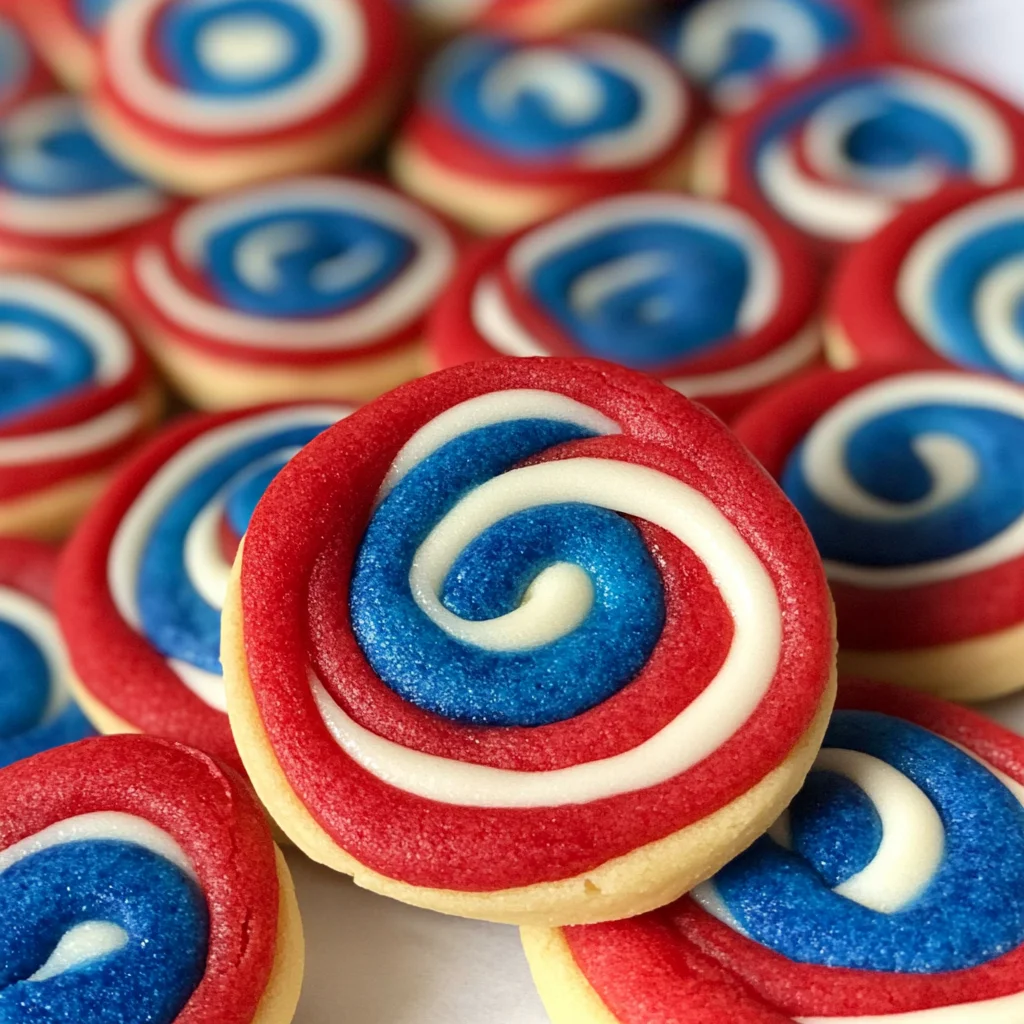
And there you have it—the spectacular unveiling of Red, White and Blue Pinwheel Icebox Cookies ready for every summer gathering or festive occasion! I promise you they’ll be adored by kids and adults alike—you’ll see bright smiles as folks take their first bites filled with pride over such delightful treats made with love! Enjoy sharing these incredible cookies filled with joyous memories around every gathering table—they’re sure going straight into everyone’s hearts just like mine did years ago!
Storage and Enjoyment Tips for Your Red, White and Blue Pinwheel Icebox Cookies
Now that you’ve crafted these beautifully vibrant Red, White and Blue Pinwheel Icebox Cookies, the best part is finally here: enjoying them! Picture yourself at a sunlit picnic or a lively gathering, sharing these delightful treats with friends and family. But wait—let’s talk about how to store any leftovers (if there are any!). Keeping these cookies fresh ensures that every bite remains as soft and chewy as the moment they come out of the oven.
Storing Leftover Red, White and Blue Pinwheel Icebox Cookies
To preserve your delectable cookies for days of enjoyment, store them in an airtight container at room temperature. This simple yet effective method can keep your cookies fresh for up to a week. If you’re aiming for a longer shelf life, consider placing parchment paper between layers of cookies to prevent sticking—trust me, this little trick makes all the difference! While they’re delightful right out of the oven, these cookies develop a wonderfully intensified flavor after a day or two in storage. If you prefer them warm (and who wouldn’t?), a quick pop in the microwave for about 10 seconds will bring back that freshly-baked bliss. Just remember not to rush this step; letting them sit for a bit allows those flavors to meld into something truly extraordinary!
Freezing Your Red, White and Blue Pinwheel Icebox Cookies for Later
If you find yourself smitten with these festive cookies (which I know you will), freezing them is a fabulous option! To freeze properly, simply slice your cookie logs before wrapping each piece tightly in plastic wrap followed by aluminum foil. This double layer ensures that no frostbite can invade your delicious creation! You can stash them away in the freezer for up to three months without losing any of their enchanting essence. When you’re ready for a treat, let them thaw at room temperature or bake from frozen—just add an extra minute or two to the baking time. The convenience factor here is absolutely paramount; imagine having these sweet delights on hand whenever you crave something special!
Red, White and Blue Pinwheel Icebox Cookies

Experience the joy of summer celebrations with these delightful Red, White and Blue Pinwheel Icebox Cookies. Bursting with vibrant colors and deliciously chewy textures, these eye-catching treats are perfect for any festive gathering. Not only are they visually stunning, but they’re also easy to prepare ahead of time, making them a stress-free addition to your summer festivities. As you slice through each colorful layer, you’ll reveal a whimsical design that embodies the spirit of togetherness. Whether you’re enjoying them at a picnic or serving them at a family barbecue, these cookies are sure to become a cherished favorite.
- Prep Time: 30 minutes
- Cook Time: 10 minutes
- Total Time: 40 minutes
- Yield: Approximately 24 cookies 1x
- Category: Dessert
- Method: Baking
- Cuisine: American
Ingredients
- 3 cups all-purpose flour
- 1/2 teaspoon baking powder
- 1/2 teaspoon salt
- 1 cup (2 sticks) unsalted butter, softened
- 1 1/3 cups sugar
- 2 large eggs
- 2 teaspoons vanilla extract
- Red food coloring
- Blue food coloring
Instructions
- Sift together flour, baking powder, and salt in a medium bowl.
- In a stand mixer, cream softened butter and sugar until fluffy.
- Beat in eggs one at a time, followed by vanilla extract.
- Gradually add dry ingredients until just combined.
- Divide dough into three parts; color one red and another blue using food coloring.
- Chill all doughs for at least 30 minutes.
- Roll out colored doughs between wax paper into rectangles.
- Layer the colored doughs together tightly and roll into a log.
- Chill again for at least one hour.
- Preheat oven to 350°F and slice logs into rounds; bake for 9-11 minutes until golden.
Nutrition
- Serving Size: 1 cookie (30g)
- Calories: 150
- Sugar: 9g
- Sodium: 70mg
- Fat: 7g
- Saturated Fat: 4g
- Unsaturated Fat: 3g
- Trans Fat: 0g
- Carbohydrates: 20g
- Fiber: <1g
- Protein: 2g
- Cholesterol: 20mg