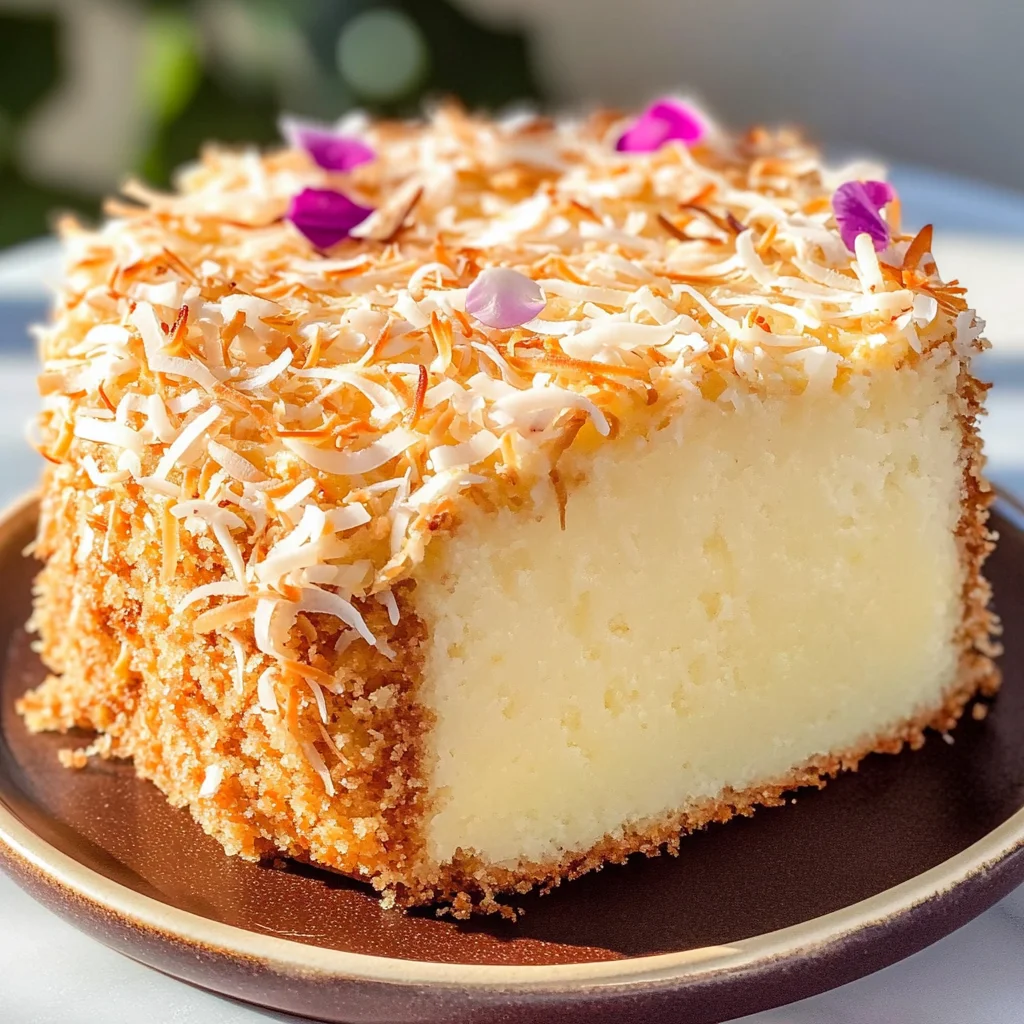
Sticky Coconut Cake
The moment you take the first bite of Sticky Coconut Cake, you’re transported to a tropical paradise, where the sweet scent of coconut fills the air and every morsel feels like a warm hug from an old friend. This gluten-free Indonesian delight, also known as Wingko Babat, is not just a cake; it’s an experience that celebrates the richness of tradition while embracing simplicity in preparation. Each slice offers a delightful contrast between its moist, tender crumb and the satisfying chewiness of shredded coconut, making it an irresistible treat for any coconut lover. Imagine the laughter of friends gathered around, sharing stories and savoring this delectable dessert—it’s more than food; it’s a bridge connecting hearts and cultures.
As I guide you through this recipe, I want you to feel that same excitement I do when I whip up this gem in my kitchen. It’s incredibly easy to make yet yields a cake that feels special enough for any occasion—from festive gatherings to quiet afternoons with a cup of tea. Trust me when I say that this Sticky Coconut Cake will become a staple dessert in your home. With its delicate sweetness and intoxicating aroma of coconut, it invites everyone to slow down and relish each bite. So grab your mixing bowl and let’s embark on this culinary adventure together!
Sticky Coconut Cake: A Tropical Delight You Can’t Resist
This Sticky Coconut Cake is truly one of those recipes that warms my heart every time I make it. The combination of creamy coconut milk and chewy shredded coconut creates an utterly intoxicating flavor profile that will have you dreaming about it long after the last piece is gone. Plus, it requires minimal prep work—perfect for those days when you want something sweet without spending all day in the kitchen!
Ingredients:
Before we dive into making this delicious cake, let’s take a moment to appreciate each ingredient that plays a role in crafting this wonderful treat. Each component contributes something special, so let’s get familiar with them!
- 2 eggs (separated): The eggs are vital here for providing structure and moisture to our cake. By separating them, we can whip the egg whites into soft peaks later, which adds lightness to our batter. This step helps create that perfect balance between dense and airy textures—so don’t skip it! Make sure your eggs are at room temperature; they will mix more easily and incorporate better.
- 1¼ cup granulated sugar: Sugar does more than just sweeten; it serves as a crucial player in caramelization during baking, contributing to both flavor and texture. In our Sticky Coconut Cake, sugar helps achieve that beautiful golden-brown top when we broil it at the end. Opt for fine granulated sugar for even distribution throughout your batter; trust me, it makes all the difference.
- 2¼ cup full fat canned coconut milk: This liquid gold is what turns our cake into a lush tropical delight! Full-fat coconut milk provides richness that enhances the overall flavor while keeping the cake moist without being overly heavy. When selecting your coconut milk, look for brands without additives or preservatives—pure quality ensures you get the best flavor.
- 3 cups shredded sweetened coconut: Ahh, shredded coconut—the star of our show! Not only does it add delightful texture to every bite but its natural sweetness complements the other ingredients beautifully. Look for unsweetened varieties if you’d like to control sweetness levels yourself or go all-in with sweetened if you’re feeling indulgent.
- 1½ cup glutinous rice flour: This unique flour is key in giving our cake its signature sticky texture—which is exactly what we want! Glutinous rice flour is different from regular rice flour; it’s what gives traditional desserts their chewiness and binding properties. You can find this specialty flour at Asian grocery stores or online; it’s worth seeking out!
- 1 teaspoon vanilla extract: A splash of vanilla extract brings depth to our flavors—a non-negotiable ingredient for any dessert! It enhances all the other ingredients beautifully without overshadowing them. Always choose pure vanilla extract over imitation for the best results; you’ll notice how much richer your cakes taste.
Equipment You’ll Need:
Having the right tools on hand makes cooking not only smoother but also much more enjoyable! These essentials help ensure your Sticky Coconut Cake turns out perfectly every time.
- Mixing bowls: A set of mixing bowls in various sizes is essential for macerating ingredients and keeping your workspace organized as you layer flavors into your batter.
- Whisk: A sturdy whisk is critical for effectively beating egg whites until frothy peaks form—the secret behind achieving that lightness in our cake! If you don’t have one handy, a fork will suffice—instead of whisking vigorously like you would with a metal whisk, use smaller circular motions.
- 8×8-inch baking pan: This size is perfect for our recipe! It allows for even baking while creating just enough thickness in each slice so they don’t collapse under their own weight when cut.
- Wire rack: Cooling racks are important because they allow air circulation around baked goods—this prevents sogginess on the bottom. Trust me on this one; no one wants a gummy texture ruining their dessert!
Preparing the Sticky Coconut Cake
Step 1: Preheating Your Oven — Setting The Stage
Before anything else, let’s preheat that oven to 350°F (175°C). This initial step might seem minor but trust me—it plays an absolutely paramount role in ensuring even baking throughout your cake! While we’re getting ready with our ingredients, having an adequately heated oven means we won’t have to worry about uneven cooking later on. As you prepare everything else—like gathering those luscious ingredients—give yourself about 10 minutes before moving onto mixing so things can warm up nicely.
Step 2: Whisking Up Some Magic
In your medium mixing bowl, start by combining those separated egg whites with granulated sugar using your whisk until they become frothy and bubbly—a process known as aerating! This step not only incorporates air but also dissolves some sugar into the mixture which helps create a smooth base later on. Once this mixture looks light and fluffy (you should see soft peaks forming), slowly pour in that beautiful full-fat canned coconut milk while continuing to whisk gently until fully combined—no lumps allowed here! Following this step ensures everything melds together seamlessly when we introduce our dry ingredients.
Step 3: Mixing In The Good Stuff
Now comes one of my favorite parts—adding in our shredded sweetened coconut along with glutinous rice flour alongside vanilla extract! Gently fold these elements into your mixture until well-distributed without overmixing (we don’t want tough cake!). At this point, expect some delightful aromas wafting through your kitchen as those flavors blend beautifully together—it’s like having summer encapsulated within four walls!
Step 4: Pouring Into The Pan
Once you’ve achieved smooth consistency without lumps—a thin batter that’s both watery yet pleasantly fragrant—it’s time to pour everything into your greased 8×8-inch baking pan! Use a spatula or spoon so none spills out during transfer—we wouldn’t want any precious batter going astray now would we? After leveling off surface evenly using said spatula (we want uniform baking here), slide that beauty right into your preheated oven for about 45 minutes’ worth of heavenly anticipation!
I’m hopeful you’re already sensing how magical this experience unfolds—from here onward it’ll only get better as we move further through these steps leading up toward delectable indulgence awaiting us ahead… Stay tuned!
The Journey to Your Sticky Coconut Cake
Let’s dive deeper into the magic of crafting this Sticky Coconut Cake. Each step along the way is not just about following a recipe; it’s about creating something truly extraordinary that will fill your kitchen with warmth and comfort. This isn’t just a cake; it’s an experience, one that’ll have your loved ones asking for seconds—and perhaps even thirds!
Step 5: The Golden Brush of Brilliance
Once your cake has baked beautifully for 45 minutes, it’s time for one of those crucial moments that will elevate your Sticky Coconut Cake from delightful to divine. Carefully remove the baking pan from the oven, allowing the tantalizing aroma of coconut and sugar to envelop you; trust me, this is one of those moments you’ll want to savor. Now, here comes the fun part: using the reserved egg yolks to brush over the top of your cake. This step is non-negotiable because it not only adds a beautiful golden hue but also creates a rich, slightly caramelized crust that contrasts wonderfully with the moist interior.
With a pastry brush or even the back of a spoon (whatever works), gently coat the top of your cake with the egg yolk mixture, ensuring every corner receives its share of this liquid gold. Then, set your oven to broil—this will give your cake that irresistible crispy topping. Keep a watchful eye on it here; broiling can be tricky as things can go from perfect to burnt in mere seconds. You’re looking for a beautiful golden brown color, which should take about 5-10 minutes at most. The change happens quickly, so don’t wander too far from your oven! Once achieved, let out a little cheer because this is where your cake starts to transform into something spectacular.
Step 6: Cooling Down—A Crucial Pause
Now that you’ve achieved that glorious golden finish, it’s time for another essential phase: cooling. Place your cake on a wire rack and allow it to cool completely at room temperature. This might seem simple enough, but I promise you that this step is critical for achieving the perfect texture you want in your Sticky Coconut Cake. Cooling allows steam to escape and helps set up those dreamy layers within—a process you definitely don’t want to rush! If you cut into it too soon, you may find that it crumbles instead of holding together in those lovely squares or triangles we’re aiming for.
As you wait—trust me on this—you’ll notice how the fragrant coconut aroma fills your kitchen more intensely during this period. It’s almost like a welcoming hug from all those cozy memories associated with good food and family gatherings. I encourage you to take this time to reflect on all that went into making this moment happen; each ingredient tells its own story in every bite.
Step 7: Overnight Magic—Patience Pays Off
Once your cake has cooled down completely, it’s time for my favorite part: letting it rest overnight in the fridge! Yes, I said overnight! I know it’s tempting to dive right in after you’ve put all this love into making it, but let me explain why waiting is absolutely paramount here. Refrigerating not only firms up the texture but also allows all those vibrant flavors—from creamy coconut richness to subtle sweetness—to meld together beautifully.
By letting it chill covered in plastic wrap for at least eight hours—or preferably until morning—you’re ensuring that when you finally slice into it, each piece holds together perfectly while still being delectably moist. Think of it as giving your cake a chance to take a little nap; when it wakes up after resting well in its cold cocoon, it’s ready to dazzle everyone with its full potential!
Step 8: The Art of Serving—Cutting with Care
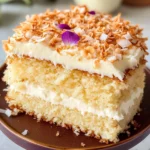
Finally! After what may feel like an eternity (but is totally worth every moment), you’re ready to unveil your stunning creation. Gently remove the plastic wrap and use a sharp knife (dipped in hot water and dried off) to cut through the chilled cake smoothly without tearing apart those luscious layers inside. Whether you choose squares or triangles is entirely up to you—both shapes are equally delightful!
As you serve each piece, take a moment to appreciate how firm yet tender each slice looks and smells—the visual appeal alone can make anyone’s mouth water! Whether served at room temperature or straight from the fridge on a warm day (which brings out an extra layer of refreshing delight), I promise that each bite will transport you and your guests into coconut paradise. This isn’t just dessert; it’s an invitation to share love and laughter around the table.
Final Touches on Your Sticky Coconut Cake Journey
At last! You’ve created something truly special with this Sticky Coconut Cake—a dessert that’s not only delicious but also filled with stories waiting to be shared among family and friends. Take pride in knowing how simple ingredients can come together harmoniously under your care and creativity.
Step 9: A Personal Touch—Garnishing Your Masterpiece
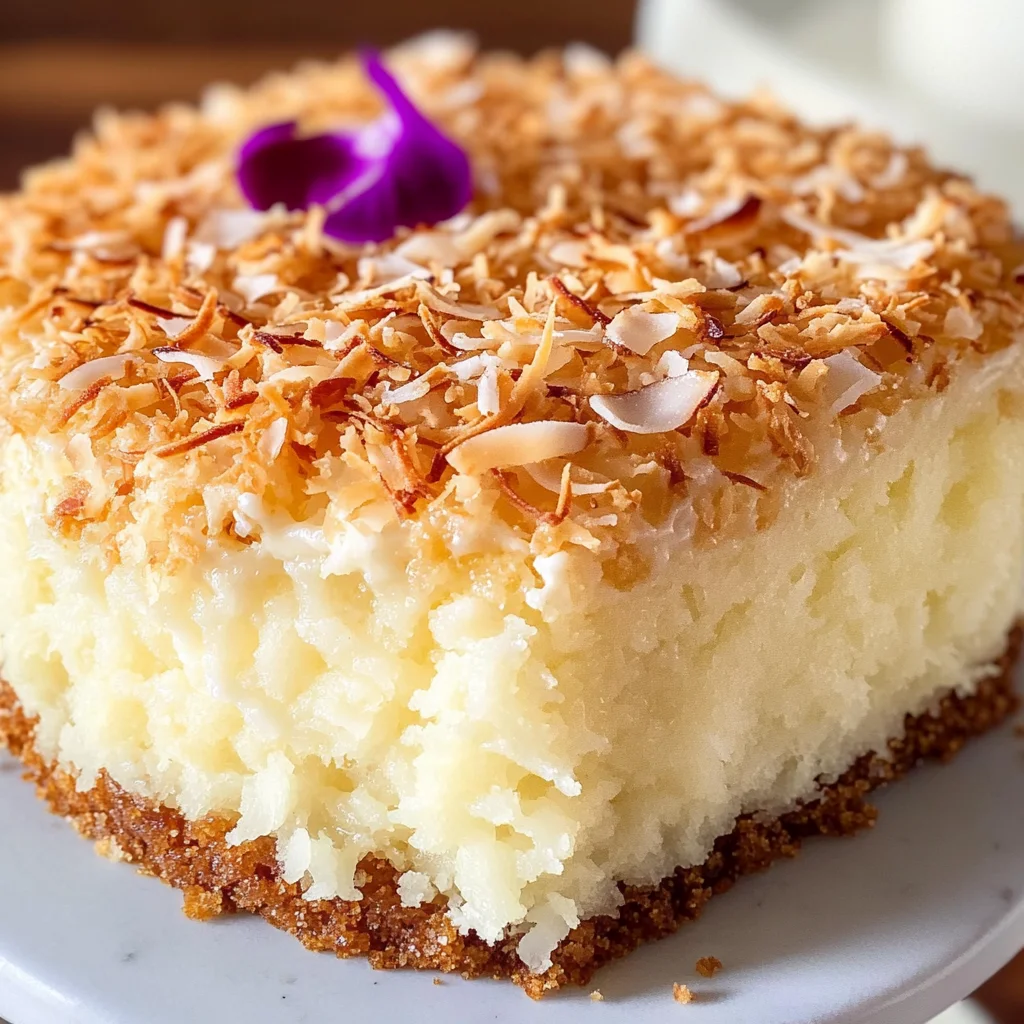
Before serving, consider adding an extra flourish that takes this dish over-the-top: shredded coconut flakes toasted lightly in a pan until they achieve a golden brown hue are just perfect for sprinkling atop each slice! Just heat them over medium-low heat for about 3-5 minutes until fragrant, stirring frequently so they don’t burn. This little touch not only enhances presentation but adds another layer of texture and flavor—a reminder of what makes each bite so enchanting.
So there you have it—a recipe steeped in love and vibrancy that’s sure to leave everyone craving more long after they’ve had their fill! Don’t forget to share these moments with others; nothing connects us quite like food does. From my kitchen to yours—enjoy every delectable morsel!
Storage and Enjoyment Tips for Your Sticky Coconut Cake
Now that you’ve meticulously crafted your Sticky Coconut Cake, it’s time to dive into the delicious world of enjoyment! You’ll be thrilled to know that this lovely cake isn’t just a one-time treat; it comes with excellent storage capabilities that allow you to savor its delightful flavors long after baking. I can almost hear the whispers of joy from your friends and family as they uncover slices of this coconut treasure hidden away in their fridge. Let’s talk about how to preserve that blissful magic!
Storing Leftover Sticky Coconut Cake
To keep your Sticky Coconut Cake fresh and flavorful, the best approach is to store it in an airtight container. This will prevent any moisture loss and keep that rich, coconut essence intact. A glass or plastic container works perfectly—just ensure it’s sealed tight! If you happen to have any leftovers (though I doubt it!), they can be stored in the refrigerator for up to a week. Trust me when I say that it only gets better as it sits; the flavors meld beautifully over time, creating a symphony of taste with each bite. For an extra pro tip, if you want to keep the texture just right, consider placing a slice of bread in the container. It absorbs excess moisture and helps maintain that delightful chewiness! When you’re ready to indulge again, you can enjoy it cold straight from the fridge or let it come to room temperature for a softer bite. Either way, prepare for those comforting flavors to wrap around you like a warm hug.
Freezing Sticky Coconut Cake for Later
If you’ve been blessed with an abundance of this divine cake or simply wish to prepare ahead, freezing is a fantastic option! To freeze your Sticky Coconut Cake properly, first ensure it’s completely cooled. Then, cut it into squares or triangles and wrap each piece tightly in plastic wrap before placing them in a freezer-safe bag or container. This method preserves every bit of its tropical charm! You can keep these frozen delights for up to three months without losing quality. When you’re ready to bring back the magic, simply remove a piece from the freezer and let it thaw in the fridge overnight or on the counter for a couple of hours. The convenience factor here is absolutely paramount—imagine having a sweet escape waiting for you on busy days! Whether you’re indulging solo or serving guests, knowing there’s a slice of heaven at your fingertips makes every moment feel extraordinary.
Sticky Coconut Cake
Sticky Coconut Cake is a delightful treat that evokes the essence of tropical paradise with every bite. This gluten-free Indonesian dessert, also known as Wingko Babat, features a harmonious blend of creamy coconut milk and chewy shredded coconut, making it a perfect indulgence for any occasion. The cake’s moist crumb and slightly caramelized crust create a satisfying texture that pairs beautifully with a warm cup of tea or coffee. Easy to prepare, this cake is not just a dessert; it’s an experience to be savored with loved ones. Whether you’re celebrating special moments or enjoying a quiet afternoon at home, Sticky Coconut Cake will surely become a favorite in your kitchen.
- Prep Time: 15 minutes
- Cook Time: 45 minutes
- Total Time: 1 hour
- Yield: Serves about 12 slices 1x
- Category: Dessert
- Method: Baking
- Cuisine: Indonesian
Ingredients
- 2 eggs (separated)
- 1¼ cup granulated sugar
- 2¼ cup full-fat canned coconut milk
- 3 cups shredded sweetened coconut
- 1½ cup glutinous rice flour
- 1 teaspoon vanilla extract
Instructions
- Preheat your oven to 350°F (175°C).
- In a medium bowl, whisk egg whites and granulated sugar until frothy. Gradually add coconut milk while whisking until fully combined.
- Fold in shredded coconut, glutinous rice flour, and vanilla extract until well blended.
- Pour the batter into a greased 8×8-inch baking pan and bake for about 45 minutes.
- Remove from the oven and brush the top with reserved egg yolks, then broil for an additional 5-10 minutes until golden brown.
- Let cool on a wire rack before refrigerating overnight for best results.
- Slice and serve chilled or at room temperature.
Nutrition
- Serving Size: 1 serving
- Calories: 215
- Sugar: 18g
- Sodium: 25mg
- Fat: 9g
- Saturated Fat: 7g
- Unsaturated Fat: 2g
- Trans Fat: 0g
- Carbohydrates: 32g
- Fiber: 2g
- Protein: 3g
- Cholesterol: 70mg