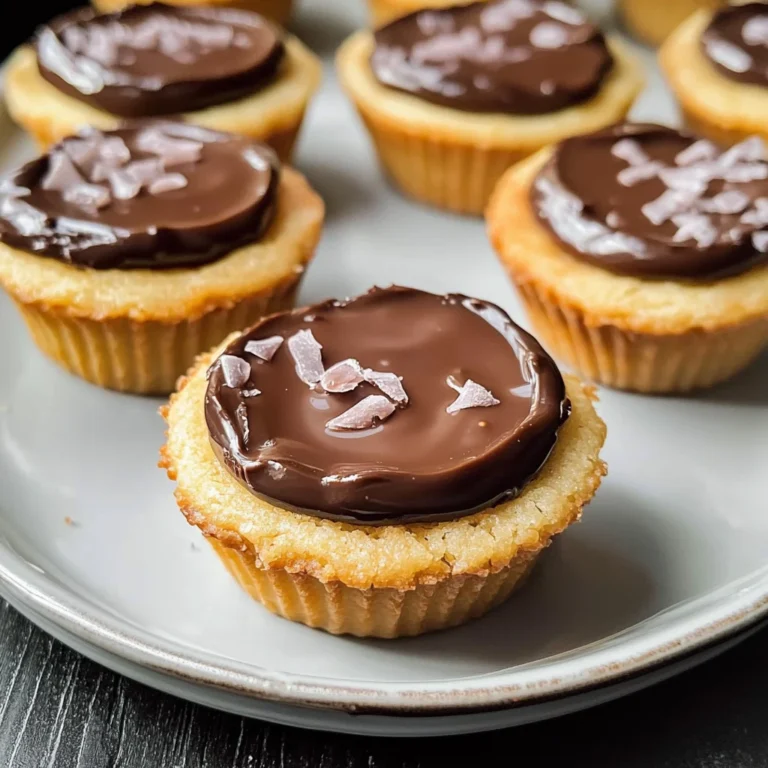
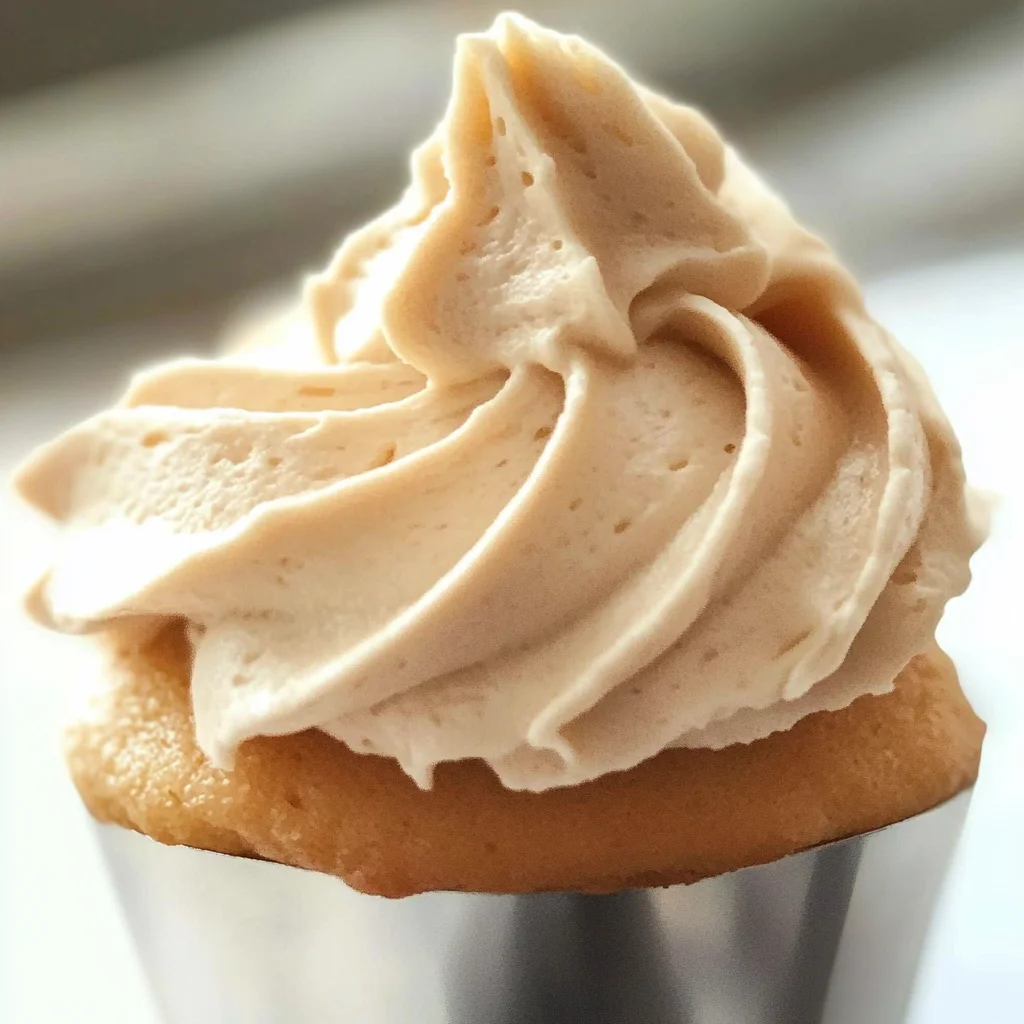
Apple Buttercream Icing
The crisp air of autumn brings with it a sense of nostalgia and warmth, doesn’t it? As the leaves turn golden and the scents of cinnamon and baked apples waft through our kitchens, there’s something deeply comforting about embracing seasonal flavors. Today, I want to share with you a recipe that captures the very essence of fall: Apple Buttercream Icing. This isn’t just any icing; it’s a luscious, creamy delight that transforms ordinary cakes and cupcakes into extraordinary experiences. Imagine spreading this velvety concoction over a spice cake or dolloping it onto freshly baked muffins, and you’ll understand why this apple buttercream icing is a must-have in your baking repertoire. The star ingredient here is apple butter, which infuses every bite with an intensely rich apple flavor that simply sings of autumn.
I’ve always been captivated by how food has the power to evoke memories and emotions, and this icing is no exception. It reminds me of cozy family gatherings where laughter fills the room, and we indulge in sweet treats while sharing stories around the table. The beauty of this recipe lies not only in its taste but in its simplicity. You can whip it up in just five minutes! Yes, five minutes to create a frosting that elevates your desserts to new heights. Trust me when I say that once you try this Apple Buttercream Icing, you’ll find yourself returning to this recipe time and again, eager to spread that deliciousness on everything from cakes to cookies.
Apple Buttercream Icing: A Toast to Autumn’s Rich Flavors
Let’s dive into making this delightful Apple Buttercream Icing together! Whether you’re prepping for a festive gathering or simply treating yourself (because you absolutely deserve it), this recipe will guide you step-by-step to create something truly special.

Ingredients:
As we embark on this culinary journey together, let’s take a closer look at each ingredient that makes up our Apple Buttercream Icing. Each component plays a vital role in crafting the wonderful flavors and textures we’re aiming for.
- 1 cup (2 sticks or 226g) salted or unsalted butter, softened to room temperature. This is crucial for achieving that ideal creamy consistency we want in our icing. When your butter is at room temperature, it allows for better incorporation of air during mixing, which results in a light and fluffy texture. If you’re using salted butter, it adds an extra depth of flavor that complements the sweetness of the apple butter beautifully. If you’re going for unsalted butter instead, just ensure you add a pinch of salt later if desired!
- 5 cups powdered sugar. Now, some might think that all sugar is created equal, but trust me—powdered sugar is what gives our icing its signature silky texture and sweetness without any grittiness. It dissolves easily into the mixture, creating that smooth mouthfeel we crave in frostings. While measuring out five cups might seem daunting at first glance, remember that this quantity ensures you have enough coverage for all your baked goods—think cakes, cookies… even pancakes!
- ¼ cup apple butter. Ahh, the heart and soul of our icing! Apple butter isn’t just for spreading on toast; it’s packed with concentrated apple flavor that will elevate your icing like nothing else can. When choosing apple butter, look for brands with minimal ingredients—just apples and spices—to ensure maximum flavor without any unnecessary additives. This little jar of liquid gold will impart both sweetness and a gorgeous autumnal aroma to your icing.
- 2 tablespoons apple cider. Adding apple cider brings an additional layer of complexity to our icing’s flavor profile; it balances out sweetness with just a hint of tanginess that’s utterly intoxicating! Make sure you’re using pure apple cider—no additives or preservatives allowed here! This small amount makes a world of difference as it enhances the fruity notes from the apple butter while lending a lovely moisture content.
Equipment You’ll Need:
Having the right tools makes the cooking experience not only smoother but also much more enjoyable! With these essential partners by your side, you’ll be well-equipped to create something wonderful.
- Medium mixing bowl or stand mixer – A good mixing bowl is non-negotiable; it’ll allow you ample space to whip everything together without worrying about spills or messes. If you’re using a stand mixer (which I highly recommend for ease), make sure you have the paddle attachment ready—it does all the heavy lifting for you while whipping up that airy frosting!
- Spatula – A sturdy spatula will be your best friend when it comes time to scrape down the sides of your bowl during mixing. It’s important to ensure every bit of butter and sugar gets incorporated evenly so there are no lumps left behind!
- Measuring cups – Precision matters in baking! Having reliable measuring cups ensures you’re getting everything right down to the last tablespoon—this level of accuracy is what allows each ingredient’s flavors to shine through perfectly.
Preparing the Apple Buttercream Icing
Step 1: Whipping Up That Creamy Base
Start by placing your softened butter into your mixing bowl or stand mixer fitted with the paddle attachment—this process is known as creaming! You want your butter to be soft but not melted; if it’s too cold or too warm, you’ll end up with an undesirable texture in your final product. Begin mixing on medium speed until it’s light and fluffy—about 2-3 minutes should do it! The goal here is to incorporate air into the mixture because this will create that luscious mouthfeel we all love in frosting.
Step 2: Infusing with Flavor
Now comes one of my favorite parts: adding in our glorious apple butter along with apple cider! Pour them into the bowl with your whipped butter and mix on low speed until combined smoothly—you don’t want splatters everywhere! This step allows those rich autumn flavors from both ingredients to meld beautifully together before we add any sweetness from powdered sugar. Remember not to rush; take your time here as each addition contributes significantly toward building depth—a balance between creamy richness from butter paired with fruity brightness from apples!
Step 3: Sweetening Things Up
Once you’ve achieved a smooth base infused with deliciousness from those earlier ingredients (can you smell that heavenly aroma?), it’s time to start adding powdered sugar gradually—about one cup at a time works wonders here! Mix slowly on low speed until fully incorporated before adding more; this prevents any cloud-like disasters where sugar flies everywhere around your kitchen! As you continue adding sugar gradually while mixing well after each addition—you’ll notice how everything becomes thicker yet creamier at once.
Step 4: Achieving Perfection
After incorporating all five cups (yes!) patiently wait until everything looks lovely and smooth—the consistency should be spreadable yet hold its shape nicely without being runny or overly stiff either way! If needed adjust consistency by adding either more powdered sugar if too thin—or even another splash of cider if feeling overly thick—a little bit goes a long way here so trust yourself throughout this journey toward achieving perfect balance within flavors too!
And there you have it—the most enchanting Apple Buttercream Icing ready for slathering atop all those delightful baked goods waiting patiently nearby. Trust me when I say this addition will elevate any dish into something extraordinary worth celebrating time after time again! Stay tuned as we explore more steps together toward finishing touches—and perhaps sharing some serving ideas along way too…
The Magic of Apple Buttercream Icing
Oh, my friends, let me tell you about this heavenly concoction known as Apple Buttercream Icing! Imagine a frosting that captures the essence of autumn—the warm spices, the sweet, luscious apples, and that velvety texture that glides over your cakes and cupcakes like a soft whisper. This icing is not just another topping; it’s an experience, a celebration of flavors, and a wonderful way to elevate your baked goods. Now that we’ve whipped up our initial mixture of butter, apple butter, and apple cider, let’s dive deeper into the remaining steps to create this truly extraordinary icing!
Step 5: Whip It Good!
In our quest for the perfect Apple Buttercream Icing, we begin with the joyful act of whipping. Take your medium mixing bowl or stand mixer—this is where all the magic happens! Start by adding your softened butter (1 cup) into the bowl. Remember, softened butter is crucial here; it allows the sugars to blend smoothly without any clumps. If you’re using salted butter, it adds a lovely hint of flavor that balances well with the sweetness from the powdered sugar and apple butter. Add in your apple butter (¼ cup) and apple cider (2 tablespoons) at this point.
Now, turn on your mixer to medium speed and whip everything together until you achieve a smooth consistency—this should take about 2-3 minutes. You’ll notice how creamy and beautifully blended these ingredients become; it’s almost like watching clouds swirl in a blue sky! This step is paramount because it creates a luscious base for our icing. The air incorporated during this process gives our icing that fluffy texture we all crave. But don’t rush—take your time here to ensure everything is fully combined before moving on.
Step 6: Sweetening the Deal
Once you have your creamy mixture at its best, it’s time to add the star player—our powdered sugar! Gradually sprinkle in about 5 cups of powdered sugar. Yes, I know it sounds like a lot, but trust me on this one; each spoonful will transform our mixture into something divine. This gradual addition is essential because adding too much sugar at once can lead to an uneven texture—nobody wants lumpy icing when there’s magic waiting to happen!
As you mix on low speed initially (to avoid a sugary cloud explosion!), watch as the icing begins to thicken. You’ll want to scrape down the sides of your bowl occasionally with a spatula to ensure every bit of sugar gets incorporated evenly. After about 3-4 minutes of mixing, you’ll notice that the icing becomes more coherent and holds its shape beautifully—a sign that we’re getting closer to perfection! The goal here is to achieve a thick but spreadable consistency; if it seems too stiff, feel free to add another teaspoon of apple cider or even water for moisture.
Step 7: Taste Testing – The Best Part!
Now comes my favorite part: taste testing! After achieving that delightful consistency with a velvety sheen, it’s time to sample your creation. Use a spatula or a clean finger (because who can resist?!) and take just a tiny bit off the edge. As you savor that first bite, allow yourself to relish in those warm notes of apple mixed with the gentle sweetness of sugar; it’s an utterly intoxicating experience! If you feel like it needs just a touch more sweetness or spice (perhaps a hint of cinnamon?), now’s your moment—add in whatever feels right for you!
This step isn’t just about ensuring deliciousness; it’s also about personalizing this icing so it resonates with your unique taste buds. Every kitchen tells a story through its flavors! So adjust as needed until you have something that feels truly yours—a reflection of what home means in every bite.
Step 8: Final Flourishes
Before we wrap up this session of delightful creation, let’s focus on one last essential step—chilling our Apple Buttercream Icing before spreading it on cakes or cupcakes. While not always necessary for frostings, resting this particular icing can enhance its firmness and deepen those flavors even further! Once you’ve finished mixing, cover your bowl tightly with plastic wrap or transfer your icing into an airtight container.
Place it in the refrigerator for at least 30 minutes but no longer than an hour—this cooling period allows those flavors to marry beautifully while also giving it structure when applied later. When you’re ready to adorn your baked goods with this heavenly icing again, simply bring it back out and give it another quick whip just until smooth—it should be spreadable yet still hold its shape perfectly when piping onto treats.
The Grand Finale: Decorating Your Treats
Now that we’ve crafted our Apple Buttercream Icing masterpiece and allowed it some time to chill, let’s talk about how truly transformative this icing can be once applied! Whether you’re dressing up simple vanilla cupcakes or layering between moist spiced cakes, this frosting will sing autumnal songs on every dessert plate.
Step 9: Spread Joy
When you’re ready to indulge in decorating with your Apple Buttercream Icing, make sure all surfaces are clean and prepped for action! Use an offset spatula or piping bag fitted with your favorite tip for creating beautiful swirls or rosettes atop each treat. Don’t forget—the goal here isn’t perfection; it’s joy! Allow yourself creative freedom as you spread or pipe generous amounts over your desserts.
As you finish decorating each piece with care and love, pause for just a moment to appreciate what you’ve created: an edible work of art infused with warmth from love and seasonal flavors! If there’s any leftover icing (and I promise you will be tempted), store it in an airtight container in the fridge—it can last up to two weeks if kept sealed tight!
And there you have it—a stunningly rich Apple Buttercream Icing ready to transform anything from simple cookies to elaborate layer cakes into something profoundly satisfying and absolutely delectable! Enjoy every moment spent sharing these creations with friends and family; after all, cooking is not just about nourishment—it’s about connection and joy shared around good food.
Now go forth and spread that Apple Buttercream Icing everywhere! Your desserts deserve nothing less than this symphony of flavors wrapped in love!
Storage and Enjoyment Tips for Your Apple Buttercream Icing
Now that you’ve crafted this deliciously creamy Apple Buttercream Icing, the real fun begins! The rich aroma of apple and butter swirls in the air like a warm hug on a crisp fall day, and I can’t help but feel excited about all the delightful ways to enjoy it. This icing is not only a treat on its own but also a versatile companion to your favorite baked goods. However, if you find yourself with some leftovers (which is rare but possible), let’s ensure you know how to preserve that heavenly taste so you can savor it later!
Storing Leftover Apple Buttercream Icing
To keep your Apple Buttercream Icing as luscious as the moment it was made, store it in an airtight container—this step is absolutely paramount! Placing it in a glass or plastic container will work wonders in maintaining its creamy texture. You can pop it in the refrigerator where it’ll happily stay fresh for about a week. I recommend checking on it every now and then; trust me, nothing beats that first scoop! If you want to keep it even longer, consider placing a piece of plastic wrap directly onto the surface of the icing before sealing the container—this little trick helps prevent those pesky air bubbles that could lead to drying out. After storage, you might notice that the flavors meld together even more beautifully, offering an even richer experience than before. When you’re ready to use it again, just give it a gentle stir and perhaps let it sit at room temperature for about 15 minutes—this ensures that it’s as soft and spreadable as when you first made it.
Freezing Apple Buttercream Icing for Later
If you’re anything like me, you’ll want to keep some of this scrumptious icing on hand for those spontaneous baking adventures or surprise dessert cravings! Freezing your Apple Buttercream Icing is an excellent option that allows you to capture that fall-inspired flavor for months ahead. To freeze correctly, simply spoon the icing into an airtight freezer-safe container or freezer bag. Make sure to seal out any excess air—this keeps your icing tasting fresh and prevents freezer burn. It will maintain its delightful quality for up to three months in the freezer. When you’re ready to use some from frozen, just transfer what you need into the fridge overnight or leave it on your kitchen counter for about an hour before using—it’s such a convenient solution! Imagine pulling out this silky icing from your freezer on a chilly day, ready to adorn something special; now that’s something to get excited about!
Apple Buttercream Icing
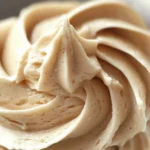
Apple Buttercream Icing is the ultimate autumn-inspired frosting that brings warmth and nostalgia to your baked goods. This luscious icing combines rich apple butter with creamy butter and a hint of apple cider, creating a delightful spread that’s perfect for cakes, cupcakes, or even muffins! In just five minutes, you can whip up this velvety concoction to elevate your desserts into extraordinary experiences.
- Prep Time: 5 minutes
- Cook Time: 0 minutes
- Total Time: 5 minutes
- Yield: Approximately 16 servings (1 tablespoon each) 1x
- Category: Dessert
- Method: Mixing
- Cuisine: American
Ingredients
- 1 cup (226g) softened butter
- 5 cups powdered sugar
- ¼ cup apple butter
- 2 tablespoons apple cider
Instructions
- In a medium mixing bowl or stand mixer, beat the softened butter on medium speed until light and fluffy (about 2-3 minutes).
- Add the apple butter and apple cider, mixing on low until fully combined.
- Gradually add powdered sugar one cup at a time, mixing on low speed until incorporated.
- Once all sugar is added, mix until smooth and spreadable.
- Adjust consistency with more powdered sugar or cider if needed.
Nutrition
- Serving Size: 1 tablespoon/15g
- Calories: 52
- Sugar: 9g
- Sodium: 30mg
- Fat: 2g
- Saturated Fat: 1g
- Unsaturated Fat: 1g
- Trans Fat: 0g
- Carbohydrates: 10g
- Fiber: 0g
- Protein: 0g
- Cholesterol: 5mg