Maple Cookies Recipe
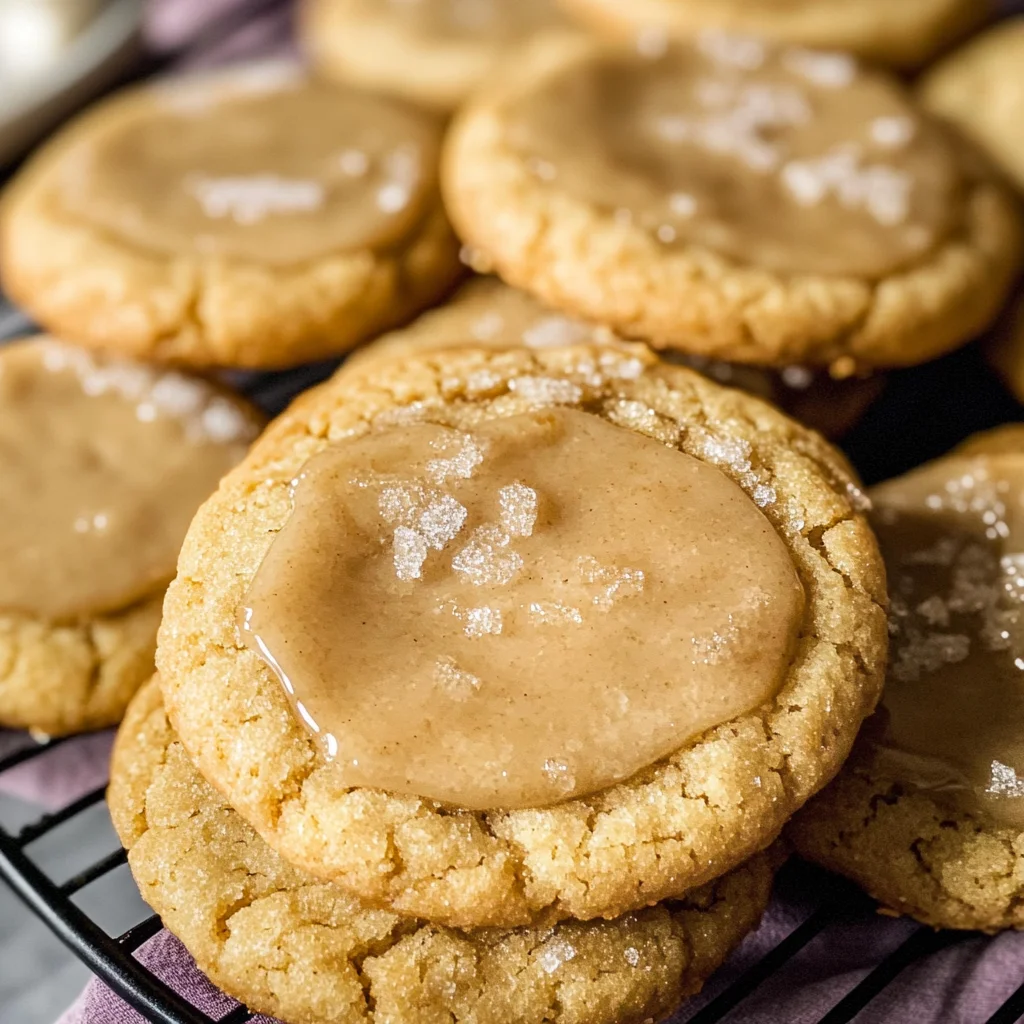
There’s something truly magical about baking cookies, isn’t there? The way your kitchen fills with aromas that beckon you to take a bite long before they’re even done is an experience that transcends mere food preparation. My Maple Cookies Recipe captures this enchantment perfectly. Picture it: soft, chewy brown sugar cookies, each one infused with the captivating essence of real maple syrup, and topped with a silky smooth maple glaze that glistens like liquid gold. They are rich yet comforting, evoking cozy memories of crisp autumn afternoons and warm gatherings around the table. I can promise you that these cookies not only satisfy your sweet tooth but also evoke feelings of warmth and nostalgia, making them the perfect treat for any occasion.
What makes these cookies so special? It’s all about the ingredients and the love you put into making them. Each component plays a vital role in creating a symphony of flavors and textures. From the deep sweetness of light brown sugar to the earthy notes of pure maple syrup, every bite tells a story. And let’s not forget about the glaze! It adds an extra layer of indulgence that elevates these cookies from delightful to extraordinary. Whether you’re sharing them at a holiday gathering or enjoying them as an afternoon pick-me-up with your favorite cup of tea, these Maple Cookies will surely become a cherished recipe in your home.
Maple Cookies Recipe: A Cozy Sweet Delight
I’m thrilled to share my Maple Cookies Recipe with you! These cookies are not only simple to make but also use everyday pantry ingredients that you likely already have on hand. The process is straightforward, and I’ll guide you every step of the way to ensure success in your baking adventure.

Ingredients:
Embarking on our culinary journey begins with gathering the right ingredients—each one is essential for crafting those irresistible Maple Cookies. Let’s dive into what makes each element shine!
- ¾ cup unsalted butter, softened. This is crucial for achieving that delightful texture we’re after; it creates a tender crumb while allowing for proper creaming with sugar. Softened butter means it should be pliable but not melted—think of it as being at room temperature for about 30 minutes. If you’re feeling adventurous, consider using European-style butter; its higher fat content will enrich your cookies even further.
- 1 cup light brown sugar, packed. Brown sugar brings a deep richness and moisture to our cookies thanks to its molasses content. This results in that wonderful chewy texture we all adore! When measuring brown sugar, make sure to pack it tightly into the measuring cup—it loves to cling together—and always opt for light brown over dark for a more balanced sweetness.
- 1 large egg. Eggs bind our ingredients together while providing structure and moisture; they also help create that lovely rise in our cookies as they bake. For best results, use eggs at room temperature since this helps them blend more seamlessly into the dough.
- 1 tsp vanilla extract. Vanilla is like the magic touch in baking—it enhances all other flavors and adds complexity to our cookie’s profile. Always choose pure vanilla extract over imitation if possible; its warmth is utterly intoxicating and worth every drop.
- ¼ cup pure maple syrup (Grade A recommended). This liquid gold is what sets our cookies apart! Real maple syrup provides an unmistakable flavor that’s both sweet and earthy, elevating our cookies from simple treats to something truly special. Grade A syrup works wonderfully here due to its lighter flavor profile; look for quality brands that boast 100% pure syrup.
- 2 cups all-purpose flour. Flour forms the backbone of our cookie dough; it provides structure and stability while absorbing moisture during baking. Be sure to spoon and level your flour when measuring—too much can lead to dry cookies! If you’re feeling adventurous or need gluten-free options, consider substituting some or all of the flour with almond or oat flour.
- 1 tbsp cornstarch. This ingredient is non-negotiable if you want perfectly soft cookies! Cornstarch helps absorb moisture while creating a tender crumb—essentially giving us that melt-in-your-mouth quality we crave in baked goods.
- ½ tsp baking soda. A leavening agent that’s key for achieving lift in our cookies without making them overly puffy; it reacts with acidity in other ingredients (like brown sugar) to create carbon dioxide bubbles during baking, giving us those lovely soft centers.
- ½ tsp salt. Salt may seem unassuming, but it’s absolutely paramount! It enhances sweetness while balancing flavors throughout our cookie dough—never skip this small but mighty ingredient!
For The Maple Glaze
- 1 ½ cups powdered sugar. This fine sugar dissolves beautifully into our glaze, creating that luscious texture we want without any graininess left behind! Sifting your powdered sugar beforehand ensures even mixing—trust me on this!
- 2 tbsp pure maple syrup. Just like in our cookie dough, maple syrup shines here too! It adds flavor while assisting in achieving a smooth consistency for glazing—feel free to adjust based on how sweet you’d like your glaze!
- 1–2 tbsp milk (as needed for consistency). Milk is our secret weapon for adjusting glaze thickness! Start with one tablespoon and add more gradually—this way, you’ll achieve just the right spreadability without turning it runny.
- 1 tbsp melted butter. Adding melted butter gives our glaze richness while contributing to its glossy finish; it’s a small addition that makes a world of difference!
- Pinch of salt. Just like before, salt enhances flavor here too—this tiny amount will balance out the sweetness beautifully!
Equipment You’ll Need:
Having the right tools at your disposal makes all the difference when bringing this recipe to life! While they may not be ingredients, think of these pieces as essential partners in your culinary creation journey.
- Mixing bowls – A good set of mixing bowls is vital because they allow you to easily combine wet and dry ingredients separately before merging them into one glorious dough without any messiness!
- Hand mixer or stand mixer – Investing in either option will save you time and energy when creaming butter and sugar together—a crucial step for building airiness into your dough!
- Measuring cups/spoons – Accurate measurements are non-negotiable in baking; having reliable measuring tools ensures consistent results every time—no guesswork here!
- Baking sheets lined with parchment paper – Parchment prevents sticking while allowing even heat distribution across your cookie bottoms—plus it’s super easy cleanup afterwards!
Now that we’ve gathered everything we need let’s dive into preparing this scrumptious Maple Cookies Recipe together!
Step 1: The Art of Creaming
In a large mixing bowl, start by creaming together your softened butter and packed light brown sugar using either a hand mixer or stand mixer set on medium speed for about 2–3 minutes until light and fluffy—a process known as creaming! Why is this step so important? Well, creaming incorporates air into the mixture which contributes significantly toward achieving those soft edges we desire while keeping centers chewy! You want it pale golden color resembling whipped clouds—that’s how you know you’re on track toward cookie perfection! Don’t rush through this step; patience pays off here as you’ll notice how buttery aroma begins filling up your kitchen—it’s absolutely exhilarating!
Step 2: Incorporating Wet Ingredients
Once you’ve achieved that gorgeous creaminess, gently add one large egg along with vanilla extract and pure maple syrup into your bowl before mixing everything until fully combined – remember: no lumps allowed here! With proper incorporation comes flavor harmony—the combination creates depth throughout each bite plus aids binding so they don’t crumble apart once baked (nobody wants sad crumbles!). As everything swirls together beautifully add visual cues by watching out for shiny glossiness as well—that’s where magic starts happening!
Step 3: Whisking Together Dry Ingredients
While waiting patiently (and smelling those glorious scents wafting through), grab yourself another bowl where we’ll whisk together two cups all-purpose flour along with cornstarch (for tenderness), baking soda (to help rise), and salt (flavor enhancer). Fluff up flour before measuring by spooning it lightly into measuring cups then leveling off—it’s crucial because too much can lead us down dry-cookie lane which none of us want! Once combined thoroughly take care not overmix when introducing dry mix back into wet mix—we’re merely looking until dough comes together smoothly without any streaks left behind—it might seem daunting initially but trust me when I say it’ll be worth every effort once baked!
Step 4: Chilling Out
Now here’s where patience becomes key again… Cover up your bowl tightly with plastic wrap before placing it inside fridge allowing dough chill out anywhere from one hour up until overnight if possible—the longer chill promotes better flavors while preventing excessive spreading during baking later down line too—it’s science folks! During chilling period feel free indulge yourself by imagining what awaits once those glorious little rounds transform oven magic—they’ll turn golden deliciousness right before eyes once done just wait till aroma hits full force surrounding entire house—it’ll pull anyone nearby closer than ever before too—all part joy this journey entails!
Stay tuned because we’re almost ready to shape these delightful treats into actual cookie form next—I can hardly contain my excitement just thinking about their final transformation coming soon!
Step 5: Shaping the Cookies into Perfect Rounds
Now that you’ve chilled your dough and it’s firmed up beautifully—a crucial step that enhances both texture and flavor—we’re ready to shape these little delights into cookies. Grab a cookie scoop or simply use a tablespoon to measure out about 1½ tablespoons of dough. The size is significant; it ensures even baking, allowing the cookies to rise just enough without spreading too thinly. Roll each scoop into a ball between your palms. Feel that cool, slightly sticky texture? That’s the magic of butter and maple syrup coming together!
As you place those dough balls onto your prepared baking sheets, make sure to leave about 2 inches of space between them. This space is absolutely paramount; it allows for proper spreading while baking, ensuring that each cookie has room to puff up and become delightfully chewy on the inside, with those perfectly golden edges. Don’t rush this step! Take your time, admire how each ball glistens with promise, and let excitement build as you prepare for the next phase.
Step 6: Baking Your Maple Cookies to Perfection
Once your oven has reached a warm embrace of 350°F (175°C), it’s time to slide those beauties in for their moment of glory. Bake them for 10–12 minutes—this is where the magic really happens! Keep a close eye on them towards the end of the baking time; you’ll want to see the edges turn lightly golden while the centers still appear ever-so-slightly underbaked. Trust me on this one: they will continue to set as they cool on the baking sheet, leading to that coveted soft and chewy texture that makes these cookies so irresistibly good.
While you’re waiting—and oh, the aroma wafting through your kitchen will be utterly intoxicating—think about what makes these cookies special. It’s not just about baking; it’s about creating memories! Picture yourself sharing these with friends or family, perhaps over a cup of tea or coffee as laughter fills the air. And if you’re using multiple sheets in batches, remember to rotate them halfway through for even baking—this simple act ensures every cookie gets its fair share of oven love.
Step 7: Cooling Down for Glorious Glaze
After those delightful morsels have baked to perfection, allow them a moment to rest on the baking sheet for about five minutes before transferring them to a wire rack. This resting period is vital because it lets the cookies finish setting up without becoming overly crisp. You might notice they look like little clouds of sweetness—soft and inviting! Gently lift each cookie with a spatula; they’ll be warm and tender, so handle them with care.
Once they’ve cooled completely on that wire rack, this is where we get to bring our Maple Cookies Recipe full circle by layering on that smooth maple glaze you’ve been dreaming about. It’s essential to let them cool completely before glazing; if they’re still warm, the glaze may just melt away and become more like syrup than a beautiful topping. Take this time to appreciate how these simple ingredients have transformed into something profoundly satisfying.
Step 8: Crafting Your Silky Maple Glaze
Now comes one of my favorite parts—the glaze! In a small bowl, whisk together 1½ cups of powdered sugar with 2 tablespoons of pure maple syrup and a pinch of salt. The salt balances out the sweetness perfectly—it’s an absolute game-changer! Start by adding just one tablespoon of milk; mix until smooth and glossy. If you find it’s too thick for your liking—perhaps you’d prefer it slightly more spreadable—add another tablespoon milk gradually until you reach that perfect consistency.
Why is this step so crucial? The glaze isn’t just an aesthetic touch; it brings an additional layer of maple flavor that complements our cookies beautifully while enhancing their overall appeal with its luscious sheen. It’s like giving each cookie a cozy little blanket of sweetness! Once you’ve achieved that silky smoothness, it’s time to spoon it generously over each cooled cookie, allowing it to cascade down naturally—you’ll feel like an artist at work!
Conclusion:
With each step we took together through this Maple Cookies Recipe, I hope you felt the warmth and love embedded in every detail—from creaming butter and sugar to savoring those final bites adorned with luscious maple glaze. These cookies are not just sweet treats; they embody the essence of cozy moments spent around the table with loved ones. The combination of rich brown sugar and pure maple syrup creates a symphony of flavors that dances on your palate, while their chewy texture offers an utterly satisfying experience that is simply extraordinary.
Why should this recipe be on your must-try list? Well, beyond the incredible taste lies the joy wrapped up in making them—it’s about creating memories in your kitchen while filling your home with mouthwatering scents. Perfect for gatherings or quiet evenings alike, there’s something so comforting about pulling these golden beauties from the oven; it’s like wrapping yourself in a warm blanket on a chilly day. Each bite invites you into a realm of nostalgia and happiness that simply cannot be replicated.
Imagine savoring one alongside a steaming cup of coffee as you relish that first blissful moment of sweetness—the perfect afternoon pick-me-up! Or picture yourself sharing them during holiday gatherings or casual get-togethers, where each cookie brings smiles and conversations bubbling over with laughter. For a truly decadent experience, try pairing these cookies with a scoop of vanilla ice cream—oh my goodness, it’s heavenly!
Feeling adventurous? This recipe is wonderfully adaptable! You can play around by adding nuts like pecans or walnuts for delightful crunchiness or even sprinkle some cinnamon into the dough for an added warmth that’ll make every bite feel like a hug from within. Perhaps even substitute some chocolate chips or dried cranberries if you’re in the mood for something different? The possibilities are endless! So roll up your sleeves and start baking—I can’t wait for you to share your creations and experiences with me!
Maple Cookies Recipe
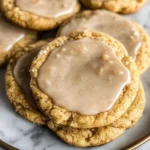
Indulge in the warmth and nostalgia of our Maple Cookies Recipe, where soft brown sugar cookies meet the enchanting flavor of real maple syrup. Each cookie is a delightful balance of chewy texture and rich sweetness, crowned with a glossy maple glaze that adds a touch of elegance. Perfect for gatherings or cozy afternoons spent at home, these cookies evoke memories of crisp autumn days and heartwarming moments shared with loved ones. With simple ingredients and straightforward instructions, baking these treats is a joyful experience that fills your kitchen with irresistible aromas. Treat yourself and your family to this scrumptious recipe that’s sure to become a cherished favorite!
- Prep Time: 20 minutes
- Cook Time: 12 minutes
- Total Time: 32 minutes
- Yield: Approximately 24 cookies 1x
- Category: Dessert
- Method: Baking
- Cuisine: American
Ingredients
- ¾ cup unsalted butter, softened
- 1 cup light brown sugar, packed
- 1 large egg
- 1 tsp vanilla extract
- ¼ cup pure maple syrup
- 2 cups all-purpose flour
- 1 tbsp cornstarch
- ½ tsp baking soda
- ½ tsp salt
- 1 ½ cups powdered sugar (for glaze)
- 2 tbsp pure maple syrup (for glaze)
- 1–2 tbsp milk (as needed for glaze)
- 1 tbsp melted butter (for glaze)
- Pinch of salt (for glaze)
Instructions
- Preheat oven to 350°F (175°C). Line baking sheets with parchment paper.
- In a mixing bowl, cream together softened butter and brown sugar until fluffy.
- Add egg, vanilla extract, and maple syrup; mix until well combined.
- In another bowl, whisk together flour, cornstarch, baking soda, and salt.
- Gradually combine dry ingredients with wet mixture until smooth dough forms.
- Chill dough for at least one hour before shaping into balls (about 1½ tablespoons each) and placing on prepared sheets.
- Bake for 10–12 minutes until edges are golden but centers are slightly underbaked.
- Allow cookies to cool before glazing with maple glaze made from powdered sugar, maple syrup, milk, melted butter, and a pinch of salt.
Nutrition
- Serving Size: 1 cookie (30g)
- Calories: 150
- Sugar: 10g
- Sodium: 80mg
- Fat: 6g
- Saturated Fat: 4g
- Unsaturated Fat: 2g
- Trans Fat: 0g
- Carbohydrates: 22g
- Fiber: <1g
- Protein: 2g
- Cholesterol: 15mg