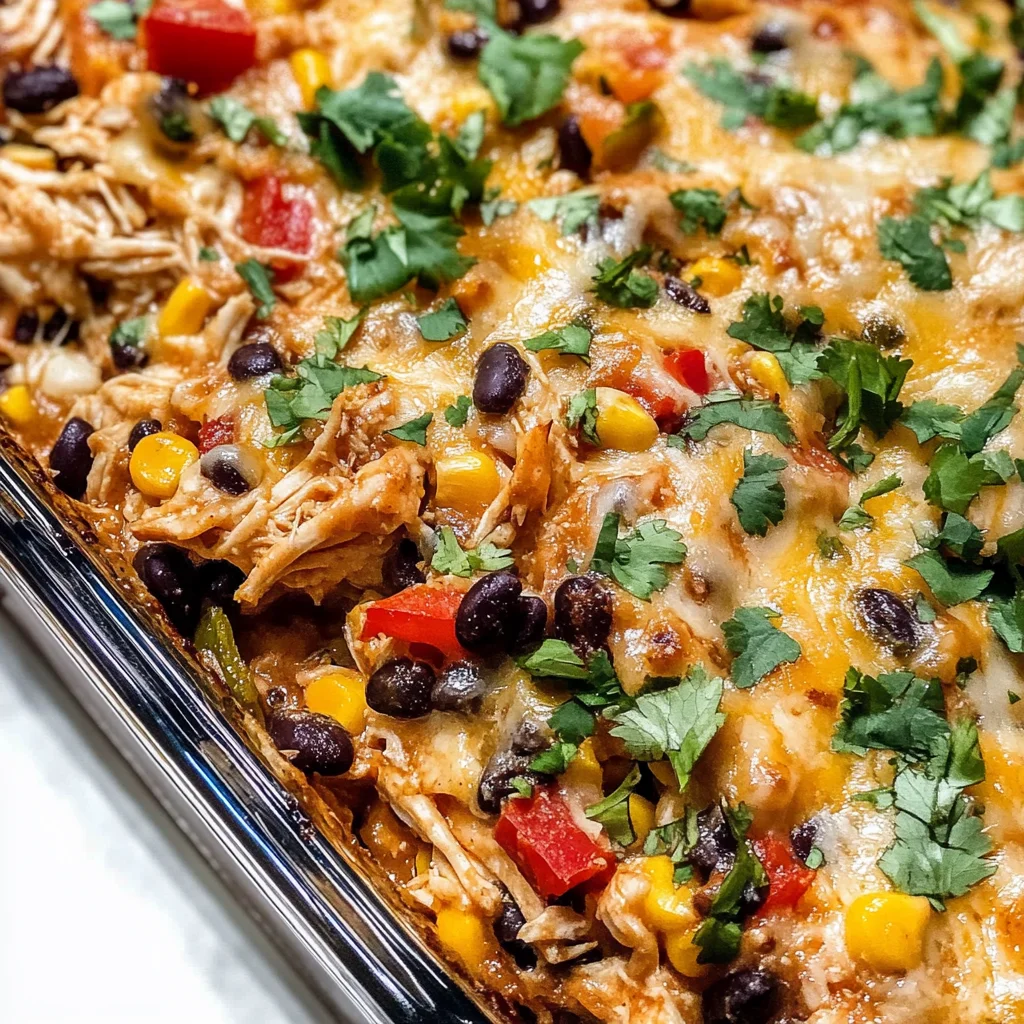
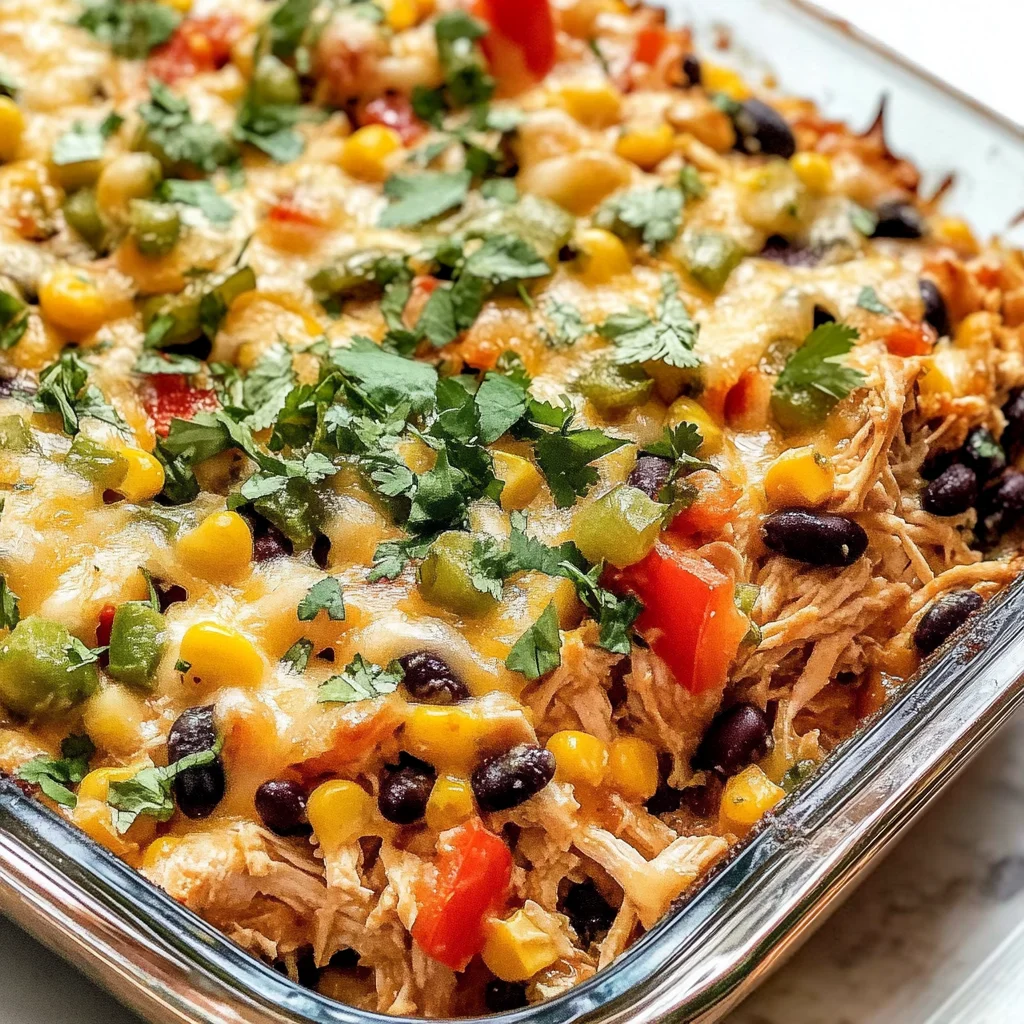
Easy Chicken Burrito Casserole
The experience of cooking is something so deeply personal and transformative, isn’t it? Each recipe has the potential to transport us back to cherished memories or create new ones with the people we love. When I think about my Easy Chicken Burrito Casserole, I’m reminded of cozy family dinners where laughter flows as freely as the food. This dish isn’t just a meal; it’s a celebration of flavors that meld together in a comforting embrace, reminiscent of your favorite burritos but without all the fuss. Imagine pulling that bubbling casserole from the oven, the tantalizing aroma filling your kitchen and wrapping around you like a warm hug. The vibrant colors, the rich textures, and the satisfying sound of cheese bubbling away—every detail adds to this culinary symphony.
This Easy Chicken Burrito Casserole brings together simple yet wholesome ingredients in one big dish, making it a fantastic choice for busy weeknights when time seems to slip through our fingers. It’s not just about convenience; it’s about creating something that nourishes both body and soul. As you gather around the table with those you care for, each bite will remind you of why we cook: to share joy, love, and comfort. I promise you, once you experience this dish, it will become a staple in your household—a recipe you’ll return to again and again.
Easy Chicken Burrito Casserole: A Flavorful Family Favorite
Let’s dive into this delightful recipe that marries simplicity with robust flavors! This Easy Chicken Burrito Casserole is everything you adore about burritos but packed into an easy-to-prepare casserole form. It’s perfect for those nights when cooking feels overwhelming because it requires minimal prep time yet delivers maximum satisfaction. Whether you’re entertaining guests or simply enjoying a quiet family evening, this dish is sure to impress everyone at your table.
Ingredients:
As we embark on this culinary journey together, let’s take a moment to appreciate each ingredient that makes this casserole so special. Each component contributes not only flavor but also texture and nutritional value.
- 1/2 cup finely diced onion. Onions are like the backbone of many great dishes; they bring depth and sweetness as they caramelize during cooking. Finely dicing them ensures they blend seamlessly into the casserole, releasing their wonderful flavors without overwhelming any single bite. Choose onions that are firm with shiny skin—this means they’re fresh! If you’re sensitive to onion’s natural sharpness, soaking them in cold water for a few minutes can help mellow their flavor without sacrificing that essential base note.
- 1 red bell pepper (diced). Ah, the vibrant red bell pepper! Not only does it add a pop of color to your casserole, but its sweet crunch balances beautifully with the savory components of this dish. Bell peppers are high in vitamin C and provide a lovely texture contrast against the softer ingredients like chicken and rice. Look for peppers that feel heavy for their size with smooth skin—these are signs of freshness! If you prefer a different flavor profile, yellow or orange bell peppers work wonderfully here as well.
- 1 cup uncooked parboiled long-grain brown rice (can also use long grain white rice). Rice serves as the heart of this casserole; it absorbs all those delicious juices while providing satisfying bulk to the meal. Parboiled brown rice retains more nutrients than its white counterpart while still cooking up fluffy and tender—not mushy! If using regular white rice instead, keep an eye on cooking times as they tend to cook faster than brown rice. Remember: rinsing your rice before cooking removes excess starch and prevents clumping!
- 3 tablespoons fajita seasoning (homemade or store-bought). This spice blend infuses our casserole with an authentic Mexican flair that’s simply irresistible! A good fajita seasoning usually includes chili powder, cumin, garlic powder, and paprika—all bringing warmth and zest to every bite. You can easily whip up your own mix at home if you have those spices on hand; trust me—it’s worth it! Just be cautious if you’re using store-bought blends as they can often contain added salt or preservatives.
- 1/8 teaspoon cayenne pepper (optional). Just a pinch can elevate this dish by adding an exciting kick! Cayenne pepper is known for its heat—it wakes up the taste buds without overpowering them if used sparingly. If you’re unsure about heat levels or have little ones at home who might be sensitive to spice, feel free to leave it out or adjust according to your preference.
- 1 cup corn kernels (frozen). Sweet corn is nature’s candy! Adding frozen corn not only enhances the flavor profile but also brings in delightful little bursts of sweetness throughout each bite. Plus, it’s super convenient since frozen corn is pre-cooked—just toss it right in without any need for thawing first!
- 1 14-ounce can low sodium black beans (drained and rinsed). Black beans are packed with protein and fiber—they make this casserole hearty while keeping it healthy too! Rinsing them helps reduce sodium content significantly while getting rid of any excess starchy liquid from the can—this step is non-negotiable for achieving that perfect texture in our dish.
- 5 cups shredded chicken. Here comes our star ingredient: shredded chicken! You could roast some chicken breasts ahead of time or even use leftovers from another meal—this versatility is what makes this recipe shine! Shredded chicken adds protein while soaking up all those flavorful juices from the broth and spices surrounding it.
- 3 cups reduced sodium chicken broth. Using broth instead of water boosts flavor immensely; it’s like liquid gold that embraces our ingredients rather than dilutes them! Opting for reduced-sodium versions allows us greater control over salt levels while still enhancing taste beautifully.
- 1 4-ounce can mild green chilies. These little gems pack so much flavor into each bite without overwhelming heat—they’re essential for creating that classic burrito essence! The mild variety maintains a gentle warmth rather than fiery spiciness; however, if you’re feeling adventurous or enjoy heat more than most do—go ahead and choose medium or spicy green chilies instead!
- 1 tablespoon olive oil. Olive oil acts as our luscious fat source here which helps create richness in flavor while ensuring everything stays moist during baking—a crucial element for achieving perfect results every time!
- 2 tablespoons tomato paste. Tomato paste adds depth beyond mere acidity; it’s concentrated goodness that enhances overall taste notes throughout our casserole substantially! Plus, it helps bind everything together while lending its vibrant hue—the ultimate comfort food color!
- 1 1/4 cups shredded Monterey Jack cheese. Cheese should always be abundant when layering comfort into any meal—and Monterey Jack creates such wonderfully gooey textures when melted atop casseroles! Its mild creaminess complements other ingredients marvelously while offering some protein punch too—you really can’t go wrong here!
Equipment You’ll Need:
Having the right tools makes such a difference when crafting something beautiful in your kitchen—it streamlines processes so there’s less stress involved! While these aren’t technically ingredients per se, consider them essential partners in creating something wonderful together.
- 9×13 inch baking dish – This size is perfect for our casserole because it allows ample space for layering ingredients while ensuring even cooking throughout every corner—no one likes dry edges on their baked goods!
- Mixing bowl – A sturdy mixing bowl is necessary not just for combining various components like broth mixtures but also provides room enough to stir vigorously without mess spilling over onto surfaces (trust me—it happens!).
- Whisk – Whisks aren’t just fun kitchen gadgets—they’re indispensable tools when blending liquids like broths together effortlessly allowing air incorporation which leads us closer toward achieving desired textures within dishes!
- Measuring cups & spoons – Precision counts here; having reliable measuring tools ensures we get ratios correct leading toward consistent results every time we prepare this cheesy delight!
Let’s continue crafting our Easy Chicken Burrito Casserole by diving into how we put all these delightful ingredients together to create our masterpiece!
Step 1: Preheat & Prepare Your Base
First things first: preheat your oven to 400°F (200°C). This step might seem simple but trust me—it’s crucial because starting off on high heat will ensure we achieve golden perfection later on! While waiting for that oven magic to happen… grab your trusty 9×13 inch baking dish—the larger size allows all flavors plenty of room to mingle harmoniously within their cozy environment as they bake away together beautifully under layers upon layers of cheesy goodness!
In your baking dish now combine finely diced onions along with diced red bell pepper plus uncooked parboiled long-grain brown rice sprinkled generously with fajita seasoning alongside optional cayenne pepper if desired—stir gently until everything melds into one happy mixture celebrating their shared destiny within this culinary adventure ahead!
Step 2: Create Liquid Gold
Now let’s focus on building those moisture-rich flavors that’ll elevate our casserole beyond expectations! In another bowl—or even better yet measuring cup where whisking becomes easier—combine reduced sodium chicken broth along with drained mild green chilies plus tomato paste mixed thoroughly until no lumps remain visible before slowly pouring over previously combined dry ingredient layer within baking dish ensuring every grain gets drenched properly—the moisture content here plays an instrumental role during baking allowing rice absorption achieving perfect tenderness without becoming mushy!
Step 3: Layer Up With Goodness
Next comes one of my favorite parts: layering in all remaining ingredients which transforms simple elements into extraordinary creations bursting forth full spectrum flavors awaiting discovery upon first bites shared amongst loved ones gathered around dining table ready ready eagerly anticipating satisfaction bestowed upon them by diligent efforts made today leading toward success achieved via teamwork forged through kitchens everywhere nurturing bonds stronger than most anything else found outside walls enclosing homes filled laughter joy warmth generosity love—even if sometimes chaos reigns supreme behind scenes…
Once you’ve added shredded chicken evenly across top followed closely thereafter by rinsed black beans alongside frozen corn kernels make sure everything gets stirred gently yet thoroughly incorporating well throughout entire mixture before final touches come next bringing us nearer toward completion fulfilled senses yearning fulfillment promised earlier…
Step 4: Baking Bliss Awaits
Now cover your glorious concoction tightly using aluminum foil ensuring steam remains trapped inside allowing all components meld beautifully enhancing flavors journey shared during baking process lasting roughly 65–70 minutes where patience truly pays off—watch closely awaiting signs indicating readiness revealing bubbling edges inviting anticipation growing stronger emanating warmth radiating from depths…
After time elapses please remove foil carefully avoiding burns whilst transitioning back outside onto counter letting cool slightly before sprinkling grated Monterey Jack cheese generously atop surface transforming visual appeal instantly igniting excitement amongst hungry guests prepping themselves eagerly awaiting delectable explosion set forth moments after returning back oven once again granting final chance melt bubbling bliss beneath golden crust formed above abundant layers below containing treasures hidden deep…
Stay tuned as we wrap up our steps leading toward serving suggestions next where garnishes elevate experience even further enriching colors aromas tantalizing senses beckoning tastebuds awaken life anew once more inviting happy hearts feast upon creation birthed lovingly sharing adventures shared gathered reminiscing fond memories forged forevermore – truly unforgettable moments await ahead oh yes indeed!!
The Heart of Your Kitchen: Creating the Easy Chicken Burrito Casserole
Nothing beats that moment when you pull a bubbling, cheesy casserole from the oven, filling your home with a tantalizing aroma that beckons everyone to gather around the table. This Easy Chicken Burrito Casserole is not just a meal; it’s an invitation to share stories, laughter, and love. So, let’s dive into the next steps of crafting this comforting dish that promises to be a hit in your home!
Step 5: The Magic of Baking – Letting It All Come Together
After you’ve covered your baking dish with aluminum foil, it’s time to let this masterpiece come alive in the oven. Preheat that oven to a sizzling 400°F (about 200°C), which is absolutely paramount for ensuring our casserole cooks evenly and thoroughly. You’re going to bake this beauty for 65-70 minutes; during this time, all those wonderful flavors will meld together, and the rice will soak up the chicken broth like a sponge, transforming into a tender and flavorful base for our casserole.
This step is crucial! The foil traps steam inside the dish, creating a humid environment that helps cook the rice evenly without drying out any of the ingredients. If you were to skip this step or not cover it properly, you might end up with undercooked rice or dried-out chicken—a fate we definitely want to avoid! Keep an eye on it as it bakes; you want to see bubbles forming around the edges. It’s like watching magic unfold right before your eyes! Remember, patience is key here; don’t rush this step. Trust me on this—it’s worth every minute.
Step 6: The Grand Unveiling – Adding That Cheesy Goodness
Once your timer goes off and you’ve taken that tantalizing casserole out of the oven, it’s time for one of my favorite parts—the cheese! Carefully peel back the foil (watch out for that delicious steam!), and prepare yourself for what’s about to happen next. Sprinkle 1¼ cups of shredded Monterey Jack cheese evenly over the top of your casserole. This isn’t just an aesthetic choice; oh no! This cheese will melt into a gooey layer that adds richness and depth to each bite.
I adore Monterey Jack because it melts beautifully and has a mild flavor that complements our spicy fajita seasoning perfectly without overpowering it. Now, pop it back into the oven uncovered for an additional 5-10 minutes until the cheese is melted and slightly golden—think golden sunshine on a summer day! You’ll know it’s done when it bubbles and has that irresistible cheesy crust on top. Keep an eye on it; ovens can vary slightly in temperature. You want that perfect melty situation but avoid letting it burn—nobody wants scorched cheese!
Step 7: A Moment of Patience – Cooling Down Before Serving
Ahh, the moment has arrived! But before we dive into this delightful dish, let’s take a breather—seriously! Allowing your Easy Chicken Burrito Casserole to cool for about 5-10 minutes is non-negotiable. Yes, I know; waiting can be hard when you can smell all those incredible aromas wafting through your kitchen! But trust me on this one: letting it rest allows everything to settle down nicely.
You see, when you first pull it from the oven, all those ingredients are still bubbling away happily in their steamy embrace. If you serve too soon, you run the risk of everything falling apart on your plate—while deliciously chaotic in its own right, we want things to hold their shape for presentation (and practicality) purposes! In those few precious moments while you wait, why not chop some fresh cilantro or slice up some creamy avocado? These little garnishes can elevate your dish from ordinary to extraordinary.
Step 8: Garnish Like a Pro – The Finishing Touches
Now comes my favorite part—the garnishing! Once you’ve given your casserole its well-deserved cooling time, grab some fresh cilantro and chopped green onions if you’re feeling fancy (and trust me; they make all the difference). A sprinkle of these vibrant greens not only adds color but also freshness that cuts through the richness of our cheesy casserole beautifully.
If you’re feeling adventurous—or simply have avocados ripe for use—slice them up and arrange them alongside your casserole when serving. Then add a dollop of salsa for an extra flavor punch; there’s something utterly intoxicating about contrasting textures and flavors in a dish. Picture this: the creamy avocado, the zesty salsa, and that warm, cheesy casserole all coming together in one bite. It’s nothing short of a symphony of flavors!
And there you have it—your Easy Chicken Burrito Casserole is ready to be savored! Gather your loved ones around the table, serve it up with pride, and watch as everyone digs in with smiles on their faces. This dish is more than just food; it’s a celebration of family, comfort, and the joy that comes from cooking together. Enjoy every bite!
Storage and Enjoyment Tips for Your Easy Chicken Burrito Casserole
Now that your Easy Chicken Burrito Casserole has come out of the oven, bubbling and golden, it’s time to dig in! But let’s not forget about those magical leftovers that can make your future meals just as delightful. Proper storage not only preserves those incredible flavors but also ensures you can enjoy every last bite. The rich combination of tender chicken, savory spices, and creamy melted cheese is too good to waste!
Storing Leftover Easy Chicken Burrito Casserole
To keep your Easy Chicken Burrito Casserole fresh and mouthwatering, transfer any leftovers into an airtight container. Make sure the casserole has cooled down a bit before sealing it up tightly; this step keeps moisture from building up inside, which is absolutely crucial for maintaining that perfect texture. You can safely store your casserole in the refrigerator for up to 3-4 days, but trust me—you’ll want to savor it long before then! If you’re concerned about keeping the flavors vibrant, consider placing a slice of bread in the container; this little trick absorbs excess moisture without compromising taste. When you reheat it, I promise you’ll still experience that profoundly satisfying blend of flavors and textures—just pop it in the microwave or oven until warmed through, and maybe add a sprinkle of cheese on top for that extra touch!
Freezing Easy Chicken Burrito Casserole for Later
If you find yourself with a sizable portion left over or if you simply want to prepare a meal ahead of time, freezing this casserole is an absolute game-changer! Allow the dish to cool completely before cutting it into individual portions; this makes thawing and reheating so much easier later on. Wrap each piece tightly in plastic wrap or aluminum foil before placing them into a freezer-safe container or bag—labeling them with the date helps keep track of freshness! Your Easy Chicken Burrito Casserole will stay deliciously intact in the freezer for up to 3 months. When you’re ready to enjoy it again, simply thaw overnight in the fridge and reheat in the oven or microwave until piping hot. This method transforms busy weeknights into effortless culinary experiences while still bringing joy and comfort right back to your table!
Easy Chicken Burrito Casserole

Discover the joy of cooking with this Easy Chicken Burrito Casserole, a delightful dish that promises to bring comfort and flavor to your family dinners. Packed with tender shredded chicken, vibrant bell peppers, and seasoned rice, this casserole is a one-dish wonder that simplifies your meal prep while delivering on taste. Imagine pulling a cheesy, bubbling casserole from the oven, its rich aroma enveloping your kitchen and inviting everyone to gather around the table. Perfect for busy weeknights or casual gatherings, this recipe transforms simple ingredients into a hearty feast that nourishes both body and soul. Enjoy the satisfying blend of textures and flavors as you create new memories with loved ones—this dish is sure to become a family favorite.
- Prep Time: 15 minutes
- Cook Time: 70 minutes
- Total Time: 1 hour 25 minutes
- Yield: Serves approximately 8
- Category: Main
- Method: Baking
- Cuisine: Mexican
Ingredients
- 1/2 cup finely diced onion
- 1 red bell pepper (diced)
- 1 cup uncooked parboiled long-grain brown rice
- 3 tablespoons fajita seasoning
- 1 cup corn kernels (frozen)
- 1 can (14 ounces) low sodium black beans (drained and rinsed)
- 5 cups shredded chicken
- 3 cups reduced sodium chicken broth
- 1 can (4 ounces) mild green chilies
- 1 tablespoon olive oil
- 2 tablespoons tomato paste
- 1 1/4 cups shredded Monterey Jack cheese
Instructions
- Preheat the oven to 400°F (200°C).
- In a 9×13 inch baking dish, combine diced onion, red bell pepper, uncooked rice, fajita seasoning, and optional cayenne pepper.
- In a separate bowl, mix chicken broth, green chilies, and tomato paste; pour over the rice mixture.
- Layer shredded chicken evenly on top followed by black beans and corn; stir gently to combine.
- Cover with aluminum foil and bake for 65–70 minutes until rice is tender.
- Remove foil and sprinkle cheese on top; bake uncovered for an additional 5–10 minutes until melted and golden.
- Let cool for about 5–10 minutes before serving.
Nutrition
- Serving Size: 1 serving
- Calories: 390
- Sugar: 3g
- Sodium: 640mg
- Fat: 12g
- Saturated Fat: 5g
- Unsaturated Fat: 6g
- Trans Fat: 0g
- Carbohydrates: 48g
- Fiber: 8g
- Protein: 25g
- Cholesterol: 80mg