Printable Salt and Pepper Chicken Recipe Card
There’s something about the aroma of frying chicken that can transport you back in time, isn’t there? The sizzling sound, the golden crispness that beckons with promise, and that first bite—oh, it’s an experience that resonates deeply within. Salt and Pepper Chicken is not just a dish; it’s a celebration of flavors that meld together in a harmonious dance, creating a culinary experience that’s both familiar and exciting. Every time I prepare this recipe, I feel as if I’m bridging the gap between my kitchen and the bustling streets of China where this delightful dish has its roots. And trust me when I say, making this at home is not only simpler than you might think, but it also gives you complete control over the ingredients—no hidden surprises here!
I’ve always been captivated by how a few simple ingredients can transform into something utterly intoxicating. When you marinate those juicy bites of chicken in soy sauce and rice apple vinegar, you’re not just seasoning; you’re infusing each piece with layers of flavor that will make your taste buds sing. The crispy exterior, kissed with salt and pepper, gives way to tender meat inside—a sublime contrast that never fails to impress. With this Printable Salt and Pepper Chicken Recipe Card in hand, you’re not just following a recipe; you’re embarking on a journey through taste and tradition that promises to fill your home with warmth and joy.
Printable Salt and Pepper Chicken Recipe Card: A Crispy Delight Awaits
Get ready to dive into an adventure that’s as satisfying to create as it is to eat! This Salt and Pepper Chicken recipe will have your kitchen buzzing with excitement as you whip up a takeout classic right in your own home. It’s perfect for family dinners or simply when you crave something extraordinary without stepping out. Let’s gather our ingredients and start this culinary journey together!
Ingredients:
As we embark on this flavorful culinary journey, let’s talk about the ingredients that will bring our Salt and Pepper Chicken to life! Each component plays an essential role in crafting this delightful dish.
- 1 lb boneless, skinless chicken thigh or breast, cut into bite-size pieces. Choosing chicken thighs or breasts for this recipe is crucial for achieving tenderness and moisture. Thighs are particularly forgiving; their higher fat content ensures they remain juicy even after frying. When cutting your chicken into bite-sized pieces, aim for uniformity—this promotes even cooking throughout each batch.
- 2 tbsp soy sauce. This dark liquid adds depth to our marinade with its umami presence while also providing a beautiful color to the finished dish. Opt for low-sodium soy sauce if you’re watching your salt intake; it still delivers rich flavor without overwhelming the palate.
- 1 tbsp rice apple vinegar (or dry apple juice). This ingredient brings brightness to the marinade with its mild acidity—a non-negotiable element! If you can’t find rice apple vinegar, dry apple juice works beautifully too—it adds a touch of sweetness that balances out the savory notes perfectly.
- 1 tsp brown sugar. Just a hint of sweetness from brown sugar enhances the overall flavor profile by balancing out salty and savory elements. It caramelizes beautifully during frying, contributing to that irresistible crunch we all love.
- ½ tsp salt. While we’re adding flavors through other means, salt serves as a key player in drawing out moisture from the chicken during marination—a vital step for ensuring every bite is packed with flavor.
- ½ tsp white pepper. A staple in many Asian cuisines, white pepper offers an earthiness without overpowering other flavors. Its subtle heat elevates our dish without being too spicy—perfect for those who prefer milder seasonings.
- 2 cloves garlic (minced). Garlic is like liquid gold in cooking—the depth it provides is unparalleled! Minced garlic releases its pungent oils into the marinade, infusing our chicken with an aromatic essence that’s simply divine.
- ¾ cups cornstarch (for coating). This is where the magic happens! Cornstarch lends an exceptionally crispy texture when fried; it creates such a wonderful contrast against the tender chicken inside. Make sure to coat generously—the extra crunch is absolutely worth it!
- ¼ tsp extra white pepper (for tossing). We’re saving some white pepper for finishing touches—a sprinkle after frying enhances flavors brilliantly while adding an extra kick!
- 2–3 chillies (sliced optional). For those who enjoy a bit of heat, sliced chillies provide just enough spice without stealing attention from our star ingredient—the chicken! They also add vibrant color—always a plus!
- Oil for frying—the unsung hero of crispy dishes! Choose an oil with a high smoke point like vegetable or canola oil for frying; this ensures your chicken cooks quickly and evenly without absorbing excessive grease.
Equipment You’ll Need:
Having the right tools at hand makes all the difference in creating something spectacular! While they may not be ingredients, these essential partners will help ensure your Salt and Pepper Chicken turns out perfectly every time.
- Deep pan or wok: A deep pan allows ample space for frying without crowding—this means better heat distribution and crispiness galore! If you have a wok on hand, even better; its shape helps circulate heat efficiently.
- Thermometer: Investing in a good kitchen thermometer is absolutely paramount when frying! Maintaining oil temperature between 350–360 °F (175–180 °C) ensures you achieve that coveted golden crust while keeping your chicken juicy inside.
- Slotted spoon: This handy tool not only helps you remove your golden nuggets from hot oil but also lets excess oil drip away—keeping them perfectly crispy instead of soggy!
- Wire rack or paper towel-lined tray: After frying, resting your chicken on a wire rack allows air circulation around each piece while draining off any lingering oil—crispiness maintained! If you don’t have one handy, use paper towels as they work just fine too.
Step 1: Marinate Like You Mean It
To start this culinary adventure, we need to marinate our chicken properly—a step I promise you won’t want to rush through! In a mixing bowl large enough to accommodate all the chicken pieces comfortably (think room to wiggle), combine your cut-up chicken with soy sauce, rice apple vinegar (or dry apple juice), brown sugar, salt, white pepper, and minced garlic. Take your time mixing everything well—each piece should be coated evenly so every bite bursts with flavor later on! Once combined beautifully, cover it up and let it rest for about 10–15 minutes at room temperature; trust me on this one—the magic happens during these moments as flavors meld together wonderfully!
Step 2: Coat Your Chicken
Now comes one of my favorite parts—the coating process! Grab yourself a shallow dish (like a pie plate) filled with cornstarch because we’re going to dredge each piece of marinated chicken until it’s fully coated—think snow-covered peaks here! Gently toss each piece into cornstarch until no wet spots remain visible before shaking off any excess—you want just enough cornstarch clinging on to create that glorious crispy shell once fried! Remember not to skimp on coverage here; it’s what gives us that delightful crunch we crave!
Step 3: Heat That Oil
Let’s get ready for action by heating some oil in our deep pan or wok! Pour enough oil into your chosen vessel so there’s plenty of space for bubbling action without overcrowding—you want about 2 inches deep if possible! Turn up the heat gradually until it reaches around 350–360 °F (175–180 °C). If you have a thermometer handy (and I hope you do!), double-checking temperature ensures optimal results every time; if it’s too hot? Well—it could lead us down burnt territory before we’ve had any fun at all!
Step 4: Fry Until Golden Perfection
With everything prepped beautifully now comes perhaps my favorite moment—the actual frying process itself! Working in small batches (this avoids overcrowding), gently place those perfectly coated pieces of chicken into hot oil using tongs or chopsticks if you’re feeling adventurous—it’ll keep splatters minimal too! Allow them approximately 3–4 minutes per batch until they turn golden brown; flip halfway through if needed but don’t poke too much as patience pays off here—you want them intact! Once done cooking beautifully crispy outside while juicy within? Carefully lift out using slotted spoon onto wire rack/paper towel-lined tray waiting eagerly nearby—it’s essential they drain properly before serving so they stay nice ‘n crunchy!
I can already feel those aromas wafting through your kitchen as we move closer towards enjoying this mouthwatering creation together—I promise it’ll be worth every minute spent prepping these delightful bites of joy!
Step 5: Drain & Toss – The Golden Transformation
Now that your chicken has taken its deep dive into the bubbling hot oil, it’s time for one of my favorite steps: draining and tossing! After about 3 to 4 minutes per batch, you’ll notice your chicken pieces transforming into golden nuggets of joy, with a crispiness that begs to be devoured. Using a slotted spoon, gently lift those luscious bites from the oil and allow them to drain over the pan for a moment—this will help keep that glorious exterior intact while letting any excess oil drip away. Remember, patience is key here; don’t rush this step! As you place the fried chicken on a wire rack or a paper towel-lined tray, take a moment to appreciate how crisp and inviting they look.
But wait—before you serve them up, let’s add that extra layer of flavor! Toss your crispy chicken lightly with the extra white pepper and the sliced chilies if you’re feeling adventurous. This is where the magic happens; the heat from the chilies beautifully complements the savory notes of the chicken while the white pepper adds a delightful warmth that dances on your palate. If you’re unsure about spice levels, start with just a few chilies—you can always add more later! Give everything a gentle mix to ensure each piece is coated evenly—this step is absolutely paramount because it enhances every bite with those irresistible flavors!
Step 6: Rest – The Unsung Hero of Crispiness
You may be tempted to dive right in after frying, but trust me on this—allowing your chicken to rest for about 5 minutes is crucial for achieving that perfect texture. During this short intermission, something magical happens: the juices inside the chicken redistribute themselves, leading to an incredibly moist interior while keeping that beautiful crispy shell intact. Think of it as giving your chicken a moment to breathe after its exhilarating fry!
As they rest on their wire rack or paper towels, resist the urge to cover them up; we want that crunch to stay as vibrant as possible. This little act of patience not only ensures flavor retention but also prevents sogginess—a big no-no in any fried dish! You might even notice some steam escaping during this time; that’s totally normal and just means your chicken is settling in for its grand debut at dinner.
Step 7: Plating – A Feast for Both Eyes and Palate
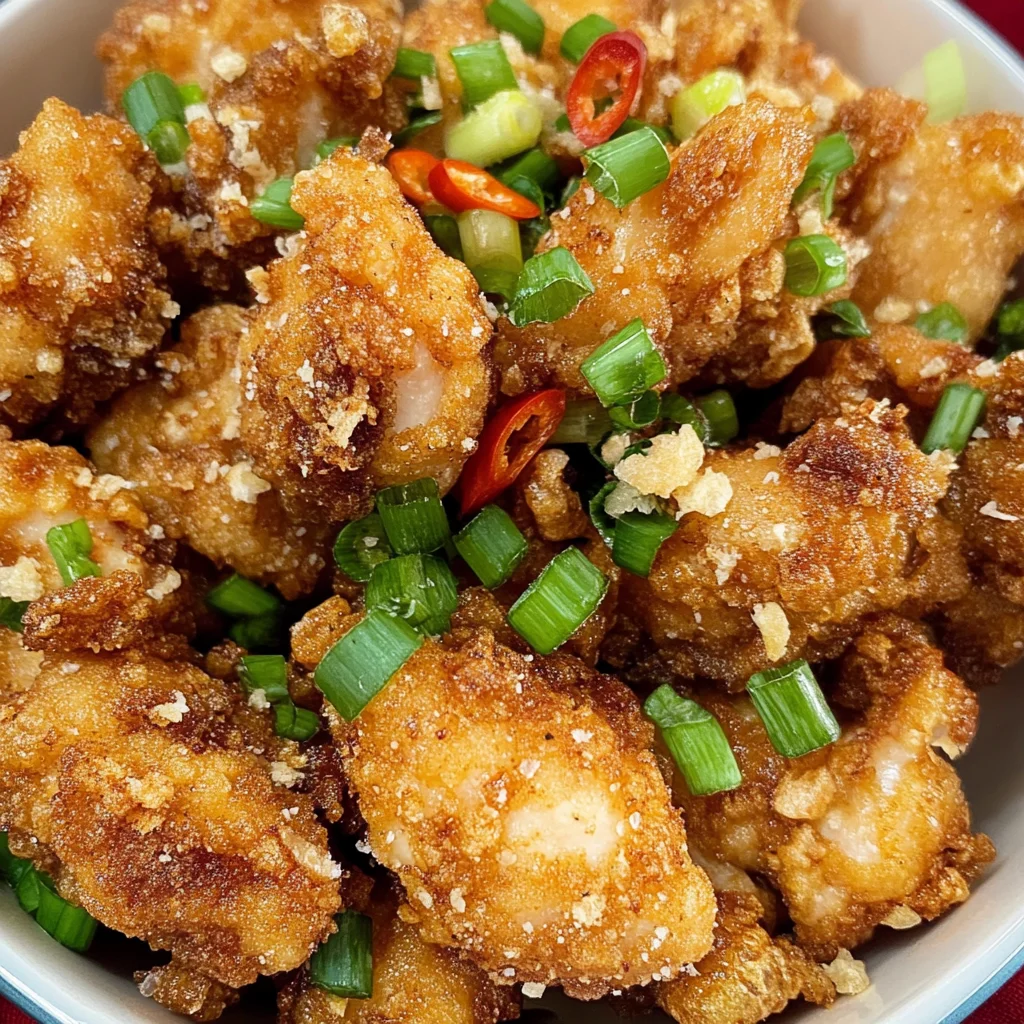
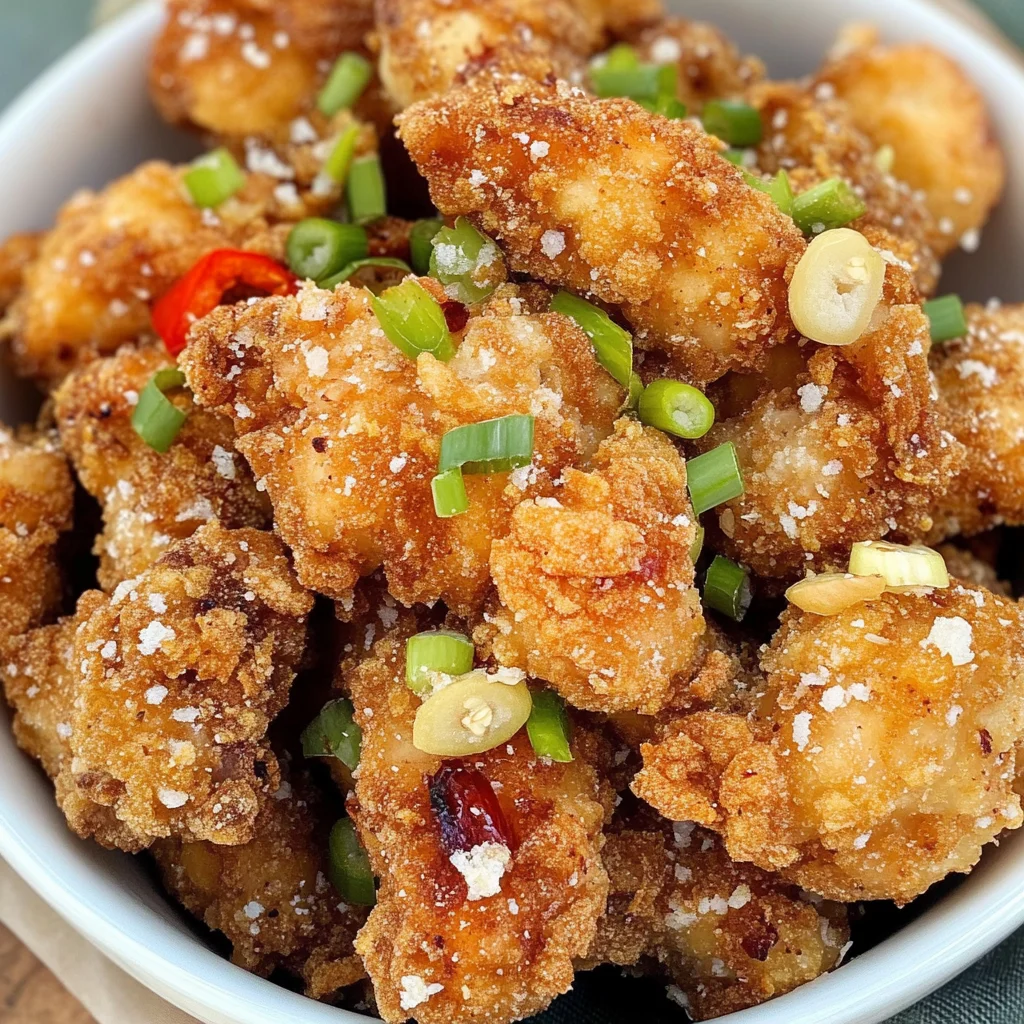
Now comes one of my favorite moments—the plating! As you prepare to showcase your Salt and Pepper Chicken, think about how you want to present this culinary masterpiece. Choose a wide platter or individual bowls that allow those crispy pieces to shine through. Arrange them in an inviting manner, perhaps leaning against each other like old friends catching up over dinner. This isn’t just about aesthetics; it sets the mood for what’s about to come—a truly extraordinary meal!
Consider garnishing with additional sliced chilies or fresh herbs like cilantro or green onions for added color and freshness. Not only does this enhance visual appeal, but it also brings an aromatic element that tantalizes before you’ve even taken your first bite! Remember, we eat with our eyes first; creating an inviting presentation elevates the entire dining experience. And don’t forget to have your favorite dipping sauce nearby—it could be something tangy like sweet chili sauce or even homemade soy sauce mixed with a hint of sesame oil! Trust me when I say this little detail can transform your dish from delightful to utterly intoxicating.
Step 8: Serving – The Joyful Moment
Finally, we arrive at serving—arguably one of the best parts! Gather around your table with family or friends (or enjoy it solo—I won’t judge!), and watch as everyone’s eyes light up upon seeing this vibrant dish laid out before them. Encourage your guests (or yourself!) to dig right in while everything is still warm and crisp; there’s nothing quite like enjoying food at its peak freshness.
As they take their first bites, listen closely for those satisfying crunches followed by delighted murmurs—that symphony of flavors will be music to your ears! Each piece should deliver a harmonious blend of savory goodness and delightful spiciness from those chilies, complemented by subtle notes from garlic and soy sauce. This isn’t just dinner; it’s an experience filled with laughter, conversation, and perhaps reminiscing about times spent together over shared meals.
Final Touches: Enjoying Every Bite
And there you have it—the ultimate Printable Salt and Pepper Chicken Recipe Card experience! With every bite so profoundly satisfying, I promise you’ll find yourself going back for seconds (and maybe even thirds!). Make sure to savor each mouthful; take note of how each flavor unfolds on your palate—from that initial crunch giving way to tender juiciness infused with all those incredible spices.
I genuinely hope you embrace this recipe as much as I do! It’s not just about cooking; it’s about creating memories in the kitchen—those cherished moments spent chopping ingredients or chatting excitedly while frying batch after batch until perfection is achieved! So gather those loved ones around and celebrate good food together; I can assure you this homemade version will have everyone asking for more!
Enjoy every crispy bite—and happy cooking!
Storage and Enjoyment Tips for Your Printable Salt and Pepper Chicken Recipe Card
Now that your kitchen is filled with the delightful aroma of perfectly fried chicken, it’s time to savor every bite! But if you’re like me, you might find yourself making a larger batch because, honestly, who can resist the allure of crispy, golden morsels? If you do happen to have some leftovers (which I promise will be hard), let’s talk about how to store them properly so that they maintain their deliciousness for as long as possible.
Storing Leftover Printable Salt and Pepper Chicken Recipe Card
To keep your leftover salt and pepper chicken at its best, you’ll want to store it in an airtight container. Glass containers are excellent because they don’t retain odors and can be easily cleaned. Place your chicken in the fridge where it’ll stay fresh for about 3-4 days. Now, here’s a little pro tip: if you want to maintain that glorious crispiness, consider adding a slice of bread to the container—this helps absorb excess moisture! When you finally get around to enjoying those leftovers, they may lose just a touch of their initial crunch but will still be utterly satisfying. For reheating, I recommend popping them back into a hot skillet or an air fryer rather than the microwave; this method revives that coveted crispiness without turning them soggy.
Freezing Salt and Pepper Chicken for Later
If you want to take meal prep to the next level, freezing some of your salt and pepper chicken is an excellent option! To freeze effectively, allow the chicken to cool completely before placing it in a single layer on a baking sheet lined with parchment paper. This way, they won’t stick together. Once frozen solid, transfer the pieces into a freezer-safe bag or container. They can last up to three months in the freezer! The beauty of this approach lies in its convenience; when you’re craving a quick meal, simply pull out what you need and reheat directly from frozen—no thawing required! Imagine pulling out these nuggets of joy after a long day; it’s like having homemade takeout right at your fingertips!
Printable Salt and Pepper Chicken

Indulge in the irresistible taste of homemade Salt and Pepper Chicken, a delightful dish that brings a burst of flavor to your dinner table. This recipe showcases juicy chicken pieces marinated in a savory blend of soy sauce and rice apple vinegar, then coated in cornstarch for an extra crispy exterior. With just the right amount of seasoning from garlic, white pepper, and a hint of brown sugar, each bite offers a perfect balance of flavors that will transport you to the bustling streets of Asian cuisine. Whether you’re preparing this for a family dinner or enjoying it as a quick meal, this dish is sure to impress. Get ready for an unforgettable culinary experience!
- Prep Time: 15 minutes
- Cook Time: 15 minutes
- Total Time: 30 minutes
- Yield: Serves approximately 4
- Category: Main
- Method: Frying
- Cuisine: Asian
Ingredients
- 1 lb boneless, skinless chicken thighs or breasts
- 2 tbsp low-sodium soy sauce
- 1 tbsp rice apple vinegar (or dry apple juice)
- 1 tsp brown sugar
- ½ tsp salt
- ½ tsp white pepper
- 2 cloves garlic (minced)
- ¾ cup cornstarch (for coating)
- Oil for frying
Instructions
- In a mixing bowl, combine chicken, soy sauce, rice apple vinegar, brown sugar, salt, white pepper, and minced garlic. Marinate for 10-15 minutes.
- Coat each marinated piece of chicken with cornstarch until fully covered.
- Heat oil in a deep pan or wok to 350–360 °F (175–180 °C). Fry chicken in small batches for 3–4 minutes until golden brown.
- Use a slotted spoon to remove chicken from oil and drain on wire rack or paper towels.
- Toss fried chicken with extra white pepper and sliced chilies if desired.
Nutrition
- Serving Size: 4 oz (113g)
- Calories: 280
- Sugar: 2g
- Sodium: 610mg
- Fat: 14g
- Saturated Fat: 2g
- Unsaturated Fat: 10g
- Trans Fat: 0g
- Carbohydrates: 19g
- Fiber: 0g
- Protein: 25g
- Cholesterol: 80mg