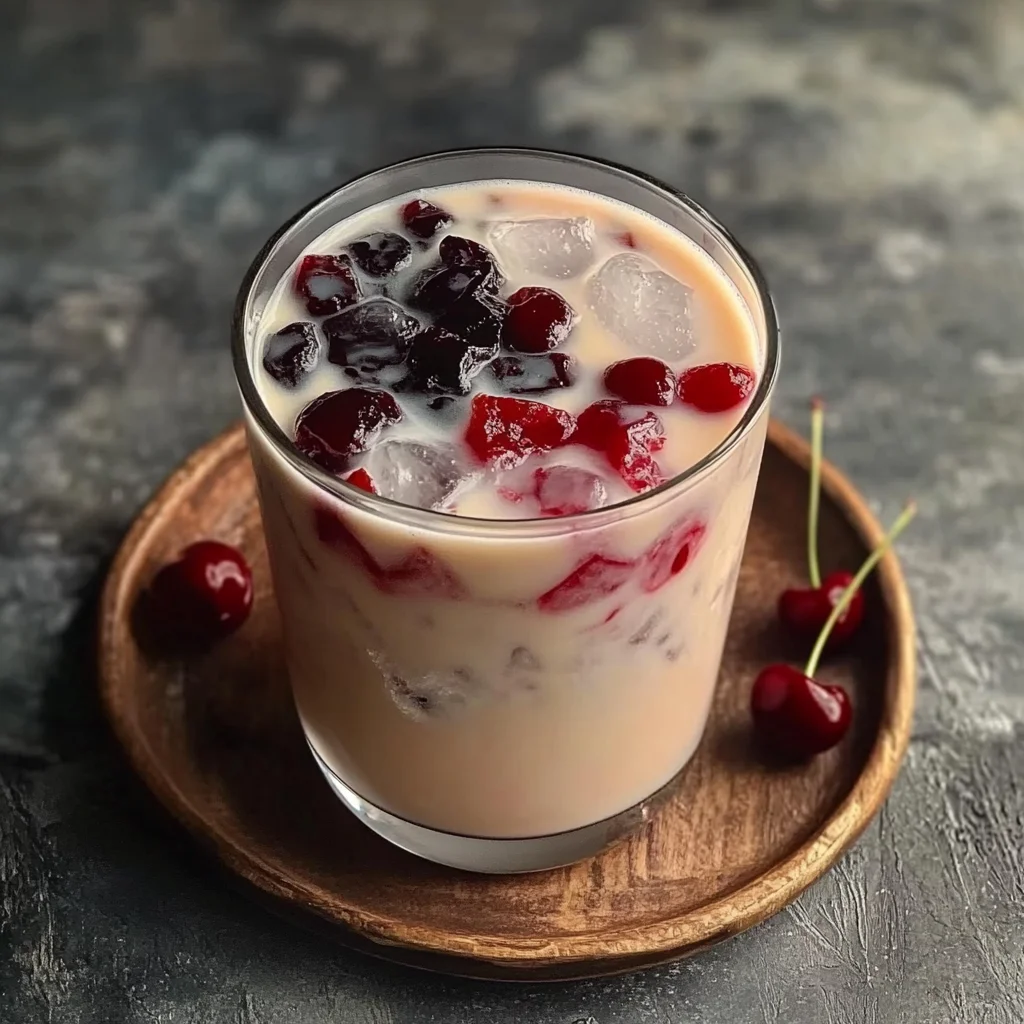
Cherry Earl Grey Milk Tea
There’s something truly magical about sipping a drink that feels like a warm hug on a sunny day, and that’s exactly what the Cherry Earl Grey Milk Tea offers. Imagine yourself sitting on a sunlit porch, the sweet scent of cherries wafting through the air as you take a sip. This isn’t just any iced tea; it’s a delightful blend where the zesty notes of bergamot from Earl Grey meet the lush sweetness of cherry syrup. Each gulp is an adventure for your taste buds, wrapping you in layers of soothing flavors that refresh and rejuvenate. The coolness of the chilled milk combined with the bright, fruity cherry creates a symphony of sensations that dance on your tongue, making this drink more than just a beverage—it’s an experience worth savoring.
I’ve always been captivated by how certain recipes can bridge tradition and innovation, and this Cherry Earl Grey Milk Tea is one such marvel. It’s not just about quenching your thirst; it’s about creating moments—perhaps enjoying it during a summer picnic with friends or unwinding on a lazy afternoon with good books and great conversation. The beauty of this recipe lies in its simplicity while being utterly extraordinary. You might find yourself craving it when the weather warms up or simply when you need a little pick-me-up to brighten your day. Trust me on this: once you whip up your first batch, you’ll be dreaming up reasons to make it again and again!
Cherry Earl Grey Milk Tea: A Refreshing Summer Delight
Let’s embark on this culinary journey together! Making Cherry Earl Grey Milk Tea at home is not only easy but also incredibly satisfying. You’ll find that each step brings you closer to crafting something unique and delicious, perfect for those warm afternoons or whenever you’re in need of a refreshing boost. So grab your ingredients, and let’s dive into this delightful concoction!
Ingredients:
As we gather our ingredients, I want you to feel the excitement building because each component plays an essential role in creating this masterpiece.
- 240 ml water: Water might seem like an afterthought in many recipes, but here it is absolutely paramount as it serves as the base for brewing our aromatic Earl Grey tea. Using fresh, filtered water elevates the flavor profile significantly—tap water can carry unwanted minerals or chlorine that might interfere with the delicate notes we’re aiming for. Bring it to just below boiling for optimal steeping—this gentle heat helps extract all those lovely flavors from the tea without scalding it.
- 2 tsp Earl Grey tea leaves: Ah, Earl Grey! This fragrant black tea infused with bergamot oil is what gives our drink its signature flavor. The floral aroma pairs beautifully with cherry syrup, creating an enchanting blend that feels luxurious with every sip. Be sure to choose high-quality loose leaves if possible; they offer richer flavor compared to bagged teas. If you’re in a pinch, don’t hesitate to use tea bags—just ensure they’re labeled as Earl Grey for authenticity.
- 2 tbsp cherry syrup: This liquid gold is what transforms our tea from simple to spectacular! The syrup adds luscious sweetness while highlighting the tartness of cherries—a combination that’s utterly intoxicating. When selecting cherry syrup, look for options made from real fruit rather than artificial flavors; quality matters here! Alternatively, if cherries are in season, consider making your own syrup by simmering pitted cherries with sugar until they break down into a sweet sauce.
- 2 tbsp sugar: While our cherry syrup provides sweetness, sugar enhances the overall flavor profile and balances acidity from both the cherries and tea. Feel free to adjust this amount based on your personal preference! For those looking for alternatives, honey or agave nectar can be great substitutes—they bring their own unique flavors into play.
- 240 ml milk: This creamy addition ties everything together beautifully! Whether you prefer whole milk for its richness or opt for plant-based milks like almond or oat—which add their own subtle flavors—this ingredient ensures our drink has that smooth finish we crave during warm months. Just remember that temperature matters; cold milk will ensure our beverage stays refreshing!
- 1 cup ice cubes: Ice may seem simple but don’t underestimate its importance! The right amount of ice keeps your drink cool without diluting its exquisite flavors too quickly. Use larger cubes if possible; they melt slower than smaller ones, making them ideal for maintaining that perfect chill.
Equipment You’ll Need:
Having the right equipment makes all the difference in creating a seamless cooking experience—it’s like having trusty companions by your side during this delicious adventure! Here are some essential tools you’ll want to gather before diving into our Cherry Earl Grey Milk Tea recipe:
- Small saucepan: This versatile piece will serve multiple purposes—from boiling water to steeping tea and mixing all those delightful ingredients together afterward. A saucepan with a tight-fitting lid can also help retain steam during steeping, ensuring maximum flavor extraction.
- Tea strainer or fine mesh sieve: To achieve that silky smooth finish without any pesky tea leaves floating around in your drink, you’ll need either a dedicated tea strainer or fine mesh sieve. If you’re using loose leaves (which I highly recommend), this tool is non-negotiable unless you’re prepared for an unexpected crunch!
- Measuring cups and spoons: Precision ensures consistency every time you make this milky treat—and let’s be honest; measuring out ingredients is half the fun! Having reliable measuring tools makes it easy to replicate success whenever you’re ready to whip up another batch.
- Glass serving cup: Choose something tall enough to hold plenty of ice while showcasing those beautiful layers of colors—from dark amber tea swirled with creamy white milk! It’ll make sipping even more enjoyable when you can admire all these gorgeous hues.
Preparing the Cherry Earl Grey Milk Tea
Step 1: Boil Your Water
Begin by bringing 240 ml of fresh filtered water to a gentle boil in your small saucepan over medium heat—don’t rush this step! Ideally, we want just below boiling point (around 200°F) because too much heat can scald our delicate Earl Grey leaves and lead to bitterness instead of blissful brightness. Once those bubbles start forming nicely on the surface—not quite rolling boil yet—you’re ready for what comes next!
Step 2: Steep Your Tea
Once you’ve reached that perfect temperature, add in 2 teaspoons of Earl Grey tea leaves gently stirring them into the hot water—it’s almost like introducing them to their new environment! Allow them to steep undisturbed for about 3–5 minutes; patience is key here since longer steeping times could yield overly strong flavors or unwanted bitterness—the goal is harmony between rich black tea notes softened by floral bergamot essence dancing alongside each other beautifully.
Step 3: Strain & Sweeten
After steeping time has elapsed (and trust me—you’ll love how fragrant your kitchen smells right now), it’s time to strain out those lovely leaves using either your fine mesh sieve or dedicated strainer directly over another container (like another saucepan or bowl). This process captures all liquid goodness while leaving behind remnants we don’t want floating around later on when enjoying our lovely drink! Then return that hot brewed tea back into its original pan before adding both tablespoons of cherry syrup along with sugar; stir well until everything dissolves completely—this mixture should begin transforming into something truly magical.
Step 4: Cool Down Your Brew
Now we take things down a notch by removing from heat and letting our sweetened concoction cool off slightly—just long enough so it doesn’t curdle when meeting chilly milk later on but still retains warmth similar enough so flavors mingle harmoniously together (about five minutes). Don’t skip this crucial step; allowing those elements time allows us full-bodied taste experience later!
Continue following these steps until you’ve completed all necessary stages toward preparing this gorgeous beverage—a true testament not only towards enjoyment but also mindful creation within kitchen walls filled laughter shared among loved ones over cups filled brimming joyfully awaiting consumption ahead…
Step 5: The Art of Cooling and Combining
Now that we’ve steeped our fragrant Earl Grey tea, it’s time for a little patience. Once you’ve strained out those lovely tea leaves, please take a moment to return the hot tea to the saucepan. This may seem like an inconsequential step, but trust me—it’s absolutely paramount to our final flavor profile. By doing this, we’re allowing the residual heat to gently meld with the cherry syrup and sugar that we’ll be adding next. As you stir these in, watch as the sugar dissolves into the warm liquid, turning it into a beautiful elixir that glimmers like liquid gold in the light.
This mixture is where the magic truly begins! The heat from the tea enhances the sweet cherry syrup, coaxing out its vibrant flavors and creating a harmonious blend that dances on your palate. Remember to keep stirring until everything is fully dissolved; any lingering grains of sugar will disrupt that silky smooth texture we’re aiming for. Once everything is well combined, remove it from heat and allow it to cool for a few minutes—this is crucial because if you pour cold milk into piping hot tea, you’ll risk curdling the milk. So take a breath, relax, and let that beautiful concoction reach a more moderate temperature before we proceed.
Step 6: The Creamy Embrace
When your tea has cooled just enough so you don’t feel like you’re pouring lava into your glass—usually around five minutes—it’s time for the next transformative step: introducing our creamy friend, milk! Pour in 240 ml of your preferred milk; whether it’s whole, almond, or oat milk, each one brings its own unique richness to this recipe. I’ve always been captivated by how each type of milk contributes something special—almond adds nutty undertones while oat delivers an extra creaminess that’s utterly intoxicating.
As you add the milk, take a moment to observe how it swirls and mingles with the vibrant cherry-tea mixture. This swirling dance signifies a beautiful union of flavors; you’ll witness how they embrace each other rather than overwhelm one another. Gently stir this mixture together; we want everything to be harmonious without losing that lovely layered look when we serve it over ice later on. It’s important not to rush this step! A gentle hand ensures that both flavors are preserved in their entirety—the bergamot aroma remains soft yet present while that juicy cherry sweetness shines through.
Step 7: Ice, Ice Baby!
Now comes one of my favorite parts—the ice! Grab your favorite serving glass and fill it generously with ice cubes; about one cup should do nicely. Don’t shy away from filling it high because this drink deserves nothing less than an abundant frosty bed! Picture yourself on a sunny afternoon with friends or perhaps enjoying a quiet moment in your kitchen—what better way to enjoy such bliss than with an iced beverage that looks as good as it tastes?
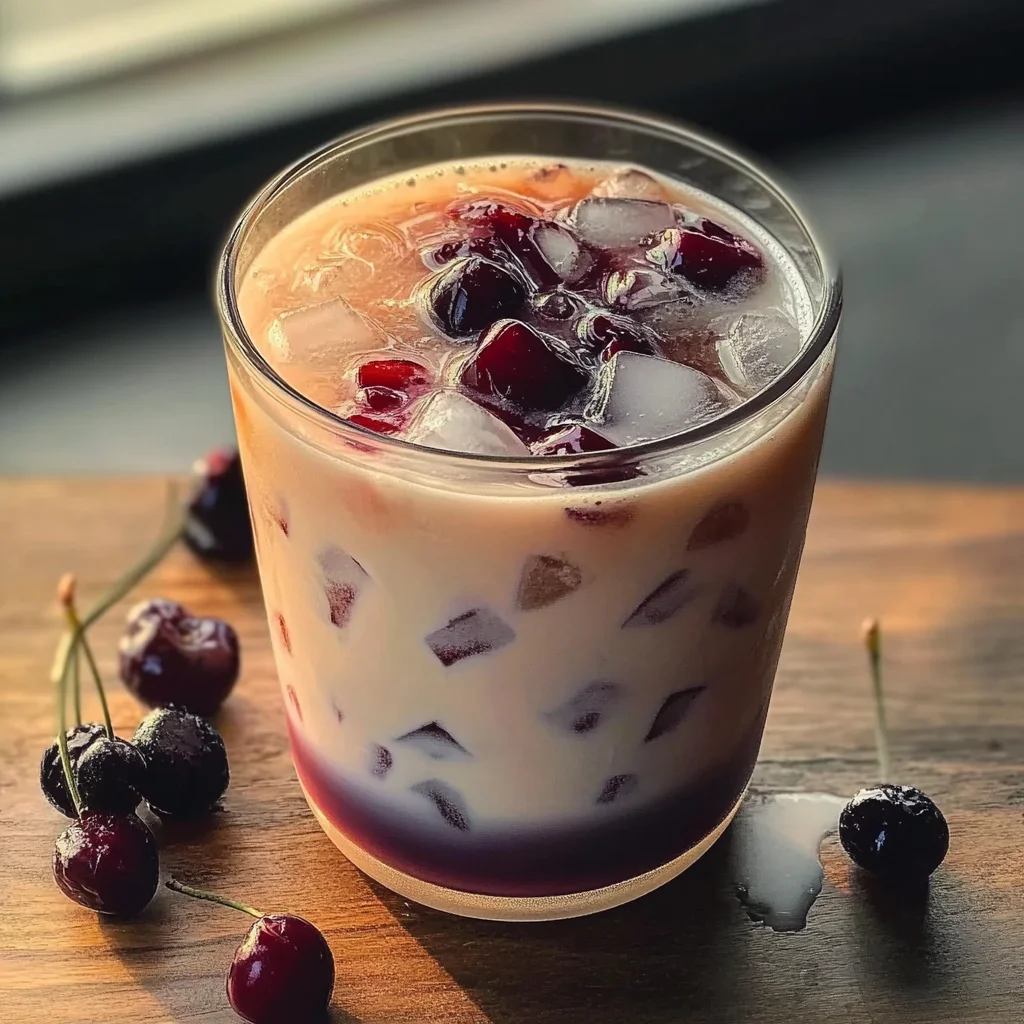
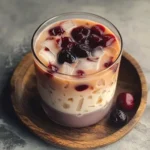
Once your glass is ready, it’s time for the grand finale—pouring our delightful Cherry Earl Grey Milk Tea mixture over those ice cubes. As you do this, listen closely; there’s something so satisfying about that gentle clinking sound as the liquid cascades over ice! Take note of how beautifully the colors mingle—the deep burgundy from the cherries against the creamy milky hue creates an inviting visual contrast that’s as pleasing to look at as it is to drink. The ice will instantly chill your concoction and create that refreshing sip we’re looking for—a perfect balance between warmth from bergamot and coolness from ice.
Step 8: Sipping Blissfully
Finally, after all that anticipation and creation, it’s time to savor every drop of your Cherry Earl Grey Milk Tea! Serve immediately; this isn’t a drink meant for waiting around—it’s best enjoyed fresh so each sip bursts with flavor and refreshment. As you take your first sip, allow yourself to fully experience those layers: start with the soft aroma of bergamot teasing your senses before diving into the juicy sweetness of cherries followed by that smooth creaminess cascading down your throat.
Pay attention here; notice how each element plays its role in what I can only describe as a symphony of flavors! The sensation should be profoundly satisfying—each gulp envelops you in comfort while also invigorating your spirits. Feel free to customize at this point; perhaps add more cherry syrup if you like things sweeter or even garnish with fresh cherries for that extra touch of elegance. Trust me on this one—these little additions can elevate an already extraordinary beverage into something unforgettable.
Next Major Phase – Enjoying Your Creation
Congratulations! You have just created a tantalizing Cherry Earl Grey Milk Tea that not only quenches thirst but also nourishes your soul with its beautiful balance of flavors. Whether you’re serving it at a summer gathering or enjoying it solo while relaxing at home, this delightful drink will surely impress anyone who has the pleasure of tasting it.
Remember, cooking is all about joy and creativity—so don’t hesitate to explore variations or make adjustments according to your taste preferences! You could infuse additional fruits or even add spices like cinnamon or cardamom for an intriguing twist on this classic recipe. The possibilities are endless when you’re guided by passion in the kitchen! So raise your glass high, relish each sip slowly, and let yourself bask in this moment—you deserve it!
Storage and Enjoyment Tips for Your Cherry Earl Grey Milk Tea
Now that you’ve crafted this delightful Cherry Earl Grey Milk Tea, I can almost hear the ice clinking in your glass as you pour that creamy, fruity concoction over it. The vibrant colors and aromas are simply irresistible! But what if there’s some left? Fear not! Here are some tips to make sure you get to enjoy every last drop of this refreshing treat, even after the initial pour.
Storing Leftover Cherry Earl Grey Milk Tea
If you find yourself with leftover Cherry Earl Grey Milk Tea—though I doubt it will happen often—you’ll want to store it properly to keep those wonderful flavors intact. First, grab an airtight container; glass works beautifully here as it won’t absorb any odors and keeps everything fresh. Place your tea in the refrigerator where it will keep well for up to three days. This is crucial because the freshness of those cherry notes truly shines when enjoyed sooner rather than later. To maintain its creamy texture, consider placing a slice of bread in the container—this little trick helps prevent any undesirable separation and keeps it tasting as though it were freshly made. When you’re ready to sip on the tea again, just give it a gentle stir or shake to blend everything back together. Trust me; you’ll be amazed at how well the flavors hold up after chilling!
Freezing Components for Later
Looking to save some of that luscious Cherry Earl Grey Milk Tea for another day? Freezing is an absolutely fabulous option! To do this, pour your prepared milk tea into ice cube trays or freezer-safe containers, making sure they’re sealed tightly. This allows you to enjoy this lovely beverage even weeks later—think about two months maximum for optimal flavor retention! The advantage of freezing is that you can pop out a few cubes whenever you fancy a refreshing drink; simply let them thaw in the fridge or add them directly into a glass of milk for a chilled delight. The convenience factor is absolutely paramount here—imagine reaching for one of those frozen cubes on a hot summer day and transforming your ordinary routine into something special with minimal effort!
Cherry Earl Grey Milk Tea
Refreshing Cherry Earl Grey Milk Tea blends bergamot-infused tea with sweet cherry syrup and creamy milk for an extraordinary treat—try it today!
- Prep Time: 10 minutes
- Cook Time: 5 minutes
- Total Time: 15 minutes
- Yield: Serves 1
- Category: Dessert
- Method: Beverage
- Cuisine: Fusion
Ingredients
- 240 ml water
- 2 tsp Earl Grey tea leaves
- 2 tbsp cherry syrup
- 2 tbsp sugar (optional)
- 240 ml milk (whole, almond, or oat)
- 1 cup ice cubes
Instructions
- Boil the water in a saucepan until just below boiling.
- Add the Earl Grey tea leaves and steep for 3–5 minutes.
- Strain the tea to remove the leaves and return it to the saucepan.
- Stir in cherry syrup and sugar until dissolved; allow to cool slightly.
- Once cooled, mix in the milk gently.
- Fill a glass with ice cubes and pour the Cherry Earl Grey Milk Tea over them.
Nutrition
- Serving Size: 1 glass (approximately 300 ml)
- Calories: 180
- Sugar: 30g
- Sodium: 100mg
- Fat: 6g
- Saturated Fat: 3g
- Unsaturated Fat: 2g
- Trans Fat: 0g
- Carbohydrates: 36g
- Fiber: 0g
- Protein: 5g
- Cholesterol: 10mg