Dutch Caramel Apple Pie
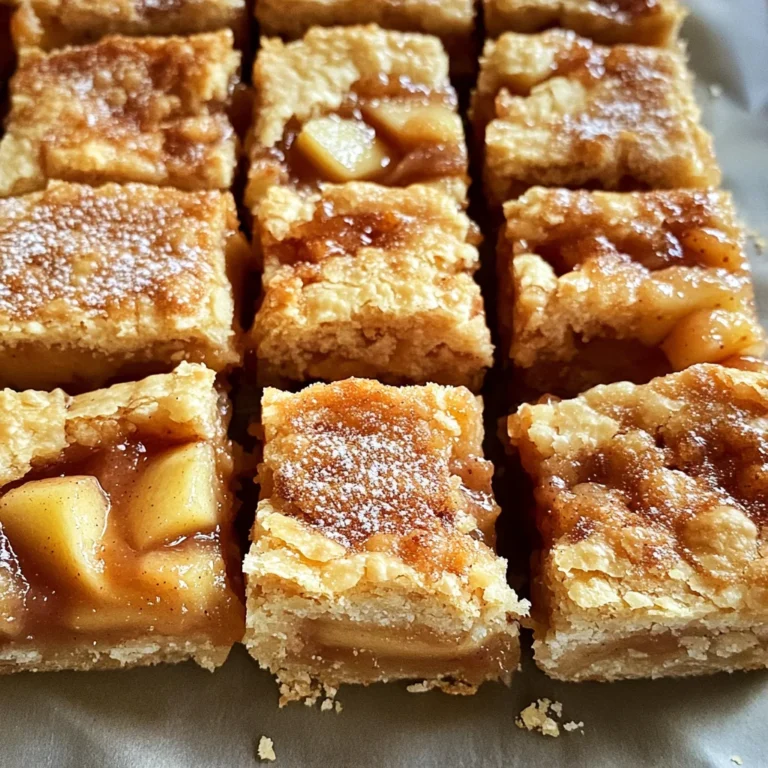
There’s something undeniably magical about the aroma of freshly baked Dutch Caramel Apple Pie wafting through your home, isn’t there? It’s not just a dessert; it’s an experience that intertwines the warmth of cherished memories with the anticipation of sweet indulgence. As you slice into this pie, the tender, spiced caramel-coated apples reveal themselves, nestled snugly beneath a golden, crumbly topping that beckons you to take a bite. This Dutch Caramel Apple Pie is more than just a treat; it’s a symphony of flavors that captures the essence of autumn and the spirit of togetherness. Picture this: your loved ones gathered around the table, laughter filling the air as they take their first bites, eyes lighting up with joy at the first taste of that heavenly caramel drizzled over each slice. This pie absolutely deserves a spot on your Thanksgiving table—or any gathering that calls for comfort and celebration.
What makes this pie truly special is its ability to bridge tradition with innovation. The classic apple pie is often adorned with a top crust, but here we’ve taken a delightful turn by embracing the Dutch crumble topping—a simple yet stunning way to elevate our beloved dessert while making it easier to prepare. Each crumb adds a textural contrast to the soft apple filling below, creating an utterly captivating experience for your taste buds. You’ll find in this recipe not only an array of warming spices but also a rich caramel sauce that adds depth and sweetness to every bite. Trust me on this one; once you serve this Dutch Caramel Apple Pie, it will quickly become a cherished recipe in your collection—one you’ll find yourself returning to again and again.
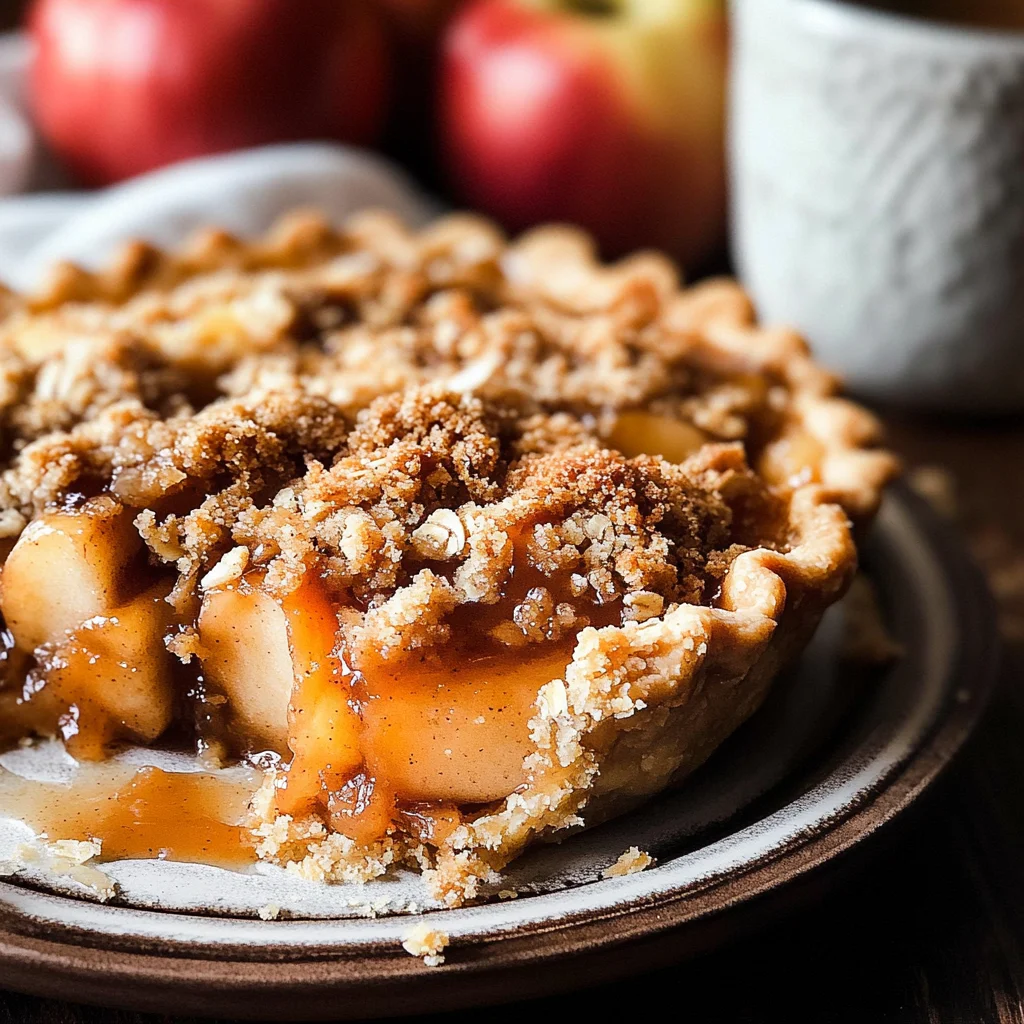
Dutch Caramel Apple Pie: A Cozy Twist on Tradition
Gathering around for dessert has never felt so inviting! This Dutch Caramel Apple Pie combines simplicity with sophistication, making it perfect for everyone from novice bakers to seasoned pros. With its flaky all-butter crust and decadent crumb topping, each slice tells a story of love and warmth—a true reflection of what makes sharing food so special.
Ingredients:
As we embark on this culinary journey together, let’s take a moment to appreciate each ingredient’s role in creating our delicious Dutch Caramel Apple Pie. These components work harmoniously to bring out flavors and textures that will leave everyone at your table craving more.
- 1 and 1/2 cups all-purpose flour (195 grams). Flour is the backbone of our crust—it provides structure while allowing us to achieve that coveted flaky texture. When measuring flour, I always recommend spooning it into your measuring cup and leveling it off gently rather than scooping directly from the bag. This ensures we don’t pack too much flour into our measurement. If you’re feeling adventurous or want an extra layer of flavor, consider using half whole wheat flour!
- 1/2 tsp salt. Salt might seem insignificant in desserts, but it’s absolutely paramount! It enhances sweetness and balances flavors beautifully—think of it as a secret weapon in your baking arsenal. Always opt for fine sea salt here; it dissolves easily into our mixture without leaving gritty bits behind.
- 1/2 tbsp granulated sugar. Sugar not only sweetens our crust but also contributes to browning during baking through caramelization—a little magic happens when heat meets sugar! A light touch is key here since we want our crust flavorful yet not overly sweet.
- 9 tbsp cold salted butter (127 grams), cubed. Butter is where we derive so much richness and flavor in both our crust and filling! Using cold butter is crucial because when baked, those little cubes create pockets in the dough that puff up beautifully—resulting in flakiness that’s simply irresistible! If you’re looking for alternatives due to dietary needs or preferences, try using coconut oil or vegan butter instead.
- 4-6 tbsp ice-cold water. The temperature matters immensely here; adding ice-cold water helps prevent gluten from developing too much in our dough, which could lead to toughness instead of tenderness. Start with less water—just enough for the dough to come together—because you can always add more if needed!
- 1 cup granulated sugar (210 grams). This sugar is essential for sweetening our caramel sauce as well as enhancing the natural sweetness found in apples themselves! When choosing granulated sugar, look for brands that are free from additives or anti-caking agents for optimal results.
- 6 tbsp salted butter (85 grams), cubed. Just like before, butter plays an essential role in crafting our luscious caramel sauce! When melting it down with sugar, you’ll discover how its creamy richness pairs perfectly with other ingredients to form that dreamy texture we’re after.
- 1/2 cup + 1 tbsp heavy cream (135 grams). Heavy cream introduces velvety smoothness into our caramel sauce—it’s what transforms regular caramel into something truly luxurious! Look for heavy cream with higher fat content if possible; it yields better results when whipped or cooked down.
- Pinch of flaky sea salt. This pinch elevates everything—it adds depth and complexity while contrasting beautifully against sweetness! Choose high-quality flaky sea salt like Maldon or fleur de sel; they dissolve nicely without overpowering dishes like coarse salts can sometimes do.
- 8 cups apples (about 5-6 large apples – 846 grams), peeled and sliced 1/4 thick. Apples are at the heart of this dish—their natural sweetness combined with spices creates layers upon layers of flavor! My favorites include Granny Smith for tartness balanced against sweetness from Honeycrisp or Fuji varieties—these hold their shape wonderfully during baking!
- 1 tbsp lemon juice. Lemon juice brightens up flavors and helps prevent apples from browning too quickly after slicing—a quick toss with lemon juice keeps everything fresh-looking until baking begins!
- 1/3 cup granulated sugar (70 grams) & 1/3 cup light brown sugar packed (73 grams) combined form a lovely balance between sweetness levels while enhancing moisture content within apple filling—it’s an essential duo!
- 2 tsp cinnamon & 1 tsp nutmeg, & 1/4 tsp cloves, & 1/4 tsp salt, & 1/8 tsp allspice are where things get aromatic—the warm spices add complexity that’ll have everyone asking for seconds! Feel free to adjust according to personal preference; perhaps add cardamom if you’re feeling adventurous!
- 1/3 cup all-purpose flour (43 grams) helps thicken juices released by apples during cooking ensuring we don’t end up with soggy bottoms!
- 1/3 cup salted caramel sauce (homemade recommended!) infuses delicious flavors throughout apple mix—don’t hesitate when drizzling some atop finished slices either!
- 1 cup all-purpose flour (130 grams) & 1 cup old-fashioned whole rolled oats (100 grams) comprise our crumble topping! Oats provide fantastic texture contrast while adding wholesome goodness too!
- 2/3 cup light brown sugar packed (146 grams) rounds off topping mixture yielding slight chewiness once baked—it’s pure comfort food bliss!
- 1/4 tsp cinnamon, & pinch of salt enhance crumble flavors perfectly—they work harmoniously together creating delightful aroma wafting through kitchen air!
- 1/2 cup cold salted butter (113 grams) brings richness into crumble mix too—remember cold is key here just like before!
- An egg serves merely as an egg wash brushed over edges producing golden-brown sheen upon baking time whilst coarse sugar adds sparkle on top enhancing aesthetics further too!
Now that we’ve gathered all these beautiful ingredients full of potential magic within them let’s dive deeper into what tools will help us achieve perfection!
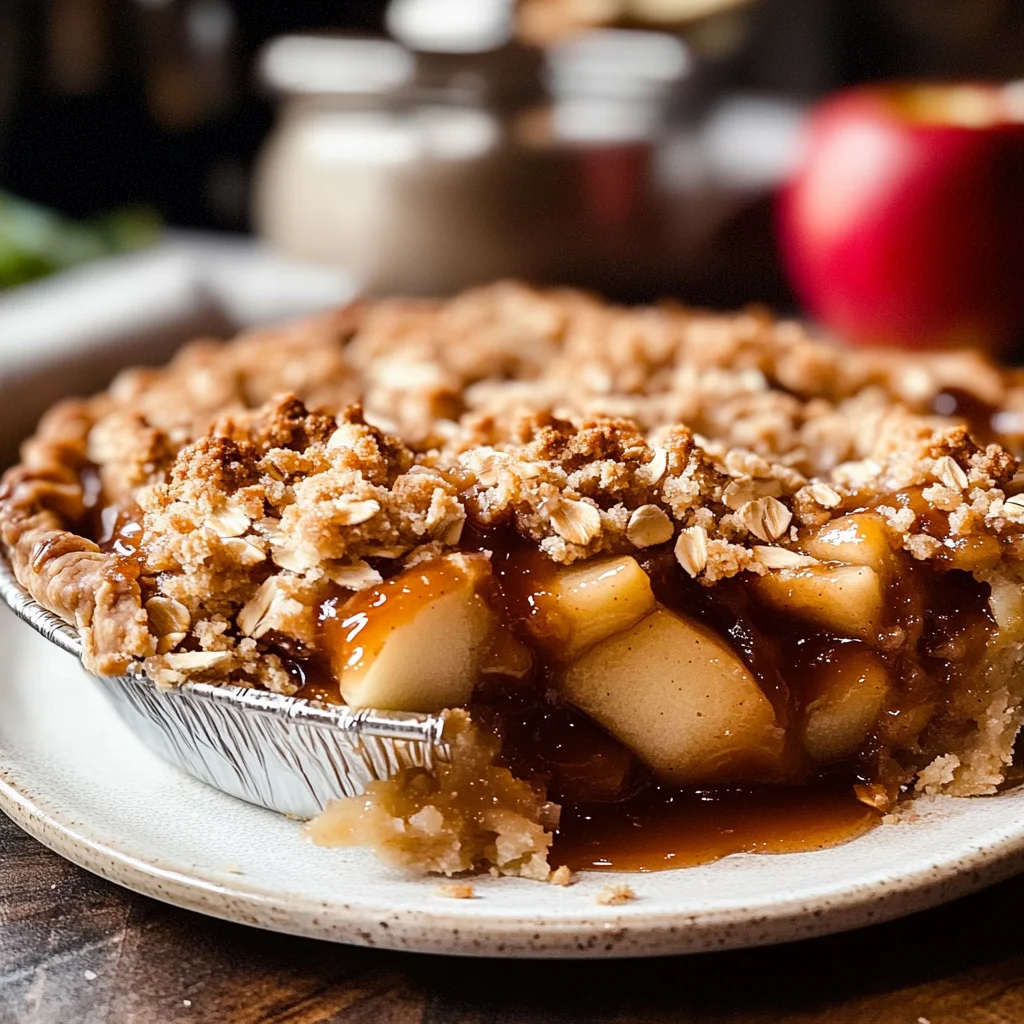
Equipment You’ll Need:
Having the right tools makes all the difference when crafting something extraordinary like this Dutch Caramel Apple Pie! Each piece serves as an essential partner along our journey toward deliciousness—and I promise you’ll appreciate how smoother everything feels once they’re all set out before you.
- Mixing bowls – A must-have for combining ingredients seamlessly! Opt for various sizes so you can tackle everything from small measurements like spices up through larger batches such as mixing pie fillings together without spilling along edges.
- Measuring cups and spoons – Precision matters immensely when baking; these tools ensure consistency throughout recipes resulting in successful outcomes every single time—you wouldn’t want anything underwhelming now would ya?
- Pastry cutter or fork – Essential while preparing pie crusts/cobbler toppings alike—this tool helps cut cold butter evenly throughout dry ingredients resulting ultimately yielding flakier textures without overworking doughs excessively either way which could lead towards tough results otherwise.
- Rolling pin – A trusty companion while shaping out those beautiful circles needed prior laying down fillings within them later—it makes rolling out dough effortless if done correctly thanks mainly due its weight distribution across surfaces evenly allowing easy handling overall!
With these essentials ready at hand let’s dive right into preparing each component step-by-step carefully crafting one delightful masterpiece after another…
Step 1: Crafting Your Perfect Pie Dough
The foundation of any great pie starts with its crust—and I can’t emphasize enough how important this step is! Begin by combining your measured flour along with salt and granulated sugar in a mixing bowl until thoroughly blended together—a quick whisk will suffice here ensuring no clumps remain lurking around causing trouble down line later on during assembly stages ahead! Next comes adding those chilled cubes o’ butter; use either your pastry cutter or fork methodically breaking apart larger pieces until they resemble coarse crumbs resembling sand-like texture—not quite fully amalgamated yet but heading towards right direction indeed! At this point pour ice-cold water gradually incorporating mere tablespoons at time mixing gently until cohesive ball forms around edges then wrap tightly within plastic film letting rest inside refrigerator minimum two hours prior rolling out afterwards—believe me when I say patience rewards greatly once oven doors swing wide open revealing gorgeous golden glory emerging forth filled warmth lingering throughout space surrounding every soul present gathered ‘round table ready indulge…
Step 2: Creating Luscious Homemade Caramel Sauce
While waiting patiently allow dough chill properly let’s shift focus towards crafting some homemade caramel sauce destined drizzle atop finished slices later on bringing everything full circle appropriately sweetened perfection overall transformation occurring midst many steps involved thus far already taken place earlier before hand! In medium saucepan combine measured amount granulated sugar over medium-low flame stirring occasionally until melted completely forming amber-hued liquid gold shimmering brightly within confines containing vessel itself exuding heady aromas beckoning taste buds alike savor each drop slowly savoring anticipation building waiting finish line nearing time approaching… Once melted remove from heat gently swirling cubed pieces salted butter followed closely behind pouring fresh heavy cream ever-so-carefully allowing bubbles rise rapidly subsiding thereafter whisk vigorously combining ensuring smooth consistency achieved ultimately desired outcome reached effortlessly—all there remains do allow cool slightly aside prepping next stages awaiting eagerly ahead…
Step 3: Rolling Out Dough + Transferring It Into Pan
Now armed fully equipped ready tackle rolling out chilled pie crust previously rested comfortably inside fridge—we begin lightly dusting clean surface area appearing clear prep space surrounding us next step forward onwards together collectively united goal achieving utmost success along journey unfolding ahead waiting patiently unravel mysteries awaiting discovery just beyond horizon soon enough awaiting embrace warmly welcoming arms promising delightful treats ahead layered beneath protective exterior shielding insides lovingly encased snugly keeping fresh until moment ripe share among friends family alike indulging joyous occasion celebratory nature intended throughout ages past generations gone by now present here today standing proud amidst community spirit thriving unyieldingly against odds stacked high above head looming overhead threatening challenge overcome triumphantly gracefully moving forward onward ever hopeful brighter futures lie ahead shining brightly illuminating paths traversed long journeys traveled far reaching destinations…
Step 4: Preparing Filling Mixture While Preheating Oven
While dough rests comfortably let’s shift gears once more diving deeper exploring next layer unfolding inviting aromas dancing forth enticing senses awakened alive stirring hearts longing reconnect bonds rooted deeply shared fond memories cultivated planted long ago blossoming vibrant landscapes flourishing evermore brightening spirits igniting flames enthusiasm rekindled passions reignited anew transforming ordinary moments extraordinary delightfully profound experiences shared among loved ones standing steadfast supporting one another lifting burdens embraced wholly surrounded care nurturing environments built trust forged solid foundations knowing wisdom passed down generations guiding footsteps embarking adventures together hand-in-hand walking paths unknown discovering treasures hidden treasures waiting uncover unveiled revealing beauty lies beneath surface depths hidden away longing reach surface bask warmth sunshining brightly illuminating lives touched profoundly bearing witness miracles unfold daily existence celebrated cherished embrace wonderment innocence purity encapsulated essence captured within sweet nectar life itself flowing freely nourishing souls sustaining hearts fueling dreams aspirations unfulfilled yearning fulfillment satisfaction derived simple joys found midst chaos surrounding world today reminding us pause reflect gratitude cultivate kindness compassion share lovingly abundance bestowed gifted freely amongst fellow travelers journey undertaken life time fleeting moments pass swiftly grasp hold tightly never lose sight precious gifts bestowed upon us…
And there we have begun laying groundwork solid foundation creating delectable masterpiece awaits revelation joyfully experienced first bites savored endlessly shared stories crafted woven threads binding lives cherished forever echo through ages… Join me soon continue unveiling secrets hidden within next steps leading ultimate climax culminating success achieved drawing closer final moments approaching realization blissful connections forged through culinary adventures undertaken journeys traveled far wide discovering new horizons simultaneously seeking treasures uncharted territory awaiting exploration revealing delights await eager hands eager hearts yearning embrace desires fulfilled satisfaction gleaned truly extraordinary experiences lived discovered exquisitely crafted delicacies brought forth life itself nurtured nourished lovingly tended roots planted deep soil fertile ground rich possibilities await discovery never-ending cycles renewal rebirth weaving tapestry fabric existence intricately interconnected weaving strands intertwining fates destinies entwined forever bound creating everlasting bonds cherished memories formed…
Step 5: Crafting the Dutch Crumble Topping
Now, let’s dive into making that utterly irresistible Dutch crumble topping that will crown our pie with a delightful crunch! Start by whisking together the 1 cup of all-purpose flour, 1 cup of old-fashioned whole rolled oats, 2/3 cup packed light brown sugar, 1/4 teaspoon of cinnamon, and a pinch of salt in a large mixing bowl. This mixture is the foundation of our topping, and it’s essential to mix these dry ingredients thoroughly so that every bite is infused with that warm, comforting flavor of cinnamon. The oats add a heartiness and texture that truly elevate this pie, giving it a rustic charm that’s simply to die for.
Once your dry ingredients are well combined, it’s time to cut in the cold, salted butter. Trust me on this: using cold butter is crucial! It creates those beautiful flaky bits in your crumble topping that will caramelize as they bake, resulting in a golden, crunchy layer that contrasts perfectly with the soft, spiced apple filling beneath. Using a pastry cutter, or even your fingertips if you don’t have one on hand, work the butter into the flour mixture until it resembles coarse crumbs—think pea-sized bits mixed throughout. Don’t rush this step; take your time to ensure each piece of butter is coated in flour. This meticulous process will lead to a topping that’s both crumbly and luxurious. Once you’ve achieved that desired texture, set aside the mixture while we prepare to assemble our pie.
Step 6: Assembling Your Pie with Love
With your pie dough now chilled and ready from its time in the freezer, it’s time to bring together all these luscious components into one glorious creation. Begin by preheating your oven to 400°F (200°C), ensuring it’s nice and hot for optimal baking. Now, retrieve your pie dough from the freezer and roll it out onto a lightly floured surface. Aim for about an inch larger than your pie pan—this extra space will allow us to create an elegant crimped edge later on. Gently transfer the rolled dough into your pie pan; I like to use my rolling pin as a helper here—just roll it over the dough and lift it into place without stretching it too much.
Once it’s nestled comfortably into the pan (don’t worry if there are a few cracks; those can be patched up!), brush the edges of your crust with an egg wash made from beating one egg in a small bowl—this step is non-negotiable! The egg wash lends that beautiful golden sheen we all adore on baked pies. After brushing, sprinkle some coarse sugar over the edges for added sweetness and texture. Now comes the moment we’ve all been waiting for: spooning in our apple filling! Be sure to leave behind any excess liquid from macerating those lovely apples; we want them juicy but not soggy. Then, generously pile on that divine Dutch crumble topping we prepared earlier—don’t hold back! Every inch should be covered because this is what transforms our pie from delicious to an absolute showstopper.
Step 7: Baking Your Perfect Dutch Caramel Apple Pie
With everything assembled beautifully in your pan, it’s time for our pie to meet its destiny in the oven—a transformative moment indeed! Place your pie on a baking sheet positioned on a lower rack; this little trick ensures that any bubbling juices won’t spill over and create chaos in your oven (we’ve all been there!). Bake at 400°F (200°C) for 45-55 minutes, but don’t forget to check around the 25-30 minute mark to watch for potential over-browning of that lovely crust. If you notice any darkening happening too soon, simply cover the top loosely with aluminum foil or use a pie shield if you have one handy.
As you bake, keep an eye out for signs of doneness: you want those apples tender yet still holding their shape; gently poke through the crumb topping with a fork and see if it slides through easily—that’s when you know you’re close! The topping should be gloriously golden brown and crisped just right—the kind you could almost hear crackle when you slice into it! If things seem undercooked at first glance, give it an additional few minutes but keep checking regularly; no one likes an apple filling that’s too firm or tough instead of luxuriously tender.
Step 8: Cooling Down – The Sweetest Anticipation
Ahh, now comes perhaps one of the hardest parts—the waiting game! Once you’ve pulled your masterpiece from the oven and allowed its intoxicating aroma to waft through your kitchen like a sweet melody beckoning everyone nearby, let it cool at room temperature for 2-3 hours before slicing into it. Patience here is key because cooling allows all those flavors to meld beautifully while also helping set up that filling so every slice holds together perfectly rather than spilling everywhere like an excited waterfall!
As you wait, consider this: cooling not only solidifies those dreamy layers but also enhances flavor profiles by allowing them to settle into harmony—like letting good friends enjoy each other’s company before diving into conversation! When you’re finally ready to serve this extraordinary Dutch Caramel Apple Pie, heat up some extra caramel sauce (which I encourage you not to skip!) and drizzle generously over each slice—it adds such richness that’ll have everyone swooning!
Final Touches: Serving Up Happiness
Step 9: The Grand Finale – Serving Your Pie with Flair
Finally, after what feels like ages (but trust me—it’ll be worth every second), it’s time for that grand reveal! Slice your beautiful Dutch Caramel Apple Pie with care; I find using a serrated knife works wonders here as it glides effortlessly through both crust and crumb topping alike. As each piece comes out revealing those tender apples nestled within their caramel embrace topped with crunchy goodness—you’ll feel like you’ve created something truly special.
Serve each slice warm alongside generous dollops of whipped cream or vanilla ice cream if desired—imagine how delightful that contrast would be against the warmth of spiced apples mingling with rich caramel notes; it’s pure bliss on a plate! And remember those extra drizzles of homemade caramel sauce? They’re not just decoration—they’re essential because they amplify every bite’s flavor profile exponentially!
In closing, sharing this Dutch Caramel Apple Pie isn’t just about enjoying dessert; it’s about creating memories around your table filled with laughter and love—each slice telling its own story shared among family and friends during special gatherings or cozy evenings at home. So go ahead—indulge yourself in this delicious adventure! Enjoy every moment—and don’t forget—I’m always here cheering you on while you bake up magic in your kitchen!
Storage and Enjoyment Tips for Your Dutch Caramel Apple Pie
Now that your Dutch Caramel Apple Pie is baked to golden perfection, it’s time to savor the fruits of your labor! The intoxicating aroma of spiced apples mingling with the sweet caramel is enough to send anyone into a blissful state. But let’s talk about how to keep that magic alive for when you want a slice (or two!) later. Proper storage can maintain its divine flavors and textures, ensuring every bite remains as delightful as the first.
Storing Leftover Dutch Caramel Apple Pie
To keep your pie fresh and delicious, simply cover it with plastic wrap or store it in an airtight container at room temperature. It will stay good for up to five days—though I doubt it’ll last that long! For those who want to keep their pie tasting as fresh as day one, consider placing a slice of bread in the container alongside the pie; this little trick helps absorb moisture, keeping the crust from becoming too soggy while maintaining its delightful texture. After a day or two, the flavors deepen and meld beautifully, almost like a symphony of tastes maturing with time. When you’re ready to indulge again, I recommend reheating slices in a warm oven at 350°F until they’re just warmed through—this will revive that fresh-baked goodness and make your kitchen smell heavenly all over again!
Freezing Dutch Caramel Apple Pie for Later
If you find yourself with extra pie (or if you’re just super organized and want to plan ahead), freezing is a fantastic option! To freeze it properly, let your pie cool completely before wrapping it tightly in plastic wrap followed by aluminum foil—this double layer ensures no freezer burn will touch your beloved dessert. You can keep it frozen for up to three months without sacrificing flavor or texture. When you’re ready to enjoy, simply transfer it from the freezer to the fridge for several hours or overnight to thaw gently. For a quick reheat, pop it back into an oven at 350°F until warmed through. This method not only preserves all those lovely flavors but also gives you the convenience of having a homemade dessert ready whenever you desire! Trust me on this; there’s nothing quite like pulling out a homemade pie on a chilly evening to share with friends or family.
Dutch Caramel Apple Pie
Indulge in the delightful experience of making Dutch Caramel Apple Pie, where every slice is an invitation to savor the flavors of autumn. This pie features tender, spiced apples enveloped in a rich caramel sauce, all topped with a buttery crumble that adds both texture and taste. Picture yourself gathering with loved ones around the table, where laughter fills the air, and eyes light up at the first bite of this comforting dessert. Perfect for Thanksgiving or any occasion that calls for sweet indulgence, this recipe blends tradition with a modern twist, making it a must-have in your baking repertoire.
- Prep Time: 20 minutes
- Cook Time: 50 minutes
- Total Time: 1 hour 10 minutes
- Yield: Serves approximately 8 people 1x
- Category: Dessert
- Method: Baking
- Cuisine: American
Ingredients
- 1 and 1/2 cups all-purpose flour
- 1/2 tsp salt
- 1/2 tbsp granulated sugar
- 9 tbsp cold salted butter, cubed
- 4–6 tbsp ice-cold water
- 1 cup granulated sugar
- 6 tbsp salted butter, cubed
- 1/2 cup + 1 tbsp heavy cream
- Pinch of flaky sea salt
- 8 cups apples, peeled and sliced 1/4" thick
- 1 tbsp lemon juice
- 1/3 cup granulated sugar
- 1/3 cup light brown sugar packed
- 2 tsp cinnamon
- 1 tsp nutmeg
- 1/4 tsp cloves
- 1/4 tsp salt
- 1/8 tsp allspice
- 1/3 cup all-purpose flour
- 1/3 cup salted caramel sauce
- 1 cup all-purpose flour
- 1 cup old-fashioned whole rolled oats
- 2/3 cup light brown sugar packed
- 1/4 tsp cinnamon
- Pinch of salt
- 1/2 cup cold salted butter
- 1 egg for wash
Instructions
- Preheat your oven to 400°F (200°C).
- Prepare the pie crust by combining flour, salt, and sugar; cut in cold butter until crumbly. Add ice water slowly until dough forms.
- Chill the dough for at least two hours, then roll it out into a pie pan.
- Prepare caramel sauce by melting granulated sugar over medium heat; once amber, add butter and cream; stir until smooth.
- Toss apple slices with lemon juice, sugars, spices, and flour; pour mixture into the crust; drizzle with caramel sauce.
- For the crumble topping, mix flour, oats, sugars, and cinnamon; cut in cold butter until crumbly.
- Spread crumble over apple filling and bake for 45-55 minutes until golden brown.
- Allow cooling for a few hours before slicing to serve.
Nutrition
- Serving Size: 1 slice
- Calories: 320
- Sugar: 25g
- Sodium: 150mg
- Fat: 14g
- Saturated Fat: 8g
- Unsaturated Fat: 5g
- Trans Fat: 0g
- Carbohydrates: 48g
- Fiber: 3g
- Protein: 3g
- Cholesterol: 30mg