BBQ Chicken (Grilled)
There’s something truly magical about the aroma of BBQ wafting through the air, isn’t there? It’s like a warm hug on a summer day, a reminder of sunny backyard gatherings filled with laughter and the clinking of glasses. This BBQ Chicken (Grilled) recipe is not just another dish; it’s an experience that wraps you in flavors and memories, evoking those cherished moments shared with loved ones around the grill. I promise you, each bite is a symphony of smoky sweetness, perfectly charred skin, and juicy tenderness that will have everyone asking for seconds. It’s more than cooking; it’s creating a memory that lingers long after the meal is over.
Every time I fire up the grill for this BBQ chicken, I’m reminded of my childhood summers spent outside with family. The sizzling sounds and mouthwatering smells transport me back to those carefree days where delicious food was an unspoken language of love and togetherness. The secret? My homemade BBQ sauce—a liquid gold that transforms ordinary chicken into something utterly intoxicating. Trust me on this: once you make your own BBQ sauce, store-bought varieties will never hold the same allure again. So grab your tongs and let’s dive into this incredible recipe that will undoubtedly become a staple at your summer cookouts!
BBQ Chicken (Grilled): A Summer Essential
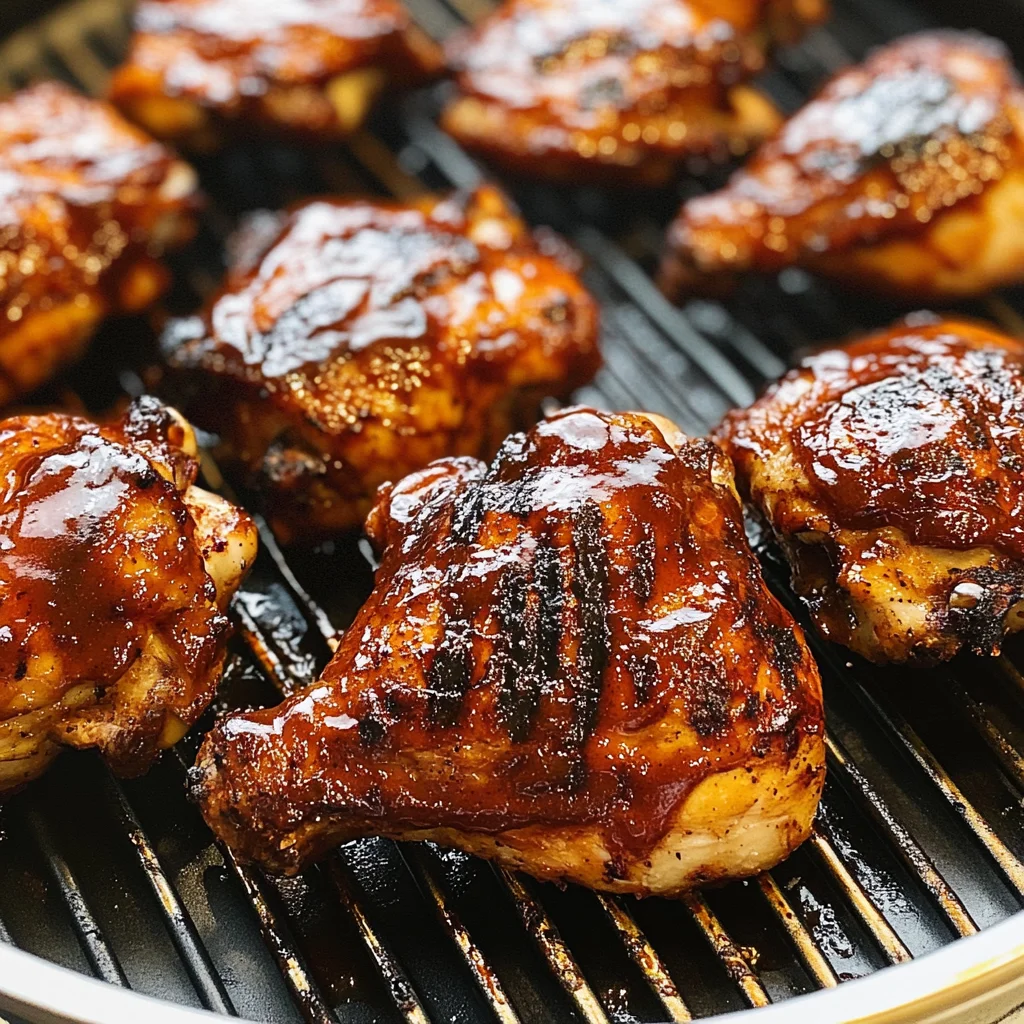
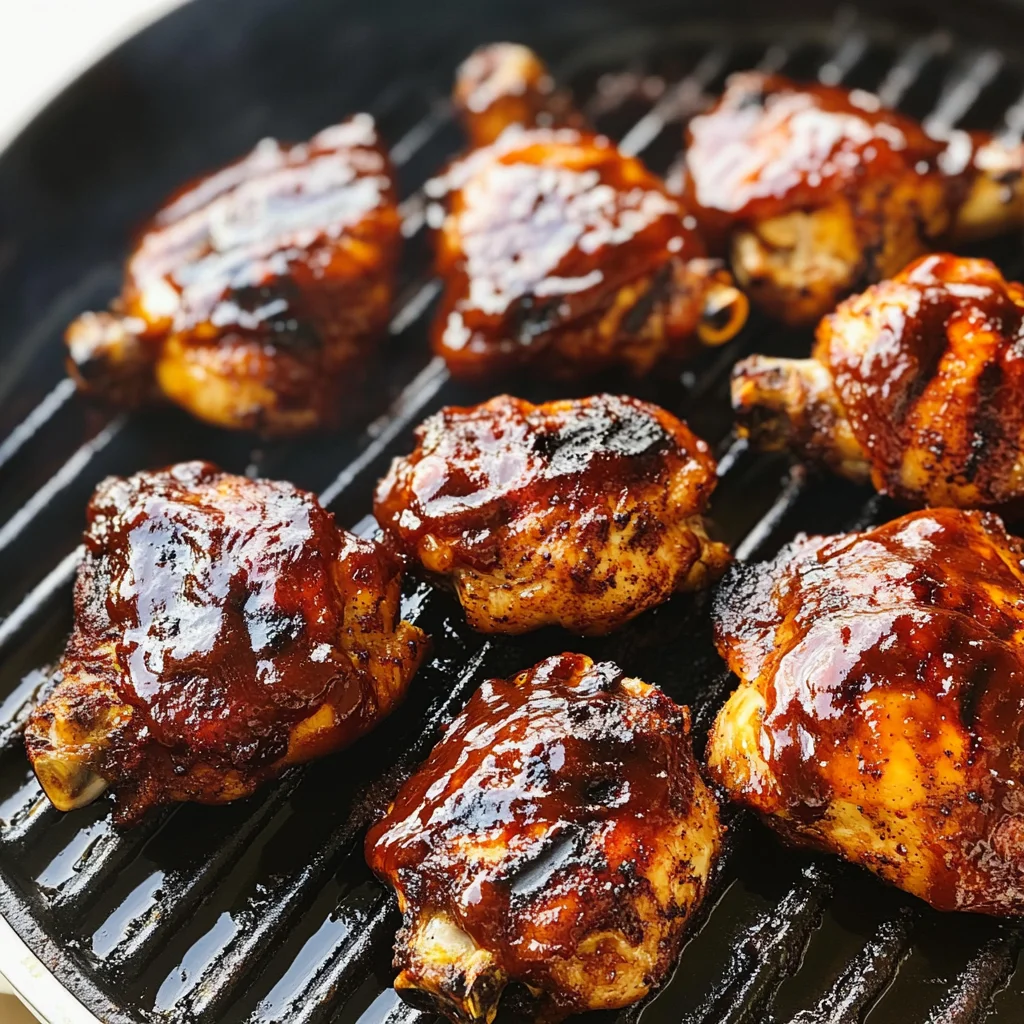
This BBQ Chicken (Grilled) is perfect for those sunny afternoons when you want to impress your friends and family without breaking a sweat. With its juicy meat and irresistible glaze, it’s bound to be the star of your summer gatherings.
Ingredients:
As we embark on this culinary journey together, every ingredient plays a pivotal role in crafting this masterpiece. Let’s take a closer look at what we need!
- 3 ½ to 4 pounds (about 12 to 14 pieces) chicken thighs or drumsticks (bone-in and skin-on). Choosing bone-in, skin-on pieces is absolutely paramount for achieving that juicy texture we crave in BBQ chicken. The bone helps keep moisture locked in during grilling, while the skin crisps up beautifully, giving us that delightful contrast of textures—crispy on the outside yet tender within. When selecting your chicken, look for pieces with vibrant skin and no discoloration; organic options are always wonderful as they often have better flavor.
- 1 teaspoon kosher salt. Salt is not just an ingredient; it’s an essential flavor enhancer that elevates our chicken from good to extraordinary. Kosher salt has larger grains than table salt, allowing for better distribution and absorption into the meat. It draws out moisture while also helping to retain juiciness during cooking—a crucial balance we want to achieve here.
- 1 teaspoon garlic powder. Garlic powder brings a depth of flavor that infuses our chicken with aromatic warmth without overwhelming it. Its earthy essence complements the smokiness from our grill while enhancing all other flavors present in our spice blend.
- 1 teaspoon smoked paprika. This ingredient is one of my favorites! Smoked paprika adds not only color but also a subtle smoky flavor reminiscent of slow-cooked barbecue perfection. It creates that signature BBQ taste we all know and love without needing hours over an actual fire or smoker.
- 1 teaspoon chili powder. While it adds a touch of heat, chili powder also contributes rich undertones—from sweet to slightly spicy—that complement the sweetness of our BBQ sauce beautifully. It’s a fantastic way to achieve complexity without overpowering the dish.
- 1 teaspoon onion powder. Onion powder lends sweetness and depth; it’s mellow yet impactful enough to make you wonder how you ever cooked without it! This component works harmoniously with garlic powder—together they create an amazing flavor foundation for our chicken.
- ½ teaspoon freshly ground black pepper. Freshly ground black pepper provides just enough kick without being harsh or overpowering. It also enhances all existing flavors while adding complexity—a non-negotiable element for well-seasoned grilled meats.
- 1 cup BBQ sauce. Last but not least—the star player! Whether homemade or store-bought (though I highly encourage homemade), BBQ sauce envelops our grilled chicken in layers of tangy sweetness that caramelizes beautifully over heat—the ultimate finishing touch that takes this dish from great to unforgettable.
Equipment You’ll Need:
Now that we have our ingredients lined up like eager participants ready for their moment in the spotlight, let’s talk about the tools we’ll need to bring this culinary vision to life! Having the right equipment can transform your cooking experience from stressful to joyful.
- Grill: Whether you’re using gas or charcoal, having a reliable grill is essential for creating those beautiful char marks and smoky flavors we adore in barbecue dishes. If you’re using charcoal, consider investing in quality briquettes or lump charcoal for optimal heat control—this will elevate your grilling game significantly!
- Instant-read thermometer: This tool may seem simple but trust me when I say it’s crucial! Ensuring your chicken reaches safe internal temperatures while remaining moist is key—an instant-read thermometer takes away all guesswork by providing accurate readings within seconds.
- Baking sheet: We’ll use this handy surface for prepping our chicken before it hits the grill stage! A large baking sheet allows ample space for seasoning every piece evenly while keeping everything tidy—no one likes cleaning up messes after all!
- Tongs: A good pair of tongs makes flipping and moving those hot chicken pieces around effortless; they provide excellent grip without piercing through meat which would release precious juices—this step is truly non-negotiable if you want succulent results!
Step 1: Preparing Your Chicken
The first step in this flavorful journey involves prepping our beloved chicken pieces so they’re ready to soak up all those glorious spices! Begin by placing your chicken thighs (or drumsticks) on a large baking sheet; this spacious setup allows them room to breathe as they come closer to room temperature—a practice I recommend because cold poultry straight from the fridge can lead to uneven cooking later on. While they’re warming up—around 15 minutes should suffice—take a moment to pat them dry with paper towels; removing excess moisture ensures better browning during grilling which translates directly into flavor enhancement!
Step 2: Crafting Your Dry Rub
Next comes one of my favorite parts—the creation of our aromatic dry rub! In a small bowl, combine kosher salt, garlic powder, smoked paprika, chili powder, onion powder, and black pepper until well blended; feel free to mix them thoroughly as each spice plays an essential role in building layers upon layers of flavor throughout our chicken pieces during cooking! This process known as “dry brining” works wonders—it allows salt molecules time enough to penetrate deeper into proteins while simultaneously drawing moisture out initially before locking it back in as they cook later on—a win-win situation you don’t want to skip! Once mixed well together sprinkle generously over both sides (and under skin if preferred) making sure every inch gets some love—you’ll thank yourself later when enjoying every juicy bite!
Step 3: Prepping Your Grill
Now that we’ve seasoned our stars beautifully let’s turn attention towards preparing our trusty grill—which acts like an oven outdoors! For gas grills simply ignite one side leaving others turned off allowing us proper indirect cooking method where heat circulates around food instead of direct flames scorching it unnecessarily—the goal being evenly cooked juicy meat rather than charred remains no one desires! If using charcoal or wood instead ensure there’s sufficient cool area created by moving coals aside once ignited; watch carefully as flames begin dancing across coals creating perfect ambiance reminiscent of backyard barbecues past—such nostalgia fills my heart at moments like these!
Step 4: Grilling Your Chicken
With everything set up perfectly it’s time now unleash magic upon those seasoned beauties laying them gently onto indirect heat side closest possible without actually touching flames themselves—we want them cooked low-and-slow rather than instantly burnt outside leaving raw interiors behind! Cover grill lid tightly allowing all flavors meld together beautifully whilst keeping heat trapped inside creating tender morsels full flavor essence few can resist craving once tried—I typically cook my chickens here between thirty-five minutes flipping every ten until golden brown reaching desired internal temperature measured via trusty thermometer showing around160°F minimum ideally reaching175°F once finished ensuring safety standards met alongside deliciousness achieved!
I can already picture how glorious these grilled pieces will turn out—juicy glory awaiting those who partake eagerly awaits further instructions next which involves brushing luscious layers upon finished product tantalizing taste buds even more…
Step 5: Brush on the BBQ Sauce – The Finishing Touch of Flavor
Now, let’s elevate this BBQ chicken to a whole new level! Once your chicken has cooked on the indirect heat for about 30 to 35 minutes, it’s time to bring out the star of the show: your homemade BBQ sauce. Trust me when I say that brushing on this luscious, sticky goodness isn’t just about adding flavor; it’s about creating that beautiful, caramelized crust we’re all dreaming of. Using a brush (a silicone one is best!), gently coat one side of the chicken with your BBQ sauce. Make sure to cover every inch because we want every bite to be infused with that incredible taste. As you close the grill lid, know that this step is crucial—by covering the chicken while it cooks, you’re trapping in moisture and allowing the flavors to meld beautifully.
After about three to four minutes, flip the chicken over and repeat this saucy ritual. Each flip and brush adds layers of complexity; as the sugars in the sauce caramelize under the heat, they form a glorious glaze that not only tastes heavenly but also looks utterly mouthwatering. You want that sauce to bubble and thicken slightly without burning, so keep an eye on it! If you notice any charring happening too quickly, simply adjust your grill temperature or move it further away from direct heat. This process will take about 15-20 minutes in total—be patient; it’s all worth it for that symphony of flavors!
Step 6: Achieving Perfect Doneness – The Science Behind Temperature
Now that your chicken is beautifully glazed and practically dripping with flavor, let’s talk doneness. This step is where an instant-read thermometer becomes your best friend; I can’t stress enough how important it is to ensure your chicken reaches the perfect internal temperature of 175°F. Not only does this ensure that harmful bacteria are eliminated, but it also guarantees juicy meat that practically falls off the bone. When checking for doneness, insert the thermometer into the thickest part of a thigh or drumstick without touching bone—this ensures an accurate reading.
If you’re cooking over direct heat at this point, keep your grill covered as much as possible during these final minutes to maintain that consistent temperature. Watch out for visual cues too—the skin should be golden brown and slightly crispy while being very fragrant with those smoky notes wafting through the air around you. At this stage, don’t be tempted to rush; patience is key! Letting those last moments happen without interruption allows all those delicious flavors to deepen even more.
Step 7: Resting Time – The Essential Pause
Once you’ve reached that glorious temperature of 175°F, resist the urge to dive right in! It’s time for a crucial step: resting your BBQ chicken. I promise you; this is non-negotiable if you want perfectly juicy results! When you remove meat from heat, it’s still cooking internally due to residual heat—a phenomenon known as carryover cooking. Allowing your grilled chicken to rest for at least ten minutes lets those juices redistribute throughout each piece rather than spill out onto your cutting board when you slice into them.
I like to cover my resting chicken loosely with foil—not too tight; we don’t want it steaming—just enough to keep some warmth in while letting moisture escape slowly. During this short wait time, aroma fills the air as anticipation builds among family and friends gathered around. Soak in those moments because nothing compares to sharing a meal that’s been lovingly prepared with everyone gathered around!
Step 8: Serve It Up – Presentation Matters
Finally! After what feels like an eternity (but was really just a handful of moments), it’s time to serve up your masterpiece! Carefully transfer your beautifully grilled BBQ chicken onto a serving platter—opt for something vibrant if you have it because presentation can elevate even simple meals into extraordinary feasts! As you arrange each piece artfully, feel free to drizzle a bit more BBQ sauce over top for an extra layer of deliciousness and garnish with fresh herbs like chopped parsley or cilantro for color and freshness.
As everyone digs in, pay attention—you’ll hear delighted exclamations about flavor explosions and tenderness in every bite! And remember: serving alongside sides like creamy coleslaw or roasted vegetables not only rounds out your meal but also provides contrasting textures and flavors that make everything sing harmoniously together.
Final Thoughts on Your Grilled BBQ Chicken Journey
Cooking this BBQ Chicken (Grilled) has been not just about preparing food but creating memories filled with laughter and joy around the table. Each step—prepping, seasoning, grilling—has brought us closer together through shared experiences and flavors that linger long after mealtime ends. I hope you feel inspired by this recipe as much as I do every single time I make it! And remember: great food takes love and patience; so take your time enjoying each moment along this culinary adventure! Enjoy every succulent bite—you deserve it!
Storage and Enjoyment Tips for Your BBQ Chicken (Grilled)
Ah, the moment you’ve been waiting for! Your BBQ Chicken (Grilled) is sizzling and ready to be devoured. But what happens when you have leftovers? Don’t fret! This dish is not just a one-time delight; it can be enjoyed again and again with the right care. Imagine the joy of pulling out perfectly cooked chicken from your refrigerator or freezer, ready to transport you back to those warm, sunlit days spent grilling with friends and family. Let’s dive into some essential tips on storing your scrumptious creation!
Storing Leftover BBQ Chicken (Grilled)
To keep that irresistibly juicy BBQ Chicken as fresh as possible, it’s best to store it in an airtight container. Glass containers work wonders because they don’t retain odors like plastic sometimes can and help maintain that tender texture. If you find yourself with leftovers, make sure to refrigerate them within two hours of cooking—this is crucial for food safety! When stored correctly, your chicken can last up to four days in the fridge. To maintain its delectable quality, consider placing a slice of bread in the container; this simple trick helps absorb excess moisture and keeps your chicken from drying out. And trust me, the flavors will only deepen over time, making each bite utterly intoxicating when you reheat it! For reheating, I recommend gently warming it up in the oven to keep that skin crispy and avoid a rubbery texture.
Freezing BBQ Chicken (Grilled) for Later
Now, if you want to extend the life of your BBQ Chicken even further, freezing is an excellent option! Allow the chicken to cool completely before transferring it into freezer-safe bags or containers—be sure to remove any excess air to prevent freezer burn. When properly frozen, your grilled chicken can last up to three months without losing much flavor or juiciness. It’s like having a little taste of summer ready at a moment’s notice! When you’re ready to enjoy it again, simply thaw it overnight in the refrigerator before reheating as mentioned earlier. The convenience factor here is absolutely paramount; imagine coming home after a long day and knowing you have this scrumptious meal waiting for you—a true weeknight lifesaver!
BBQ Chicken (Grilled)
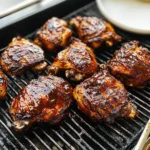
BBQ Chicken (Grilled) is the epitome of summer cookouts, combining smoky flavors with juicy tenderness that will leave your taste buds dancing. This easy and delicious recipe features succulent chicken thighs or drumsticks slathered in a homemade BBQ sauce, perfect for impressing family and friends during backyard gatherings.
- Prep Time: 15 minutes
- Cook Time: 50 minutes
- Total Time: 1 hour 5 minutes
- Yield: Serves approximately 6 people 1x
- Category: Main
- Method: Grilling
- Cuisine: American
Ingredients
- 3 ½ to 4 pounds chicken thighs or drumsticks (bone-in and skin-on)
- 1 teaspoon kosher salt
- 1 teaspoon garlic powder
- 1 teaspoon smoked paprika
- 1 teaspoon chili powder
- 1 teaspoon onion powder
- ½ teaspoon freshly ground black pepper
- 1 cup BBQ sauce
Instructions
- Preheat your grill for indirect cooking.
- Pat the chicken dry with paper towels and place on a baking sheet.
- In a small bowl, mix together salt, garlic powder, smoked paprika, chili powder, onion powder, and black pepper.
- Generously coat the chicken pieces with the spice mixture on both sides.
- Place the seasoned chicken on the grill away from direct heat; cover and cook for about 30–35 minutes.
- Brush BBQ sauce on one side of the chicken, close the lid, and cook for another 3–4 minutes.
- Flip the chicken, apply more BBQ sauce, and cook until internal temperature reaches 175°F.
- Remove from grill and let rest for at least 10 minutes before serving.
Nutrition
- Serving Size: 1 piece (113g)
- Calories: 290
- Sugar: 12g
- Sodium: 680mg
- Fat: 16g
- Saturated Fat: 5g
- Unsaturated Fat: 10g
- Trans Fat: 0g
- Carbohydrates: 9g
- Fiber: 0g
- Protein: 29g
- Cholesterol: 140mg