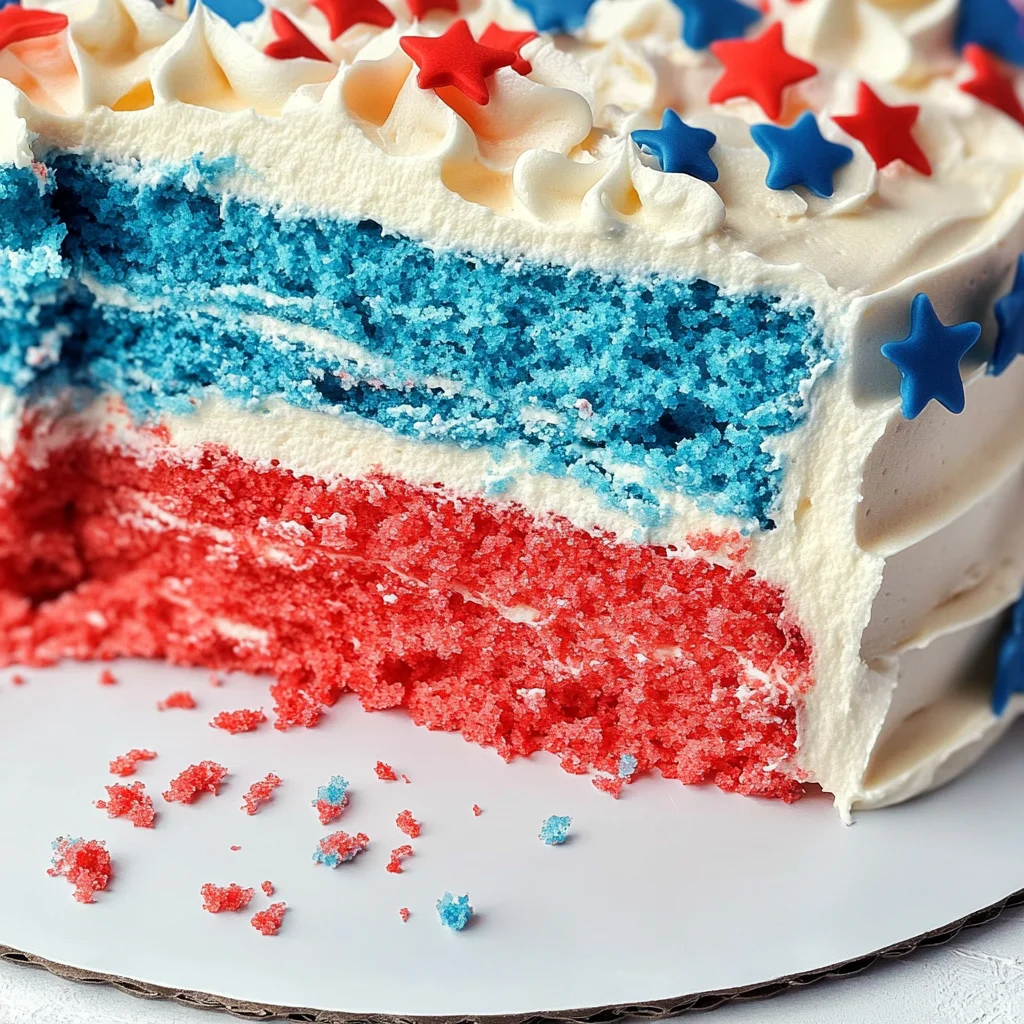
Red White and Blue frosted Vanilla Cake
There’s something profoundly magical about baking a cake, especially when it comes to a celebratory treat like the Red White and Blue frosted Vanilla Cake. It’s not just about mixing ingredients; it’s a heartfelt experience, a fragrant embrace of nostalgia that fills the kitchen with warmth and joy. This cake is more than just dessert; it’s a canvas for memories, representing shared moments around the table during holidays and gatherings. The sweet scent of vanilla wafting through the air invites everyone to come closer, promising delicious bites of fluffy cake adorned in vibrant colors. Trust me, as you dive into this recipe, you’ll find that every step is an invitation to create something extraordinary.
When I think of this cake, I remember summer barbecues and Fourth of July picnics where desserts play a starring role in bringing people together. The vibrant reds and blues symbolize not only patriotism but also joy and community spirit. Each slice is like a joyful celebration on a plate! The texture of the cake is rich yet light, thanks to the sour cream that infuses moisture and flavor. And let’s not forget the frosting—a sweet cloud that holds everything together while adding whimsical colors reminiscent of fireworks lighting up the night sky. This Red White and Blue frosted Vanilla Cake isn’t just for special occasions; it’s perfect anytime you want to brighten someone’s day or simply indulge yourself in something delicious.
Red White and Blue frosted Vanilla Cake: A Sweet Celebration of Flavor
Let’s embark on this delightful culinary journey together! Baking this cake will fill your kitchen with love and laughter, transforming simple ingredients into something beautiful and memorable. As we go through each step, you’ll see how approachable this recipe is while still delivering that homemade taste that feels like a warm hug from your favorite person.
Ingredients:
As we gather our ingredients, think of them as individual characters in our story—each one playing an essential role in creating this delightful masterpiece.
- 1 box white cake mix (Duncan Hines) – This box mix serves as our foundation for the cake, giving us ease without sacrificing flavor. We’re not going to follow the package directions because we’re elevating it into something truly special! Instead of just adding water, we’ll enhance it with extra flour and sugar to achieve that homemade taste everyone adores.
- 1 cup all-purpose flour – Adding all-purpose flour gives structure to our cake while enhancing its density just enough for that perfect bite. It acts as a binding agent alongside our boxed mix, ensuring we have that classic fluffy texture without being overly airy or crumbly.
- 1 cup granulated sugar – This ingredient does more than just sweeten our cake; it also helps with browning due to caramelization during baking. Sugar contributes to moistness by attracting water molecules, which keeps our cake delectably tender long after it’s out of the oven!
- pinch salt – Never underestimate salt’s role in baking! A pinch enhances the flavors throughout—balancing sweetness and making every other ingredient sing harmoniously. It’s an essential element that elevates our dish from good to truly extraordinary.
- 1 1/4 cups water – Water hydrates our dry ingredients so they can form a batter but also plays another crucial role in creating steam during baking, which helps our cake rise beautifully. Make sure it’s room temperature for even mixing!
- 4 egg whites (from large eggs) – Using egg whites gives us lift without added fat from yolks while contributing to structure and moisture retention in our bake. They help achieve that light texture we’re striving for—think clouds floating gently across your plate!
- 4 oz (½ cup) butter, melted – Butter brings richness and flavor like nothing else can! When melted, it integrates seamlessly into our batter, contributing to moistness and helping with leavening as well—it’s pure liquid gold here!
- 1 cup sour cream – Sour cream may seem unconventional but trust me on this—it adds incredible moisture and tanginess that elevates flavor profiles wonderfully! It creates an exceptionally tender crumb while balancing sweetness beautifully.
- 2 tablespoons oil (I use avocado oil) – Oil keeps cakes moist longer than butter alone can provide because it remains liquid at room temperature. Avocado oil offers mild flavor along with healthy fats; however, vegetable or canola oil are excellent alternatives if that’s what you have on hand.
- 1 tablespoon vanilla extract – A dash of vanilla extract infuses warmth into your batter with its lovely aroma while enhancing all those other flavors working together. Always opt for pure vanilla extract when possible—it makes all the difference!
- 1 cup butter (room temperature) – For frosting purposes, having room temperature butter is absolutely paramount. It allows you to whip air into it easily when combined with powdered sugar for that irresistible creamy consistency we crave in frostings!
- 3 cups powdered sugar – This sweet powder transforms into fluffy frosting when beaten with butter! You can always add more if you’d like thicker frosting; it’s like magic dusting over your creation!
- 1-2 tablespoons heavy cream or milk – We need just enough liquid to achieve spreadable consistency in our frosting without compromising its structural integrity—it should be creamy but not runny!
- Food coloring: super red & navy blue – These vibrant hues bring life to your cake! Use them sparingly until you get your desired depth—more color means bolder results—but don’t forget less is often more when blending shades!
Now let’s prepare ourselves for an adventure in baking bliss as we gather our tools…
Equipment You’ll Need:
Having the right tools at hand makes all the difference in ensuring a smooth baking experience filled with joy rather than frustration! While they may not be ingredients themselves, these essential partners will help create something truly wonderful.
- Large mixing bowl – A large mixing bowl allows ample space for combining ingredients without worrying about spills or overflow. Look for one that’s sturdy enough to withstand vigorous mixing yet lightweight enough for easy handling.
- Hand or stand mixer – A mixer speeds up tasks significantly compared to manual whisking! If you’re using a stand mixer (my personal favorite), pay attention as you combine ingredients—they do half the work while leaving your hands free for cleanup or prepping frosting simultaneously!
- Measuring cups & spoons – Precision is key in baking! Invest in reliable measuring tools so each ingredient finds its perfect place within your recipe’s symphony—not too much sugar or too little flour makes sure everything comes out just right!
- Spatula or rubber scraper – These handy tools ensure no batter gets left behind—scraping down sides after mixing guarantees even incorporation throughout every part of your batter or frosting.
- 9×13 inch baking pan(s) – For this recipe specifically designed around layers stacked generously atop one another—these pans provide space necessary for rising beautifully without spilling over edges while being easy enough to handle once cooled.
Now we’re ready to bring everything together as we step into preparing this glorious Red White and Blue frosted Vanilla Cake!
Step 1: Mixing Up Our Dreamy Batter
In a large bowl fitted with either your hand mixer or stand mixer attachment (whichever suits you best!), begin by adding all the dry ingredients first: the box white cake mix along with flour, sugar, and salt before pouring in water next followed by those precious egg whites—this process allows them time together before introducing any fats which could hinder their ability bond effectively later on during baking! Gently stir these dry components until they start blending before cranking up speed medium-high for two minutes—a crucial time period allowing those proteins from flour mingle nicely alongside sugars developing flavors throughout evenly across batter surface area (scraping down sides midway ensures proper incorporation).
Step 2: Adding Moisture Magic
Once mixed thoroughly till smoothness prevails—a beautiful sight—we’ll introduce melted butter next along with sour cream/oil/vanilla extracts creating ultimate harmony between textures here—what’s happening? Oh my goodness; feel free smell aromas wafting upward enveloping kitchen space already bursting forth delightful scents calling anyone nearby closer towards joyous adventure ahead! Continuously beat until fully blended—don’t rush this step since these elements need time merging together creating lusciousness promised earlier—the result should resemble velvety thick concoction ready showcase itself proudly inside waiting pans below…
Step 3: Dividing & Leveling Our Batter
Now comes an exciting moment where patience pays off dividends: gently pour equal portions into prepared pans then take time tapping each pan lightly against countertop surface—a few moments dedicated here ensures even leveling occurs preventing lumps forming during bake cycles later—which could lead uneven results instead achieving perfectly risen beauties topped later triumphantly adorned bright colors celebrating occasions most cherished within hearts everywhere felt deeply across generations…
Step 4: Perfectly Baking Our Cakes
Preheat oven at precisely 335°F—not any lower nor higher—to avoid uneven results achieved otherwise leading dryness encountered often seen elsewhere among bakers alike! Place racks near center ideally positioned ensuring optimal heat distribution across both layers present simultaneously—you might even notice slight golden hue appearing around edges forming crispiness yet soft centers remaining intact while testing doneness carefully upon reaching timer set initially marking forty-minute point thereafter checking regularly every five minutes afterward verifying toothpicks inserted emerge cleanly afterwards confirming readiness achieved successfully coming alive slightly sprung back upon touch indicating perfection achieved throughout each bite offering delight beyond words imaginable awaiting eagerly those moments shared laughing joyously amongst loved ones gathered round tables enjoying delicious slices served forth…
With these first four steps complete—and oh what delicious promise lies ahead—we’re well on our way toward achieving something truly magnificent: let’s move onward toward decorating this masterpiece shortly after cooling down properly allowing flavors meld even further deepening richness found within…
Step 5: The Art of Baking—Perfecting Your Cake
Now that your cake batter is a harmonious blend of flavors, it’s time to give it the heat it craves. Preheat your oven to 335°F, as this specific temperature is absolutely paramount for achieving a beautifully risen cake without an overly dark crust. Don’t be tempted to crank up the heat! Baking is a science, and at this temperature, your cake will rise evenly, creating a lovely golden exterior while maintaining its moist interior. You’ll want to position your oven rack just above the center so that air circulates freely around your cake pans, helping them bake uniformly.
When you pour the batter into your two prepared pans, take a moment to appreciate how creamy and luscious it looks. Pour it evenly into each pan—this ensures that both layers will bake at the same rate and gives you a perfectly level cake when stacked later on. Give each pan a gentle tap on the counter; this helps release any air bubbles trapped in the batter, which could create unsightly holes in your final cake. Now it’s time for baking! Set your timer for 40 minutes but stay vigilant. As they bake, aromas will envelop your kitchen—this is where the magic begins! Check for doneness by inserting a toothpick into the center of each layer after 40 minutes; if it comes out clean or with just a few crumbs clinging on, you’re ready to remove them from the oven! That moment when you pull those warm cakes out is profoundly satisfying—a true testament to your hard work.
Step 6: Cooling Down—The Importance of Patience
Once your cakes are out of the oven, resist the urge to frost them immediately—even though they smell utterly intoxicating! Allow them to cool in their pans for about 10-15 minutes before transferring them to a wire rack. This step allows the cakes to set properly and prevents them from breaking apart when you try to lift them out. Trust me on this; you want those layers intact for stacking later. A cooling rack provides airflow all around, which helps prevent sogginess from steam buildup underneath.
After they have cooled for an additional hour or so on the wire rack (or until they reach room temperature), I recommend wrapping them in plastic wrap and refrigerating them overnight. This isn’t just about aesthetics—it transforms your cakes into a firmer yet moist treat that’s much easier to frost! The chilling process helps solidify the fats in your cakes and reduces their fluffiness just enough that frosting becomes an effortless task. If you’re short on time, don’t stress too much! You can skip refrigeration, but my friends know that this extra step makes all the difference in texture and flavor.
Step 7: Frosting Fundamentals—Creating Your Masterpiece
Now comes one of my favorite parts—the frosting! In a large mixing bowl, beat together one cup of room-temperature butter until it’s creamy and smooth—think liquid gold here! This step is essential because softened butter creates an airy texture that makes every bite light yet rich. Gradually add three cups of powdered sugar while continuing to mix; you’ll want to start slow so you don’t end up with a sugary cloud covering your kitchen! If you find your frosting too thick after adding sugar, drizzle in one or two tablespoons of heavy cream or milk until you reach that perfect spreadable consistency.
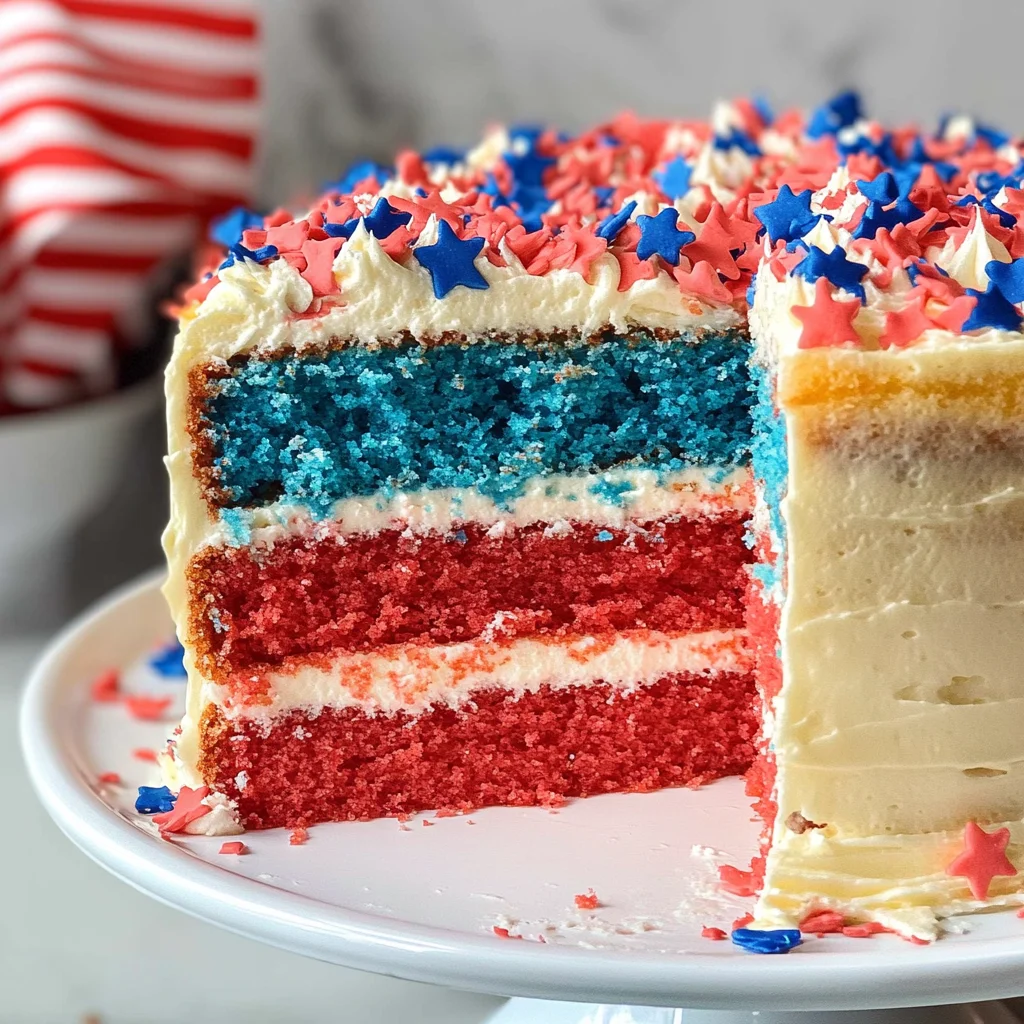
Here comes the fun part: adding color! For our Red White and Blue frosted Vanilla Cake, divide your frosting into three bowls: one will remain white as our base layer, while you’ll tint one bowl with super red food coloring and another with navy blue. Start off cautious with food coloring; add just a drop at first because you can always deepen the shade but can’t lighten it back once added! Mix well until you’ve reached those vibrant patriotic hues—oh my goodness, seeing those colors come alive is absolutely thrilling!
Step 8: Layering Love—Assembling Your Cake
With everything prepped and ready for assembly, it’s time to bring your stunning creation together! Start with one cooled vanilla cake layer as your base; place it on your serving platter (I use something vibrant that can showcase all those colors). Apply an even layer of white frosting across the top—it should be thick enough that it holds its shape but still spreadable like silky cream cheese on warm toast.
Gently stack the second layer on top—the moment when those two layers meet feels like sheer joy! Now it’s time for what I call “the crumb coat.” This thin layer of frosting encases any crumbs that might try to escape during decoration; apply it carefully all over the sides and top of the cake before placing it back in the fridge for about 30 minutes. This chilling step firms up that crumb coat making sure none escapes during our final decoration phase—a non-negotiable step when creating a flawless finish!
Final Touches—Decorating Your Masterpiece
Step 9: The Grand Finale—Frosting Decoration
After allowing your crumb-coated cake to chill again (trust me—it’s worth it!), it’s time for what I lovingly refer to as “the grand finale.” With more colorful frosting at hand, decorate according to what speaks most deeply to your heart—swirls of red and blue icing around edges create such stunning visual appeal against that pristine white backdrop. Pipe stars or rosettes using piping bags fitted with decorative tips if you’re feeling adventurous; however simple dollops can also be equally beautiful!
Take this opportunity not only to create something visually appealing but also something that’s truly special for gatherings with family or friends—you’ll feel such pride knowing how much love was poured into every detail. Add fresh berries or sprinkles if desired for an extra pop of color and flavor—it’s all about celebrating life’s moments! Once you’ve finished decorating, let everyone admire this masterpiece before cutting into it because trust me—you’ll want everyone savoring how utterly extraordinary this Red White and Blue frosted Vanilla Cake truly is.
And there you have it—a delightful journey from mixing bowl to celebration table featuring flavors that’ll linger long after each slice has been enjoyed. Get ready for compliments galore as people revel in every bite of this moist vanilla cake adorned with flag-worthy colors—the perfect centerpiece for any festive occasion!
Storage and Enjoyment Tips for Your Red White and Blue frosted Vanilla Cake
Now that your masterpiece is baked to perfection and frosted in all its patriotic glory, it’s time to dive into the joyous act of sharing it—or enjoying it all by yourself (no judgment here!). The beauty of this Red White and Blue frosted Vanilla Cake lies not only in its delightful flavors but also in how wonderfully it keeps. If you find yourself with leftovers, don’t worry; there are fantastic ways to store this cake without losing any of that moist, delectable goodness.
Storing Leftover Red White and Blue frosted Vanilla Cake
To ensure your cake remains as delicious as the day you baked it, I recommend storing it in an airtight container at room temperature if you’ll be enjoying it within a couple of days. If you’re like me and want to savor every last crumb over time, placing it in the fridge will keep it fresh for about a week. Just imagine slicing into that velvety cake a few days later—it’s still wonderfully moist! For an extra layer of protection against drying out, you can place a slice of bread in the container with your cake; this little trick works wonders at maintaining moisture. When you take a bite after storage, you’ll find that the flavors have melded beautifully, creating an even richer taste experience. If you want to serve it warm or give it a little revival, pop individual slices in the microwave for just a few seconds until they’re slightly warmed through; trust me, the aroma alone is utterly intoxicating!
Freezing for Later
If you want to get ahead of the game or simply have more cake than you can handle right now (a delightful problem!), freezing portions of your Red White and Blue frosted Vanilla Cake is an excellent option! Wrap each piece tightly in plastic wrap before placing them in a freezer-safe container or bag—this will help preserve both flavor and texture. When properly frozen, your cake can last up to three months without losing its charm! When you’re ready to indulge again, simply thaw the slices overnight in the refrigerator or at room temperature for a couple of hours. It’s such a convenient way to have a slice of happiness anytime you need it! Imagine pulling out those bright red and blue layers on a whim; it’s like having a little celebration waiting just for you.
Red White and Blue frosted Vanilla Cake

Indulge in the joy of baking with this vibrant Red White and Blue frosted Vanilla Cake, perfect for any celebration or gathering. This delightful dessert combines fluffy vanilla layers with a creamy frosting, adorned in patriotic colors that evoke feelings of joy and community spirit. Ideal for summer barbecues, birthday parties, or simply to brighten someone’s day, each slice promises to bring smiles all around the table. The rich yet light texture, enhanced by the addition of sour cream, ensures that every bite is moist and flavorful. This cake isn’t just dessert; it’s a canvas for memories that will delight friends and family alike.
- Prep Time: 30 minutes
- Cook Time: 40 minutes
- Total Time: 1 hour 10 minutes
- Yield: Serves approximately 12 1x
- Category: Dessert
- Method: Baking
- Cuisine: American
Ingredients
- 1 box white cake mix
- 1 cup all-purpose flour
- 1 cup granulated sugar
- 1/4 teaspoon salt
- 1 1/4 cups water
- 4 egg whites
- 4 oz butter, melted
- 1 cup sour cream
- 2 tablespoons avocado oil
- 1 tablespoon vanilla extract
- 1 cup butter (room temperature)
- 3 cups powdered sugar
- 1–2 tablespoons heavy cream or milk
- Food coloring: super red & navy blue
Instructions
- Preheat your oven to 335°F and prepare two 9-inch round baking pans by greasing them.
- In a large mixing bowl, combine the cake mix, flour, sugar, and salt. Add water and egg whites; mix on medium speed for about two minutes.
- Gradually add melted butter, sour cream, oil, and vanilla; beat until smooth.
- Divide batter evenly between prepared pans and tap lightly to remove air bubbles.
- Bake for approximately 40 minutes or until a toothpick inserted comes out clean. Allow cakes to cool in pans for 10 minutes before transferring to wire racks.
- Once cooled completely, frost with your prepared buttercream frosting colored with red and blue food dye.
Nutrition
- Serving Size: 1 slice (80g)
- Calories: 350
- Sugar: 32g
- Sodium: 150mg
- Fat: 18g
- Saturated Fat: 10g
- Unsaturated Fat: 6g
- Trans Fat: 0g
- Carbohydrates: 43g
- Fiber: <1g
- Protein: 3g
- Cholesterol: 30mg