Kung Pao Chicken
There’s something truly magical about the experience of cooking Kung Pao Chicken. It’s not just a dish; it’s an invitation to dance in the kitchen, to embrace vibrant flavors and textures that tell stories of tradition while allowing for personal touches. Just imagine the sound of sizzling chicken in a hot pan, the fragrant aroma of garlic and ginger mingling in the air, and the vivid colors of bell peppers popping against the backdrop of your kitchen. This is more than food; it’s a celebration of life, laughter, and those beautiful moments shared with family and friends. With each bite, you’ll discover a symphony of flavors: the heat from dried red chili peppers perfectly balanced by the sweet undertones of hoisin sauce and sugar. Trust me when I say that this Kung Pao Chicken will become a cherished part of your culinary repertoire.
In my journey as a home cook, I’ve always been captivated by how certain dishes can bridge cultures and bring people together. Kung Pao Chicken is one such recipe, originating from Sichuan province in China, where it has been delighting taste buds for centuries. The combination of spicy, sweet, and savory components creates an utterly intoxicating experience that resonates with so many. You can whip it up for weeknight dinners or special occasions alike—it’s versatile enough to impress guests yet easy enough for a cozy night at home. As we embark on this culinary adventure together, I promise you’ll find joy and satisfaction in every step.
Kung Pao Chicken: A Flavorful Adventure Awaits
Welcome to my kitchen! Today, we’re diving into the world of Kung Pao Chicken—a dish that is as vibrant as it is delicious. I can’t wait to share with you all the secrets behind creating this mouthwatering masterpiece that bursts with flavor and texture. So roll up your sleeves and get ready for an adventure!
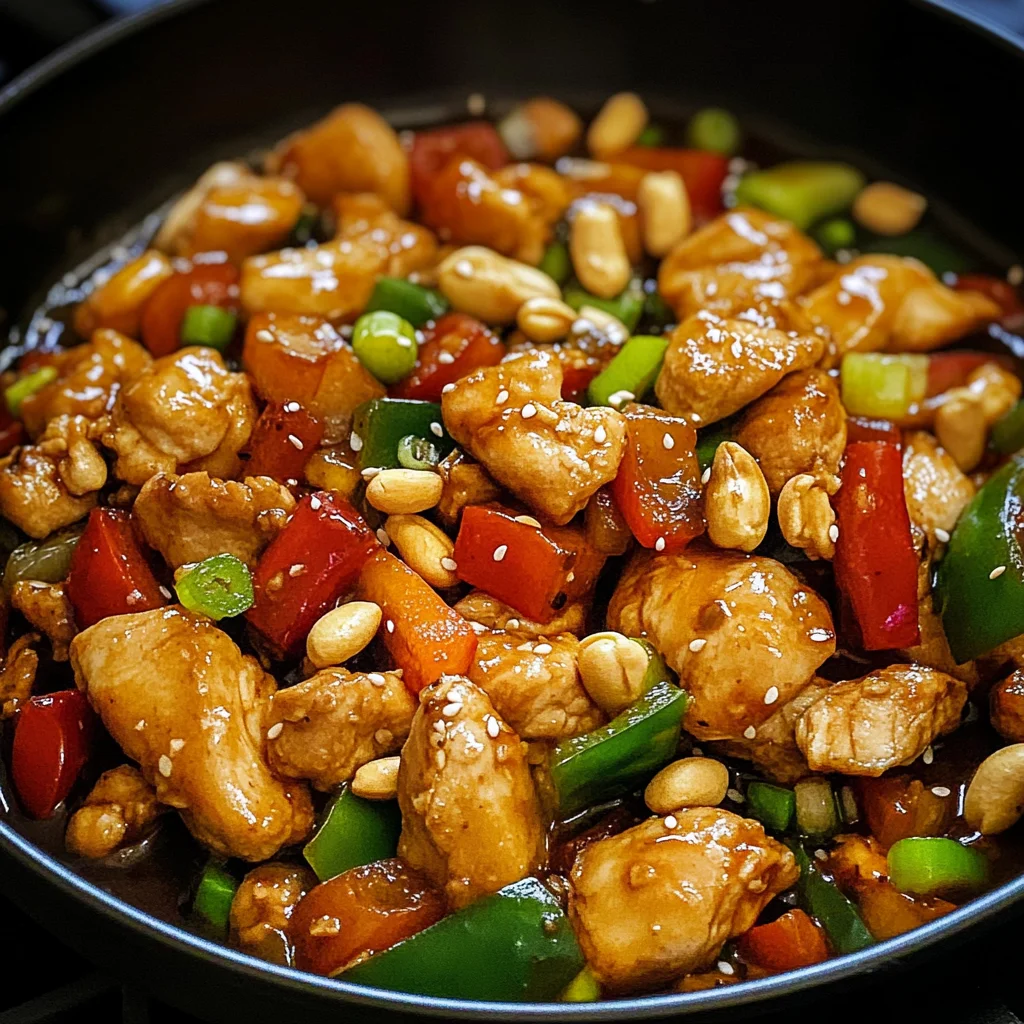
Ingredients:
Before we start cooking, let’s gather our ingredients like old friends coming together for a reunion. Each ingredient plays a vital role in crafting this delightful dish, so let’s dive deeper into what makes them special.
- 24 oz boneless skinless chicken breast (cut into bite-sized pieces). The star of our show! When selecting chicken breast, look for cuts that are firm but not overly dense; they should have a fresh pink color without any dark spots or unpleasant odors. By cutting it into bite-sized pieces, we’re ensuring even cooking and maximum flavor absorption from our marinade. This tender protein will soak up all those incredible flavors we’re about to create!
- 2 tbsp corn starch. This ingredient is non-negotiable when it comes to achieving that perfect crispy texture on our chicken. Coating the chicken pieces with cornstarch before frying helps seal in moisture while creating a delightful crust that’s both crunchy and satisfying. It also acts as a binding agent for our sauce later on—trust me on this one!
- 4 tbsp low sodium soy sauce. This liquid gold adds depth and umami to our dish without overwhelming it with saltiness. By using low sodium soy sauce, we can control the salt levels while still enjoying its rich flavor profile. It’s essential for marinating our chicken because it helps tenderize the meat while infusing it with savory goodness.
- 2 tbsp dry apple juice vinegar (or Chinese Shaoxing apple vinegar). The tangy brightness of apple vinegar brings balance to this dish; it cuts through the richness of oil and meat beautifully without being overly harsh like some vinegars can be. If you can find Chinese Shaoxing vinegar, it has complex flavors that will elevate this dish even further!
- 2 tsp oil. We’ll be using oil not only for frying but also in our marinade to help coat the chicken evenly—this small addition enhances flavor while ensuring that each piece stays juicy during cooking.
- 1/4 cup low sodium soy sauce (for sauce). This second dose of low sodium soy sauce reinforces that umami note we’re aiming for in our Kung Pao Sauce. It melds perfectly with other ingredients to create a rich base that’s simply irresistible.
- 2 tsp dark soy sauce. This variety is thicker than its lighter counterpart and brings with it an earthy sweetness along with a lovely deep color to our dish—it transforms everything into an inviting feast for the eyes as well as the palate!
- 1/2 cup low sodium chicken broth. Using broth instead of water enriches every drop of our sauce with flavor! Make sure it’s low sodium so we don’t overpower our other delicate flavors while still giving life to the overall taste.
- 2 tbsp Chinese black vinegar (or balsamic vinegar). Here comes another layer of complexity! Chinese black vinegar adds depth similar to balsamic but offers unique notes reminiscent of molasses or aged wine—perfectly complementing all those sweet and spicy elements.
- 2 tbsp dry apple juice vinegar (again!). Yes, we’re going back to this ingredient because its acidity balances out sweetness beautifully—not something you want to skip if you’re aiming for that classic Kung Pao taste!
- 2 tsp hoisin sauce. Often described as Chinese barbecue sauce, hoisin contributes sweetness alongside spices—a little goes a long way here! It also adds body to our sauce making every bite feel indulgent yet comforting.
- 1 tbsp sugar. A touch of sugar is crucial here; it harmonizes all flavors by balancing out spicy notes from chilies while enhancing natural sweetness found in veggies—an absolute must-have!
- 1 tsp corn starch (for thickening). Just like before but used differently here: mixing cornstarch into our Kung Pao Sauce ensures that when heated, everything thickens beautifully creating that gorgeous gloss we crave.
- 4 tbsp oil (for frying). Again emphasizing quality here—choose oils with high smoke points like vegetable or peanut oil which will give us those perfect sear marks without burning away precious flavor!
- 6 dried red chili peppers (chopped roughly). These beauties introduce heat but also complexity! As they release their oils into everything else during cooking—it becomes less about just spice but more about flavor building—you’ll love how they transform during frying!
- 1/2 large green bell pepper (cut into bite-size pieces). Bell peppers add crunchiness alongside freshness which lightens up every mouthful—we want distinct textures throughout so make sure they’re chopped evenly!
- 1/2 large red bell pepper (cut similarly!). Using both colors provides visual appeal—a feast not just for taste buds but sight too! Plus they add subtle sweetness too which balances perfectly against savory notes.
- 1 tbsp fresh ginger (grated). Fresh ginger brings warmth along with slight spiciness—incredibly aromatic; grating releases those essential oils better than chopping does—don’t skip this step if you want boldness!
- 4 large garlic cloves (about 2 tbsp pressed garlic). Garlic’s pungency rounds out flavors magnificently; pressing allows juices released mingle seamlessly throughout dish—we’re after layers upon layers here folks!
- 6 green onions (cut into bite-size pieces). These scallions provide freshness alongside crunchiness—they’re delicate enough not overpower yet substantial enough stand out among harsher components—truly extraordinary addition here!
- 1/2 cup roasted peanuts. Roasted peanuts give us much-needed texture contrast plus nutty flavor elevates whole experience—even if allergies are present…feel free swap them out sunflower seeds instead—you won’t miss out either way!
- 1 tsp sesame seeds (optional garnish). While optional these tiny gems add flair atop finished product—serve garnished generously & watch everyone marvel at presentation—they won’t believe how simple yet stunningly flavorful meal was created right within your very own kitchen!
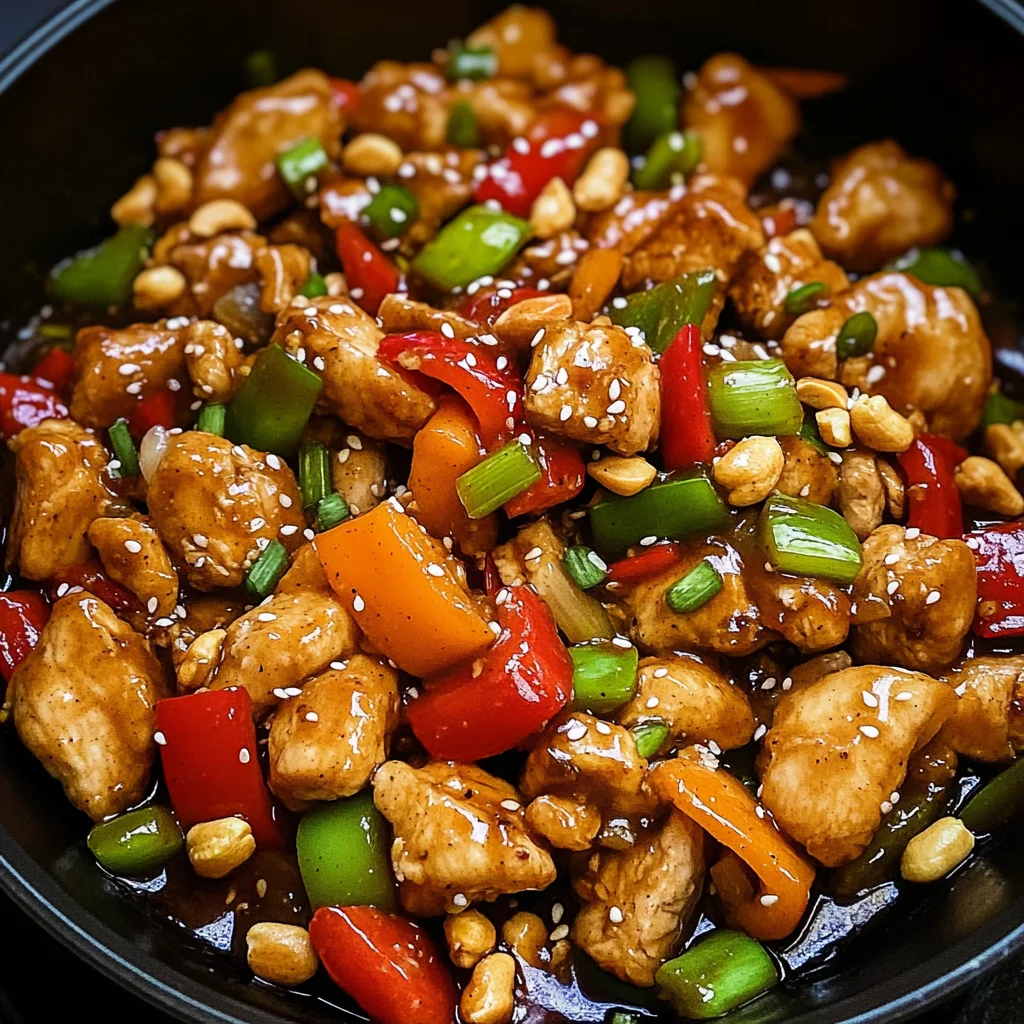
Equipment You’ll Need:
Now that we’ve gathered all these wonderful ingredients together let’s talk tools—the unsung heroes standing by ready help us create culinary magic! Having proper equipment makes everything smoother & enjoyable—as someone who loves nothing more than experimenting in kitchen… I can’t stress enough importance having right partners on hand during cooking process.
- Wok or large skillet: Essential for stir-frying! A wok’s design allows heat distribution unlike anything else—it encourages quick cooks while letting moisture escape easily preventing sogginess—a vital balance when preparing dishes like ours especially since we want crispy veggies alongside tender protein elements! If no wok exists don’t fret—any heavy-bottomed skillet should suffice just make sure it’s large enough accommodate all ingredients comfortably without overcrowding them during fry-time.
- Cutting board: A sturdy surface is key; whether wooden or plastic invest in one that’s easy-to-clean yet durable—this becomes your canvas where flavors meld & ideas take shape throughout preparation stages leading towards final masterpiece awaiting savoring momentously later on!
- Chef’s knife: A reliable knife ensures smooth cuts across various vegetables plus proteins alike—it will make prep-time breezy rather than laborious which means more joy-filled moments spent crafting delectable meal instead stressing over tedious tasks at hand—choose something comfortable grip-wise since you’ll likely rely heavily upon during entire process.
With these tools ready at hand let’s transition smoothly right into preparing this incredibly flavorful Kung Pao Chicken—the anticipation builds wonderfully as we begin executing each step precisely leading towards mouthwatering results ahead…
Step 1: Marinating Our Star Ingredient
To kick things off beautifully, let’s start by preparing our chicken breast cubes for marination! Begin by taking those 24 ounces of boneless skinless chicken breasts you’ve cut into bite-sized pieces earlier—and place them in a bowl where they’ll receive their first touch of love through seasoning! Add in those 2 tablespoons corn starch along with 4 tablespoons low sodium soy sauce plus 2 teaspoons oil—we’re creating magic here folks! Toss everything together gently until each piece gets coated nicely—this helps lock moisture within while adding necessary flavors even before hitting heat source itself later on during stir-fry process itself! Allowing this mixture sit aside resting peacefully allows time absorb goodness—it’s best if left alone at least ten minutes—that patience pays off trust me!
Step 2: Whisk Up That Irresistible Sauce
While we wait patiently let’s shift focus onto crafting what will undoubtedly be highlight moment later—the Kung Pao Sauce itself! Grab another bowl where you’ll combine all remaining saucy ingredients: take your ¼ cup low sodium soy sauce mixed harmoniously alongside two teaspoons dark soy sauce plus half-cup low sodium chicken broth—you may also mix those two tablespoons dry apple juice vinegar right inside making sure everything melds seamlessly together before incorporating two teaspoons hoisin sauce finally finishing off mix-in one tablespoon sugar followed lastly by teaspoon cornstarch dissolved completely too! Whisk briskly until no lumps remain visible—that velvety consistency is crucial since it’ll thicken gently once heated during cooking phase bringing forth luscious glaze coating every morsel perfectly amidst stir-fry symphony soon unfolding ahead…
Step 3: Searing That Chicken
Now it’s time unleash fiery passion onto stove top—we’re preheating either wok or large skillet over medium-high flame adding first round two tablespoons oil once heated sufficiently shimmering invitingly beneath surface beckoning us closer toward sizzling action soon unfolding… Carefully introduce marinated chicken pieces ensuring no overcrowding occurs otherwise they’ll steam rather than sear achieving desired golden brown crispy texture instead so cook batches if needed until nearly cooked through appearing succulent shades fading white visibly turning golden brown edges forming beautifully around exterior surfaces about five minutes should do trick nicely here then remove cooked batch carefully transferring onto plate temporarily allowing rest space whilst preparing vegetables next…
Step 4: Stir-Frying Those Veggies
In same pan now left behind filled fragrant essence lingering behind from previous step add back another two tablespoons oil once again heating rapidly before tossing chopped bell peppers alongside pressed garlic minced ginger plus dried chili peppers previously set aside too—all combine harmoniously within pan transforming ordinary stir-fry scene altogether elevating aroma entirely new heights entirely drawing attention senses engaged fully anticipating delightful outcome approaching fast ahead… Allow these beauties sauté about four minutes stirring often until vibrant colors shine brightly showcasing crisp tenderness desired without losing freshness entirely—that crunch remains paramount throughout final assembly ensuring textures play well altogether inviting guests wanting more bites repeatedly throughout meal enjoyed entirely amongst joyous company nearby sharing stories laughter building memories everlasting around dining table brought forth life enriching experiences worth cherishing forevermore…
As these introductory steps come together seamlessly blending elements naturally flow toward completion soon ahead—with every detail attending refined precision uniting forces culminating spectacularly towards unforgettable result expectantly awaiting discovery shortly thereafter best enjoyed hot steaming plates served forth decorated generously garnished finishing touches reflecting care poured forth lovingly amidst preparation journey embarked upon today across culinary landscapes traveled successfully arriving destination awaits patiently…
Cooking Your Irresistible Kung Pao Chicken
Cooking Kung Pao Chicken might seem like a daunting task, but I promise you, it’s an adventure worth taking! This dish is all about layering flavors and textures, and when you follow each step with care, you’ll create something truly extraordinary. Let’s dive into the next steps of this culinary journey together!
Step 5: Bringing the Sauce to Life
Once your vibrant bell peppers are sizzling away in that glorious pan, it’s time to add the pièce de résistance: the Kung Pao sauce. Pour the prepared sauce mixture into the pan, stirring as you do so. As soon as that sauce hits the heat, you’ll notice it begin to bubble and thicken—this is where the magic happens! The cornstarch in your sauce acts as a thickening agent, creating a luscious coating that clings beautifully to each piece of chicken. Trust me on this; watching that transformation is utterly intoxicating!
Be sure to keep stirring for about 1-2 minutes until it reaches a glossy consistency. You want it to be thick enough to coat everything evenly but not so thick that it becomes gloppy—there’s a fine line here! If the sauce feels too thick, don’t hesitate to add a splash of low-sodium chicken broth to loosen it up. The goal is to achieve that perfect balance of sweet, savory, and slightly tangy flavors that defines Kung Pao Chicken. It’s truly an art form!
Step 6: Reuniting with the Chicken
Now comes one of my favorite moments—the reunion of your golden-brown chicken with that beautiful sauce! Gently add your sautéed chicken back into the pan and toss everything together with love. Make sure every piece gets coated in that rich sauce; this is crucial because each bite should be bursting with flavor. You’ll want to cook everything together for another minute or two on medium heat.
This step is non-negotiable; it’s where all those wonderful ingredients meld together into a cohesive dish. The heat allows the chicken to soak up all those flavors while also ensuring each piece remains juicy and tender. Remember, don’t rush this part—let those flavors get acquainted in their fragrant dance!
Step 7: Adding Crunch and Freshness
As we approach the finish line, let’s not forget about our fresh ingredients! Toss in those vibrant green onions and crunchy roasted peanuts at this stage. The green onions will add a pop of color, freshness, and a mild oniony bite that elevates your dish beautifully. Plus, they offer a delightful contrast against all those hearty elements you’ve been cooking!
The roasted peanuts are absolutely paramount here—they’re not just for decoration; they provide that satisfying crunch you crave in every mouthful of Kung Pao Chicken. Stir everything gently so that those ingredients mix well without losing their distinct textures. This final combination is what will make your dish sing with flavor and excitement.
Step 8: Final Touches for Perfection
Now take a moment to pause and appreciate what you’ve created before serving it up! If you’d like an extra layer of texture and presentation, sprinkle some sesame seeds over your Kung Pao Chicken just before plating—it’s like adding little jewels to your masterpiece! This simple touch enhances both visual appeal and adds another nuanced flavor component.
As you’re ready to serve this delicious concoction, consider pairing it with steamed rice or quinoa; they’ll absorb all those incredible flavors from the sauce beautifully! When plating up this dish for family or friends, don’t be shy about garnishing with a few extra peanuts or green onions for added flair—after all, we eat with our eyes first!
Conclusion:
As we wrap up our culinary journey through this mouthwatering recipe for Kung Pao Chicken, I sincerely hope that my excitement has rubbed off on you! This dish isn’t just about tossing together ingredients; it’s about creating a symphony of flavors that dance across your palate—from the tender chicken enveloped in a sweet and savory sauce to the crunch of those roasted peanuts. Each bite offers an extraordinary balance between heat from the chilies and sweetness from the hoisin sauce that makes this recipe not only easy but profoundly satisfying.
But what truly makes this Kung Pao Chicken a must-try is how accessible and enjoyable it is to prepare. Whether you’re hosting friends for game night or looking for an effortless weeknight dinner solution, this recipe shines brightly on any table. Just imagine pulling out that fragrant skillet filled with colorful peppers and glistening chicken—your loved ones will gather around with eager anticipation, ready to experience something truly special together.
To elevate your meal further, consider serving your Kung Pao Chicken alongside fluffy jasmine rice or crispy noodles that soak up every drop of that amazing sauce. If you’re feeling adventurous, toss in some steamed broccoli or snap peas for added color and crunch—imagine savoring one with perfectly cooked white rice piled high beside it! For an afternoon pick-me-up, serve leftovers cold over crunchy salad greens with some sliced avocado for an unexpected twist.
Feeling adventurous? This recipe is wonderfully adaptable! You could swap out chicken for tofu or tempeh if you’re leaning towards plant-based options—both would absorb those bold flavors beautifully while offering their unique textures. Want more spice? Consider adding extra dried chilies or even a dash of sriracha to kick things up another notch! I encourage you to experiment—after all, cooking should be fun! So go ahead, try out these variations, share your experiences with me, and let’s continue celebrating our love for cooking together!
Kung Pao Chicken
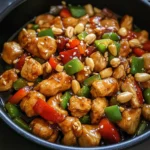
Kung Pao Chicken is a vibrant and flavorful dish that brings the excitement of Asian cuisine right to your kitchen. This delightful stir-fry combines tender chicken pieces with colorful bell peppers, aromatic garlic, and ginger, all coated in a sweet and savory sauce that’s perfectly balanced with heat from dried red chilies. Each bite delivers a satisfying crunch from roasted peanuts, making it a dish that’s both comforting and exhilarating. Ideal for weeknight dinners or special occasions, this Kung Pao Chicken recipe is adaptable and easy to prepare, ensuring that you can whip up this crowd-pleaser in no time. Gather your loved ones around the table and enjoy the delicious symphony of flavors together!
- Prep Time: 15 minutes
- Cook Time: 20 minutes
- Total Time: 35 minutes
- Yield: Serves approximately 4
- Category: Dinner
- Method: Frying
- Cuisine: Asian
Ingredients
- 24 oz boneless skinless chicken breast
- 2 tbsp corn starch
- 4 tbsp low sodium soy sauce
- 2 tbsp dry apple juice vinegar
- 2 tsp oil
- 1/4 cup low sodium soy sauce (for sauce)
- 2 tsp dark soy sauce
- 1/2 cup low sodium chicken broth
- 2 tbsp Chinese black vinegar
- 2 tbsp hoisin sauce
- 1 tbsp sugar
- 1 tsp corn starch (for thickening)
- 4 tbsp oil (for frying)
- 6 dried red chili peppers
- 1/2 large green bell pepper
- 1/2 large red bell pepper
- 1 tbsp fresh ginger (grated)
- 4 large garlic cloves
- 6 green onions
- 1/2 cup roasted peanuts
- 1 tsp sesame seeds (optional garnish)
Instructions
- Marinate the chicken: In a bowl, combine chicken pieces with cornstarch, soy sauce, and oil. Toss to coat evenly and let sit for at least 10 minutes.
- Prepare the sauce: Whisk together low sodium soy sauce, dark soy sauce, chicken broth, apple juice vinegar, hoisin sauce, sugar, and cornstarch until smooth.
- Sear the chicken: Heat oil in a wok or large skillet over medium-high heat. Cook marinated chicken in batches until golden brown; remove from pan.
- Stir-fry vegetables: In the same pan, add more oil if needed and sauté bell peppers, garlic, ginger, and dried chilies until fragrant.
- Combine: Return the chicken to the pan and pour in the prepared sauce. Stir well until everything is coated and heated through.
- Finish: Add green onions and roasted peanuts; stir to combine before serving.
Nutrition
- Serving Size: Approximate 1 cup (240g)
- Calories: 350
- Sugar: 8g
- Sodium: 680mg
- Fat: 14g
- Saturated Fat: 2g
- Unsaturated Fat: 10g
- Trans Fat: 0g
- Carbohydrates: 27g
- Fiber: 3g
- Protein: 30g
- Cholesterol: 85mg