Cranberry Mascarpone Tart with Pecan Crust
Cranberry Mascarpone Tart with Pecan Crust: A Symphony of Flavors
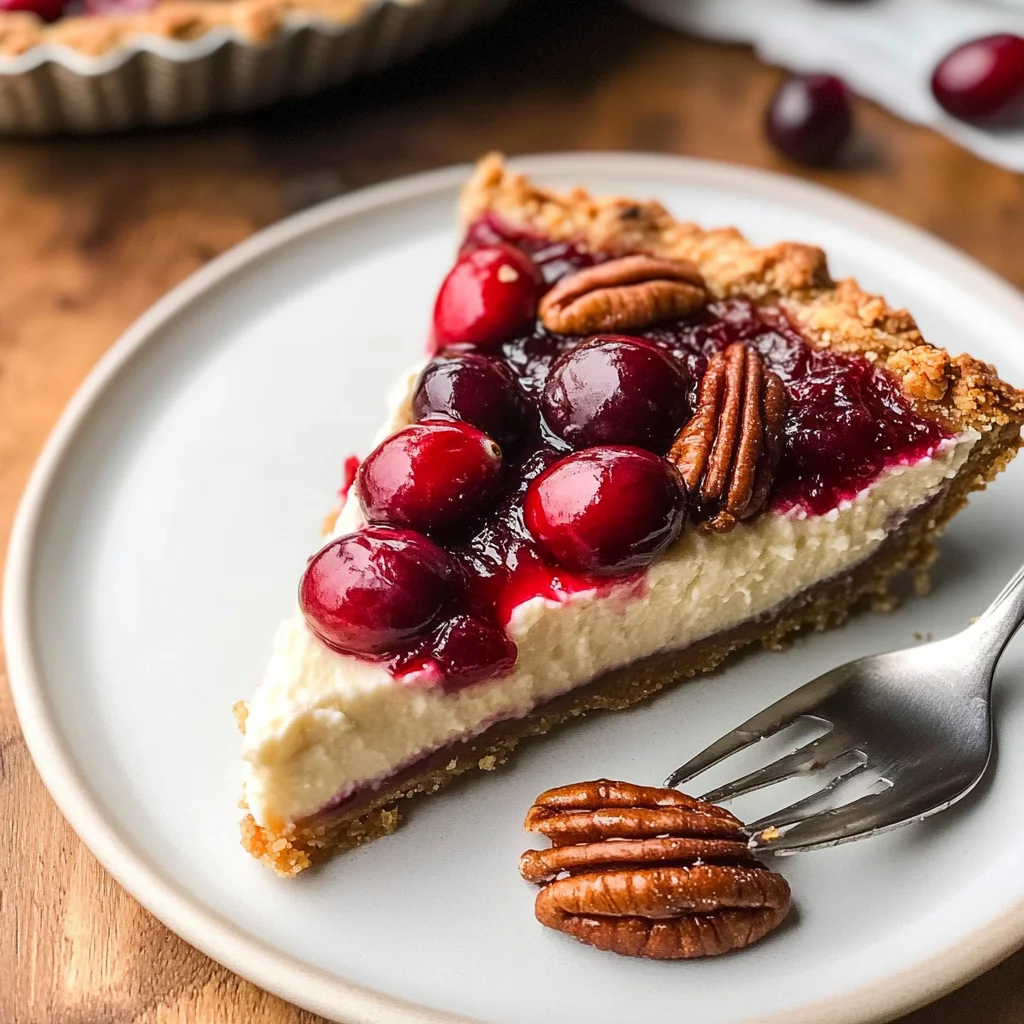
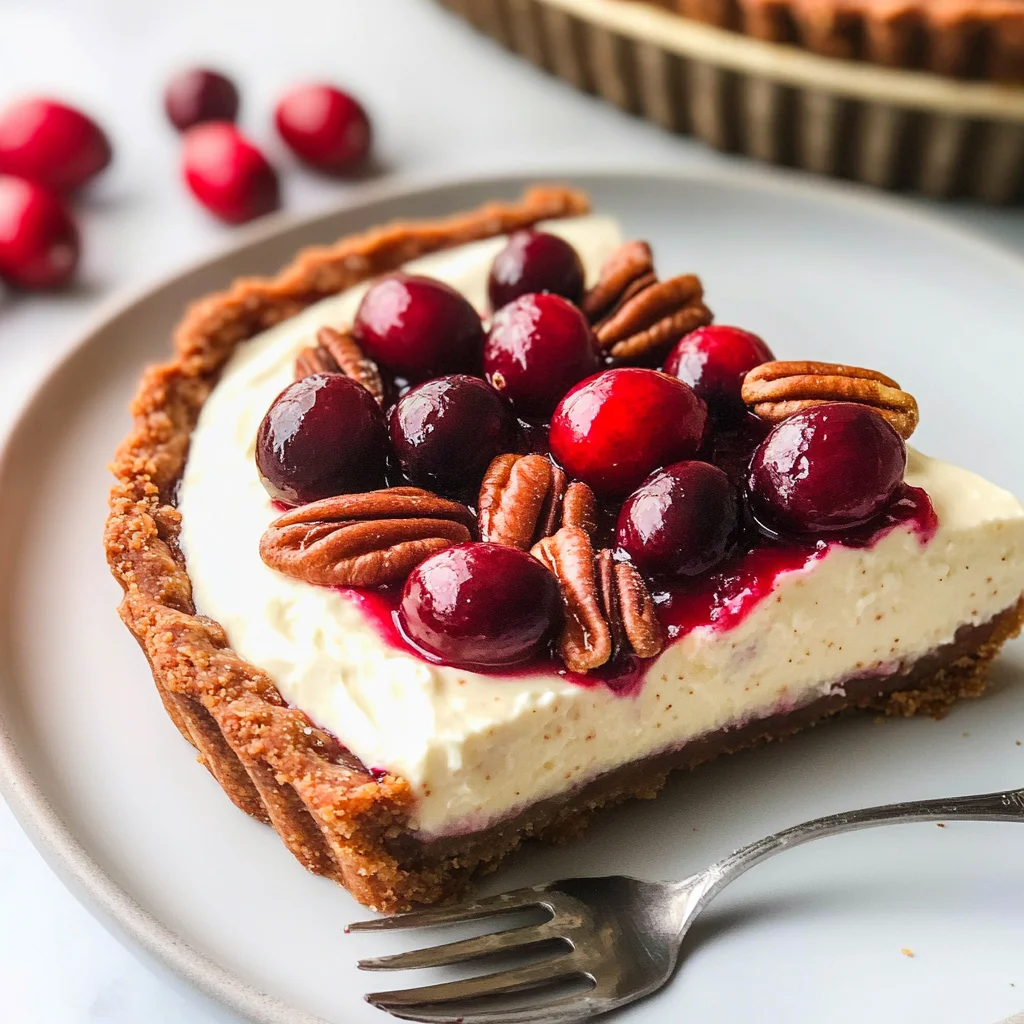
Have you ever stumbled upon a dish that felt like it was meant to be shared, one that brings people together around the table with laughter and warmth? That’s precisely what this Cranberry Mascarpone Tart with Pecan Crust represents to me—a beautiful blend of vibrant flavors and creamy texture that transports you to a cozy kitchen filled with sweet aromas. Imagine slicing through the golden pecan crust, revealing a luscious mascarpone filling topped with jewel-toned cranberries, their tartness perfectly balanced by a hint of sweetness. This isn’t just dessert; it’s a celebration of the changing seasons, a nod to traditions woven through generations, and an invitation to savor every bite.
As the holidays approach or perhaps during those cherished evenings when friends gather, this tart stands ready to impress. The symphony of flavors in this delight draws inspiration from classic American desserts while adding its own twist—a touch of nutmeg here, a splash of apple cider juice there—creating something utterly extraordinary. I promise you, whether you’re making it for a festive gathering or simply because you deserve a little indulgence, each slice will be met with wide-eyed admiration and satisfied sighs. It’s more than just food; it’s an experience waiting to unfold.
Ingredients:
Before we dive into crafting this masterpiece, let’s gather our ingredients. Each one plays a crucial role in creating the exceptional flavor profile and texture of our Cranberry Mascarpone Tart with Pecan Crust. Take your time selecting high-quality components; after all, great cooking starts with great ingredients!
- 1 ¼ cup (150 grams) all-purpose flour. This is the foundation of our tart crust, providing structure and stability while ensuring it holds up against the creamy mascarpone filling. When choosing flour, look for one with moderate protein content; too much protein can lead to toughness rather than tenderness. Sifting your flour before measuring can introduce air and help prevent clumping—this simple step makes your crust light and flaky.
- ¼ cup (50 grams) granulated sugar. This sugar does more than just sweeten; it contributes to the browning and flavor development of your crust. When mixed into the butter and flour, it creates a lovely caramelization as it bakes, providing subtle richness and color that makes each bite irresistible. Always opt for fine granulated sugar so that it dissolves seamlessly into your mixture.
- ½ teaspoon salt. A pinch of salt is absolutely paramount in balancing sweetness and enhancing flavor throughout any dessert recipe. It works almost like magic by bringing out the natural flavors of other ingredients while preventing any overly sweet notes from overpowering your palate.
- ¼ teaspoon fresh grated nutmeg. Freshly grated nutmeg adds warmth and depth—its aromatic essence will fill your kitchen as you prepare this tart! Nutmeg has such an inviting scent that evokes cozy memories; make sure to grate it fresh for maximum flavor impact since pre-ground spices often lose their potency over time.
- ½ cup (56 grams) pecans, toasted. Toasting pecans enhances their nuttiness and transforms them into crunchy little gems in our tart crust. The act of roasting releases essential oils that deepen their flavor profile significantly. When shopping for pecans, opt for raw nuts that are plump without any signs of rancidity; they should smell wonderfully nutty.
- ½ cup (113 grams) unsalted butter, cold and cubed (1 stick). The cold butter is crucial for achieving that tender shortbread-like texture we crave in our crust—it prevents gluten formation during mixing! Cut your butter into small cubes before chilling it again briefly if necessary; this will help create flaky layers as it melts during baking.
- 1 large egg yolk. The egg yolk acts as an emulsifier here, enriching our crust while also adding moisture for binding without making it tough. When separating your egg yolk from the white, take care not to break it—this golden orb is essential for achieving the perfect consistency!
- 1-2 tablespoons ice-cold water. Why chill? Adding ice-cold water helps bring everything together while keeping the dough cool enough so that the butter doesn’t melt prematurely—this is non-negotiable if you want flaky goodness! Start with one tablespoon at first; add more only if needed until the dough holds together without being sticky.
- 8 oz (113 grams) mascarpone cheese, at room temperature. This creamy Italian cheese brings luxurious richness to our filling unlike any other! Its velvety texture blends beautifully with other ingredients while adding mild sweetness—never substitute this unless absolutely necessary because its unique properties can’t be replicated.
- ½ cup (100 grams) granulated sugar (for filling). Just like in our crust recipe, sugar here balances out acidity from cranberries while enhancing flavors overall—a small amount goes such a long way! Use fine sugar again so that it incorporates smoothly into the mascarpone mixture.
- 2 teaspoons vanilla extract. Pure vanilla extract elevates every bite by infusing warmth intrinsic to many beloved desserts—it’s like giving your fillings an extra hug! Choose high-quality pure vanilla over imitation varieties for optimal results; trust me on this!
- 1 cup (250 ml) heavy whipping cream. Whipping cream adds volume and texture when folded into our mascarpone mixture resulting in airy lightness—this melt-in-your-mouth quality turns ordinary tarts into show-stoppers! Make sure it’s chilled too before whipping since warm cream won’t hold its shape properly.
- 6 oz (170 grams) cranberries (fresh or frozen). These little beauties add tartness that cuts through creaminess beautifully—their vivid color brightens up both presentation-wise and visually! If using frozen cranberries directly from the freezer without thawing first is acceptable but may require slightly longer cooking time during preparation steps later on.
- ⅓ cup packed light or dark brown sugar (70 grams). Brown sugar brings depth due to added molasses content compared to white sugars—it lends comforting caramel notes perfect alongside tangy cranberries! Choose whichever variety suits your taste best; both will work wonderfully here!
- ⅓ cup apple cider juice (75 grams). Apple cider juice infuses additional sweetness along with fruitiness enhancing overall flavor harmony within tart topping itself! Look for 100% pure apple cider without added sugars or preservatives—a natural option yields better results every time!
- Zest of 1 orange. Bright citrus zest brightens up flavors like nothing else—it cuts through creaminess while adding freshness reminiscent of sunny days ahead! Use organic oranges whenever possible since they tend not chemically treated; washing them thoroughly ensures safety before grating.
- A few grates of fresh nutmeg & 1 cinnamon stick. These aromatic spices enhance complexity immensely—they evoke feelings tied closely associated with home-cooked comforts throughout generations past & present alike! Grate fresh nutmeg right before using ensures optimal potency while cinnamon sticks provide visual appeal as well aroma infusion through cooking process ahead!
Equipment You’ll Need:
Now that we have gathered all these wonderful ingredients together let’s talk about some essential tools you’ll need on this culinary adventure—the right equipment makes all the difference in ensuring success! It’s like having trusted companions by your side guiding you through each step towards creating something truly special.
- Mixing bowls – various sizes: Having multiple mixing bowls allows us flexibility throughout different stages—from mixing dry components separately first then combining wet ones seamlessly later on—it keeps everything organized too!
- Food processor or pastry cutter: A food processor simplifies blending together butter/flour quickly but if you prefer traditional methods use pastry cutters instead—they help create those lovely pea-sized bits we want in pie/crust recipes ensuring flakiness achieved when baking occurs!
- Rolling pin: This trusty tool rolls out dough evenly without tearing apart edges ensuring uniform thickness across entire surface area—we want consistency here especially when lining tart pans perfectly!
- Tart pan with removable bottom: Opting for one ensures ease during serving allowing slices come out intact plus gives professional finish look once baked beautifully golden brown color achieved!
- Whisk: A whisk helps aerate mixtures effortlessly especially when beating eggs/whipping cream until soft peaks form ensuring lightness overall—we want clouds not bricks here folks!
Preparing the Cranberry Mascarpone Tart with Pecan Crust
Step 1: Crafting Your Pecan Crust
Let’s begin by creating our delightful pecan crust which serves as both base layer holding everything together while offering crispy contrast against rich filling above! Start by preheating your oven to 350°F (175°C)—a crucial step for ensuring even baking later on once assembled completely comes together beautifully inside warm embrace over time spent within oven’s heat chamber nonetheless… In your food processor fitted with metal blade attachment pulse together flour along salt & freshly grated nutmeg until combined well—trust me when I say freshness matters here! Next toss in toasted pecans roughly chopped beforehand making sure they blend evenly throughout dry mix produced earlier—it’s important not skip this step if you’re aiming at achieving delightful crunch factor added benefit down line too… Afterward add cubed cold unsalted butter directly into bowl alongside granulated sugar proceeding pulse until mixture resembles coarse crumbs resembling sand between fingers gently pressing down lightly leaving behind some larger pieces intact still remaining visible yet perfectly integrated among rest mixture created thus far…
Step 2: Bringing Everything Together
Once you’ve reached desired consistency resembling sandcastles ready build let’s add egg yolk along tablespoon(s) ice-cold water gradually increasing as necessary until dough forms cohesive ball around blades attached firmly surrounding edges within processor bowl itself—it shouldn’t feel sticky either but pliable enough roll out comfortably later without fuss… Gently remove dough from machine onto lightly floured surface patting down gently forming disc shape covering tightly cling wrap refrigerate minimum thirty minutes resting period before rolling out further ensuring flakiness retained sufficiently throughout baking process afterward ultimately producing ideal final product waiting eagerly reveal itself soon enough…
Step 3: Rolling Out Your Dough
When ready take chilled dough out fridge uncover placing onto lightly floured work surface once again rolling pin positioned atop allowing gentle pressure applied evenly across entire disc pushing outwardwards towards corners gradually reaching preferred thickness ideally around quarter inch thick but don’t stress if uneven occurs little bit here there—that charm handmade imperfections add character anyway right? Carefully transfer rolled-out piece over prepared tart pan fitting snugly pressing down gently along edges taking care avoid stretching material too tightly lest cause cracks appear later post-bake—which would ruin aesthetic appeal entirely ruining effort put forth thus far… Trim excess hanging off edges leaving slight overhang rather than cutting flush straight away gives chance shrink back slightly during initial heat cycles preventing mishaps occurring otherwise failing achieve golden crispness throughout end result desired…
Step 4: Blind Baking Your Crust
Now comes time bake off prepped shell blind style utilizing parchment paper laid flat atop filled beans/dried rice weights placed inside preventing puffing whilst cooking through evenly maintaining structure below lacking anything else contained therein—you’ll thank me later trust hands-on experience yields best results always every single time baked goods made well done right way consistently yielding scrumptious outcomes desired indeed never disappoints anyone involved no matter who joins feast table awaiting eagerly await big reveal finally approaching next moments away shortly… Bake about fifteen-twenty minutes till edges turn lightly golden watch carefully avoid burning tops leave unattended unwise decision made regrettably probably wished instead kept close eye after timer set accordingly remember patience virtue within culinary arts indeed worth effort exerted wait patiently till fragrant aromas waft home beckoning everyone nearby toward kitchen vicinity where magic happens stirring excitement bubbling anticipation grows steadily rising amongst guests alike shared enthusiasm palpable evening unfolds beautifully connecting hearts minds souls alike gathered around table eventually enjoying delectable creations made lovingly henceforth thereafter…
Final Touches: Bringing Your Tart Together
We’re getting ever closer to enjoying our wonderful Cranberry Mascarpone Tart with Pecan Crust! While that gorgeous shell cools down completely, let’s turn our attention towards whipping up the luscious filling that will crown our creation.
Step 9: Whipping Up Mascarpone Bliss
In a large mixing bowl, combine room-temperature mascarpone cheese with half a cup of granulated sugar and two teaspoons of vanilla extract. Using an electric mixer fitted with beaters (or even a whisk if you’re feeling adventurous), beat these ingredients together until they are smooth and creamy—a process that should only take about two minutes at medium speed. You should see soft peaks forming; this means air has been incorporated into our filling resulting in something light yet decadent.
Why whip? Because incorporating air gives our filling volume which results in an airy texture—truly extraordinary when paired with tart cranberries later! Be careful not to overbeat; otherwise you’ll risk turning this divine mixture grainy rather than creamy. Once combined beautifully, set aside while we tackle those spiced cranberries.
Step 10: Cooking Down Those Cranberries
In a saucepan over medium heat, combine six ounces of cranberries (fresh or frozen works fantastically), one-third cup packed light or dark brown sugar (I lean towards dark for its deeper flavor), one-third cup apple cider juice (for brightness), orange zest from one fresh orange (the zest adds such vibrancy!), freshly grated nutmeg (just a pinch)—and don’t forget that cinnamon stick which infuses warmth! Stir everything gently until combined well.
As those cranberries start heating up in their liquid gold concoction, they’ll burst open releasing their juices—creating an intoxicating aroma that fills your kitchen like nothing else can. Allow this mixture to simmer for about ten minutes until most cranberries have popped open and thickened slightly; stirring occasionally ensures nothing sticks or burns at the bottom of your pan—a fate no one wants!
This step is crucial because cooking down intensifies flavors while also balancing out sweetness against tartness; creating layers upon layers of symphony-like flavors dancing joyously across your palate once served atop our creamy mascarpone base!
Step 11: Assembling Your Masterpiece
Once both components—the cooled crust and cranberry topping—are ready at last! Spread that creamy mascarpone filling evenly across your pecan shortbread crust; use an offset spatula if you have one—it makes spreading oh-so-easy while giving a pretty finish too! I find joy in taking my time here, ensuring every corner gets its fair share of mascarpone goodness because everyone deserves equal love!
Then pour those luscious cranberry compote spoonful by spoonful onto the mascarpone layer—we want them placed artfully so they peek out beneath creating visual interest when sliced later on! Feel free to leave some cranberry sauce aside for drizzling right before serving; trust me when I say presentation matters just as much as flavor here!
Step 12: Chill Before Serving
Finally—and I promise this last wait will be worth every second—cover your assembled tart lightly with plastic wrap (to avoid condensation) before placing back into refrigerator for at least four hours (preferably overnight). This chilling phase allows flavors to meld beautifully while firming everything up nicely so each slice cuts cleanly when ready!
Picture this: You pull out perfectly chilled slices adorned with vibrant cranberry jewels shimmering atop creamy mascarpone bliss—it’s truly unforgettable!
So there you have it—the journey from humble ingredients toward creating something profoundly satisfying yet elegant enough for any gathering or cozy night-in treat alike! Enjoy every bite knowing all love woven throughout each step along way has culminated into sheer perfection right here before you—all thanks bringing forth delightful memories shared around table filled laughter amongst family friends alike too…
Storage and Enjoyment Tips for Your Cranberry Mascarpone Tart with Pecan Crust
Oh, the delightful moment when your Cranberry Mascarpone Tart with Pecan Crust is ready to be served! This tart is not just a dessert; it’s a celebration of flavors that bring warmth and joy to any gathering. As you slice into the beautifully baked crust and unveil the creamy mascarpone filling topped with that spiced cranberry goodness, it’s hard not to feel a surge of excitement. But what happens if you have leftovers? Fear not! I’ve got some fantastic tips to ensure your tart remains as delicious as the first bite, allowing you to enjoy it over several days.
Storing Leftover Cranberry Mascarpone Tart with Pecan Crust
To store your leftover Cranberry Mascarpone Tart with Pecan Crust, place it in an airtight container or cover it tightly with plastic wrap. This is absolutely crucial because you want to lock in that luscious creaminess and prevent any unwanted odors from mingling in your fridge. Ideally, you should keep it refrigerated where it will stay fresh for about 3 to 5 days. If you’re anything like me, you’ll be tempted to savor every last crumb—but trust me on this: the flavors only deepen over time! Pro tip: if you want to maintain the texture of that delectable crust, consider adding a slice of bread into the container—this little trick helps keep everything moist and prevents the crust from becoming too soft. When you’re ready to indulge again, simply take a slice directly from the fridge; there’s no need for reheating since this tart is delightful served cold.
Freezing Cranberry Mascarpone Tart with Pecan Crust for Later
Now, let’s talk about freezing! If you find yourself with more tart than you can handle (which is a wonderful problem to have), you can freeze individual slices or even the whole tart. To do this properly, wrap each slice tightly in plastic wrap and then place them in a freezer-safe bag or container, ensuring there’s minimal air trapped inside. It can last beautifully in the freezer for about 2-3 months without losing its heavenly flavors. When you’re ready to enjoy a piece again, simply transfer it from the freezer to the refrigerator and allow it to thaw overnight. The best part? You can indulge in this culinary delight whenever your heart desires, making it a convenient option for last-minute gatherings or quiet evenings at home. Trust me; knowing that a slice of this exquisite tart awaits in your freezer brings an unparalleled sense of comfort!
Cranberry Mascarpone Tart with Pecan Crust
Indulge in the festive spirit with this exquisite Cranberry Mascarpone Tart with Pecan Crust. This dessert features a buttery pecan crust that perfectly balances a rich, creamy mascarpone filling topped with vibrant, tart cranberries. Each bite delivers a delightful blend of flavors and textures, making it an ideal treat for gatherings or special occasions. With its seasonal ingredients and elegant presentation, this tart is not just a dessert; it’s a celebration of taste that brings warmth and joy to your table.
- Prep Time: 30 minutes
- Cook Time: 20 minutes
- Total Time: 50 minutes
- Yield: Serves approximately 8 slices 1x
- Category: Dessert
- Method: Baking
- Cuisine: American
Ingredients
- 1 ¼ cup all-purpose flour
- ¼ cup granulated sugar
- ½ teaspoon salt
- ¼ teaspoon fresh grated nutmeg
- ½ cup toasted pecans, chopped
- ½ cup unsalted butter, cold and cubed
- 1 large egg yolk
- 1–2 tablespoons ice-cold water
- 8 oz mascarpone cheese, at room temperature
- ½ cup granulated sugar (for filling)
- 2 teaspoons vanilla extract
- 1 cup heavy whipping cream
- 6 oz cranberries (fresh or frozen)
- ⅓ cup packed light or dark brown sugar
- ⅓ cup apple cider juice
- Zest of 1 orange
- A few grates of fresh nutmeg
- 1 cinnamon stick
Instructions
- Preheat oven to 350°F (175°C). In a food processor, combine flour, salt, nutmeg, and toasted pecans until mixed. Add butter and pulse until coarse crumbs form.
- Mix in the egg yolk and cold water until dough forms. Chill for at least 30 minutes.
- Roll out the chilled dough to fit a tart pan and blind bake for about 20 minutes until golden.
- For the filling, beat mascarpone cheese with sugar and vanilla until smooth. In another bowl, whip cream to soft peaks; fold into mascarpone mixture.
- Cook cranberries with apple cider juice, brown sugar, and zest until thickened (~10 minutes). Let cool slightly.
- Spread mascarpone filling onto cooled crust and top with cranberry mixture. Chill for at least four hours before serving.
Nutrition
- Serving Size: 1 slice (100g)
- Calories: 320
- Sugar: 22g
- Sodium: 75mg
- Fat: 20g
- Saturated Fat: 10g
- Unsaturated Fat: 9g
- Trans Fat: 0g
- Carbohydrates: 31g
- Fiber: 2g
- Protein: 4g
- Cholesterol: 45mg